-
Legacy Member

How to Make an M1 Shoot Better
One of life's great joys for the Rifleman is having a good rifle that is both dependable and accurate. If it is also a thing of beauty, it may very well be a Rifleman's most prized possession. For some reason, I have always been drawn to the M1 as both a historical artifact, and an accurate rifle. With a little TLC, it can also be a thing of beauty as far as military weapons are concerned.
This piece will deal with how to get the most out of the M1 without the type of mods that make it too delicate for ordinary use. The procedures listed here should allow a M1 with a good barrel and good stock to shoot better than the typical M1 and more importantly, maintain its zero as the barrel heats up. We won't go into NM type mods like glass bedding as most readers here will want their M1 to be JCG legal.
The thing about the M1 that reeks havoc with accuracy is that all manner of things are hung upon the barrel, most of which are not secure and rattle around from shot to shot. This interferes with the barrels vibration pattern as the pattern differs for each shot.
The other issue is insufficient clearance so that parts that are not supposed to touch each other don't.
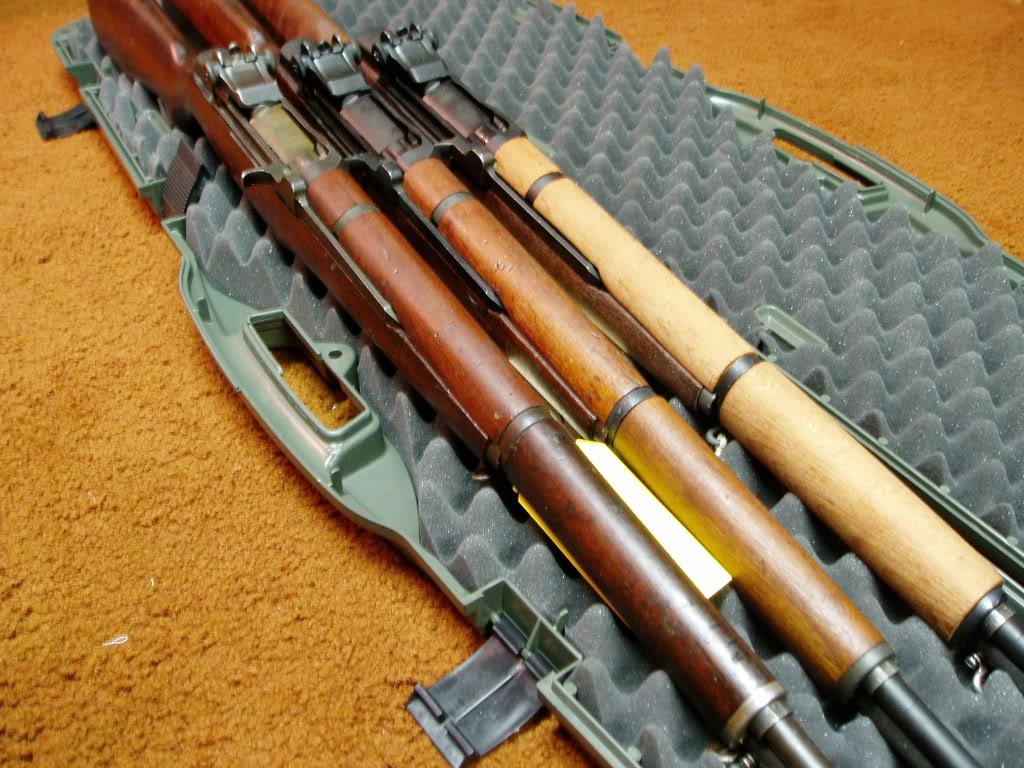
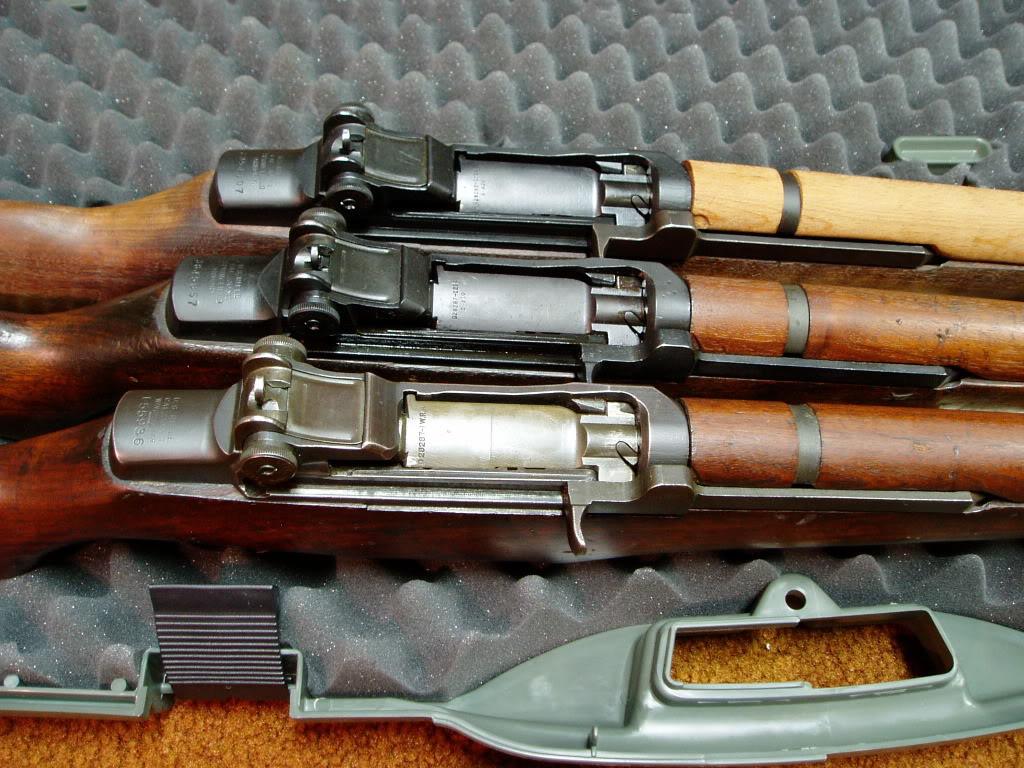
For illustration, we will use pics of an M1 I built last year in 308 Winchester on a $100 CMP receiver. I have the great good fortune to have a bud who is a civilian small arms technician for the Army at Anniston. Anniston Army Depot is located in the same city as the CMP South store/whse. With his help, a suitable receiver was selected, the bad barrel removed, and replaced with a Barnette 308 barrel. I also purchased a new set of wood from the CMP which is made by Boyd's but re-profiled to WW2 dimensions by DuPage. For those with small hands that find the Boyd's stock too fat in the wrist, this is the solution.
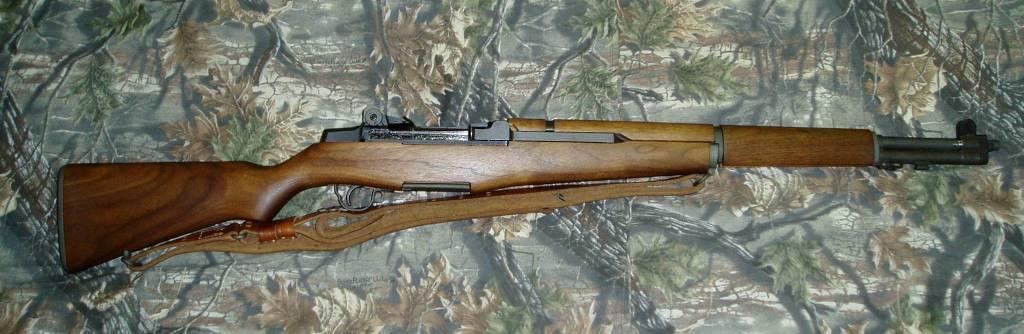
Here is the receiver with new barrel installed along with the new wood.
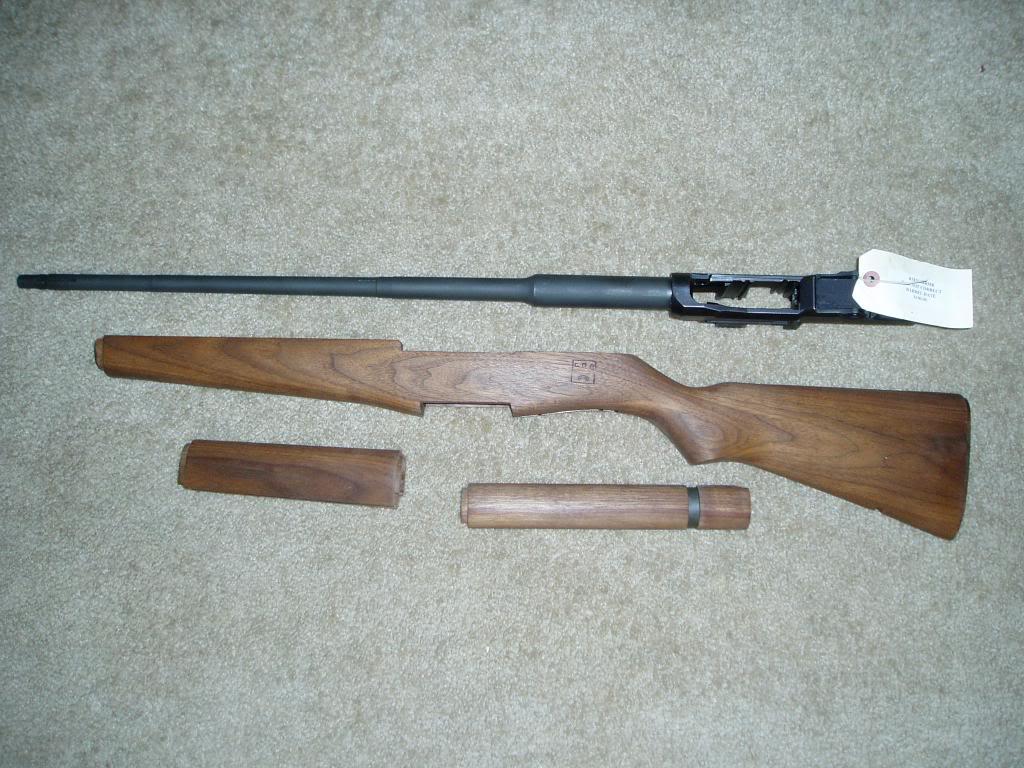
New stocks from Boyd's are reported to be made to the most recent Gov't print and are somewhat thicker in most dimensions compared to a USGI WW2 stock. The pieces will also require some fitting for the job to be done properly.
As shown, the new barrel does not come with the cut for the GI barrel wrench since GI barrel wrenches are not that common. Because of this, the rear handguard needs to be relieved so it will fit.
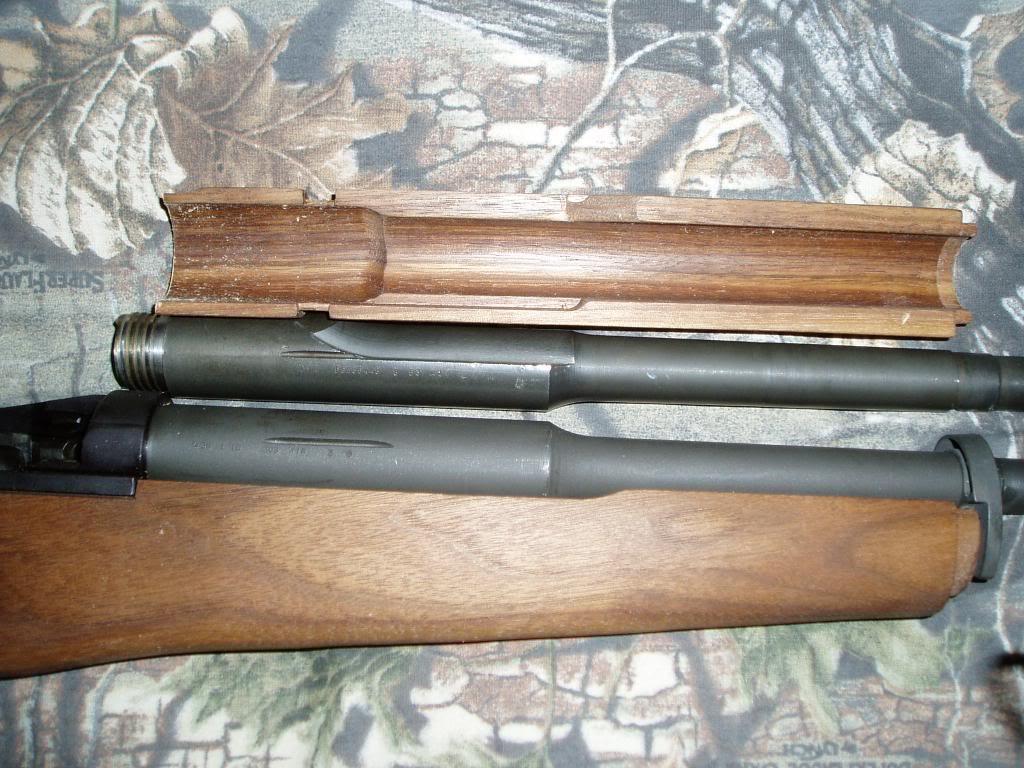
After relieving.

The handguard is also a tad too long and needs to have the rear end sanded/filed to give 1/32"-1/16" clearance between it and the front face of the receiver.
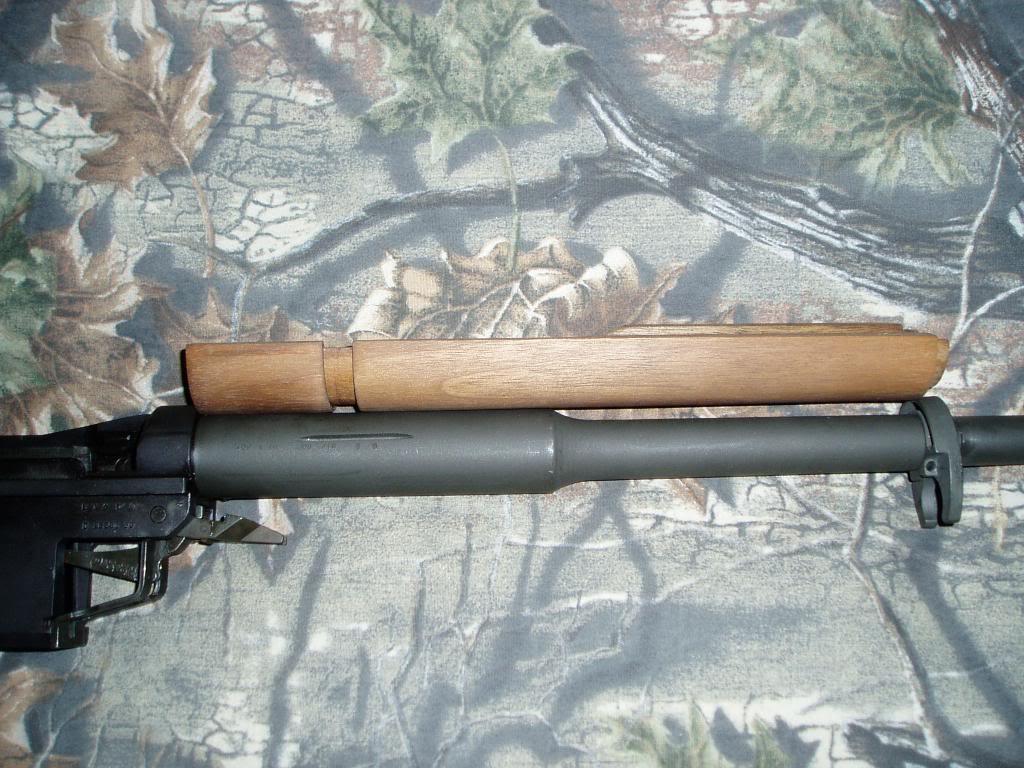
After fitting.
Next, the handguard needs to be relieved so it does not touch the stock on either side when finally assembled. The handguard clip is removed to make fitting easier. There is a special tool to remove/install this clip without the risk of cracking the handguard. Here you can see how the handguard binds against the stock enough to be able to pinch this tag and hold it in place.
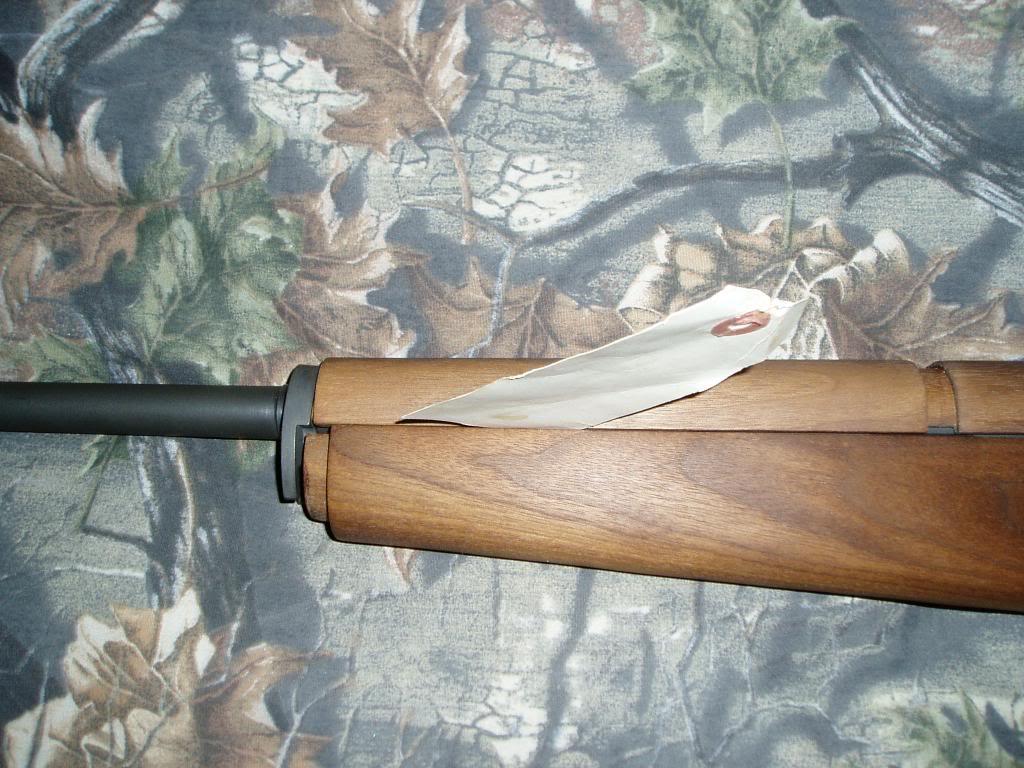
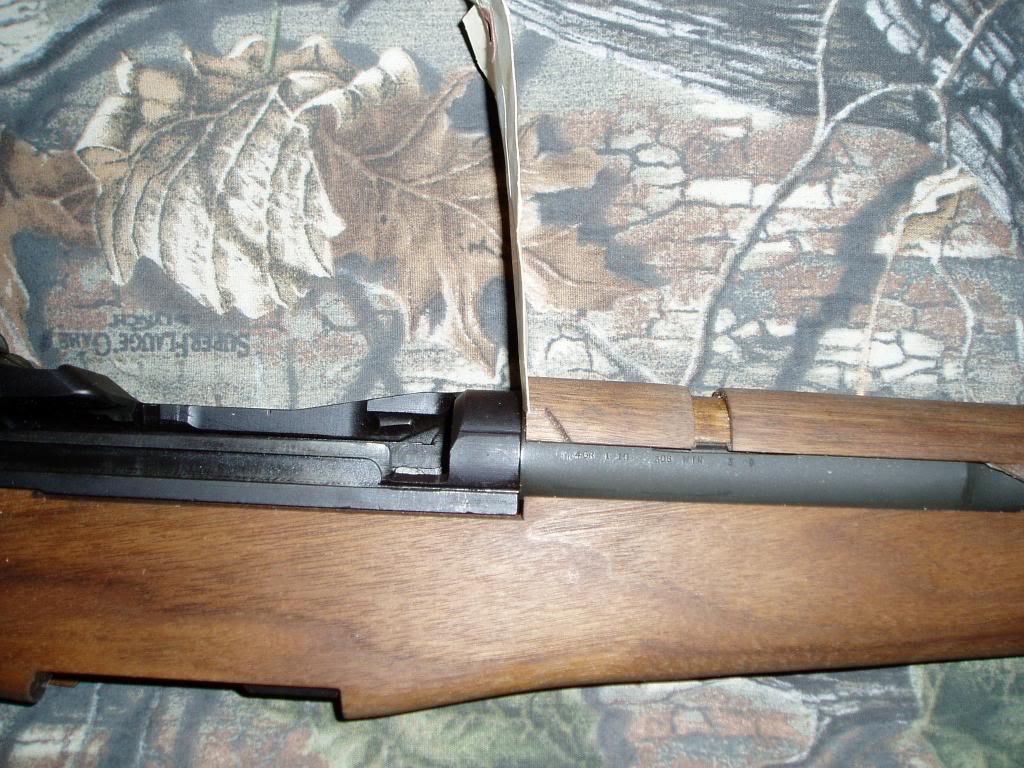
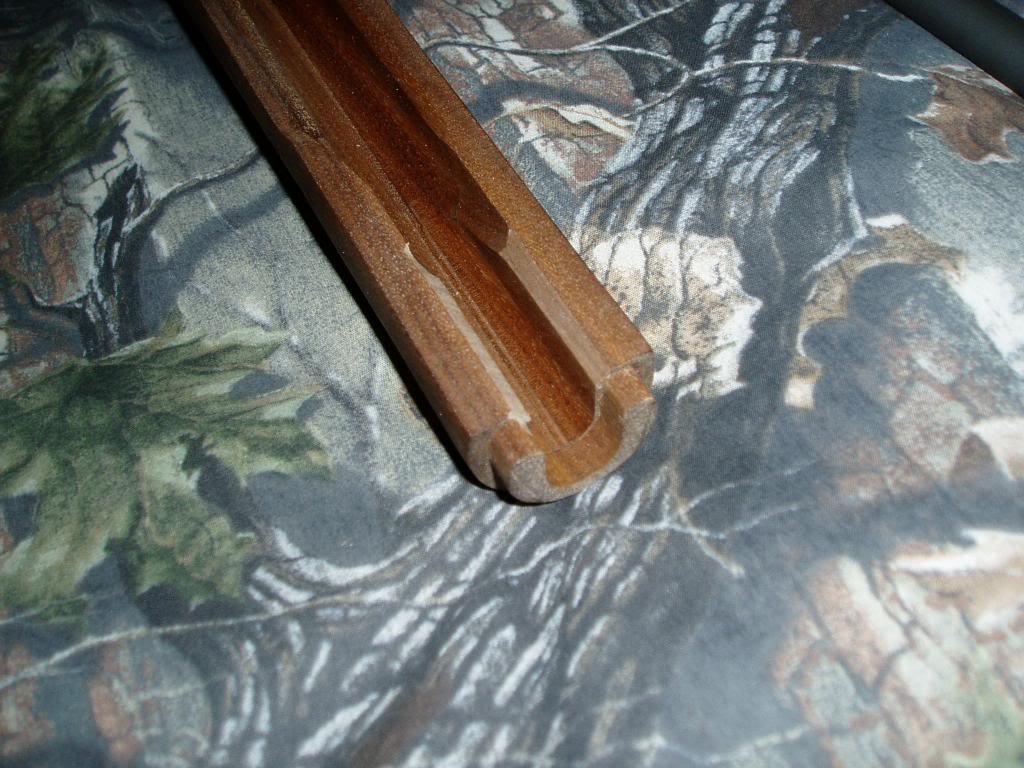
Don't ask me why, but every M1 I've ever worked on has the barrel touching the stock at the end as illustrated. Usually on just one side too. This makes the rifle walk its shots as the barrel heats.
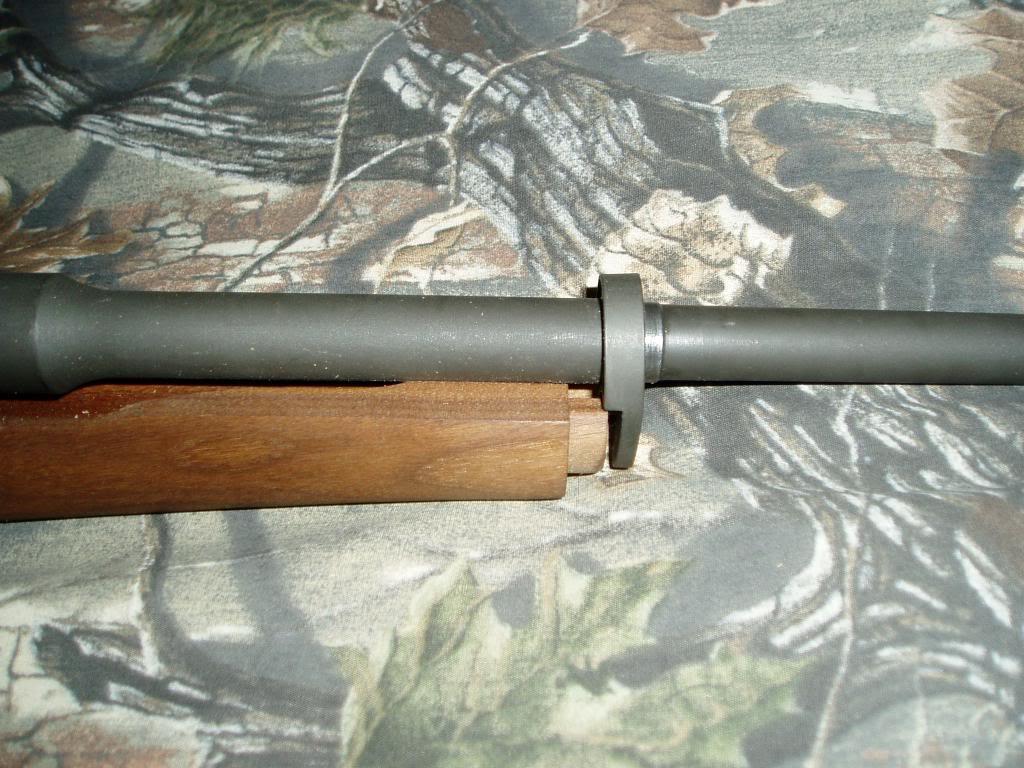
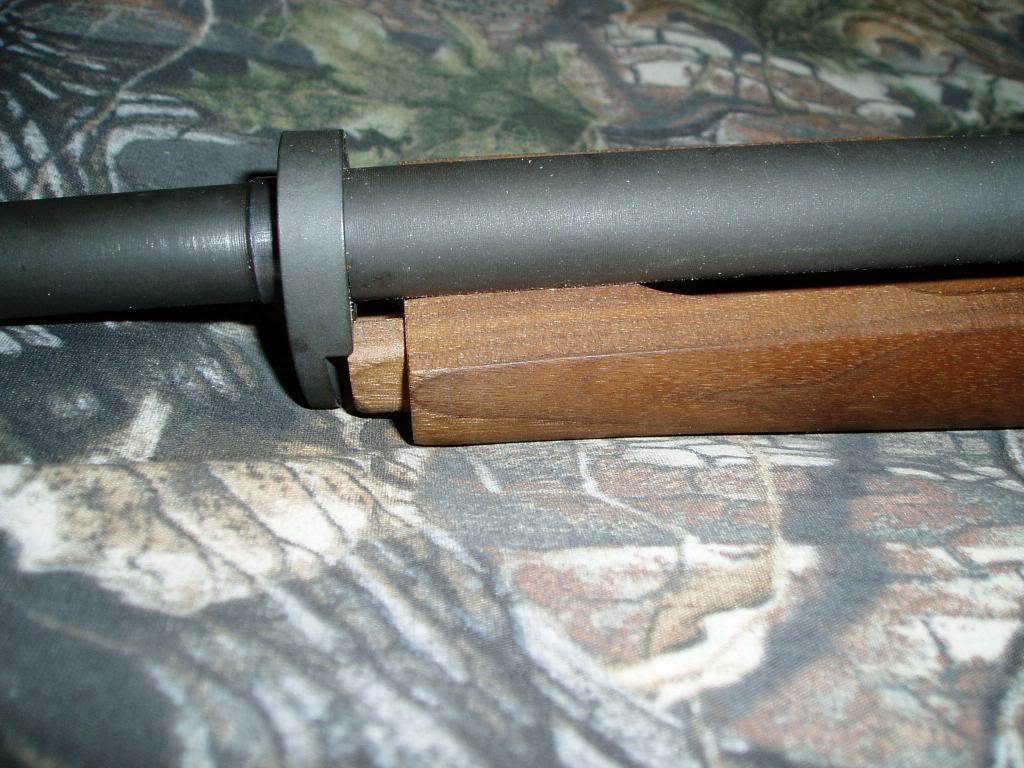
The solution is to bevel the sharp corner for about 3/16" clearance.
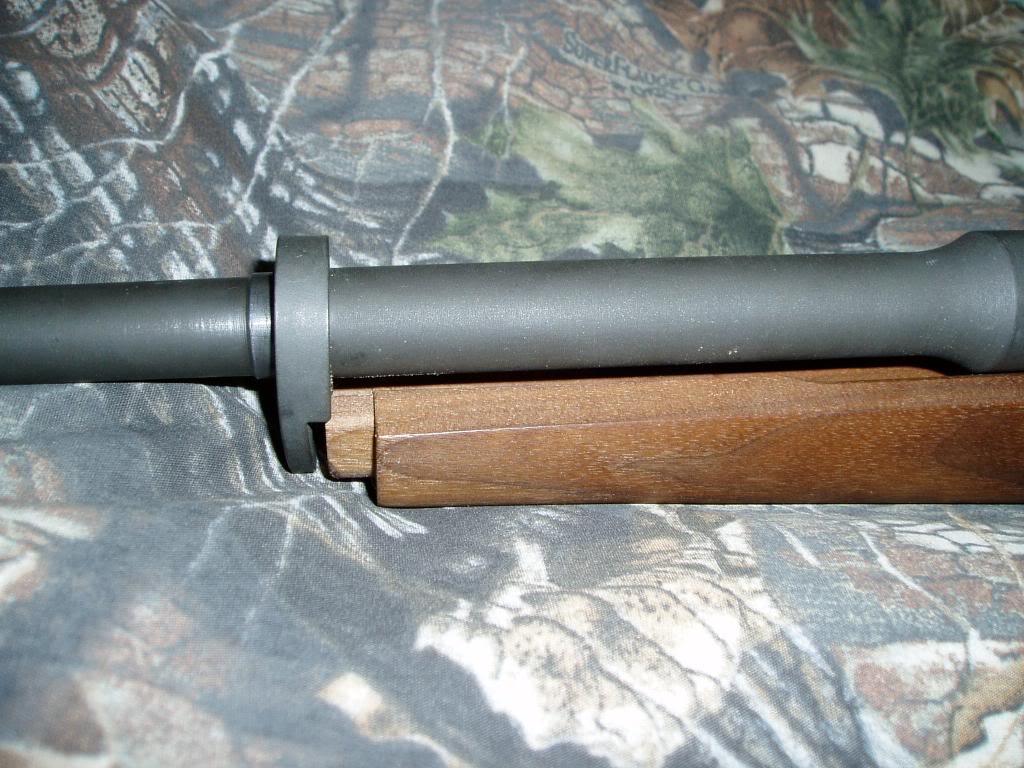
This was done in just a few minutes handheld with a Dremel with a wood bit.
After the rear handguard is fitted, the front handguard is slid into place. There are no mods or fitting to perform to it.
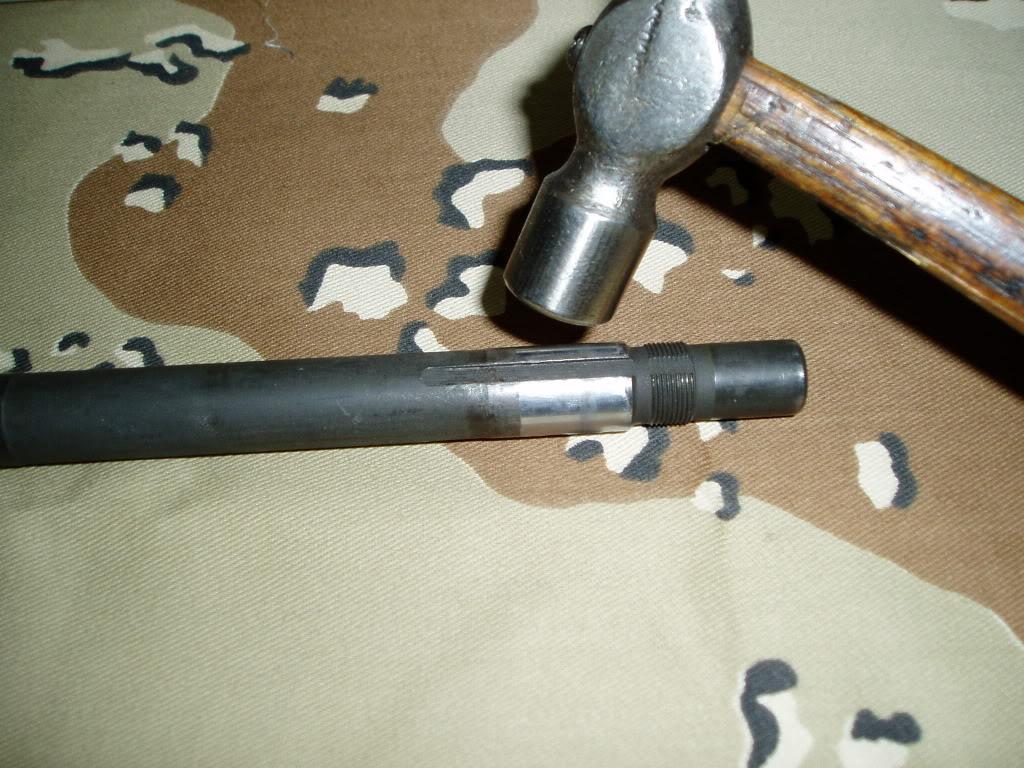
Next, we want the gas cylinder to be a tight fit on the splines. With most M1's you encounter, there is a bit of rotational movement. This is how you get rid of it.
Lay the barrel on a bench block or block of wood supporting it underneath the splined area. Take a small machinists hammer and lightly peen the rear 1/3 of the top spline only. This serves to remove the rotational play and at the same time draw the gas cylinder up into close contact with the gas port. You are looking for a fit that requires the gas cylinder be driven onto the splines with light to moderate tapping with a 10 oz. ball peen hammer and a block of wood. By only peening the rear 1/3, this allows the gas cylinder to be aligned and started in the spline before encountering the peened section. And it reduces how much you have to beat on the gas cylinder.
Invert the rifle when driving the gas cylinder on and stop when the gas port just becomes fully visible.
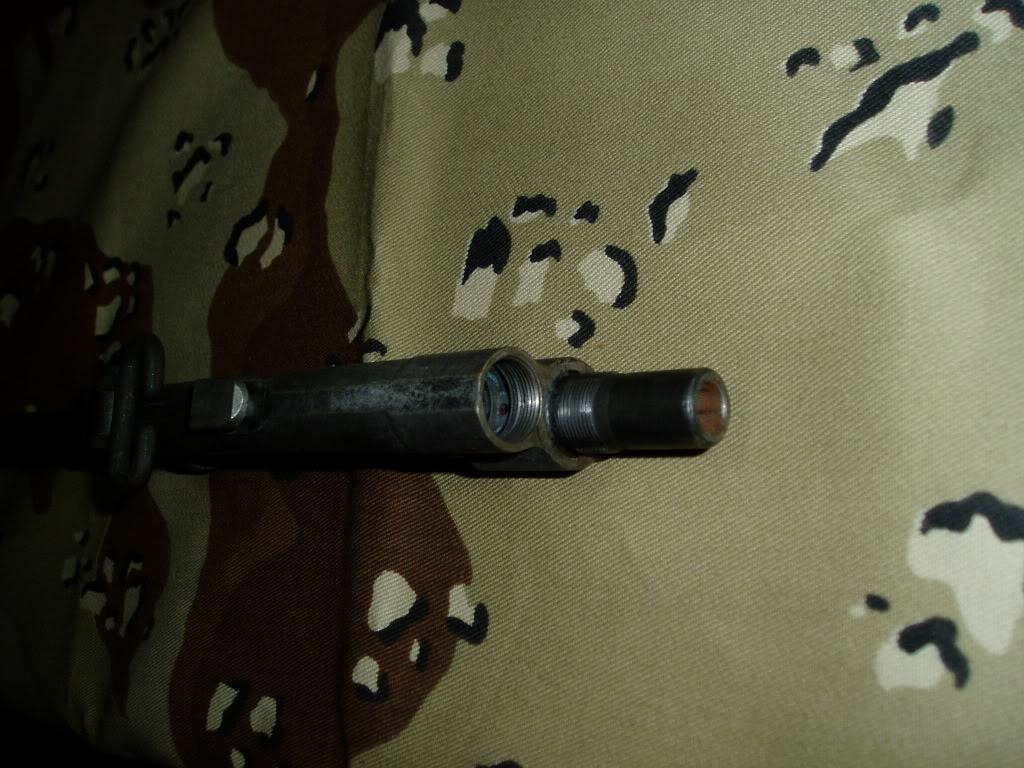
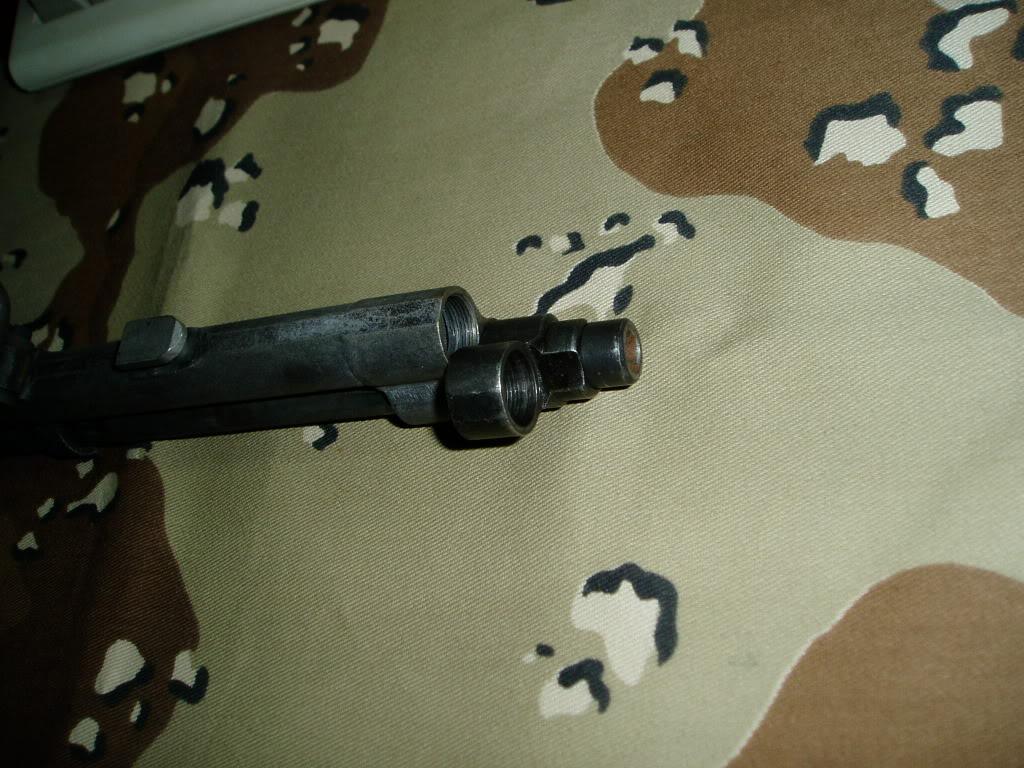
Install the gas cylinder lock and tighten. You want it to stop as shown in the pic and require a little force until it just aligns and allows insertion of the gas plug. When done, the front handguard should have a slight bit of fore and aft play. It must not bind between the lower band and gas cylinder.
Now before someone points out that the barrel used for the pics is rusty, and takes me to task for neglect, I must tell you that this is the barrel from the "learning experience" M1 that was removed 25 years ago. I keep it around to show people who doubt how bad you can ruin a M1 barrel by improper cleaning without using a rod guide. 3/8" of the rifling is gone.
After getting all this done, reassemble the rifle without the recoil spring. Tilt the rifle muzzle up, then muzzle down at a 30 degree angle. The op rod and bolt should open and close completely under their own weight. If not, the op rod is dragging wood somewhere. Find the offending spot and sand/file for clearance. Also check the front stock ferrule, the op rod often drags it. The appropriate size Dremel stone makes short work of this.
In this pic, you can see how inletting black has been used to find the bind points. Repeated assembly/dis assembly is required until the op rod does not drag wood.
Here's another pic of fitting the hand guard.
And after.
The last thing is how much draw tension you have with the combination of stock and trigger guard you have. You want the trigger guard to encounter resistance when closing as it approaches the tip of the trigger. You should have to grunt a little to fully close and latch the trigger guard. If not, it's like shooting a bolt action with loose trigger guard screws. Most M1's have flattened trigger guard trunnions to one degree or another. Boyd's makes up for this some by making their stocks thicker in this dimension, but if that still is not enough, you need to swap trigger guards. Don't forget to grease the trunnions!
BTW, the trigger guard on the right was received from the DCM back in the 80's. Even though it looks new due to being reparked, it is useless with almost half the trunnions worn away. When shopping for trigger guards, look past the pretty finish.
The trigger guard on the left is brand new, never used. It will not close on a new Boyds stock.

One last thing. Replace the op rod spring with a new one. You will be able to tell the difference. The rifle shoots a little softer with a new spring and returns to battery a little snappier. Clint McKee at Fulton Armory tracked down the original contractor who still had the original prints. They are making the springs he sells. Don't forget to grease it.
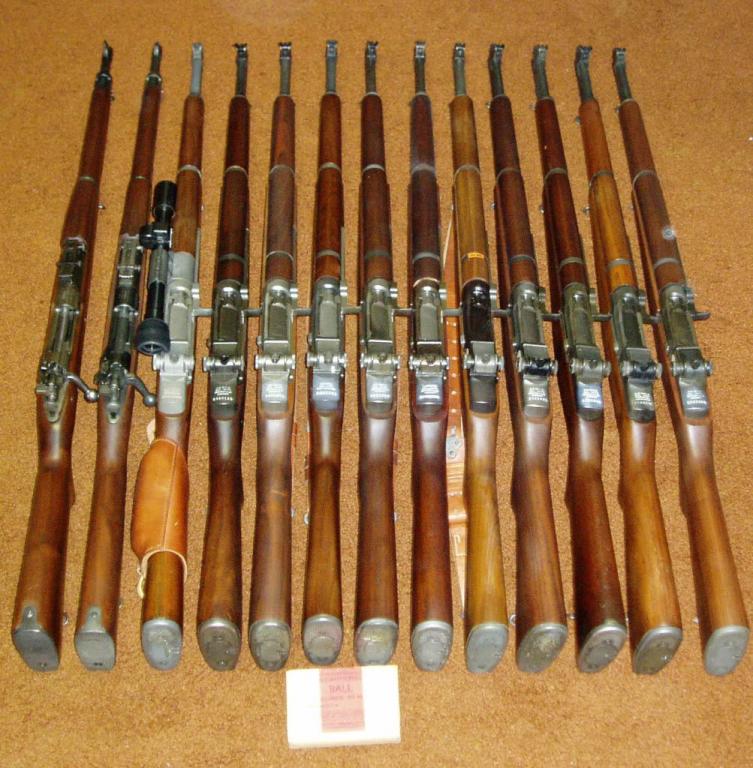
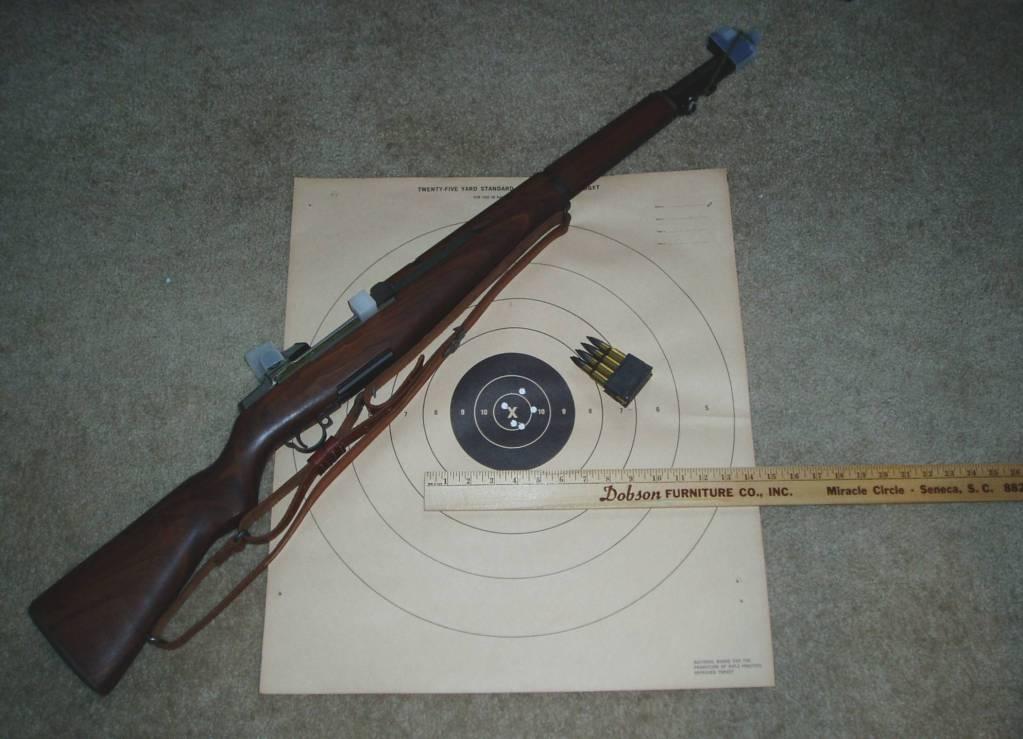
Some before/after pics of various DCM/CMP M1's I've done.


Information
 |
Warning: This is a relatively older thread
This discussion is older than 360 days. Some information contained in it may no longer be current. |
|
-
The Following 28 Members Say Thank You to no4mk1t For This Useful Post:
25-5,
AZPhil,
bearrowland,
Bill Hollinger,
BMorgan1953,
Bob Seijas,
Bob Womack,
bow,
Brian Dick,
browningautorifle,
CalTex,
CINDERS,
Clash77,
en bloc,
jesse_,
Joe W,
lude92,
mannparks,
mar53,
Prince Humperdink,
RiggerBoot,
SA M1Dom,
Sarge1998,
Steve762,
Stoshu,
surpshooter,
tom gray,
vintage hunter
-
03-25-2012 08:55 PM
# ADS
Friends and Sponsors

-
Legacy Member

-
-
-
Legacy Member
So, who has used this information to make their own M1 shoot better?
-
-
Contributing Member


What are those two with the odd crank on the side? And where are their gas cylinders? LOL
Real men measure once and cut.
-
-
FREE MEMBER
NO Posting or PM's Allowed

Hehehe. I like the bolt guns too. I think you need one with a rear aperture sight though. 
But yes, this was a very good and informative thread. Thank you for taking the time to do so.
-
Legacy Member

Originally Posted by
no4mk1t

So, who has used this information to make their own
M1 shoot better?
I just read this today and I plan on shooting my M1 in the CMP Western games, So I will get my butt in gear and look at everything you pointed out and see what I can fix.
Thank you Very much for this Info.
Semper Fi
Phil
-
-
Legacy Member
Originally Posted by
ABPOS
Hehehe. I like the bolt guns too. I think you need one with a rear aperture sight though.
But yes, this was a very good and informative thread. Thank you for taking the time to do so.
Thanks. Glad to see the info is getting used.
I have some rear aperture bolt guns. This one is the subject of its own post.
Resurrection: Restoring an 03-A3 Drill Rifle to a Shooter
These have apertures, but the glass sees more use.
-
The Following 3 Members Say Thank You to no4mk1t For This Useful Post:
-
FREE MEMBER
NO Posting or PM's Allowed
Thank you for taking the time to post the good pictures and clearlly mark them with red colors. Great tutorial that I need badly.
This seems aimed at those who get a new CMP stocked M1, or go buy a new stock. In your opinion, would a new stock be more accurate in the long run v. a used GI Wood? (some of the GI Stocks seem a bit loose fitting, and the new ones from the CMP are definitely snugger- does this contribute much to accuracy). Said another way, to get the most out of my M1 would it help to buy a new stock v. the old one on it?
Another question from a new M1 guy- how much more will the much written about "gluing of handguards, turning down gas cylinder, cutting down back of gas cylinder" mods do vs. the proper inletting? Do you think it will give even more, or is that extra bit of trouble really worth it? Trying to shoot some JCG Matches soon and not sure if all that cutting on my M1 will really help much....
Thank you for the great article.
-
FREE MEMBER
NO Posting or PM's Allowed

in your line up what is 5th from right?
also 4th from r no trap butt plate?
-
FREE MEMBER
NO Posting or PM's Allowed
When you "Peened" the last 1/3 of the splines do you use a socket or a brass punch? Or do you use the ball of the machinist hammer?
I worry, and perhaps unfounded of bending or tweaking the barrel...but I supposed a wood block is a good enough back up.


 PM
PM


