-

Originally Posted by
Surpmil

"Product from
Canada
". Hmm!? More likely product from Celestial Kingdom methinks. And that label hath a lean and hungry look that says the same!

It was mailed from Canada unless some other country is using Canadian stamps, think it was on ebay.
Methylated spirit will break down SOME forms of Canadaicon Balsam in my experience. But why it won't break down some others that are clearly Canada Balsam, heaven only knows. Best for taking it off is old carbon tetrachloride as taught to me in the 60's but, alas, now banned. Trichlorethylene is a good second best but MUST be wiped off with surgical/pure MS before assembly to clear any residue.
M.S. is just my abbreviation for Methylated spirit. Just to reiterate. I use industrial meths for general cleaning but before final assembly I clean all lenses, prism's etc etc with PURE/Surgical MS to be 1000% certain of cleanliness.
Occasionally you'll get a layer of balsam or other adhesive that you just can't get off a lens, generally around the edges! We used to use a piece of thin/.005" or so brass shim to gently scratch/scrape it away. The shim won't attack the glass.
Thanks Peter, lurking somewhere in the background and behind the cheap Aldi beer is a bottle of surgical spirits, as its a similar bottle to the beer stubby bottle its more than an arms length away !!
-
-
08-28-2015 09:31 AM
# ADS
Friends and Sponsors

-
Binoculars Prismatic No5 repair (part 2)
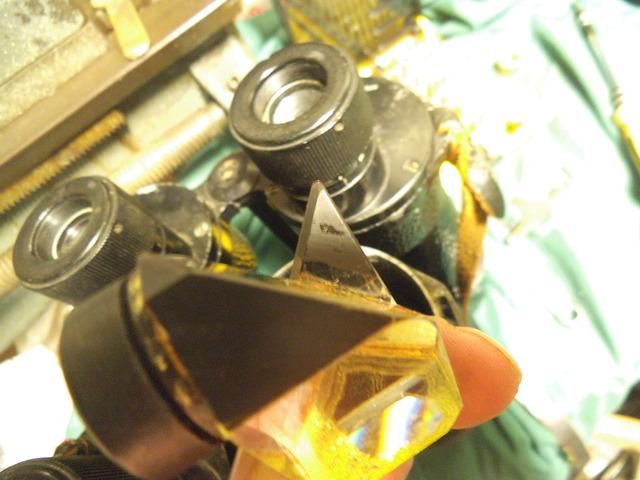
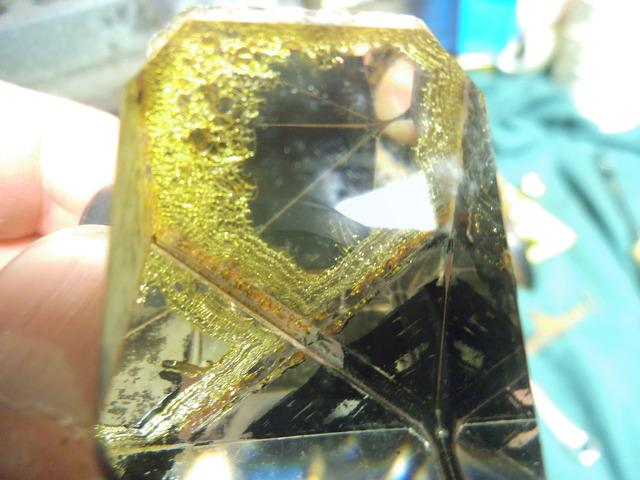
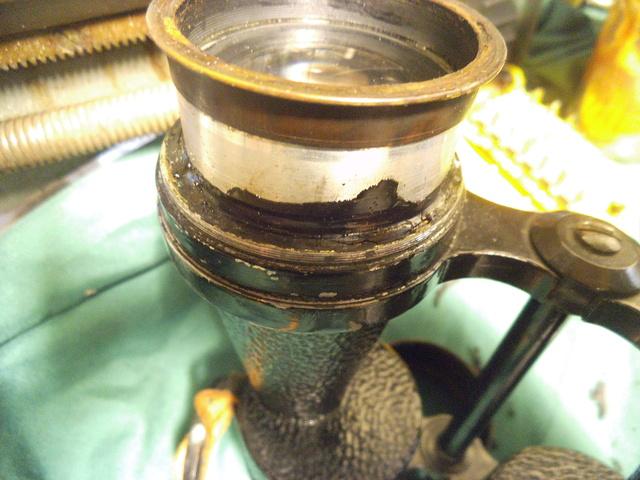
From when I finished last time the cement was left to cure, I would say its been well over four weeks from cementing to when I rebuilt the binoculars, the assembly is a straightforward reversal of the stripping, a good idea now to give the prism a clean and remove any excess cement etc, once this is complete replace the matt black paint that is on parts of the prism, acetone will and does remove some of it in the cleaning process, as I assembled the Bino's I,ve used another prism from another pair that is due for a re cement etc, but it gives an idea of the places it (the paint) needs to be re applied. Also shows a clear example of the breakdown of the cement.
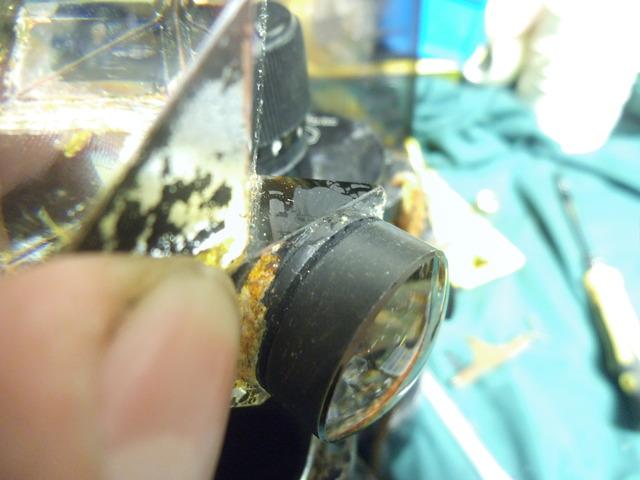
The next part of assembly and if everything is clear etc, is the re collimation if necessary, it can be as simple or as complicated as you want, personally I like to keep it simple, first off is to remove the cover on the objective lens, the cover is normally sealed if its never been off, and removal will break down the old seal (am not sure what it is or was, but Peter or one of the other Armourers may be able to shed some light on it)
With the cover removed the objective part should look like this and would say its never been touched since it was made, greased up and sealed. for me the repair didn't require me to re collimate but I,m guessing in most cases it will.
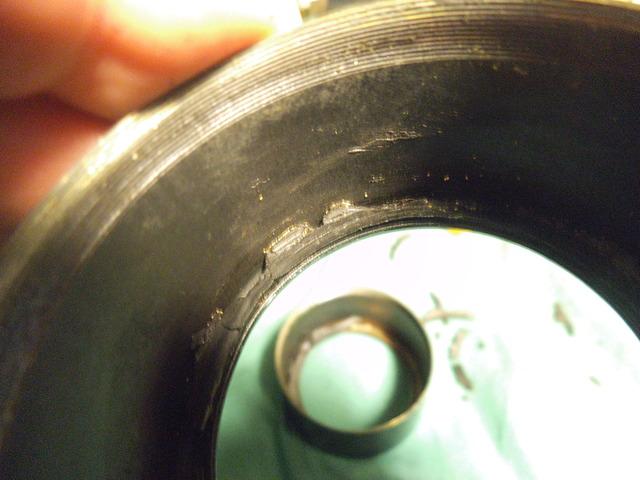
I removed the other side cover and you can see someone has been there before..... who obvious didn't realise this is a locking ring .....and looks like its been prised up until the threads have shown !!!!!
its quite easy to see the slot (two opposite to each other), this is were a specialised spanner or tool would be used to undo this slightly... obvious the tool wasn't available when someone did into these.
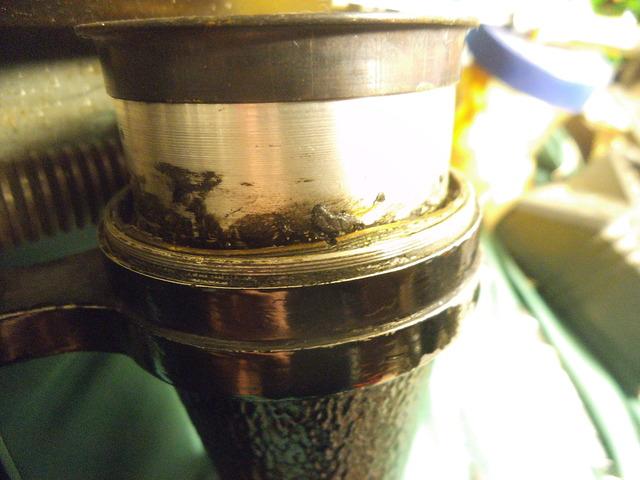
so thats not the way to do things, but this ring would normally be buried under lots of old grease etc, pic below gives an idea of what it would look like amongst years of grease.
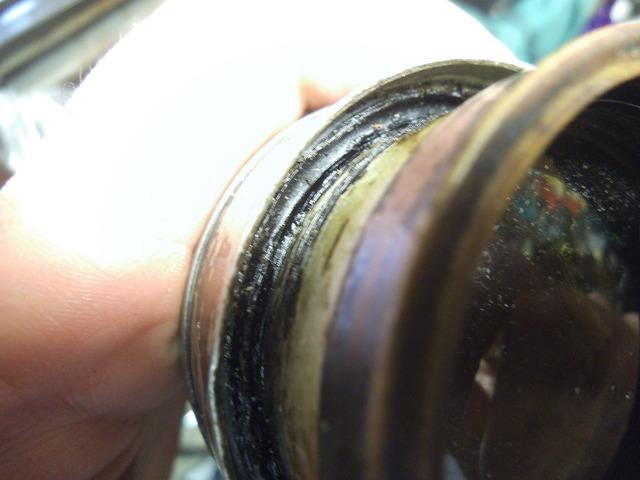
Once the ring is located and a tool is made etc its a case of undoing this slightly, in some cases I,ve found the whole objective assembly will turn without the need to undo the locking ring.
The whole reason behind all this is the objective assembly is set in an co-eccentric ring, once the locking ring is free the assembly will rotate either way.
(just some advice on any future projects or removal of the objective lens for any reason, either mark the original position or make a drawing, or take one point and mark/measure) saves time on re assembly.
With this done you ready to collimate, first you need something to look at in the distance, of course be discreet, as there are some who do not like the idea of someone standing in the garden looking at their house through binoculars and may got the wrong impression !!
(Myself I use a roof top and chimney to look at) if your are seeing a double image then its a simple process of rotating the objective assembly right or left, slowly, until a clear image can be seen. (it may be necessary in some cases to do both sides) I won't go in to the science just trying to keep it simple.
There are all manner of ways described on the internet but I find simplicity the best.
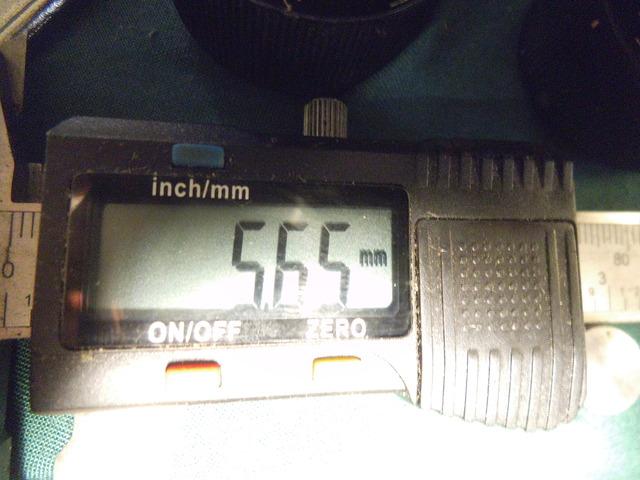
Some pics below give an indication of travel on half a turn,


once happy with the image then a simple case of nipping the locking ring and replace the cover... If you feel the need to reseal etc thats up to you, myself I,m not going in to action with them and if I was I,d take a pair of Bino Prism No2 Mk11/ Mk111 
I will post other threads regarding repairs etc if anyone is interested, one which will be of interest is the gland assembly of the above type of binoculars regarding the ocular lens.....
Regarding the co-eccentric ring, I,ve a few pics somewhere of an assembly removed for cleaning on a pair of German WW2 binoculars if any one is interested, this is a bit more clear and you can see what I mean regarding marking them before removal.
Last edited by bigduke6; 09-02-2015 at 06:45 PM.
-
The Following 3 Members Say Thank You to bigduke6 For This Useful Post:
-
-
FREE MEMBER
NO Posting or PM's Allowed

I think the black sealing material was called Luting, an instrument maker i visited and had a discussion with showed me an original Australian Military marked tin of the stuff.
-
Yes, LUTING was the stuff we used. It was also used to make impressions of marks in gun barrels. We'd take the impression, take it out and examine the mark set in the luting.
-
The Following 2 Members Say Thank You to Peter Laidler For This Useful Post:


 PM
PM


