-
Legacy Member

Restoration of a Spanish Mauser Cavalry Carbine
Hello all,
Well, this was a pawnshop find greatly depressing. An otherwise beautiful Spanish Cavalry Carbine, not unlike the little Argentines you can occasionally bump into. When I found it I was suspicious having never seen one before in the flesh, so I rushed home to consult my book 'o mausers (Ball's Mauser Military Rifles of the World) and having satisfied myself that it was indeed a real thing and not some bubba carbine or import concoction, I set to negotiating and finally bought for pretty cheap.
So here is what I got:
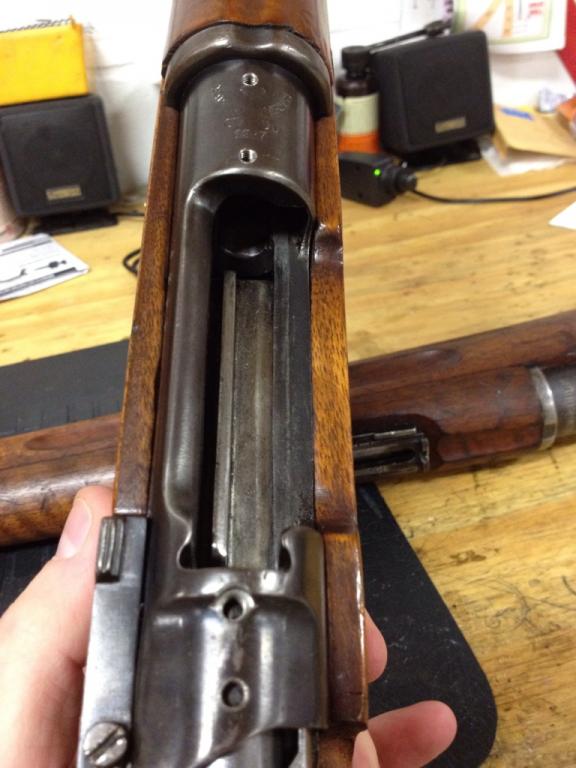
The rifle, in full stock, missing only the saddle ring and bar, and the butt sling bar. Oddly enough, bubba had filled these two places in and where he had removed the sling bar, he installed a sling swivel stud.... So that was interesting.
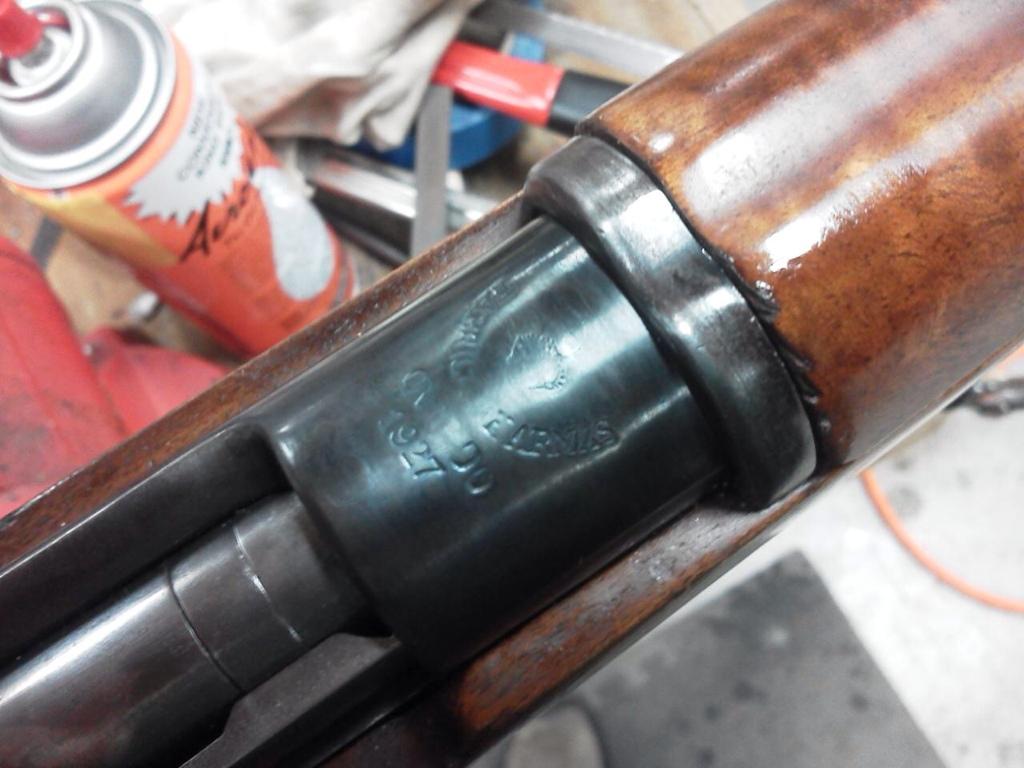
The biggest bummer, however, stuck out like a sore thumb:
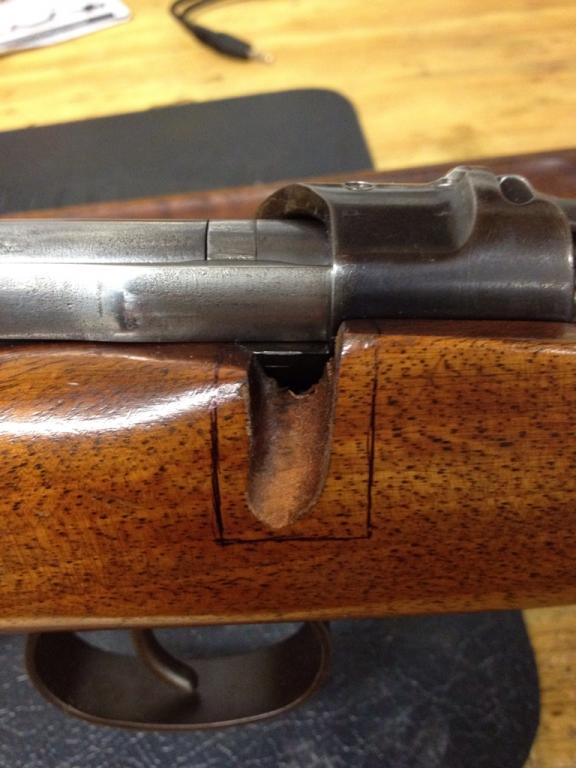
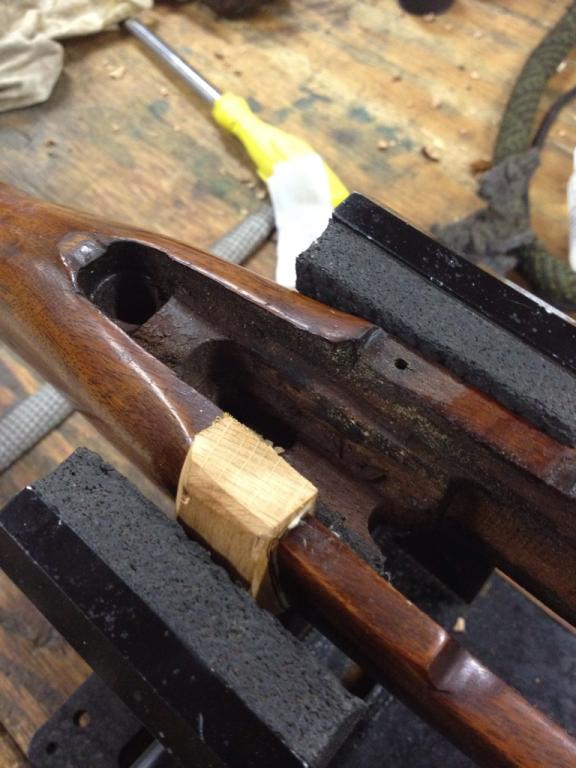
Sorry there aren't any pics of the whole rifle before the restoration began but I am sure you can just imagine. So the biggest problem was the receiver being drilled and tapped. The stock I knew would be an easy fix, but the drill and tap took some thinking. Wanting to avoid the hazards of welding and such, we decided for something a bit more creative. Let me preface all of this with the notion that in all reality, this was sort of a practice for something a bit more valuable and no matter what, this rifle will always be a salvage piece, no matter how well it came out. Now, back to your regularly scheduled update:
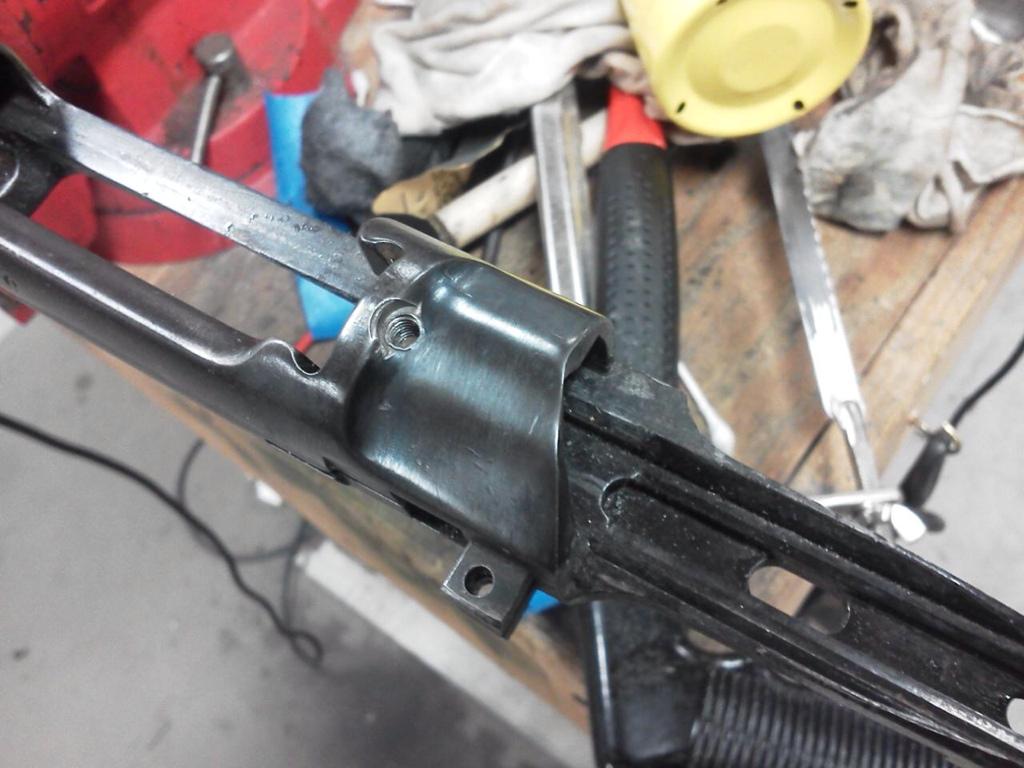
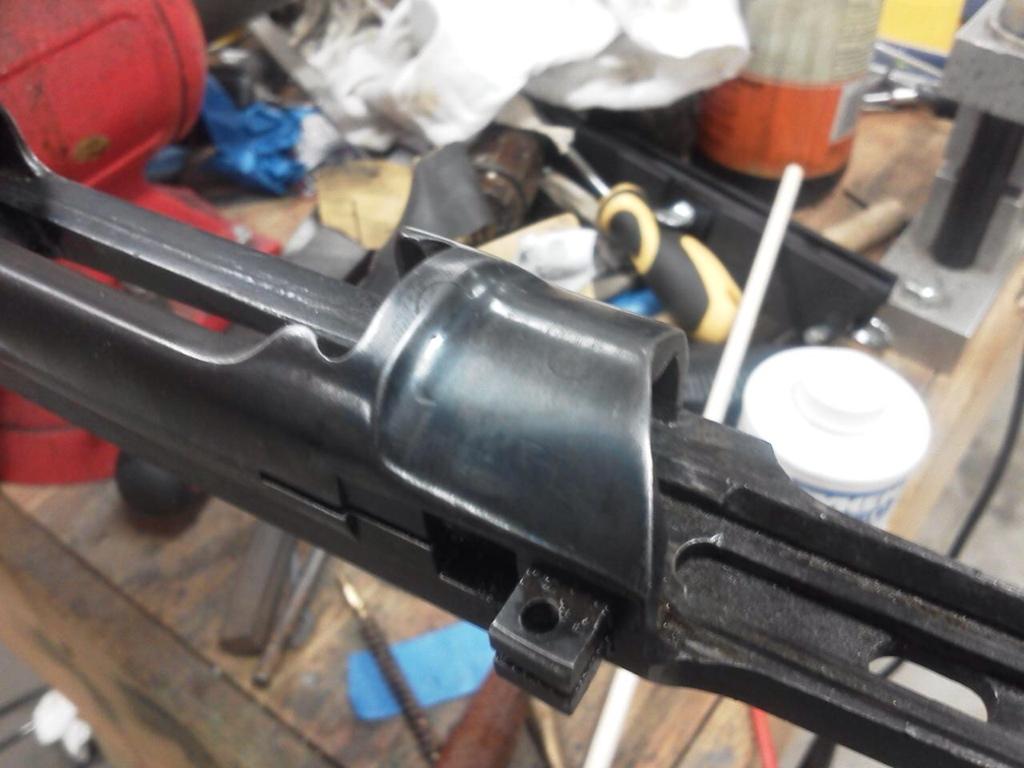
We decided we would use screws to fill in the holes and then polish them off along the top of the receiver and match the contours. This was a great idea and only had two complications. The forward most screw had missed everything but the crown so we needed to be extra careful there. Additionally, the third screw back was conveniently cut into the charger bridge which made imaginable complications. Regardless, It came out really well. Used a bit of heat and cold blue to touch up the finish after.
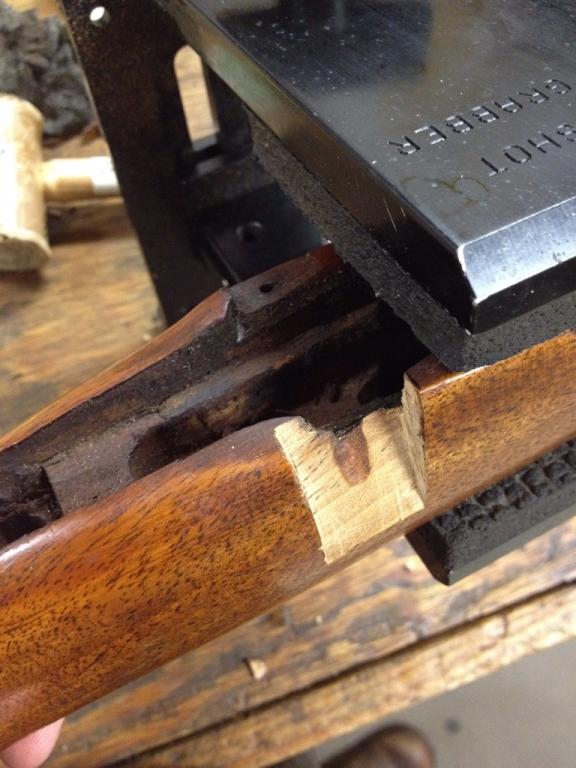
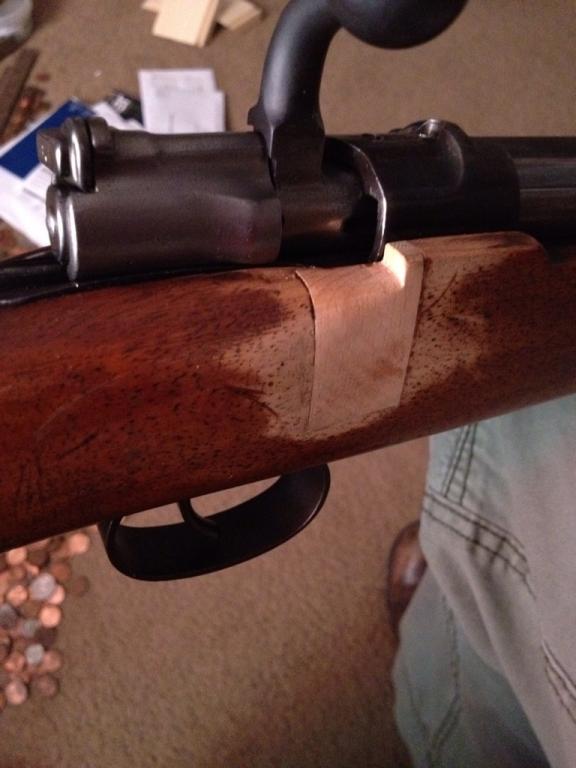
Next was the wood which looked something like this before:
They ofcourse turned down the bolt for that cut out so I had to replace the bolt body... Ugh
During and After:
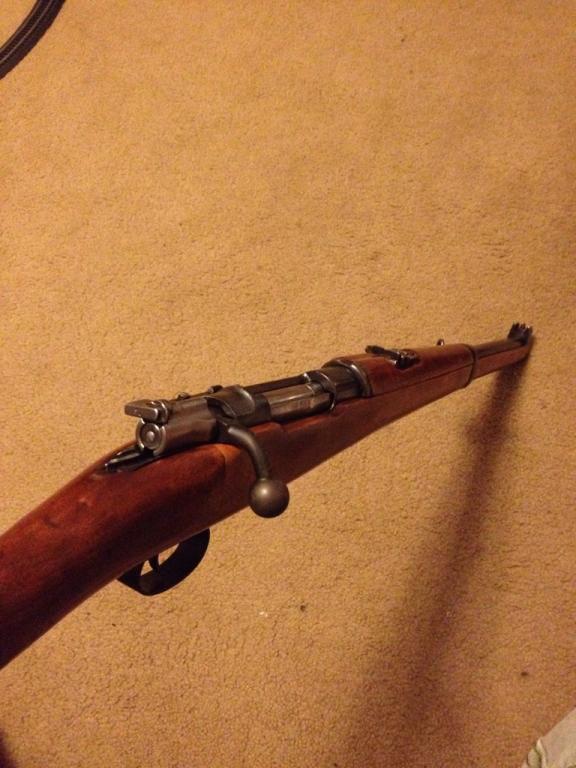
And now, a sort of up close picture of the final product:

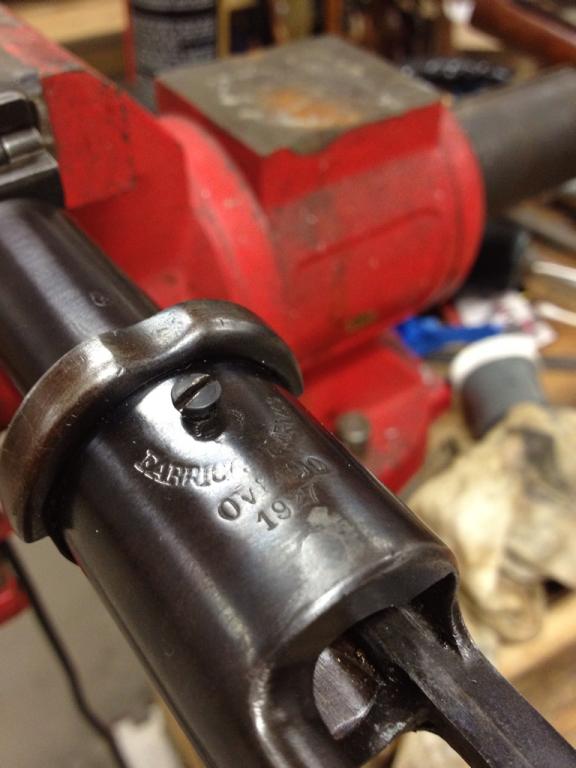
I want to thank Sht_le for his help with the metal work, his partnership (and supply of Bundaberg Ginger Beer) is invaluable for most of these projects. Also want to thank and reference LibertyTreeCollectors.com It is the only place I can think of where you can ask the owner if he knows if a saddle ring bar from an Argentine will fit this Spanish and get the responce, "well go measure it and I'll see if it will fit." A few seconds and a micrometer later, we got our answer and I paid the man for the part. No special fees, no hand select business, just honest and incredibly helpful service. If you haven't discovered this place yet, do so!
And of course finally, Sorry for the long Post! I hope it provides a bit of satisfaction to us guys who love to see an old girl put back into service and working. I also hope it might give you guys some ideas for projects of your own. Something like this didn't cost anything apart from the rifle, a new bolt body, and some stock metal. Some old screws and a chunk of walnut can be found floating around most any workshop or salvaged from a junk stock.
Anyway, Cheers!
Information
 |
Warning: This is a relatively older thread
This discussion is older than 360 days. Some information contained in it may no longer be current. |
|
-
The Following 4 Members Say Thank You to m4a3sherman For This Useful Post:
-
03-17-2012 12:11 AM
# ADS
Friends and Sponsors

-
Legacy Member

m4a3sherman, Thank you for sharing your restoration. Your up-close photos are excellent. There are many rifles out there that can be restored to their original specifications and your work is an excellent guide to show what can be done to undo Bubba's work.
-
-
-
Advisory Panel


m4a3sherman = 2, bubba = 0
-
-
Legacy Member
Hahaha, perhaps so but I fear the odds are more like m4a3sherman = 2, Bubba = 35,000 Still, we all do our part to save history! I cringe a bit every time someone comes in and wants to chop a mosin. Sure, they are pretty cheap and plentiful but there was a time when that was true of mausers, and springfields, and dare I say, krags. I see both sides of it but it still urks me...
-
-
Legacy Member

More detail on the metal work. I took the drill press to it to install Countersunk screws so there would not be a half moon where the threads surfaced. As for the lump where the charger guide was I used an oversize Fillister head screw and spent some time with a file, Drimal and Dyechem to try and fit it as best I could. It did not help that Bubba apparently used three different sized drill bits to make the hole I was trying to fill .... Screws were installed using Rocksett Engineering Adhesive. Finish used was a mix of cold blues with just a dash of browning solution. As a final touch I used an engraving chisel to finish out the top of the crown where Bubba had drilled through it. Now if M4A3Sherman would bring her back to the shop I will install a saddle ring on his sling bar.

..... I'm just a glutton for punishment
-
Thank You to Sht_LE For This Useful Post:
-
FREE MEMBER
NO Posting or PM's Allowed

-
Legacy Member

Nice work.
-


 PM
PM


