-
IMA Brunswick rifle - a restoration thread.
So I ordered a Pattern 1837 Brunswick rifle form IMA a couple weeks ago. When it arrived, it looked rather like the pictures on their site - covered in filth, crystallized storage grease, rust and grime.
The worst thing I could immediately find is the gun came without a complete trigger guard. Or more accurately, 70% of the trigger guard is just missing - not included. The ad clearly states you get a trigger guard so I contacted IMA and they are sending a replacement - it was a mistake when the rifle was selected - no biggie. With these guns you sometimes will have missing parts which is why the sell parts rifles as well, but they do guarantee you get what's stated in the ad.
On the surface the gun otherwise looks restorable, or as much as I can tell without any cleaning at all. It is REALLY REALLY dirty - but that is to be expected with all these untouched guns.
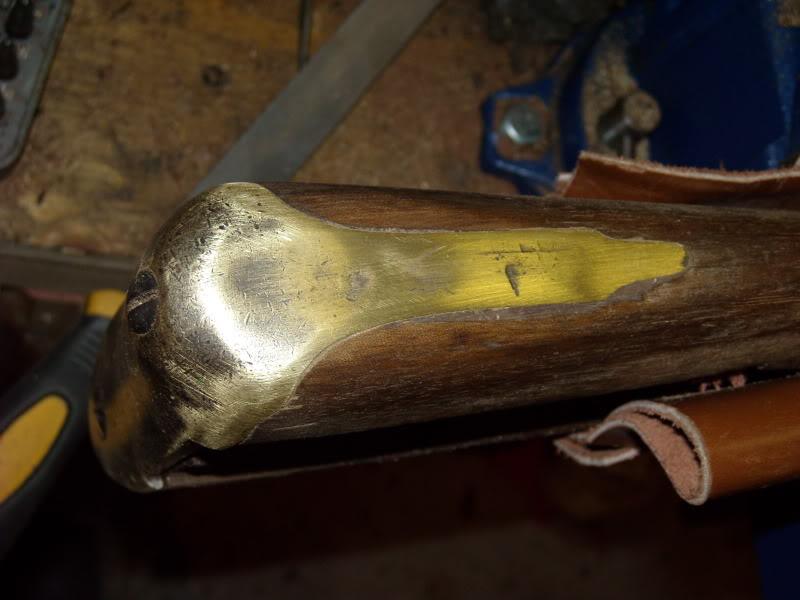
Sadly, the buttplate is totally missing like on half of these and the Indian cast repro is way huge and will require some fitting.
The repro patchbox cover they sent me turned out to be defective, but these thing happen and IMA is sending a replacement. It looks like the manufacturer in India filed off a huge casting flaw on the door at the hinge so there's a huge gap. Most guys get nice one though and I'm sure the replacement will be fine.
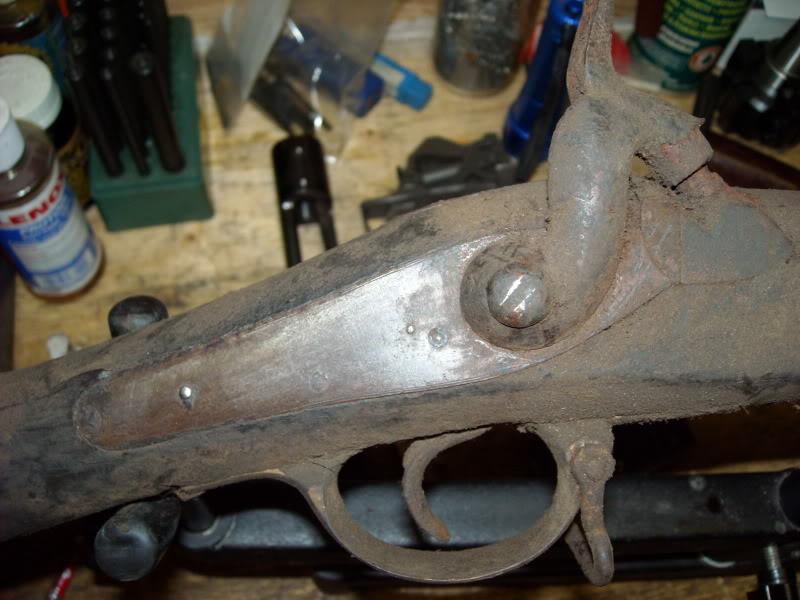
Here it is as it arrived:
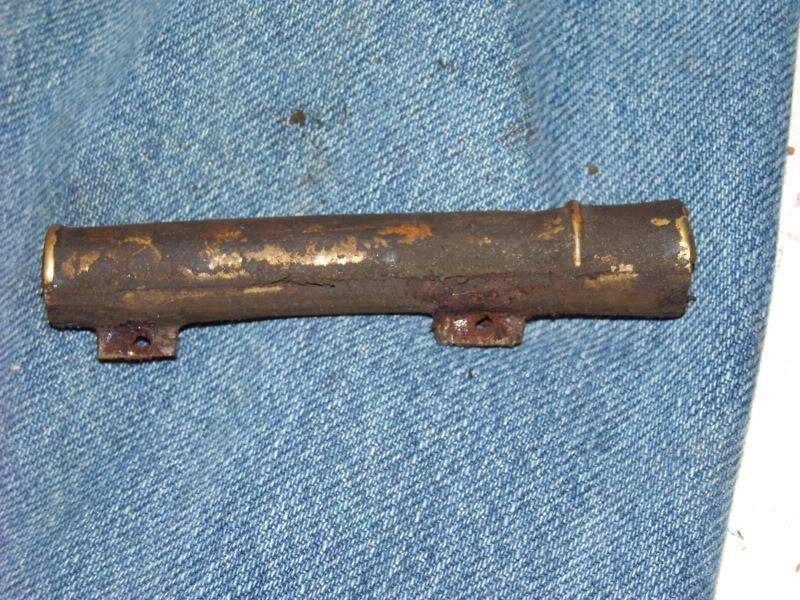
Here's the busted trigger guard. It's only held on by the front screw - the two rear screws are still there but no trigger guard around them. I'm glad the screws were still there and the new trigger guard is en-route.
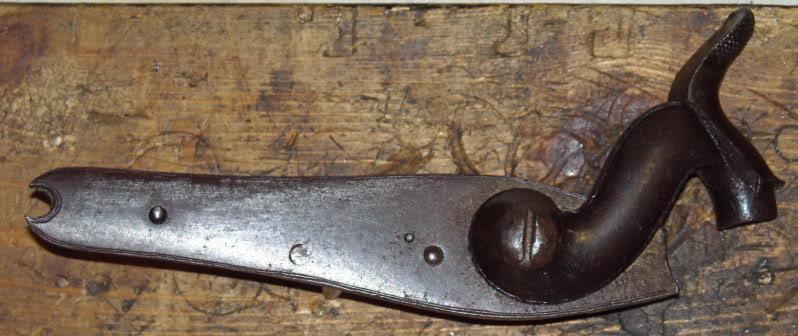
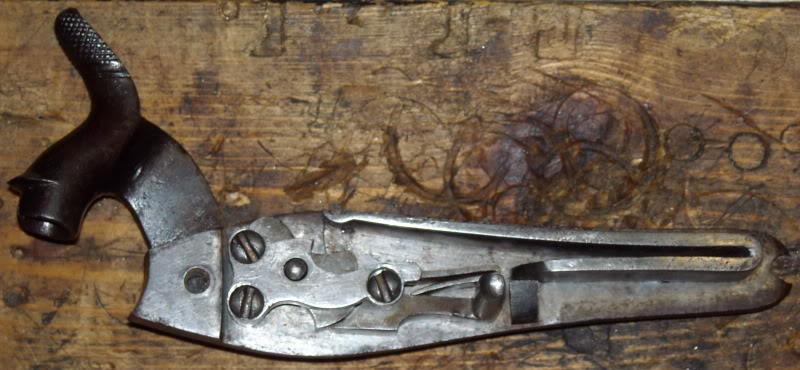
The lock looks OK and cocks and fires (very sluggish prior to cleaning), though I don't want ot try it much without de-gunking it:
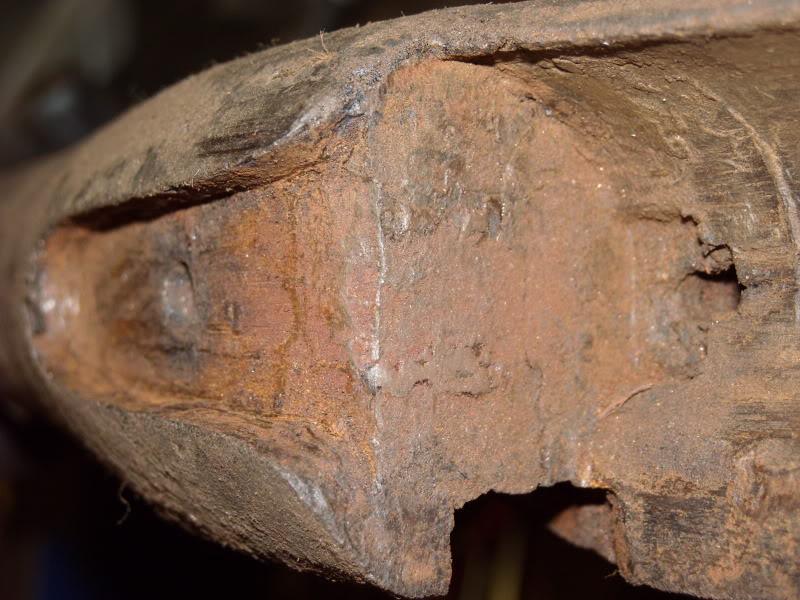
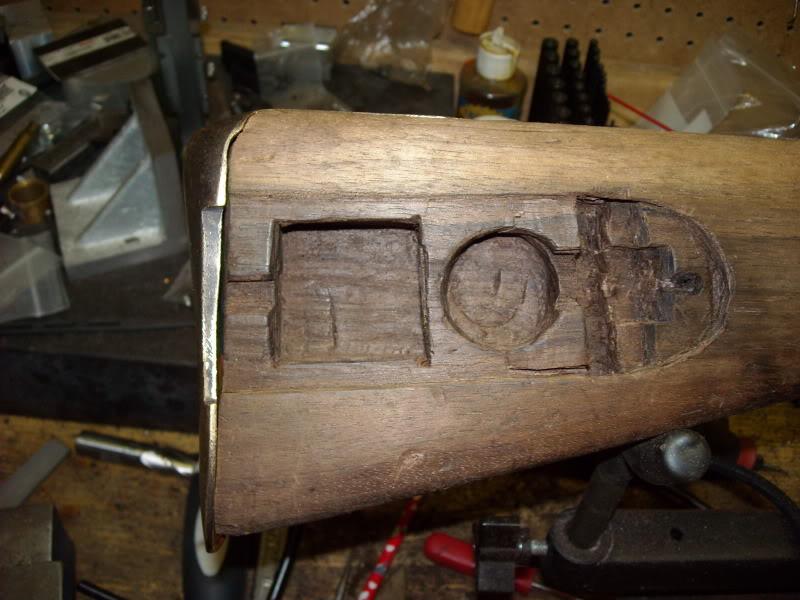
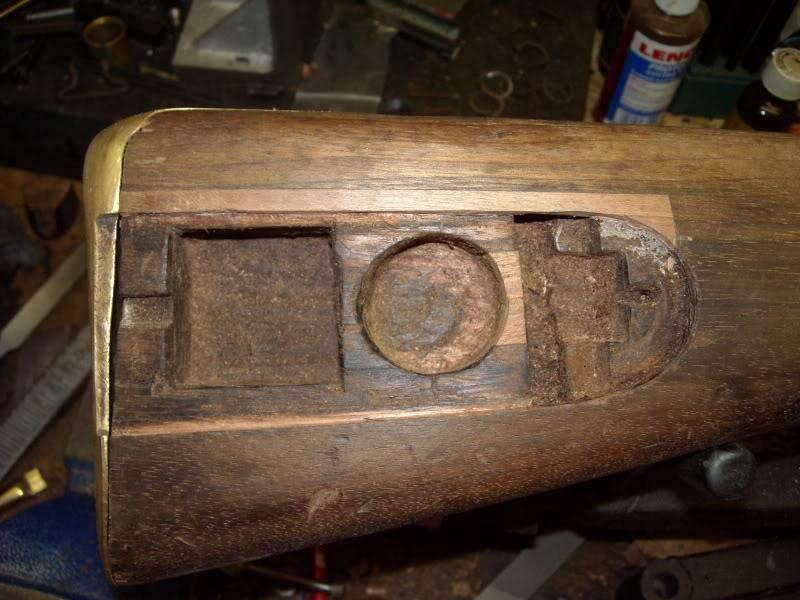
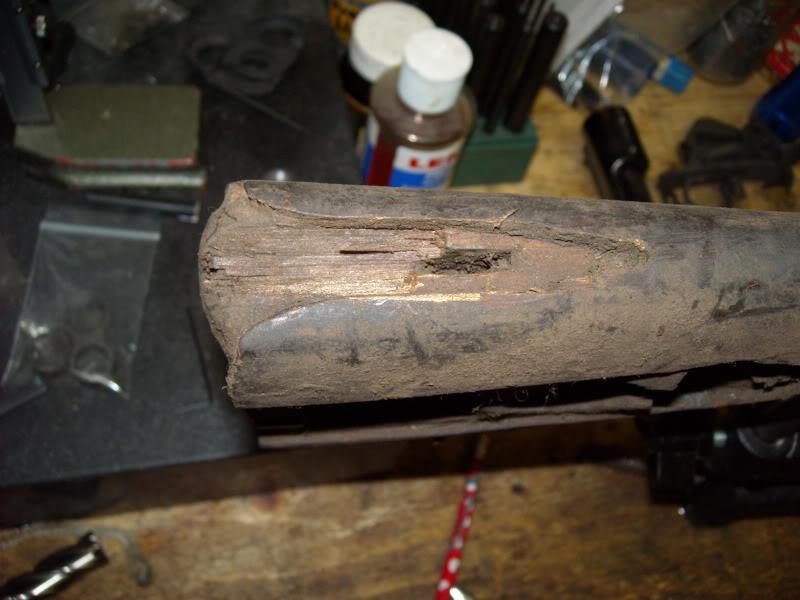
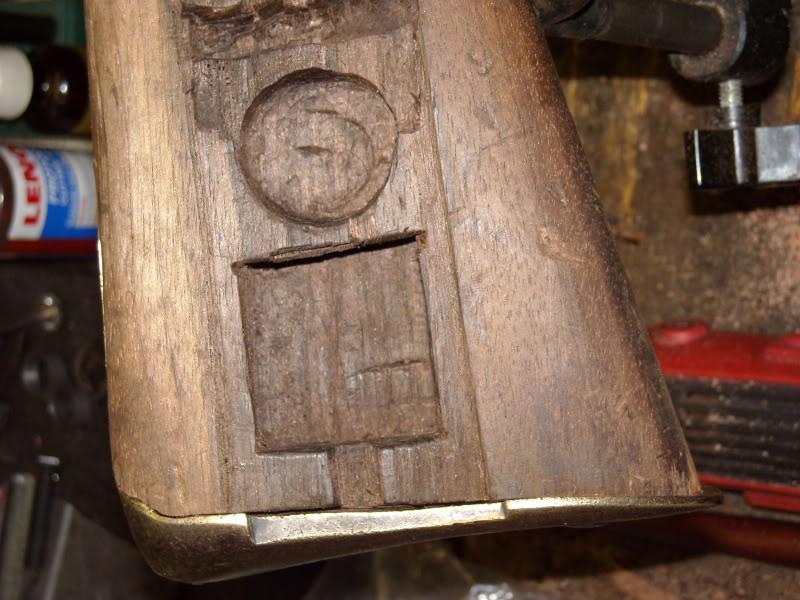
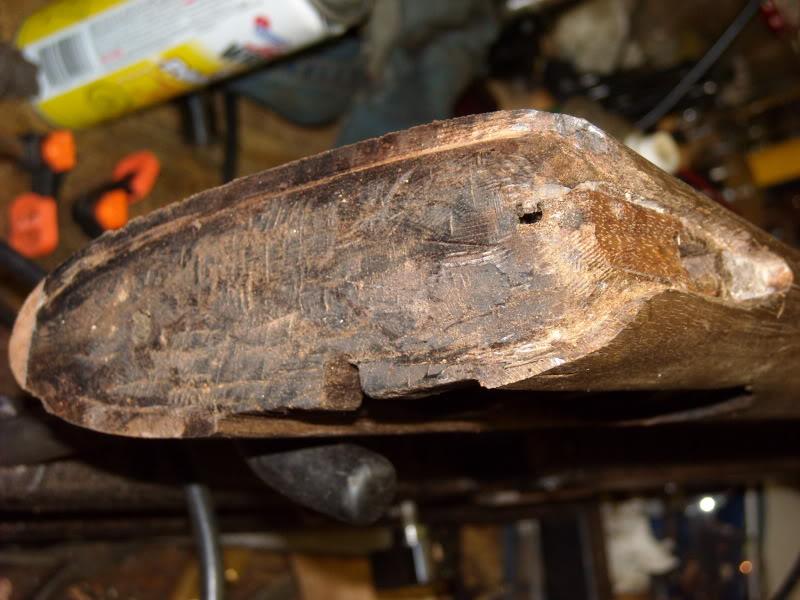
This seems to be the worst stock damage inside the buttplate inletting. Looks like someone pried off the buttplate and broke out some wood. The break is clean and it looks really recent??? Like within the last few years? This should be an easy repair for when I'm inletting the buttplate.
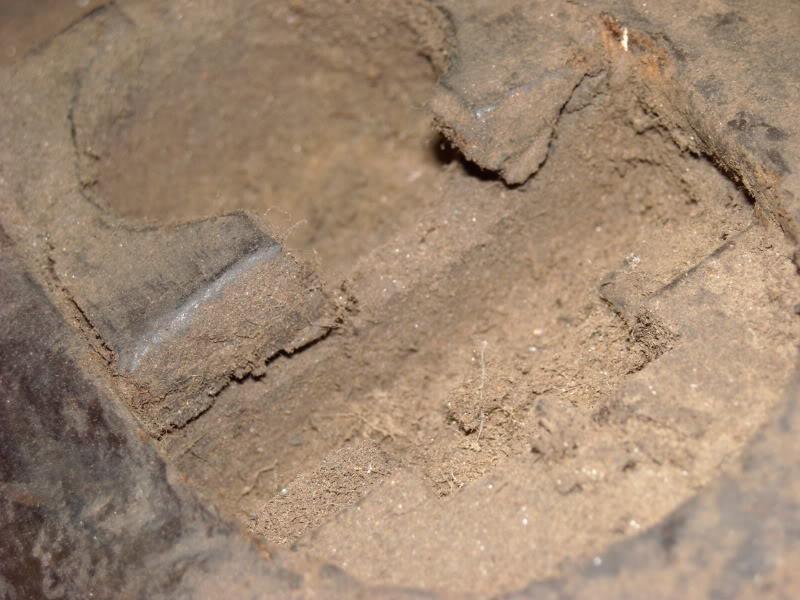
Some cracking in the patch box inletting:
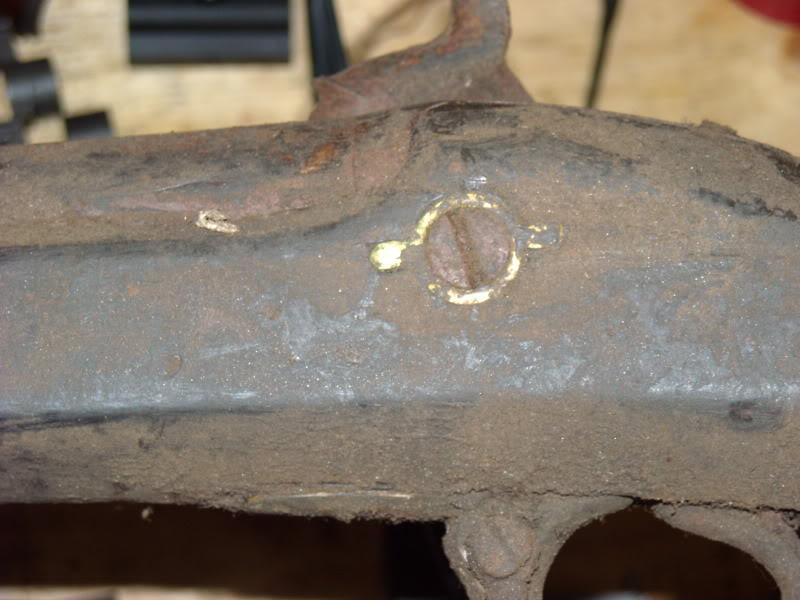
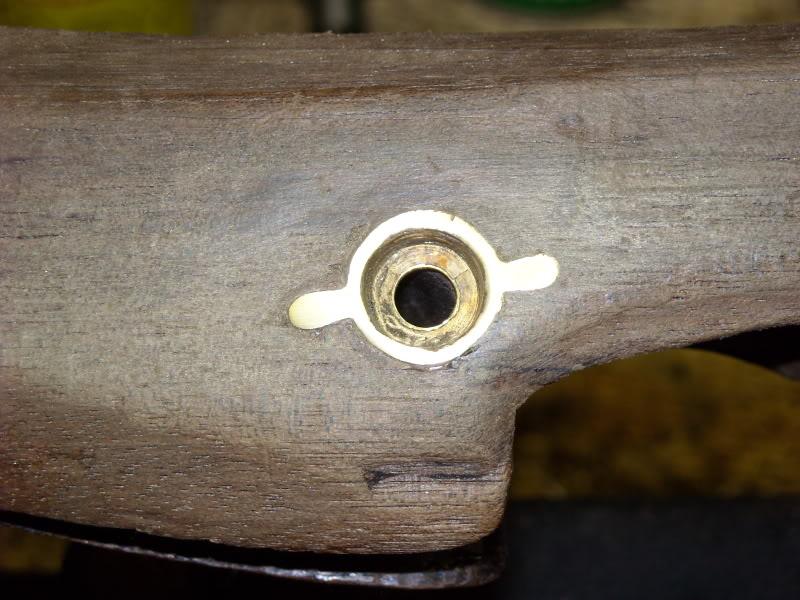
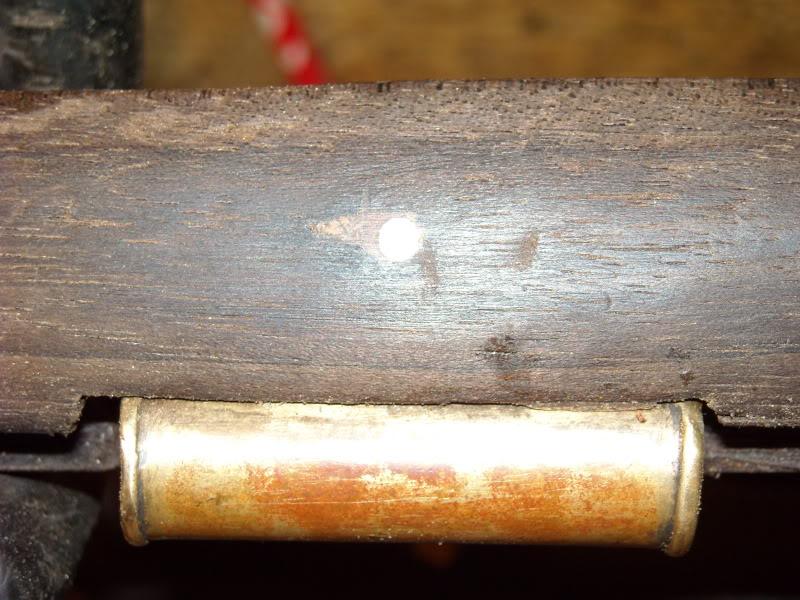
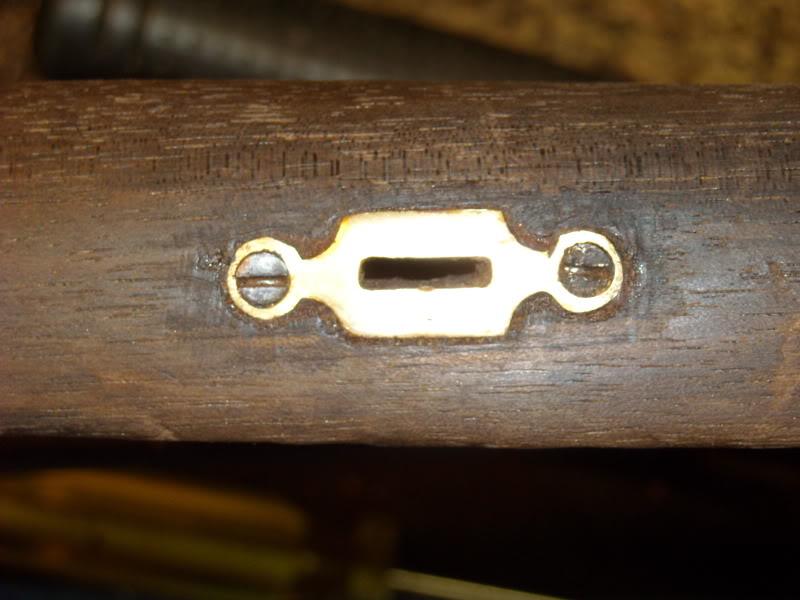
There looks like maybe some cracking around the escutcheon, but hard to gauge without cleaning. Nothing major is evident though:
Information
 |
Warning: This is a relatively older thread
This discussion is older than 360 days. Some information contained in it may no longer be current. |
|
Союз нерушимый республик свободных Сплотила навеки Великая Русь. Да здравствует созданный волей народов Единый, могучий Советский Союз!
-
-
07-26-2010 06:37 PM
# ADS
Friends and Sponsors

-
OK, time to show off some small positive progress. I had hoped to be further along but my wife wanted the porch fixed too, and happy wife = happy life 
First the lock. It was, as expected, really frozen up sluggish with storage grease (something akin to cosmolene but thicker) and grime. I expected it to be fairly bad, but it was surprisingly nice under all the gunk. No broken parts and good strong springs.
Before going drastic, my plan is to try and retain as much original patina as possible - no small feat when rinsing everything with evapo-rust and superclean is FAR easier. I took the lock off and disassembled it (it only needed minimal amounts for liquid wrench). Used an ultra-sonic cleaner with progressively more agressive fluid until something worked well. I started with dish soap and water - it removed the grime but not the oil or cemented-on dust, then gain laundry detergent - only a mild improvement, finally settled on TSP and scolding hot water. Did the trick and got 90% of the filth and grease off the lock.
There were some rust issues on the ourside, mostly under the hammer and on the hammer itself. I spent about two hours with a fine copper scraper and stoft steel dental pics to detail it. I got all the active rust off and out of the pits without damaging any patina. The hardest part was the feather-like engraving just above hte neck of the hammer.
I oiled it and re-assembled the lock - it works great when tested, nearly as good as new. Got lucky with a really nice lock IMHO. and it still looks 170 years old as it should.
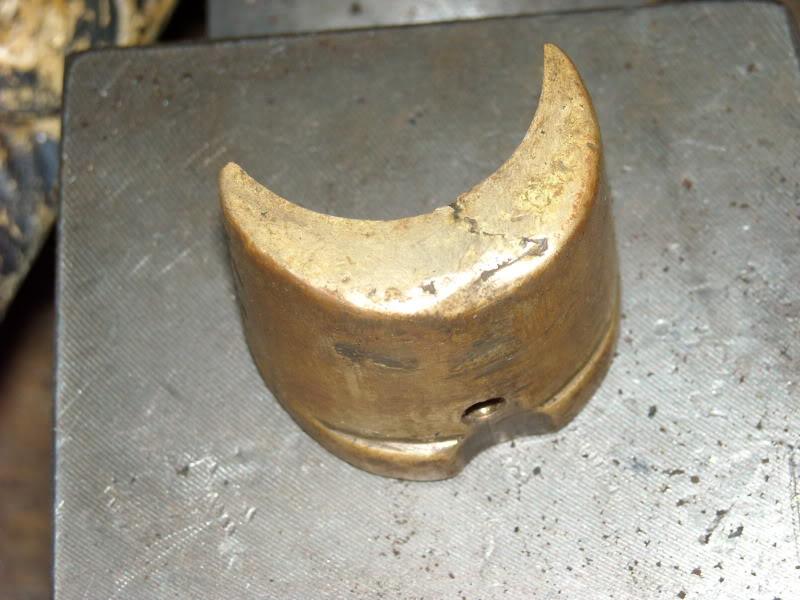
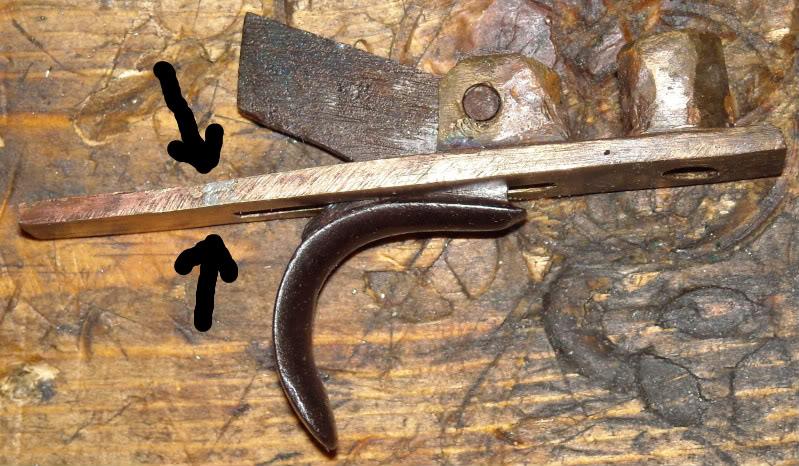
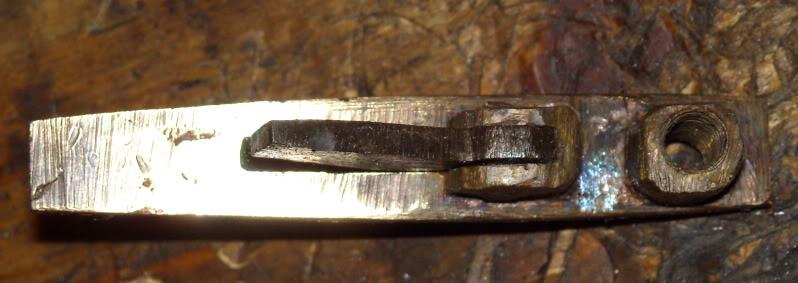
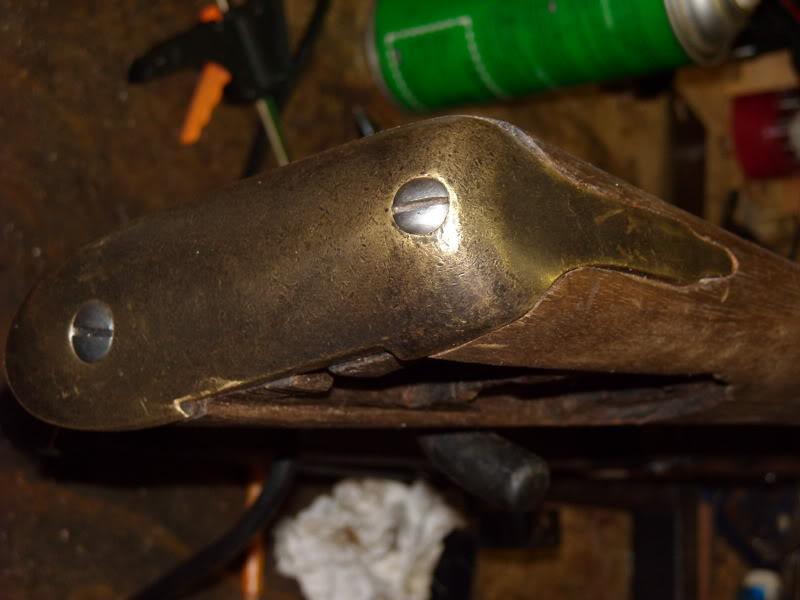
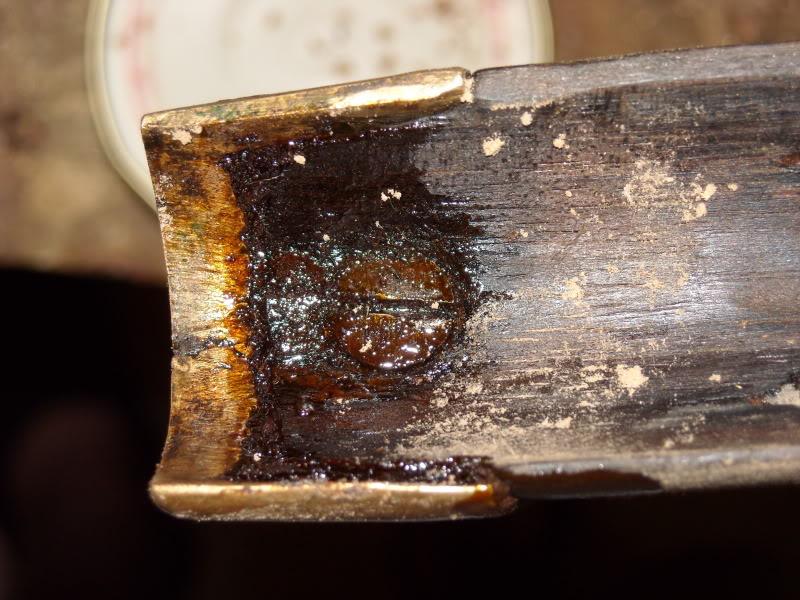
Next, I tacked the trigger assembly. The original brass casting had a crack in it out at the tail. Probably it was a casting fault that got aggravated when the trigger guard was broken away. It's a non-critical surface, so I repaired it with low-temperature silver solder and dressed it. I think it looks good, the repair is almost invisible.
The original trigger guard screws were still in place and were not torn out when the trigger guard was broken away. Lucky for me. The down side is they were badly mangled and bent. I had to heat them up hot, straighten them, and fix the heads by hammering them back to shape with a jewellers ballpeen. I then reheated them and hardened them with a cold water quench.
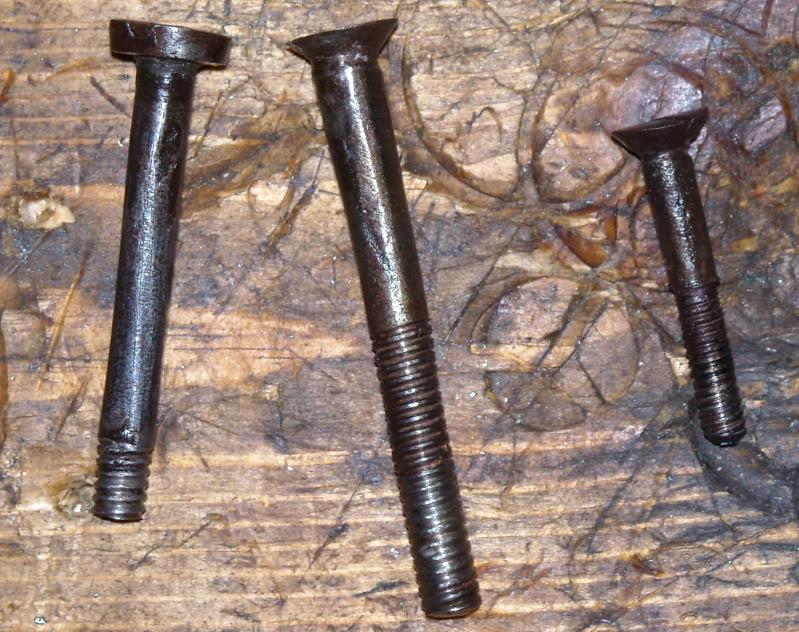
Here we see the orignal hand-forged screws, from left to right, for the lockplate, tang and forward trigger guard screw. Apart from superficial surface rust, they were all pristing with good crisp slots and the original heat-treating quench color still visible on all them!
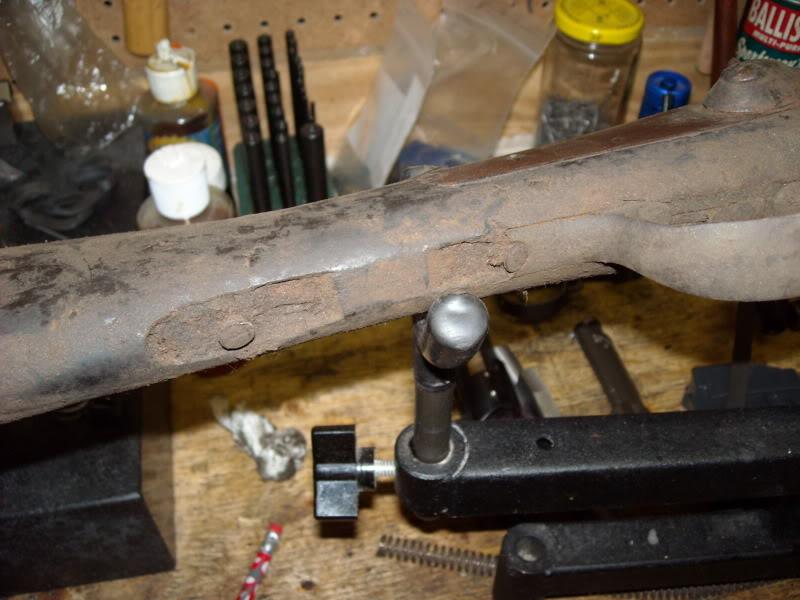
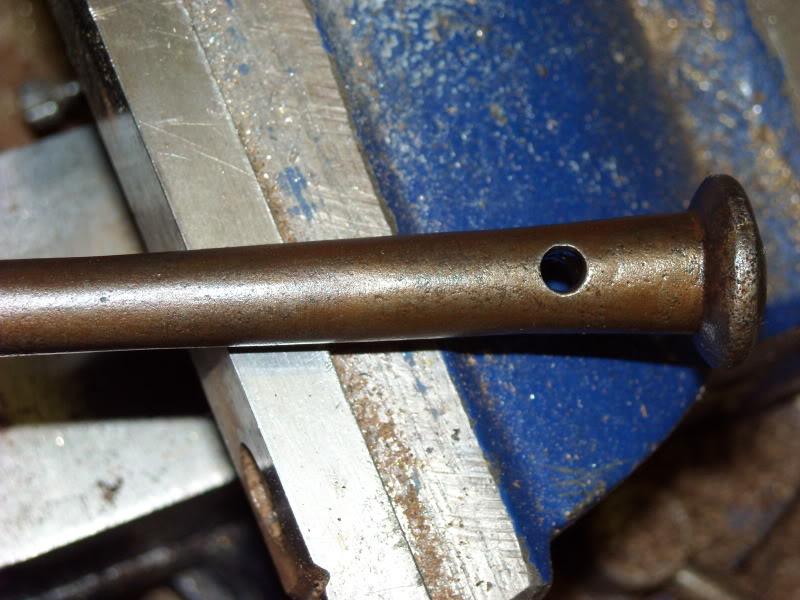
I got the cleaning rod out - boy was it ever stuck in the stock! I had to wiggle it back and forth with an old drill bit through the hole in the head of the rod as I pulled on it. when it came out it was CAKED in rust and dried mud. It must be made of soft iron because it was also rippled like a snake in motion
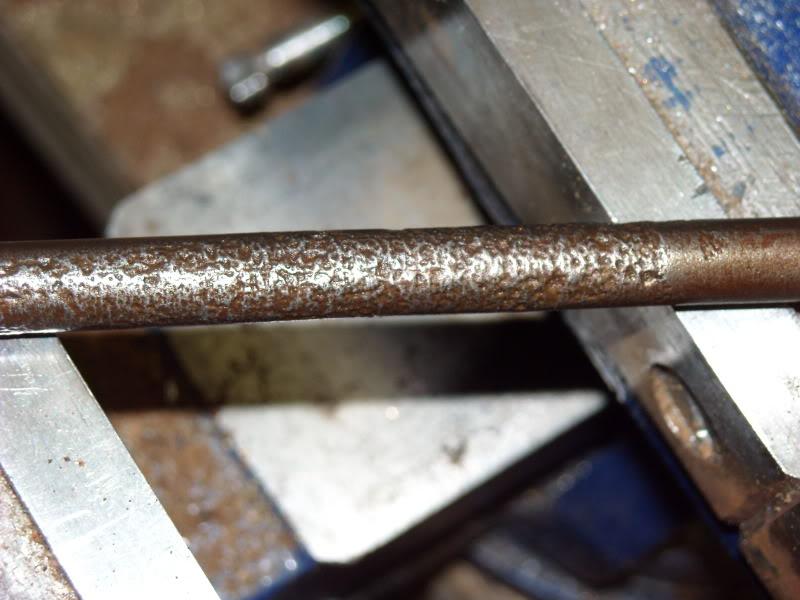
I fired up the fine wire wheel and went to town on it - cleaned it right up. There's some pitting on it, mostly where it's inside the stock, but at least there's no active rust now and the the pits aren't that deep. I spent a good 30 minutes straightening it in a soft-jawed vice. It's threaded, though I don't think it threads into anything. There must have been an issue ball screw or patch worm for the end of it.
There were some clean areas of the rod before I started, mostly under the brass finials, and from that I could tell the original finish seems to have been in the white with some mottled patina. I may give the rod a quick once-over with browning solution and then buff it with coarse burlap to make it look aged again... we shall see.
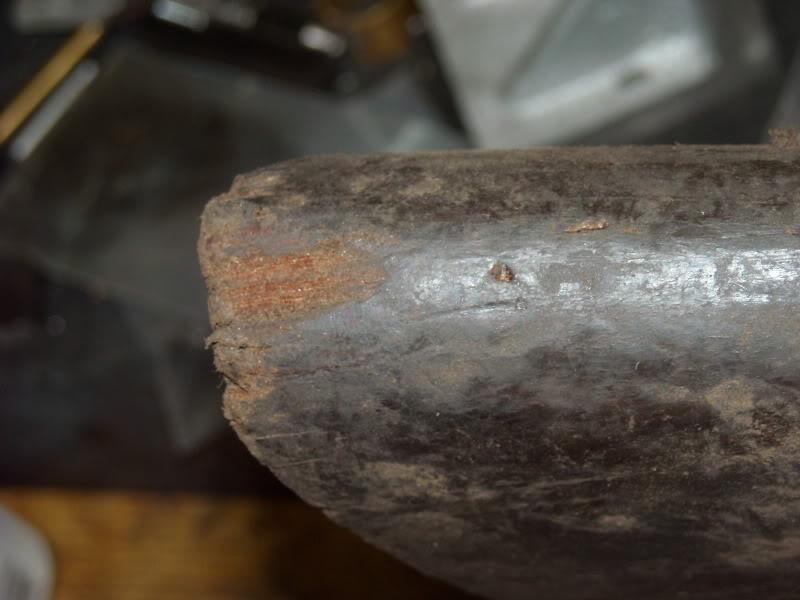
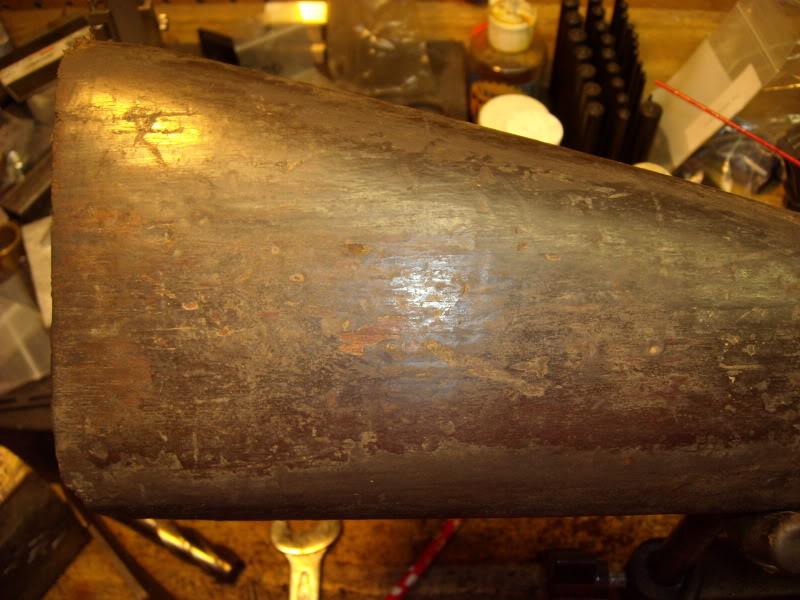
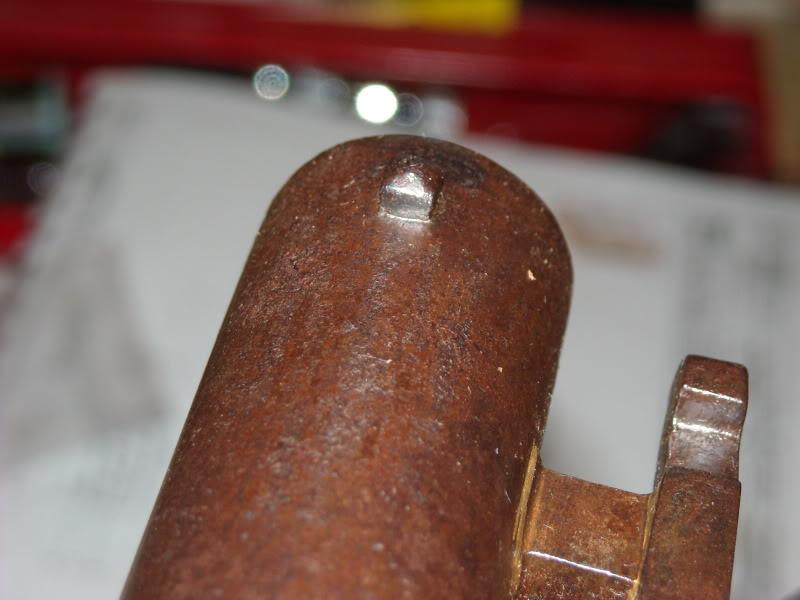
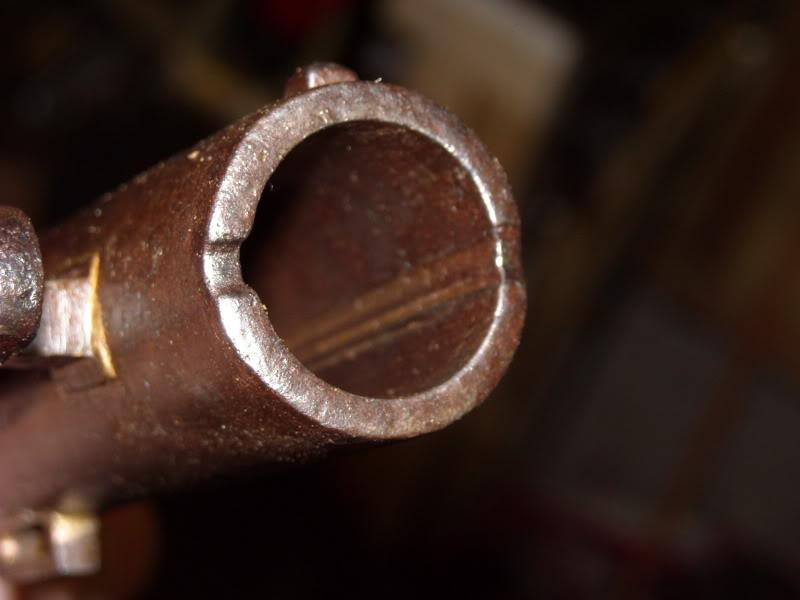
I also got the barrel out of the stock. It's not too bad, just some shallow pitting mostly confined below the stock line. Nothing is deeper than maybe a half a millimetre. Haven't looked at the bore yet. Much of the original browning is still there with a moderate amount of wear above the stock line. I may leave it as-is and not re-brown it.
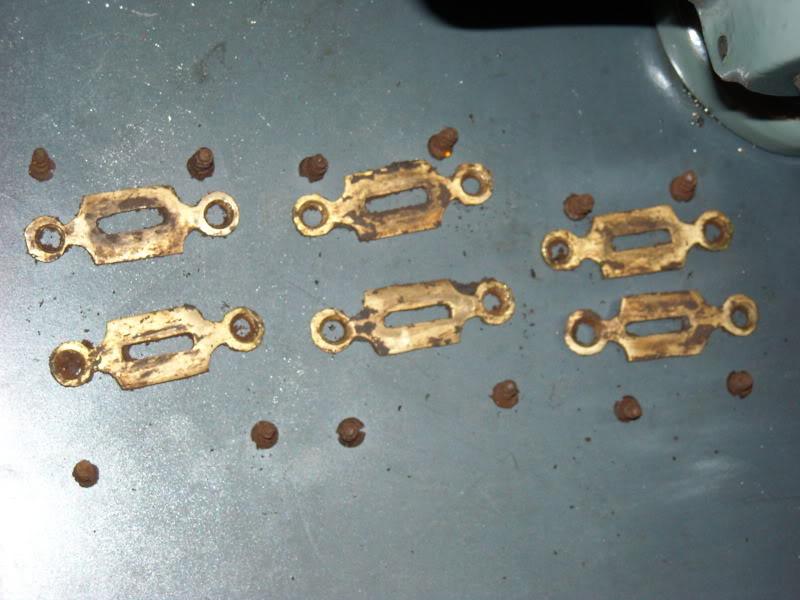
I tried removing some of the screws for the brass escutcheons and most are stripped.
More as I progress...
Союз нерушимый республик свободных Сплотила навеки Великая Русь. Да здравствует созданный волей народов Единый, могучий Советский Союз!
-
-
-
-
-
Some further progress today! 
Fitting the tang a little better
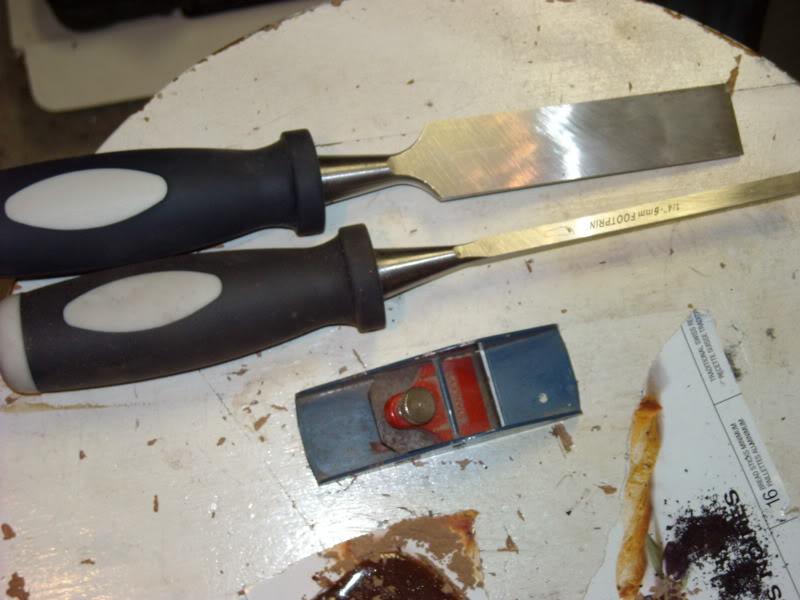
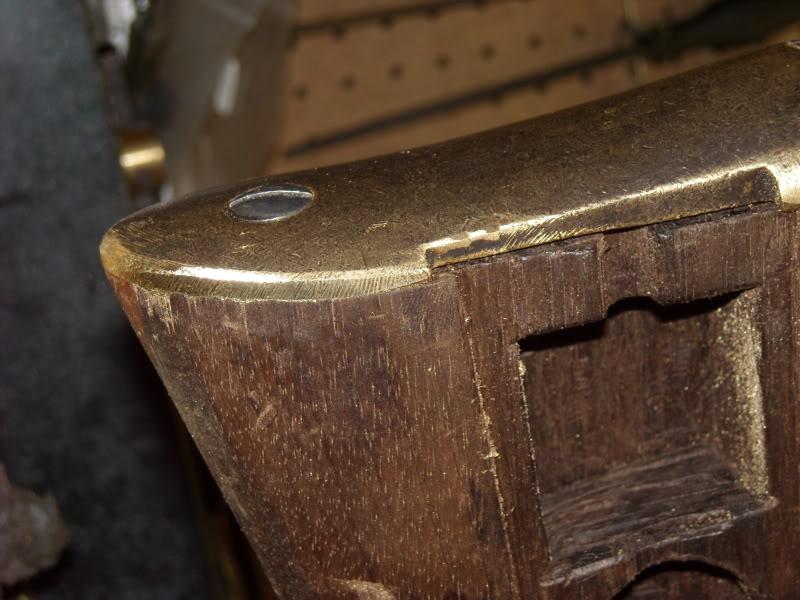
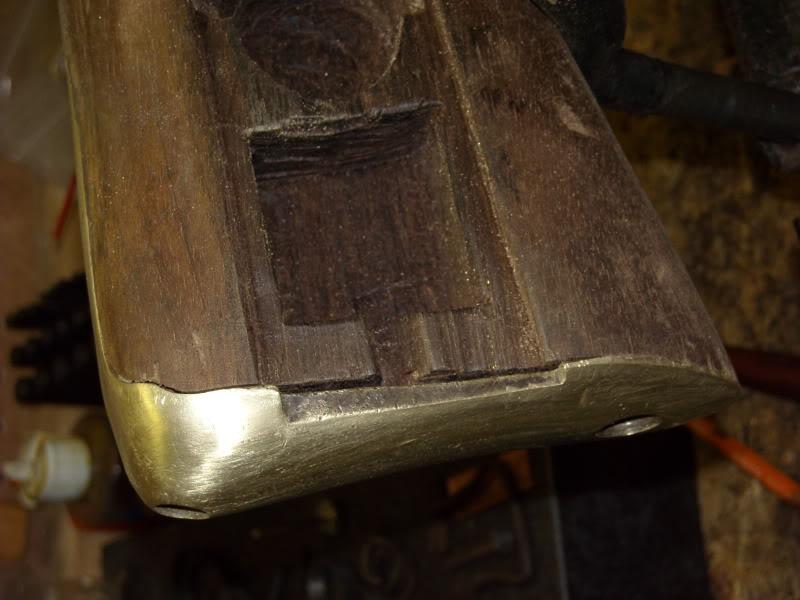
Roughing out the toe patch, attached with sawdust and epoxy and further fitting using SHARP chisels, fit is getting better, almost there... just a few minor high points...
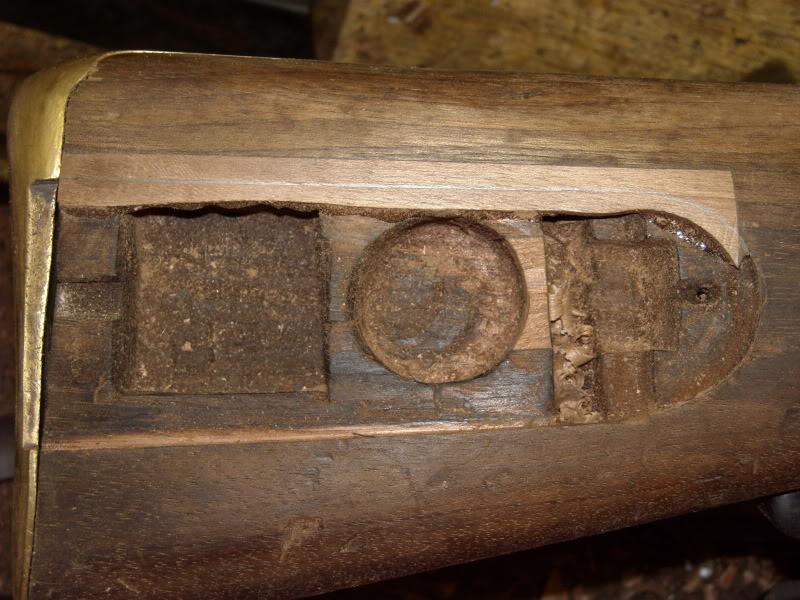
And here's the trick of the trade... some guys use inletting black, but this stock is too dark to see it, so I use orange grease pencil. You tap the buttplate on the stock with a dead-blow hammer and the orange transfers to the high spots, you then take those down with a narrow sharp wood chisel.

You can see some of the orange transfer at the toe...
You'll note with these buttplates, they bear around the perimeter. The idea is to get full contact all the way around, a shug fit at the tang, and SOME contact in the middle, so you leave that proud. 20-25% fit in the middle is more than sufficient.
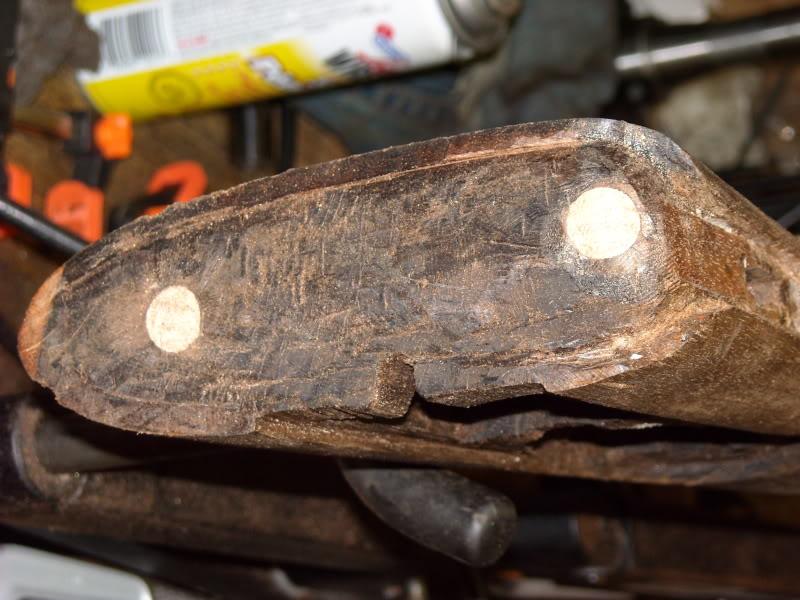
The old screw holes are plugged... they were WAY out form the repro buttplate screw holes.
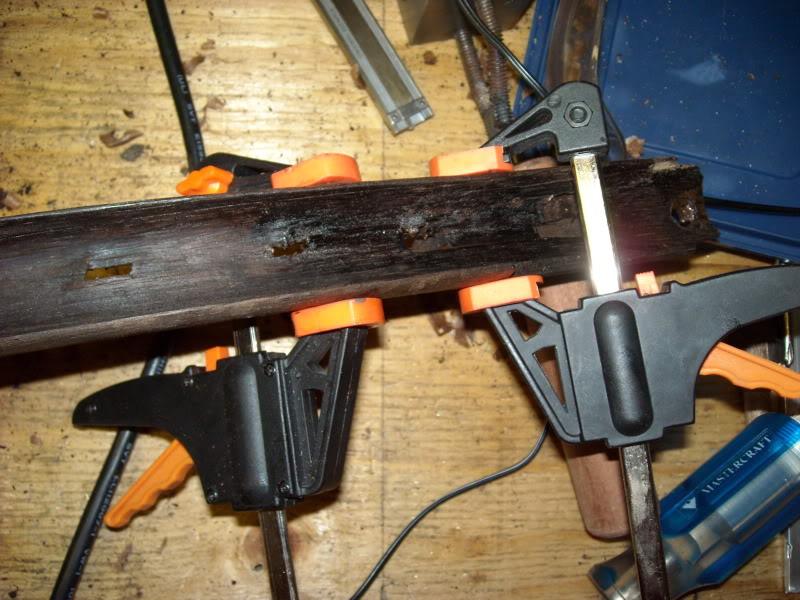
Took a break to glue a longitudinal crack in the forestock, epoxy and sawdust is your friend...
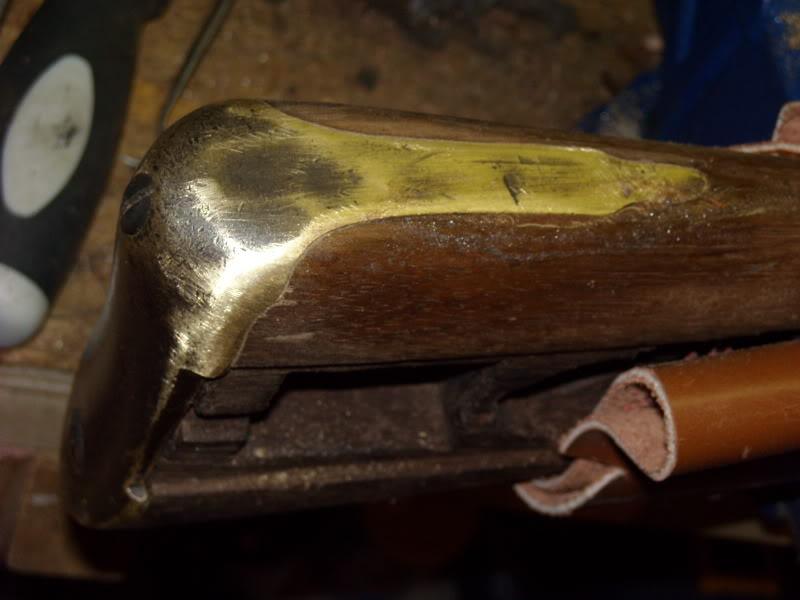
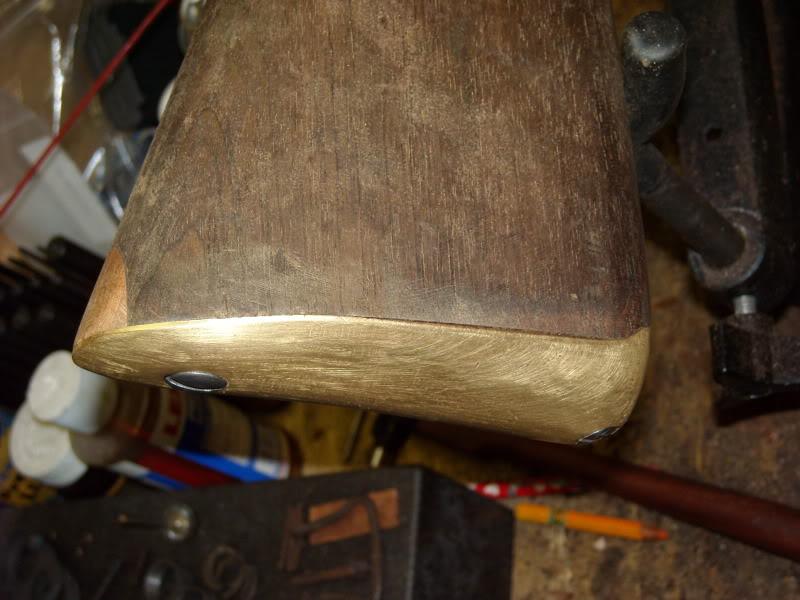
Re-drilled and installed some period buttplate screws I was lucky enough to have in the spares bin Nice domed slotted screws with patina.
Perfect contact all the way around, but still a fair bit of overhang around the toe...

LOTS of filing to bring the buttplate down to proper dimensions
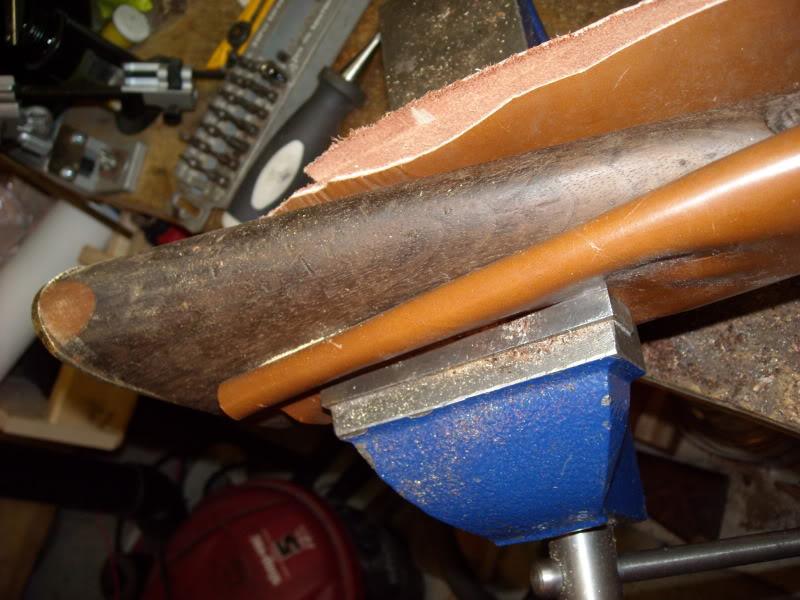
It's down to size, but WAY too thick around the bottom 1/3 of the stock.
Lots more work on the power sander, then draw filing, then sandpaper (120grit, 300grit, 800grit), then some reproduction wear made with cold chisels, then patina applied by smearing solder flux all over the buttplate, applying torch hear, and then buffing with denim:
The original inletting for hte tang was slightly too wide for the repro buttplate (slightly t0o narrow), so I filled the gap with sawdust and epoxy after smearing wax on the buttplate tang to act as a release agent. It's only about 1/16" to 1/32" wide and about 1.5" long. Fairly invisible.
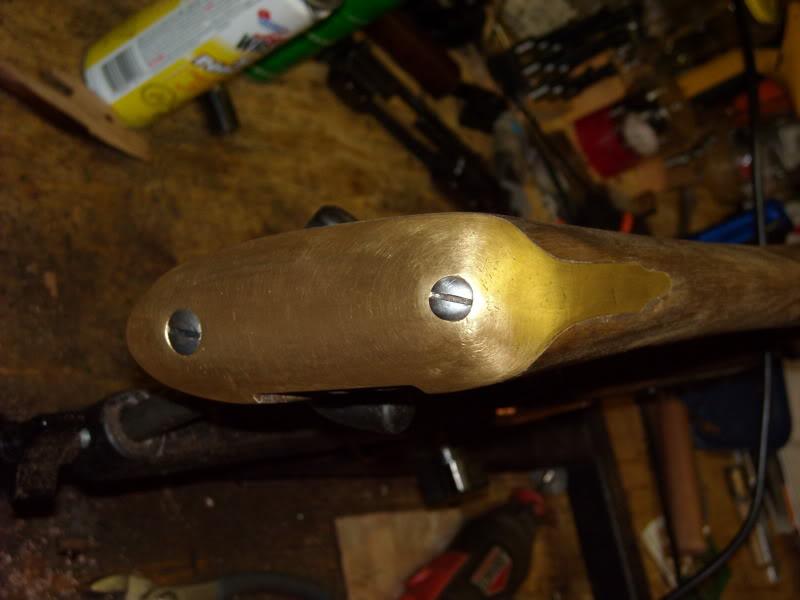
I also got the lockplate screw escutcheon fixed up. There were some gaps around it and a small crack, all were filled with sawdust and epoxy, chiseled back to flat, and the escutcheon cleaned up.
My conclusion is that the repro buttplates that are shipping with these rifles (the ones with no original buttplate) are definitely useable, but properly fitting one is NOT a beginner project if you want it to turn out right. If you feel it's beyond your abilities to inlet and fit an oddly shaped buttplate, I wouldn't let that dissuade me from buying a brunswick. You could ask IMA to select one with a buttplate still attached or get advice or work done by your local gunsmith.
Союз нерушимый республик свободных Сплотила навеки Великая Русь. Да здравствует созданный волей народов Единый, могучий Советский Союз!
-
-
-
The Following 4 Members Say Thank You to Claven2 For This Useful Post:
-
FREE MEMBER
NO Posting or PM's Allowed

Very nice work, I hope I have that much patience when I redo my two.
-
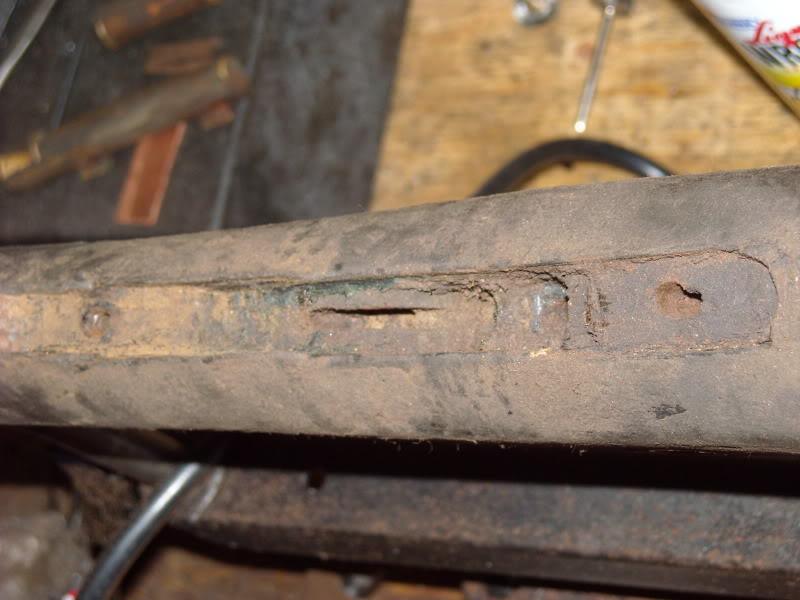
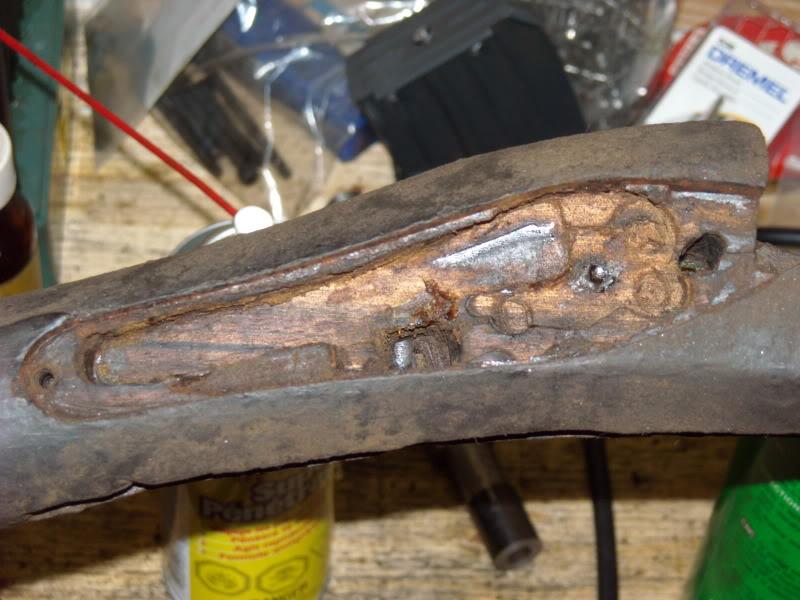
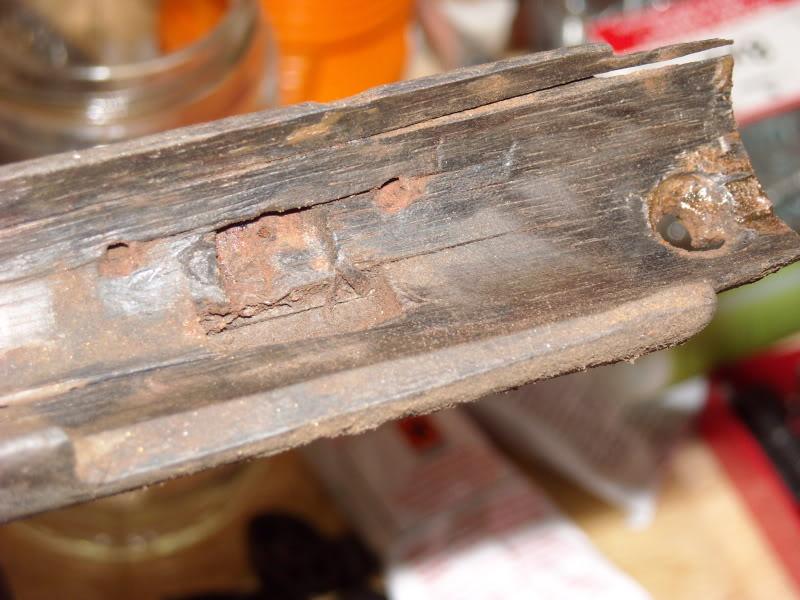
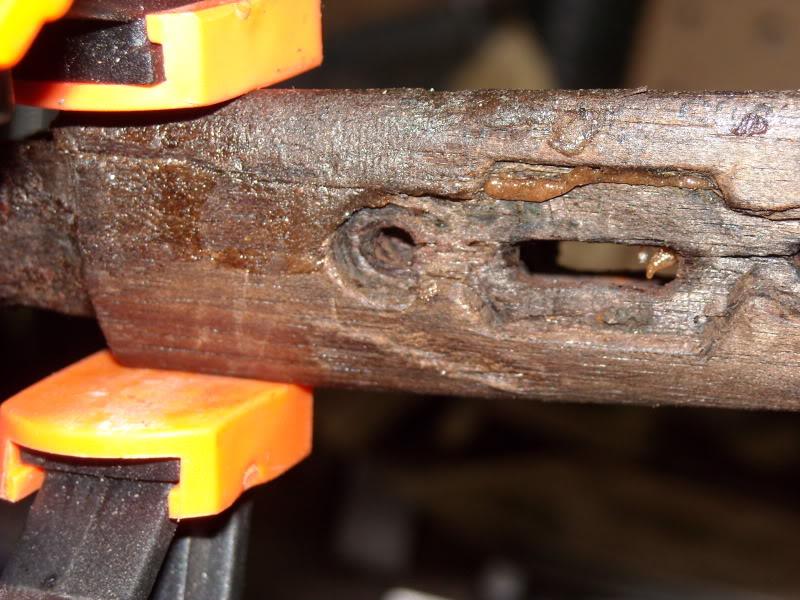
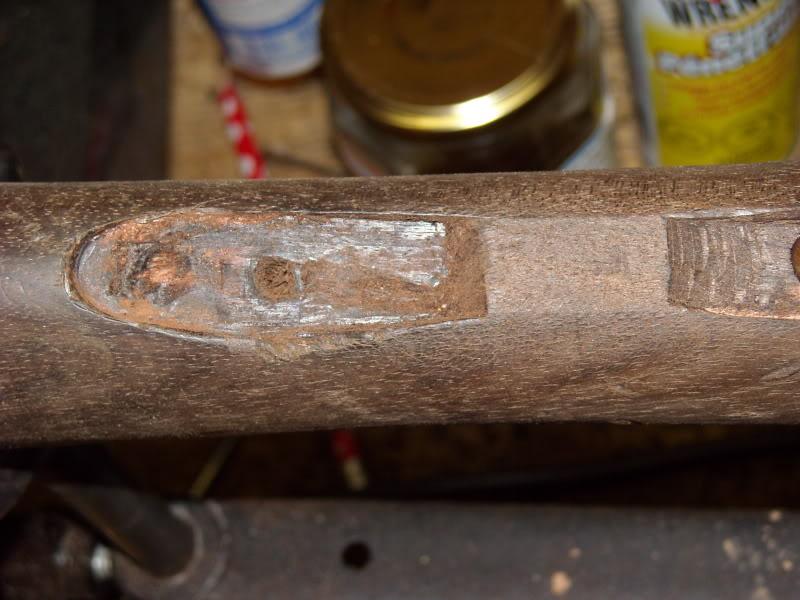
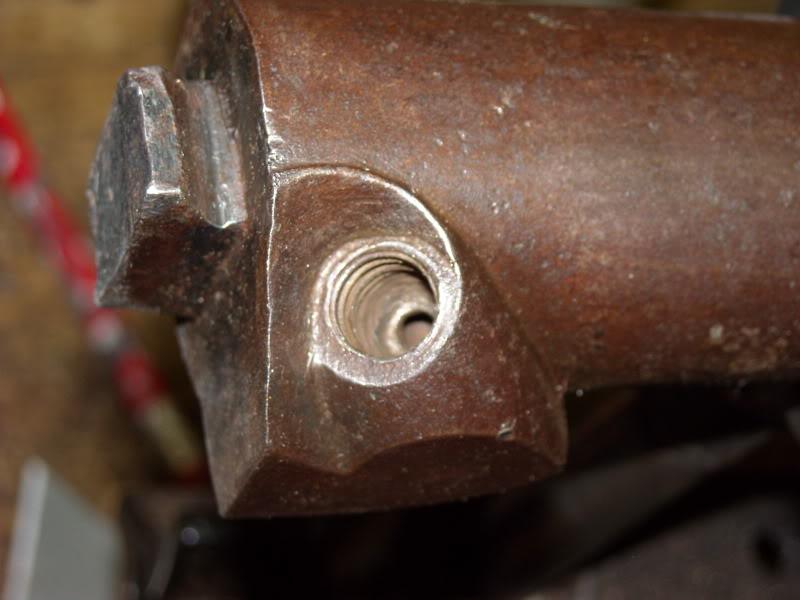
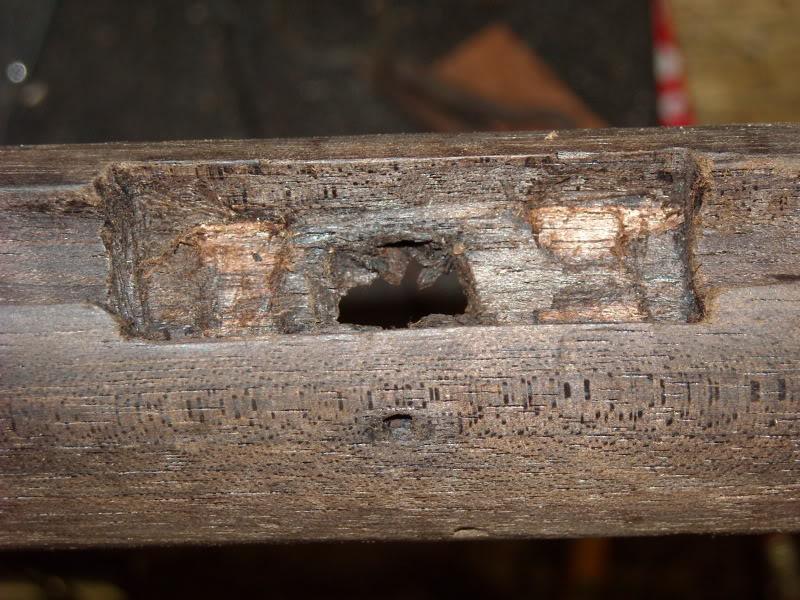
The lower ramrod pipe was a very poor fit - this dates back to manufacture. The pipe rocked axially around the pin by nearly 10 degrees, meaning there was too little wood under either end of it. I decided to repair this and started by chiselling some flats for the patches to glue to.
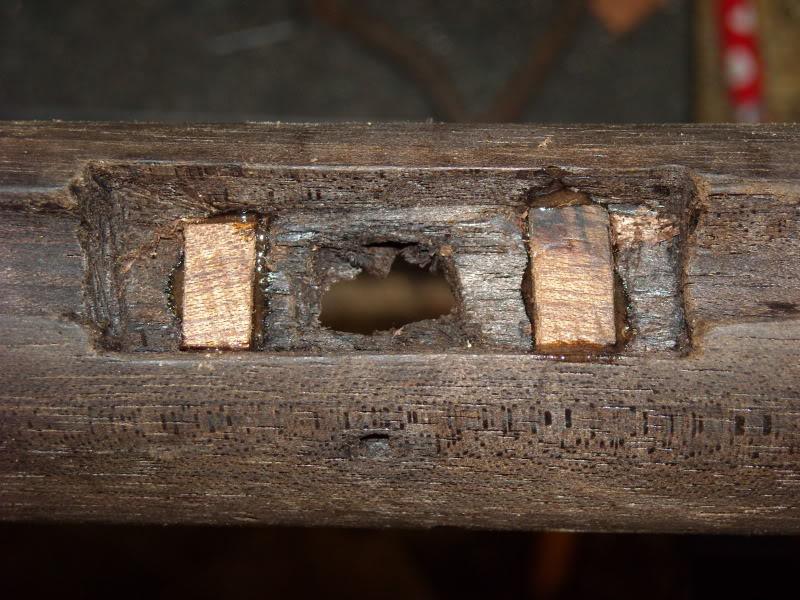
Next I used epoxy-sawdust mis to glue in some small walnut blocks.
I decided to use steel pins and not brass as I had been toying with for the ramrod pipes. I would use iron, but as far as I know, no-one makes or sells wrought iron any longer, so I made the pins out of mild steel. Actually, no-one will ever know, but I used zinc-plated nails so that they (hopefully) won't corrode beneath the woodline again. The ones I found in my junk drawer were the perfect diameter for the original holes.
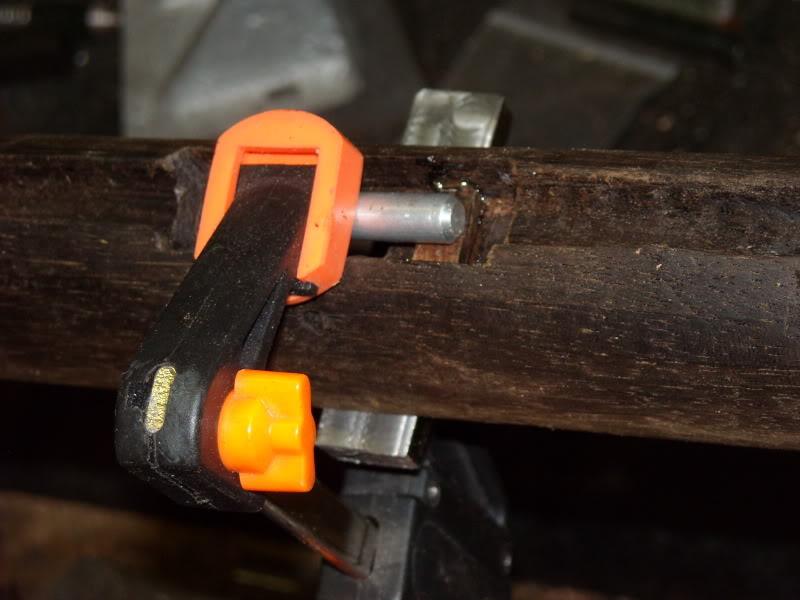
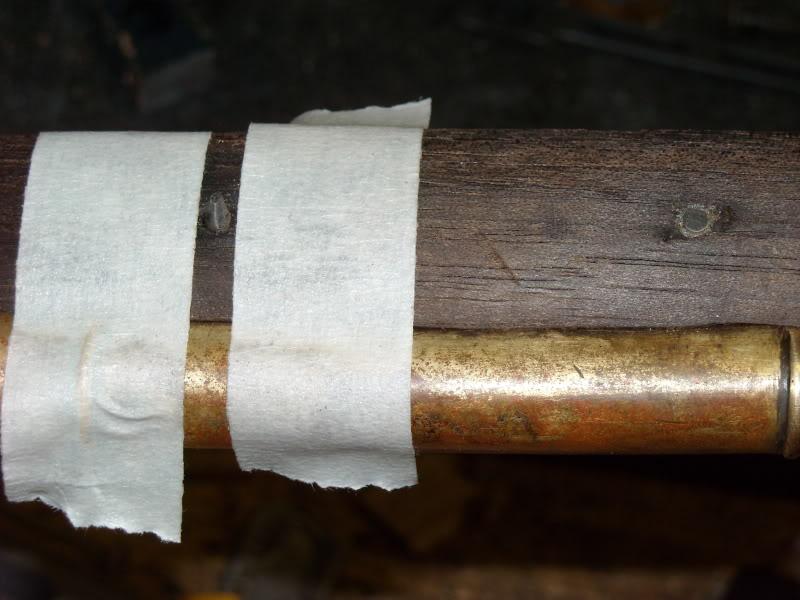
I use a dremel cutoff wheel to chop them off close to the stock, then I tape either side of the pin so that the file won't scar the wood. I use a fine mill file for this work and go slow. Coarse files jar the pins too much and will oblong the holes if you are not careful.
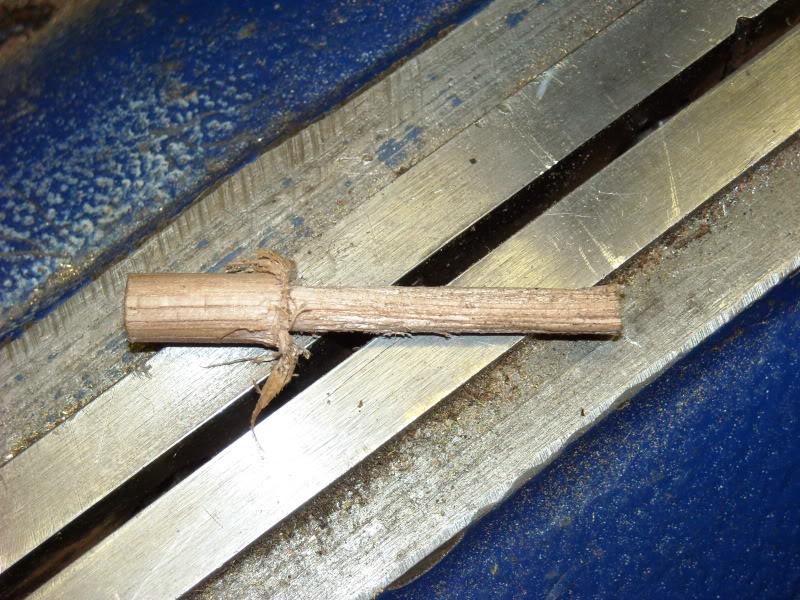
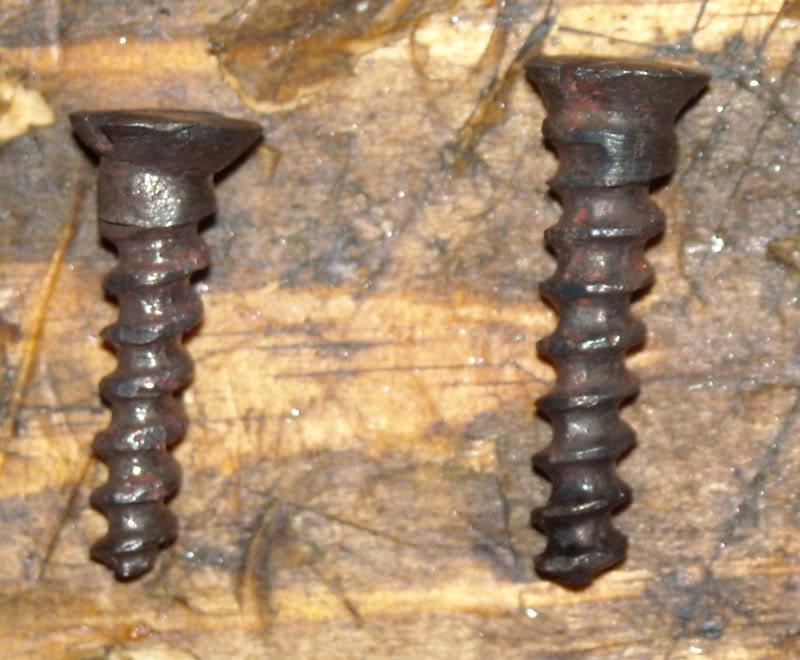
These are the original pins. They were pretty bent up and had rusted to the point that the diameter was now too small to re-use them in the same holes, otherwise I'd have cleaned them up and re-used them.

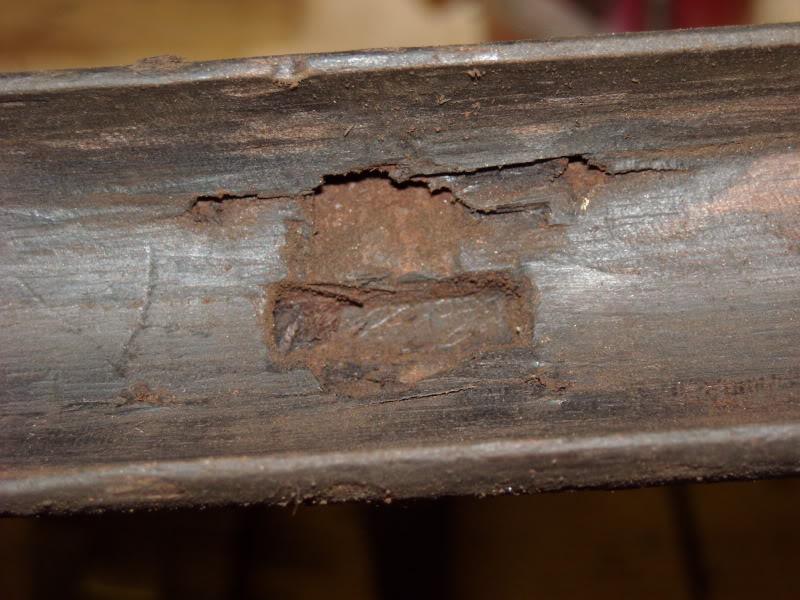
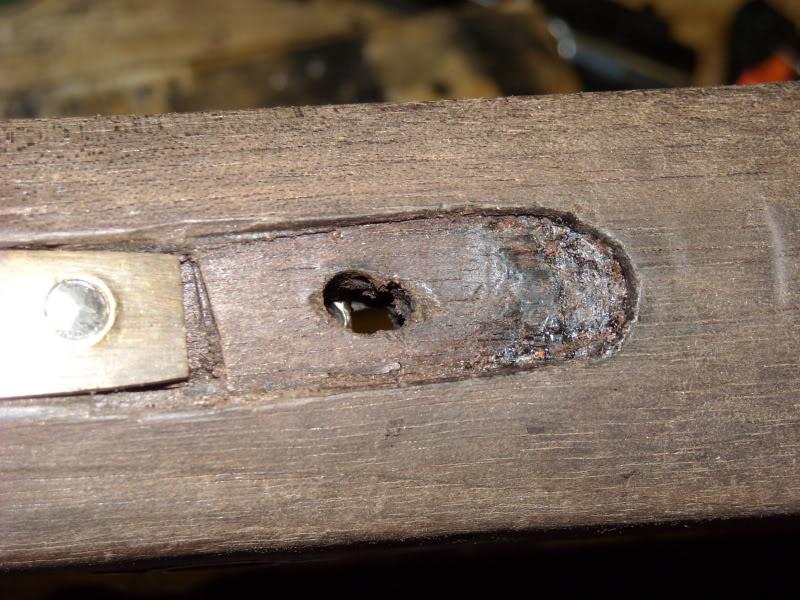
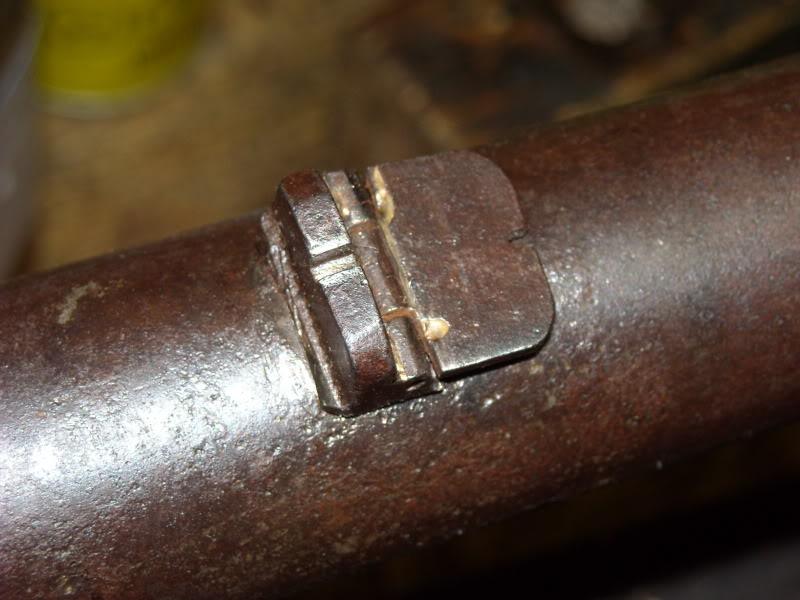
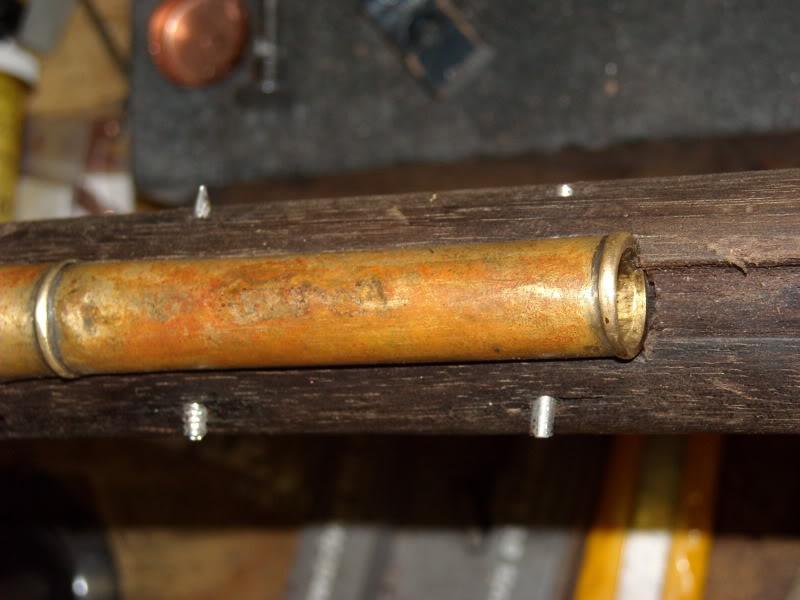
On a couple of my holes on one side, the wood was either dry-rotted or chipped out when I removed the old pins. Here is how I deal with that. I install the new pin and use the dremel cut-off wheel to cut near the surface. Then I pack the chip or void around the pin with fine sawdust. Once I can't pack more in, I carefully apply a couple drops of cyano-acrylate glue over the sawdust. It wicks right in. I coun until 30 or so and then put another couple drops onto the sawdust, this will pool on the surface now that the prior drops have set up. I then dribble more awdust over the new cyano-acrylate until you end up with something like this:

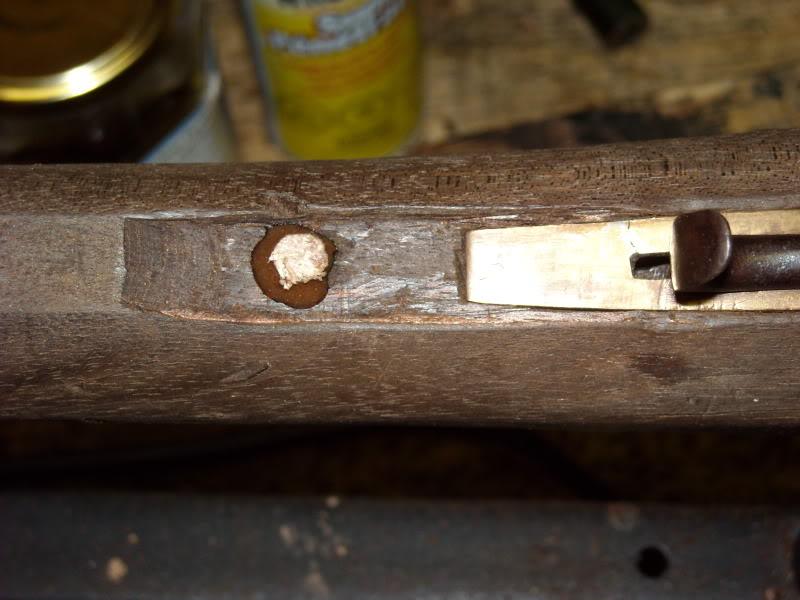
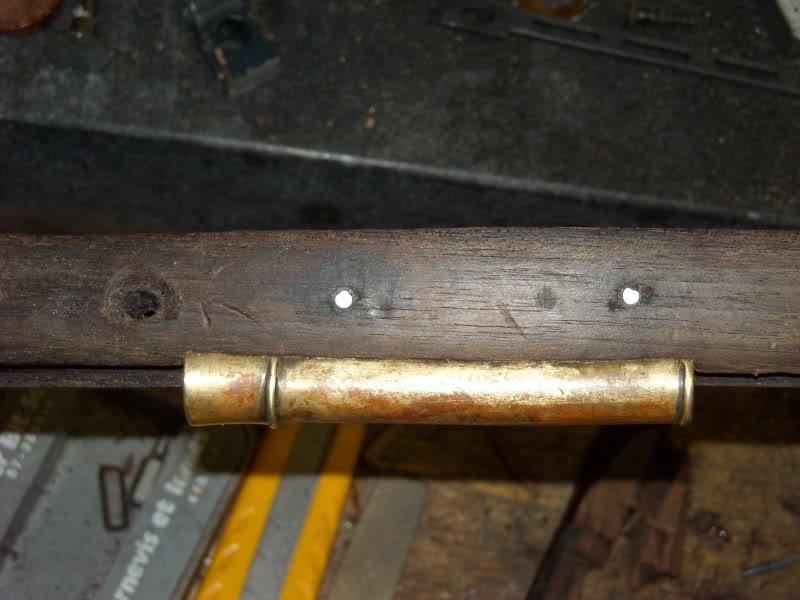
After the glue has dried, I usually wait a good 30 minutes or so, you can now file the pin down as you normally would (remember the masking tape!). This is how it ends up, and this was my worst hole.
Really not too bad and it should be bear-invisible once the stock is re-oiled.
Remember that you don't stop at filing. Buff your pin heads with progressively fine sandpaper until the pins are smooth. I haven't got pics yet, but I use a Q-tip to apply laurel mountain forge browning solution to the pin heads. After 2 or three coats they will be chocolate brown and look like they've been there for 170 years. You can get the solution form Track of the Wolf - I'm also using it to re-patinate my cleaning rod.
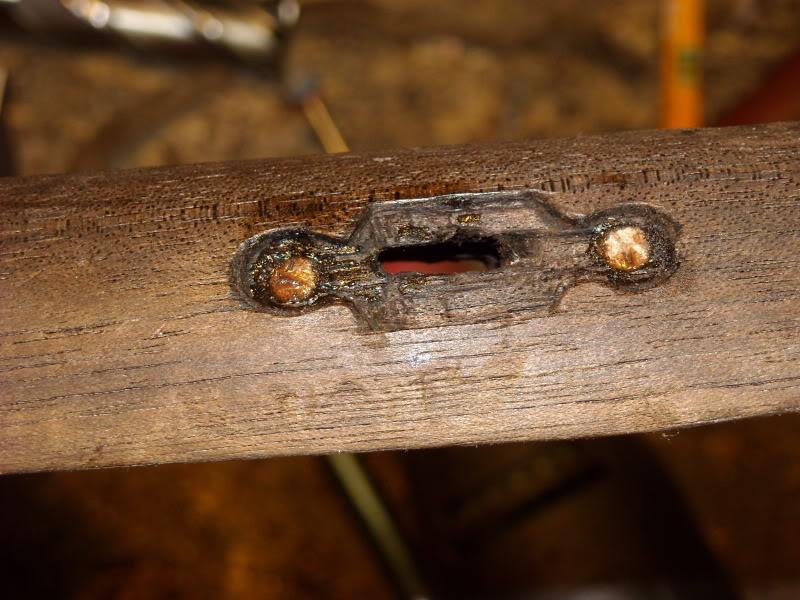
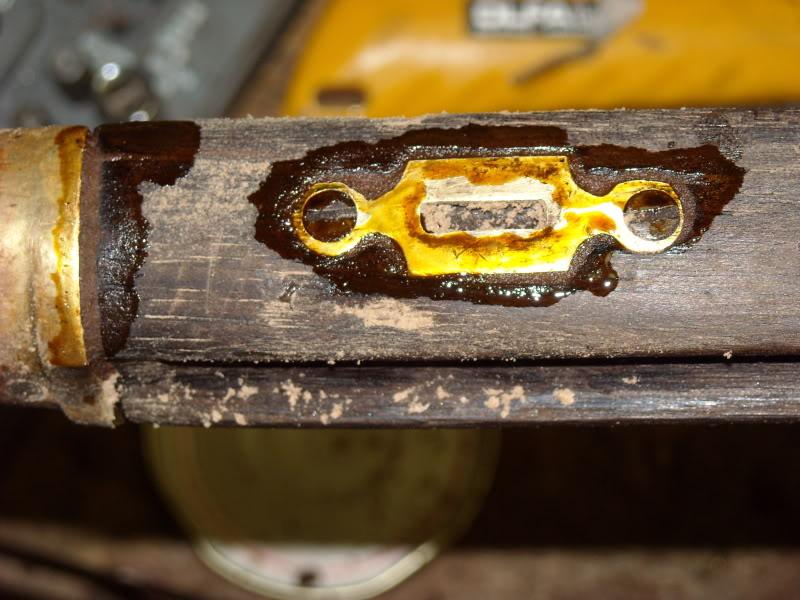
More progress... I addressed the gaps around the rather loose inletting the Nepalese did on the original brass wedge escutcheons. When I disassembled the rifle, I noted that the nepalese had smeared something into the inletting that mostly flaked out when the brasses were removed. I don;t know what the original was, but I have seen shellac paste used for these types of fixes on a variety of vintage rifles, so I'm going to duplicate that.
First, grind up some really fine sawdust and then get some garnet shellac flake. Mix with alcohol to make a 2# cut.
Smear the fine sawdust into the inletting gaps and then dribble (carefully as possible) the shellac into the sawdust. It will wick right in. Let set for 24 hours. I also did the same thing at the nosecap gap, which was about 1/16" wide in some places!
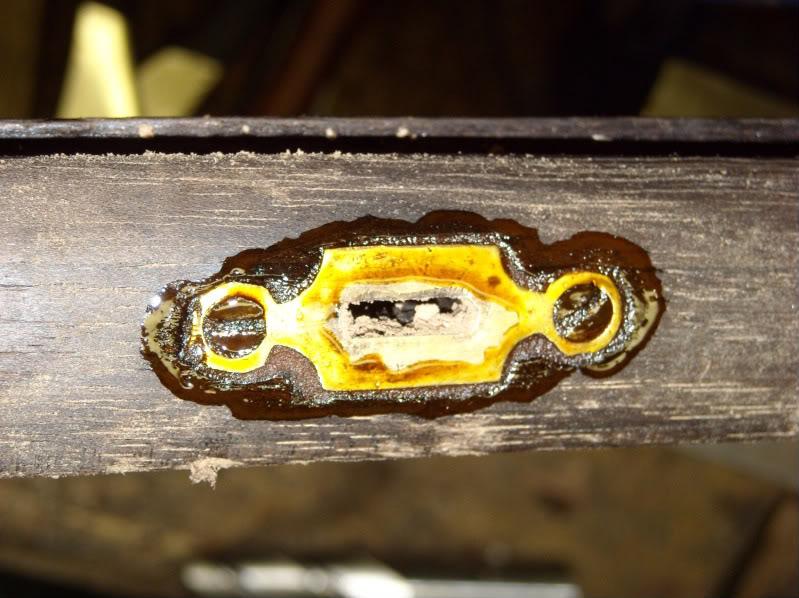
To clean it up, scrape the shellac off the escutcheon with a brass scraper (I make them out of empty shell casings). For the wood, I carefully scrape the shellac off with a razor blade trying not to remove any wood, or a thou at most. This is VERY finicky work, but the results are (in my opinion) pleasant and worth the effort.
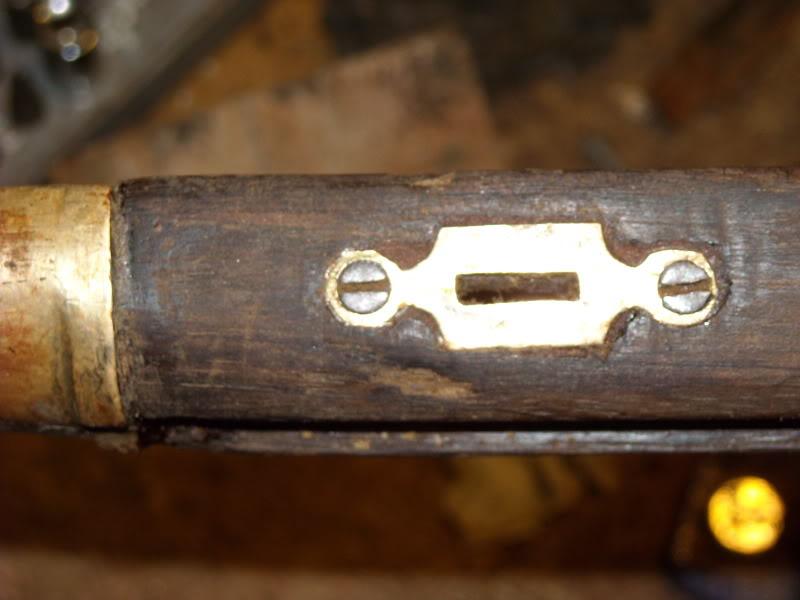
And the gaps hve become FAR less obvious It's also in keeping with the original condition of the rifle where some type of filler was applied at manufacture.
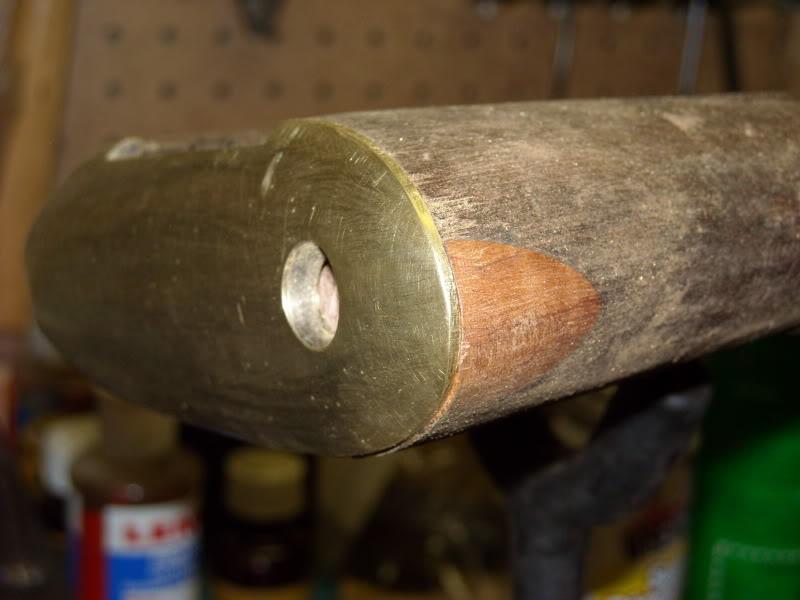
One other thing, the nosecap on my rifle was fairly loose, even with the screw tightened, because the Nepalese had bedded it with some type of natural gum or glue. Most of it fell out when I cleaned the nosecap, so I had to duplicate that bedding so the nosecap would not rattle around. I did this by using the same 2# cut of garnet shellac and I used some of the coarse wood chips from the chiselling I've done on previous repairs. I mashed them up real good with a hammer, mixed with shellac, and smeared it into the nosecap before re-attaching it. After it dries, it's very solid.
After the shellac dries, use some small bits of 120 sandpaper to take off the shellac still on the surface, use brass scrapers to remove it from the brass, and the shellac bedding basically disappears, though honestly it's under the barrel and you probably don't need to clean it up. I did, but forgot to take a picture!
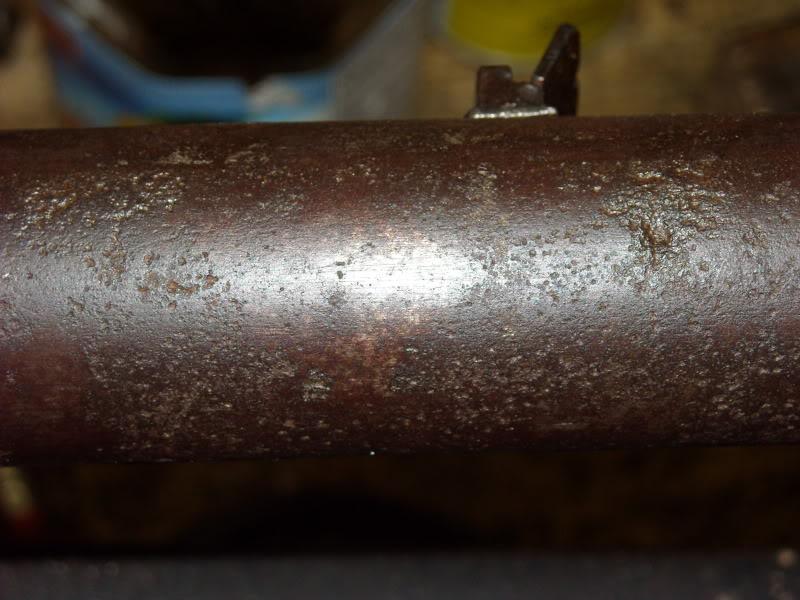
I also managed to finish the ramrod. I used two coats of browning solution to repatinate it. When I started cleaning it, it had to be wire wheeled to get all the rust scale off. this left it bright white which wouldn't do.
The solution was laurel mountain forge and I used 2 12 hour coats, de-scaled with coarse denim rubs, finished with a wash in baking soda solution and then buffed with cotton rags soaked in Ballistol. I think it came out looking wonderfully aged.
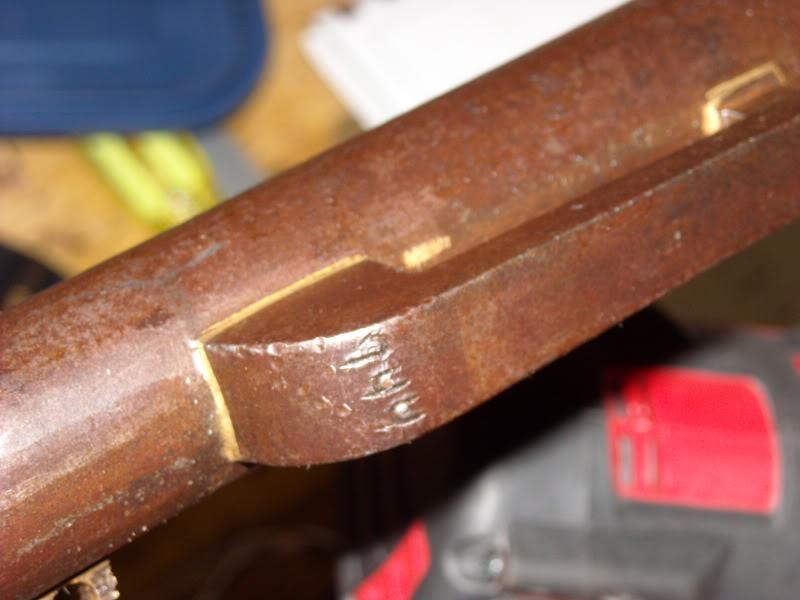
And this was the worst spot of rust pitting - not that bad and it's inside the wood when the rod is stowed.
Союз нерушимый республик свободных Сплотила навеки Великая Русь. Да здравствует созданный волей народов Единый, могучий Советский Союз!
-
-
-
The Following 3 Members Say Thank You to Claven2 For This Useful Post:
-
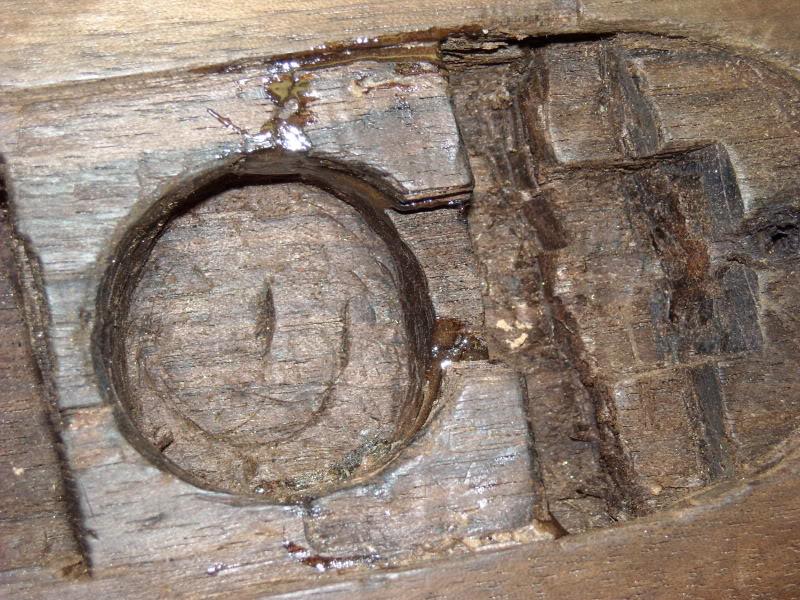
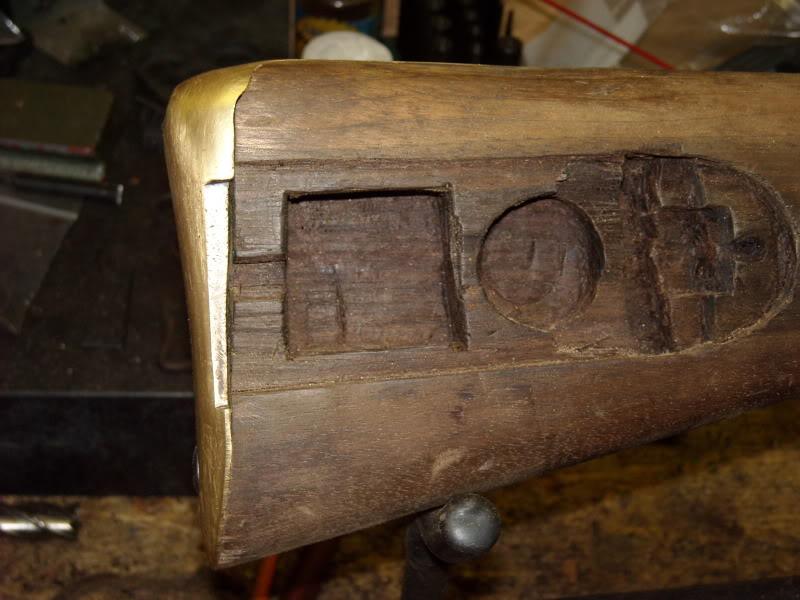
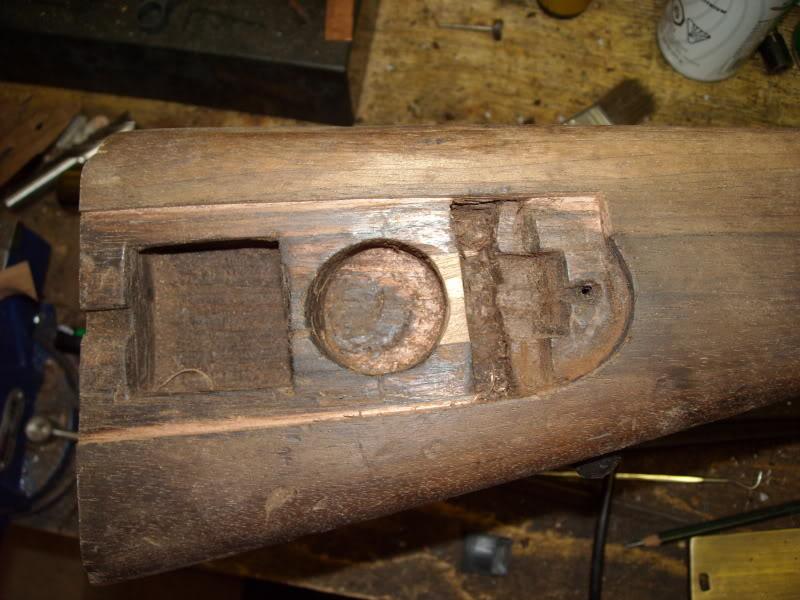
Right, so now to tackle the patch box - a rather big job on this particular example since we have two problems to account for:
1) The inletting doesn't line up with the inletting in the buttplate; and
2) The inletting is too wide or the cover is too narrow - you pick - lol.
Now I will point out that the repro patchboxes that come with these seem to be wide enough for most of the P37's out there from what I have seen online. Most guys are able to fit them with minimal or no gaps and they generally line up with the original buttplates and maybe the repros as well? But in my case, this was not to be. In case you end up with a similar fit issue, I hope this helps you solve it.
There are basically two choices, alter the metal (brass) or alter the stock. In the case of the metal, I would have to TIG or braze brass 1/8" thick all down the top side of the patchbox and also add material to the buttplate and re-cut the buttplate inlet higher. this is a TON of work and it may not work out as TIG work on long thin pieces of brass is a very difficult business. I opted for a wood repair.
Now the first thing to remember about this long and slender a repair, is that the prep time up front will pay dividends on the quality of your repair. You can go with "close enough" and just epoxy something in there, but the haphazardness of the repair will most certainly show. A good quality repair should be nearly invisible and look like it was done by an armorer 100+ years ago. Even then, some repairs will never look that way and mine isn;t yet to the point where anyone can judge it
Anyhow, all that to say, fit the repair PRECISELY before you glue it in. The smaller the gaps before glue, the better it will look. Make sure the grain of the repair aligns with the original wood, and use wood of a very close color match if you can. Bevel the end of your repair of that the gap will be shallow and minimized. and make the patch well oversize so you can dress it down later with chisels to make it nice and even with the original woodwork.
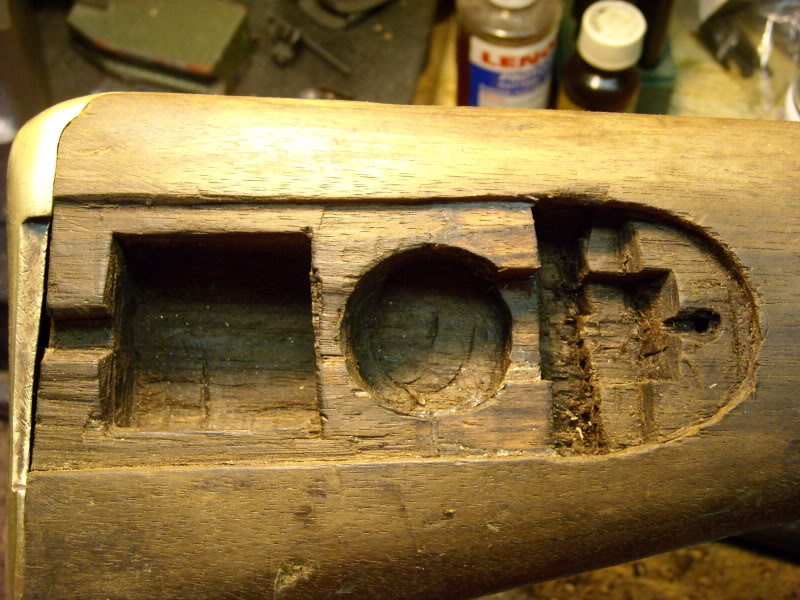
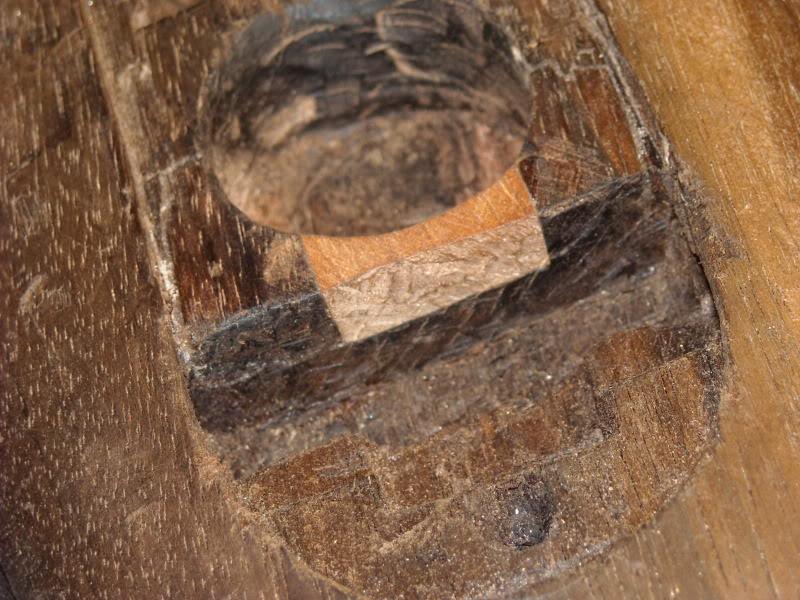
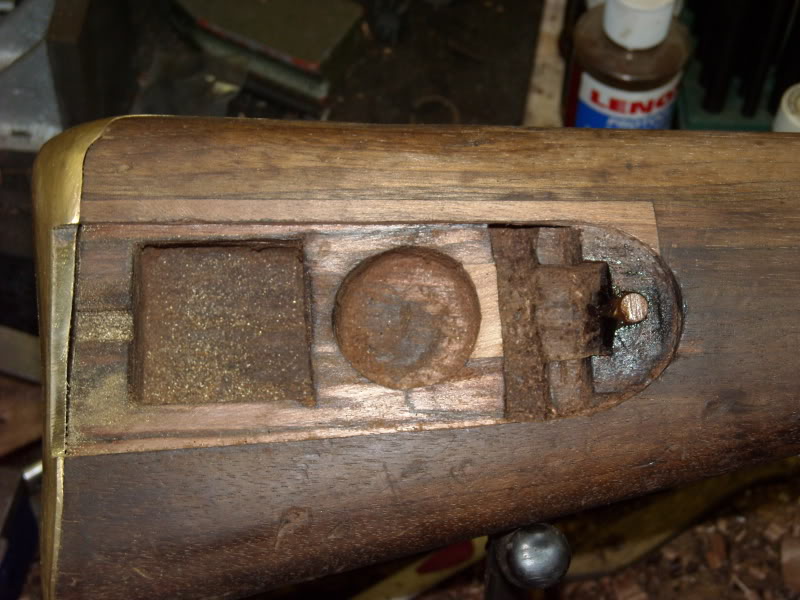
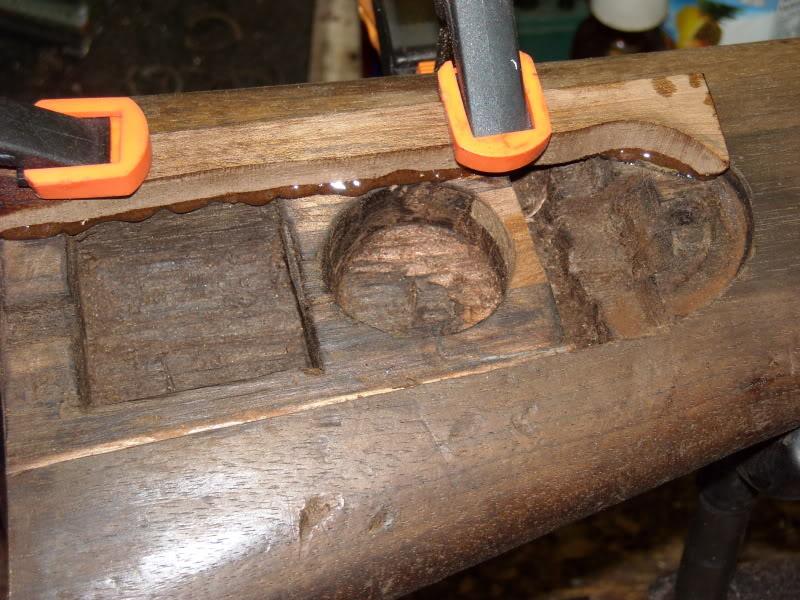
To start, chisel out the area where the repair will sit. I widened the already too wide inlet as you want your patch to be wide enough to be strong and have a large enough bonding surface area. Take this opportunity to square it up real well and then draw-rasp the inletting to make sure it is flat and square.
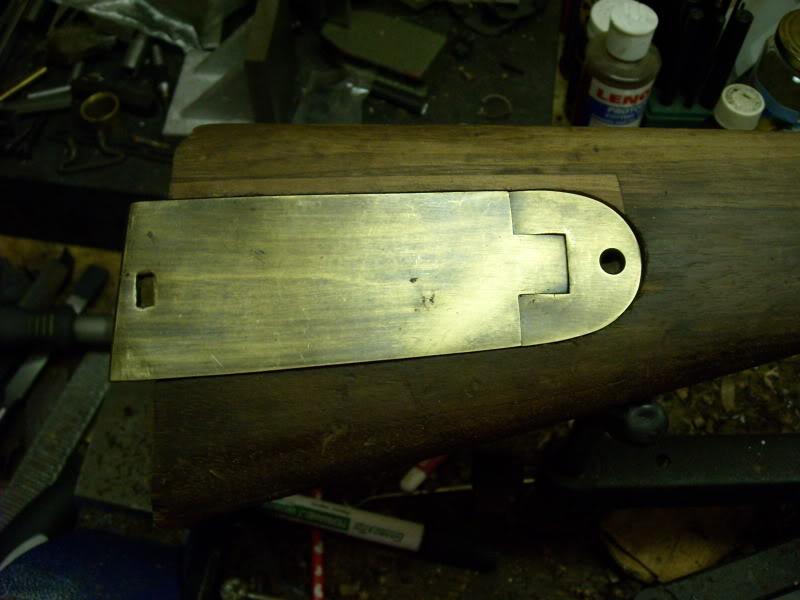
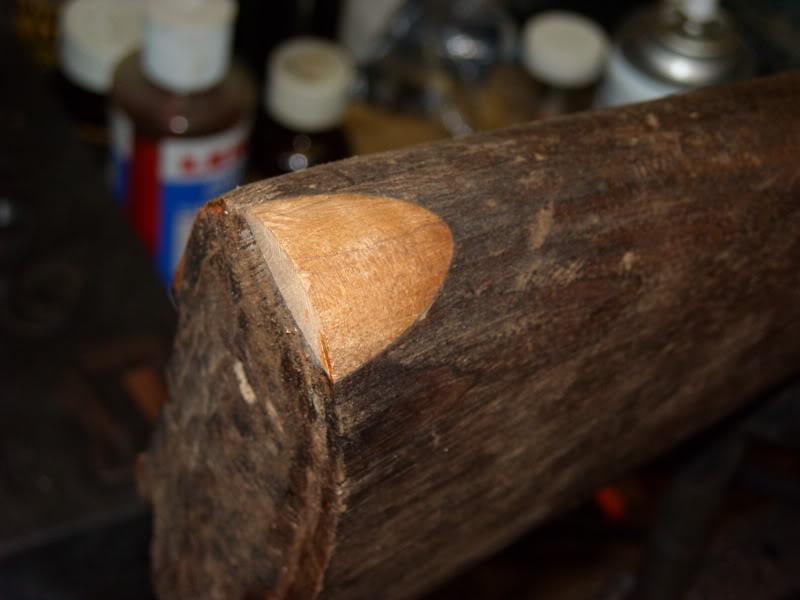
In my case the hinge inlet and the door inlet were of different height, so I made my patch stepped to account for this. I also used the bandsaw to roughly shape the patch so that I'll have less inletting to do later with chisels.
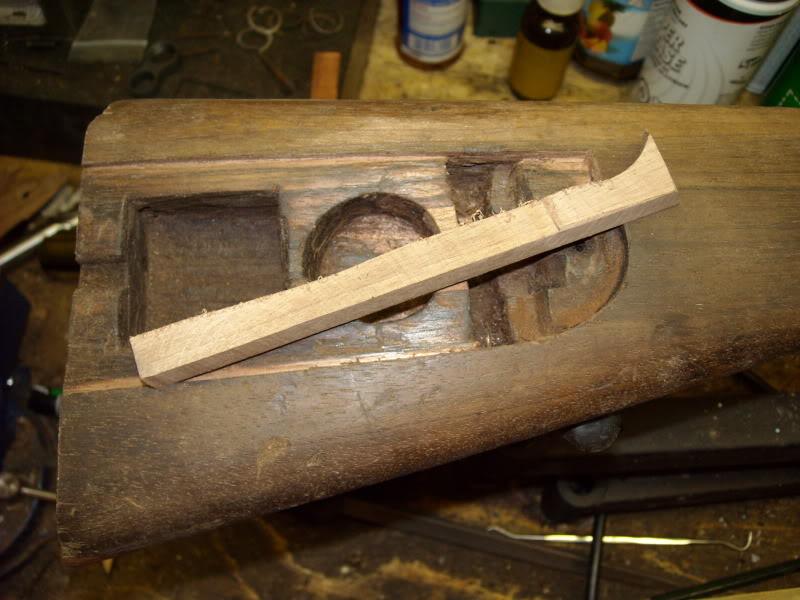
Notice the tight fit without glue or clamps.
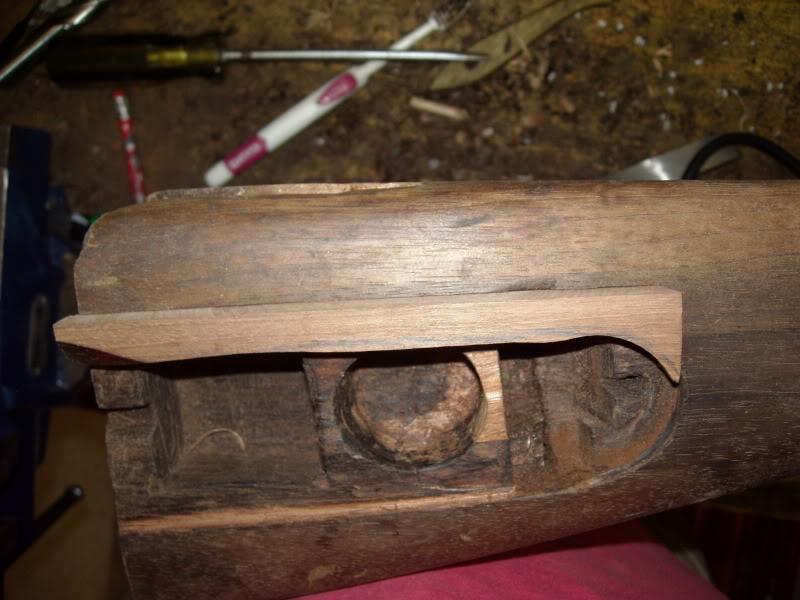
The edge of the patch and the inletting is bevelled so that the bit of epoxy joint that shows will be shallow and minimized.
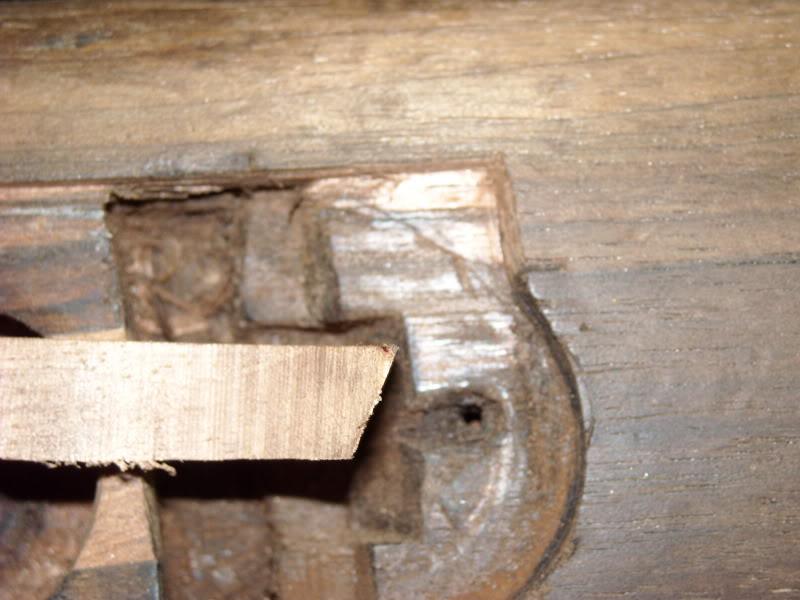
Mix the epoxy and sawdust until it looks like molasses and then let it set up for a good 60 seconds. Smear it on like butted and push the repair into place. It should hold without clamps if you inletted it tightly enough, though I did add some clamps as insurance.
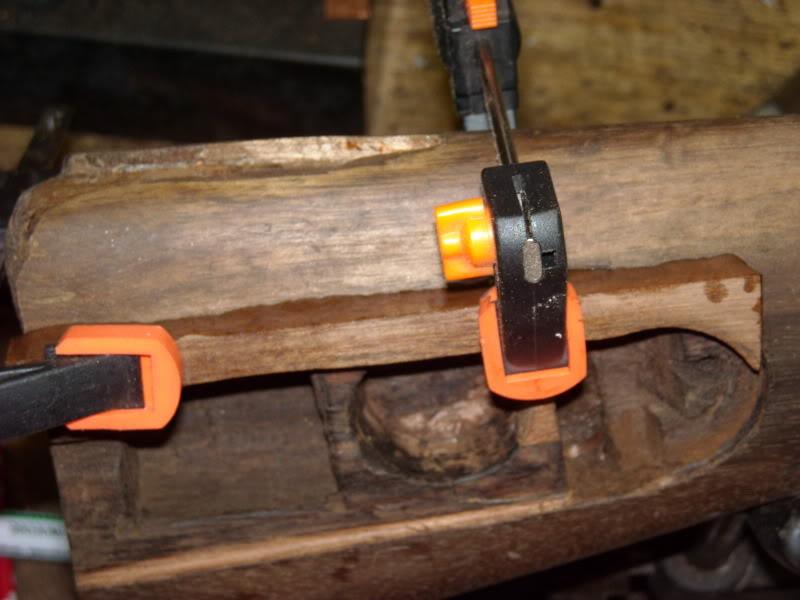
Now in a few hours when it's good and dry, the job will start of dressing it down and then re-nletting the patchbox.
Союз нерушимый республик свободных Сплотила навеки Великая Русь. Да здравствует созданный волей народов Единый, могучий Советский Союз!
-
-
-


 PM
PM