-
No4 Mk1 T Rebuild
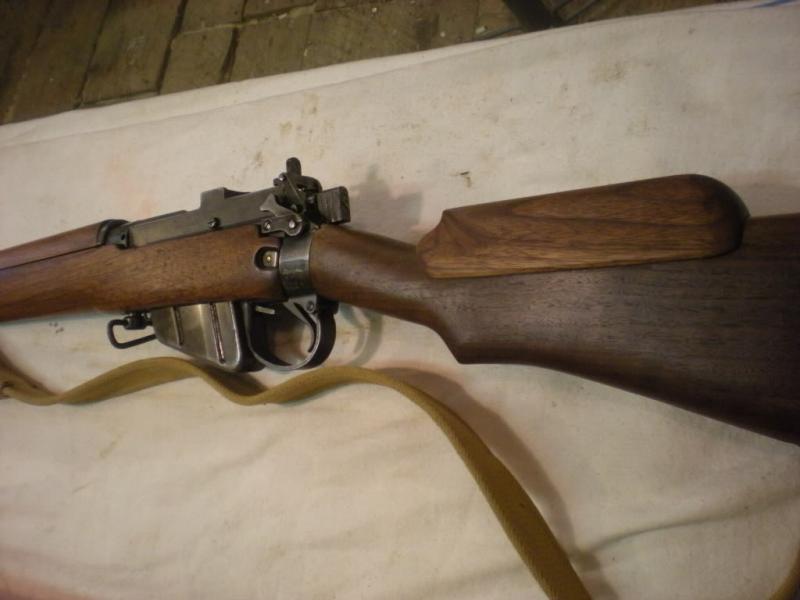
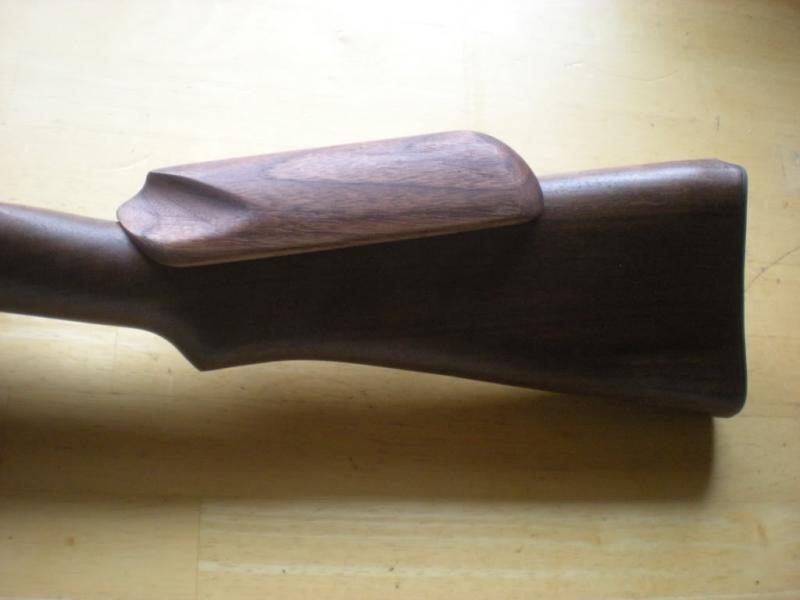
Howdy all. This is a project that I've had in the pipeline for a while now and I have just brought together all the parts I need to begin. I'm hoping for a new wood set in the near future, but I'll have to see how that pans out. I have a fall back, but not as ideal as a new set. Also I need a cheek piece, so if anyone can help me out with one please let me know.
I bought the receiver as a bare No 4 T barrelled receiver. The barrel is pretty well knackered, but I have an unused 5 groove in perfect condition. The No32 Mk2 scope, I bought as a very expensive, very rough example, it is 1944 like the receiver, and has now been restored to perfect functional condition.
All the action parts and bolt are robbed from a BSA receiver (1944), and the other metal parts are off a Matlby, but these are all british contractor parts and are pretty at home on the rifle.
The bracket is one I bought from Roger Payne .
.
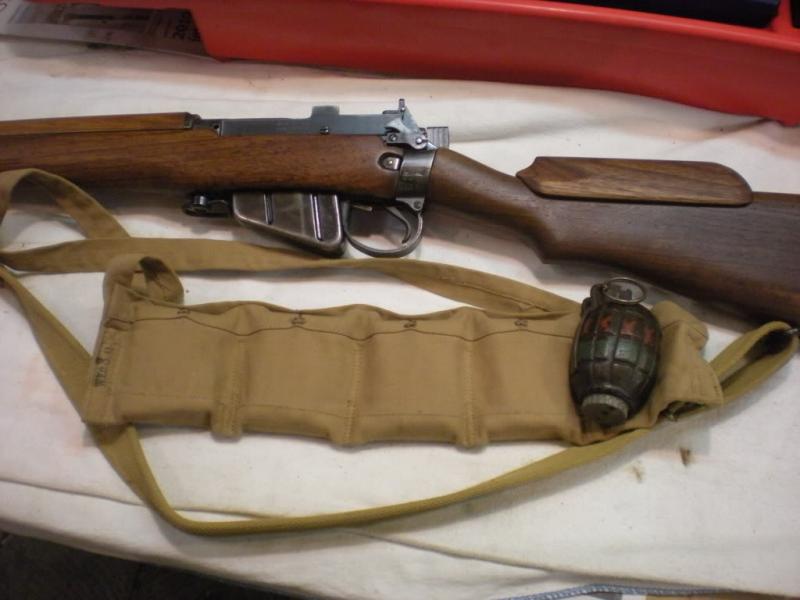
The hardware in the foreground I bought from a forum member.
It is my intention to document the rebuilding of this rifle to a state, as it would be having just come out of British FTR. Including rebarreling, bedding and fitting the woodwork, beadblasting, phosphating, Suncoriting(or a substitute if its unavailability prevails) of metal parts, fitting and renumbering bolt body, forend and butt, collimating the scope, and restoring the finish of the No8 telescope tin/case.
Additionally I will be building 2 transit cases, one for me and one for a friend and I will be stensilling the rifle and telescope numbers on them.
For this project to be successful for me, it is essential that the rifle shoots beautifully, and in its completed form be indistinguishable from an honest example to all but the most knowlegable inspectors, in terms of appearance, trigger pull, scope collimation, stock fit, , parts utilized, and stamp fonts.
I will never sell this rifle, and I will never lie about its assembly by me, but it has cost me an embarrassing amount of money, and this will be the best damn bitsa, at least on my local rifle range.
I expect the project to take up to a year to complete.
Attachment 15097
Information
 |
Warning: This is a relatively older thread
This discussion is older than 360 days. Some information contained in it may no longer be current. |
|
Last edited by Badger; 08-17-2010 at 11:27 AM.
Reason: Moved to Enfield Forums with permanent redirect so both forums may follow project ...
-
The Following 7 Members Say Thank You to tbonesmith For This Useful Post:
-
08-17-2010 10:18 AM
# ADS
Friends and Sponsors

-
Att'em boy............, that's what I like to see. Here's a bit of advice first. When it's breech it up, YOU tell the man how YOU want it done. And that is on a sheet of glass, indexed across the backsight axis pin hole and the top of a set of burr free, tight fitting foresight protectors. And when it's finished, I'll send you a small cot of the GREASE XG279 to grease under the woodwork so that it even SMELLS right!
Keep us all informed, in pictures. Fantastic project
-
-
-
tbonesmith,
Am sure i,ve got a spare cheek piece you can have, ( just pay the postage) it was off the butt i used in the SMLE No 1 Mk V restro, the one i am doing in the restorers corner, (you have seen the post and if you look on the butt in part 3 there are still the holes to sort) will have a look later, am not sure if its beech or walnut.
As for the wood work, think Roger Payne has a good supply of walnut for No4 Mk1, am sure he would pick out a nice set for you (at a cost) for other bits etc and repro cheek piece,s have a look on the link below.
DS-Solutions
Look forward to seeing the progress in the restorers corner, ask the moderators to keep the posts together, one of them was kind enough to do it for mine, ( I dont know who but I owe them a few beers) think the differance here is apart from the rifle, is the cost.
I tried to do it on a shoestring and making my own top gaurd was to show that its possible to get a milsurp up and running after bubba has had his hands on it for a reasonable cost.
-
Thank You to bigduke6 For This Useful Post:
-
FREE MEMBER
NO Posting or PM's Allowed

-
Legacy Member
-
-
Plan and barrel removal.
My plan of attack with this project is as follows:
1. pull the barrel
2. replace the barrel
3. fit the bolt, bolthead, striker, and cocking piece
4. stock up the rifle, and assemble
5. adjust the trigger
6. test fire with iron sights for accuracy and function and adjust anything as required
7. fit the bracket (scope) to collimate the telescope, test for function, and zero rifle with scope
8. strip the rifle, bead blast all parts as required, phosphate, and paint/suncorite
9. reassemble and re test, and use
10. build repro transit cases with original hardware, paint, stensil and use.
Tonight I got the barrel out, but first I made a new adapter for my wrench as I saw an excellent one that someone else had that I thought I'd copy as it provides such excellent support to action without having to be rediculously tight.
I took the relief cut around the front of the receiver(without touching the receiver) after first trying to get it out without doing so. It always blows me away how tight these are, and while it might have come off, I didn't want to risk bending or twisting anything for the sake of a cack barrel.
These are the pics of this process, I'll do the rebarrel next week sometime, after I pick up my sheet of glass, "V" blocks and drill rod.
Attachment 15134 - Attachment 15135 - Attachment 15140 - Attachment 15138 - Attachment 15142 - Attachment 15139 - Attachment 15137 - Attachment 15141 - Attachment 15133 - Attachment 15136
Last edited by Badger; 10-07-2010 at 10:17 AM.
Reason: Edited post for member to fix pics alignment within thread ...
-
The Following 6 Members Say Thank You to tbonesmith For This Useful Post:
-
Legacy Member

looking good so far,I would use that paint I showed you on my No5 it seems to emulate that suncorite really close and does not wear off.also I ordered a stirling 308No 4 mag
-
-
Breeching up
Alright, I will have to edit this in the next week to add some photos of indexing the barrel to align the sights on glass with Vee blocks etc., but I couldn't afford to buy that this week so I've put the barrel in using the Knox as a datum, and also checking the rear sight axis hole, to the foresight protector for wind using a straight edge, I'll check and adjust if, and as necessary, but it must be very, very close.
Also this has illustrated the inadequacy of my barrel vice mounting, as I find it difficult to make very fine adjustment to indexing of the barrel, as there is too much flex in the table for me to be able to feel slight movement, or even to do fine adjustment with a hammer to the wrench. This too will be rectified.
None the less, I'm happy with the job. I've a few bolts to choose from, a new body headspaces on a "0" bolthead, and a good used longbranch bolt headspaces correctly on a"1". Another is clapped and is no good.
I'll do the bolt fitting and make a choice this weekend.
-
The Following 3 Members Say Thank You to tbonesmith For This Useful Post:
-
FREE MEMBER
NO Posting or PM's Allowed

Relief cuts?
Can someone explain the principle and practice of relief cuts?
-
If you're talking about them in relation to small arms, then the only two that I know about are in the reciprocating bolt of the Sterling SMG and the L1A1 breech block carrier. Very basically, these sharp edged cuts. recesses are cut and angled so that they'll effectively divert small sand particles out of the breech block carrier trackway in the body, up, out of harms way. In the rifle, it deposits the gunge in recesses in the body. However, as we learned later, this only works when the rifle is bone dry. Generally speaking, where dust and sand was a problem, such as the desert, then the rifle was rinsed out in petrol and left dry. The Sterling shovels it out of the cocking handle slot according to the slow speed video. But quite where the gunge on the left hand side gets shoveled is, well....., anyones guess. But presumably the open right hand side is the major problem.
The Sterling bolt was well thought out and if you get hold of one, you'll see that the 'lands' do cover 360 degrees. If I was any good at photography, I'd show an example of each but I'm sure someone out there will. Where are you KtK when we need L1A1 pics?
-


 PM
PM