+ Reply to Thread
Page 2 of 7 FirstFirst 1 2 3 4 ... LastLast
Results 11 to 20 of 69

Thread: Building the BP trade rifle from a TOTW kit

Click here to increase the font size Click here to reduce the font size
  1. #11
    Moderator
    (Lee Enfield Forum)


    tbonesmith's Avatar
    Join Date
    Sep 2007
    Last On
    03-05-2024 @ 02:45 AM
    Location
    Sydney, Australia
    Posts
    1,076
    Real Name
    Thomas Smith
    Local Date
    03-19-2024
    Local Time
    05:45 PM
    This is a nice project to watch.

  2. # ADS
    Friends and Sponsors
    Join Date
    October 2006
    Location
    Milsurps.Com
    Posts
    All Threads
    A Collector's View - The SMLE Short Magazine Lee Enfield 1903-1989. It is 300 8.5x11 inch pages with 1,000+ photo’s, most in color, and each book is serial-numbered.  Covering the SMLE from 1903 to the end of production in India in 1989 it looks at how each model differs and manufacturer differences from a collecting point of view along with the major accessories that could be attached to the rifle. For the record this is not a moneymaker, I hope just to break even, eventually, at $80/book plus shipping.  In the USA shipping is $5.00 for media mail.  I will accept PayPal, Zelle, MO and good old checks (and cash if you want to stop by for a tour!).  CLICK BANNER to send me a PM for International pricing and shipping. Manufacturer of various vintage rifle scopes for the 1903 such as our M73G4 (reproduction of the Weaver 330C) and Malcolm 8X Gen II (Unertl reproduction). Several of our scopes are used in the CMP Vintage Sniper competition on top of 1903 rifles. Brian Dick ... BDL Ltd. - Specializing in British and Commonwealth weapons Specializing in premium ammunition and reloading components. Your source for the finest in High Power Competition Gear. Here at T-bones Shipwrighting we specialise in vintage service rifle: re-barrelling, bedding, repairs, modifications and accurizing. We also provide importation services for firearms, parts and weapons, for both private or commercial businesses.
     

  3. #12
    Senior Moderator
    (Founding Partner)


    Site Founder
    Claven2's Avatar
    Join Date
    Oct 2006
    Last On
    08-09-2023 @ 10:17 PM
    Location
    Scandaltown, Ontario
    Posts
    3,242
    Real Name
    Ronald
    Local Date
    03-19-2024
    Local Time
    01:45 AM
    Thread Starter
    Made some more progress today as I started inletting the stock. On this one, the barrel channel was machined into the blank before I got it, but it was too tight for my barrel by probably 30 thou in width and the end of the barrel channel is left round so you have to square it up to get bearing at the back of the barrel. To do this, it's best to remove the barrel plug and set it aside. I then rough out the squaring by eye and start with inletting black brushed onto the underside of the bbl. This identifies the tight spots which I brought down with a small bastard file. I then put black on the back of the bbl and used chissels and small files to get the contact acceptable and square to the barrel.


    Now is a good time to trim off the excess from the front of the stock. Leave it a little proud for now though since you don;t know the final dimension of the stock until you are done inletting the barrel tang and the nosecap at the other end of the forestock (later). Save the scrap as we will use it later as a test piece for the stock's finish


    Here you can see there's pretty good contact at the back of the barrel. This is plenty good enough for now so I'm moving on to inletting the tang. First (and obviously) you have to re-install the tang into the barrel and then scribe out the rough location on the stock in pencil. I then use a special chisel meant for outlining cuts (I never remember it's real name but it's only sharp on one side so you can chisel in straight lines) to start the cut.


    Now using a variety of chisels you start cutting the tang inlet by eye. Keep it slightly undersized - not oversized as we don't want gaps when we're done!


    At around this point you switch back to inletting black and begin trial fitting the barrel frequently until you get nice contact. You also may need to slightly tweak the angle of the tang. The metal will be somewhat annealed from being heated before and you can do the tweaking in a vise. Note that the contact areas at the barrel shoulder are the critical areas that soak up recoil so pay the most attention to the fit in these places.


    Normally you would inlet the lock next but since I still don't have the lock, I'll likely tackle the ramrod pipes next.
    Last edited by Claven2; 10-10-2010 at 10:27 AM.
    Союз нерушимый республик свободных Сплотила навеки Великая Русь. Да здравствует созданный волей народов Единый, могучий Советский Союз!

  4. The Following 2 Members Say Thank You to Claven2 For This Useful Post:


  5. Avoid Ads - Become a Contributing Member - Click HERE
  6. #13
    Senior Moderator
    (Founding Partner)


    Site Founder
    Claven2's Avatar
    Join Date
    Oct 2006
    Last On
    08-09-2023 @ 10:17 PM
    Location
    Scandaltown, Ontario
    Posts
    3,242
    Real Name
    Ronald
    Local Date
    03-19-2024
    Local Time
    01:45 AM
    Thread Starter
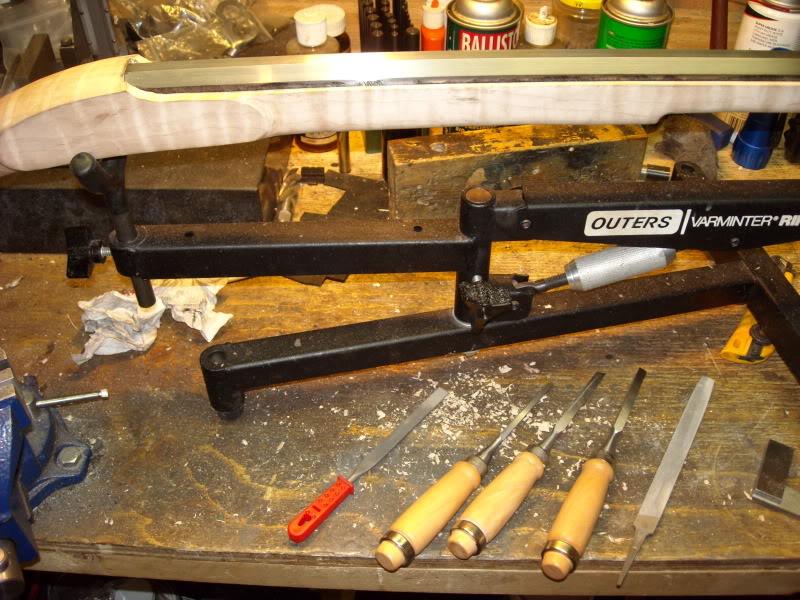
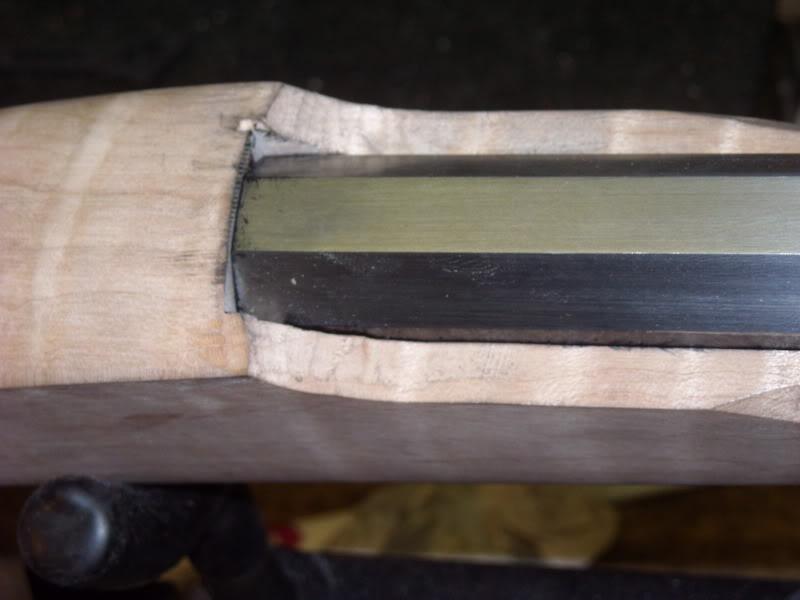
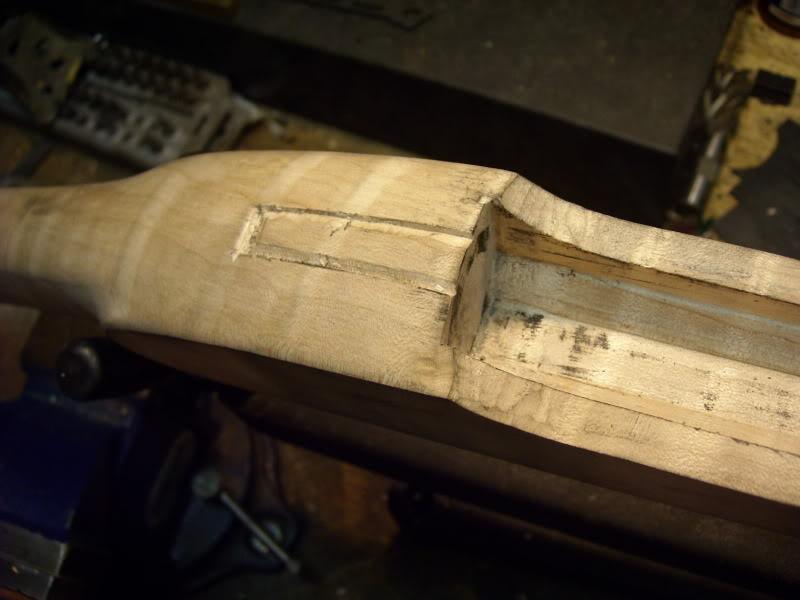
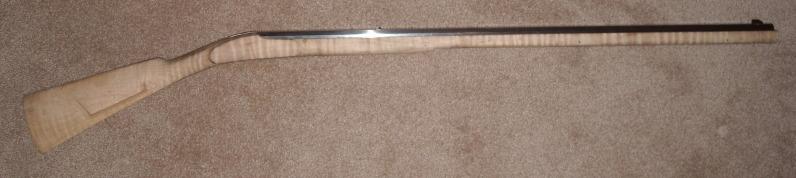
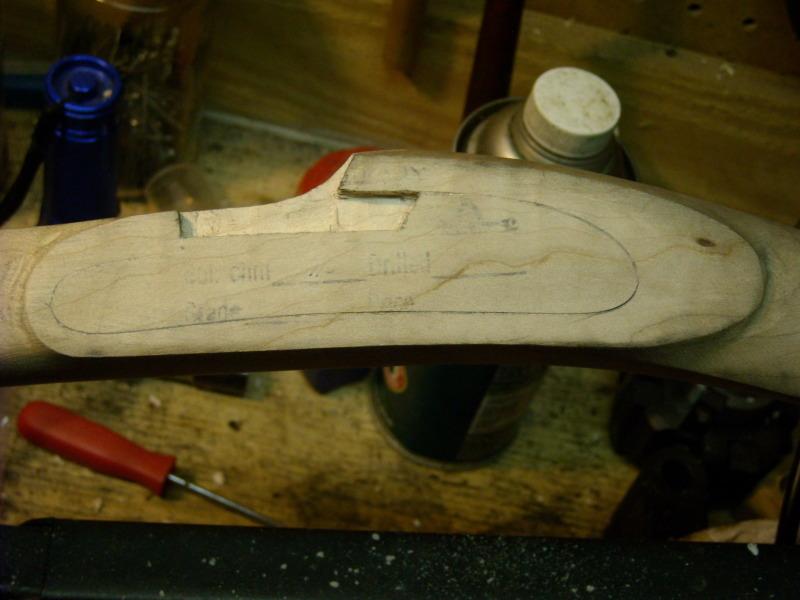
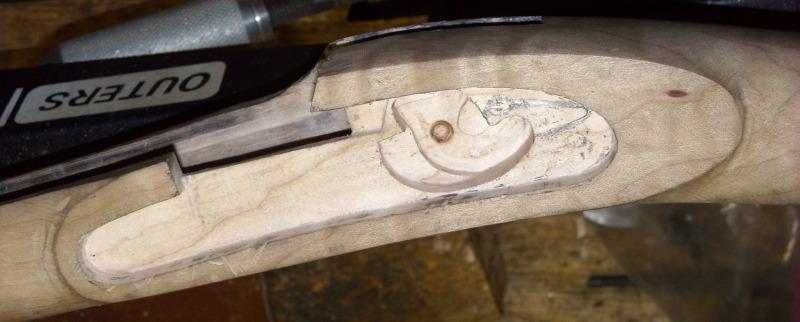
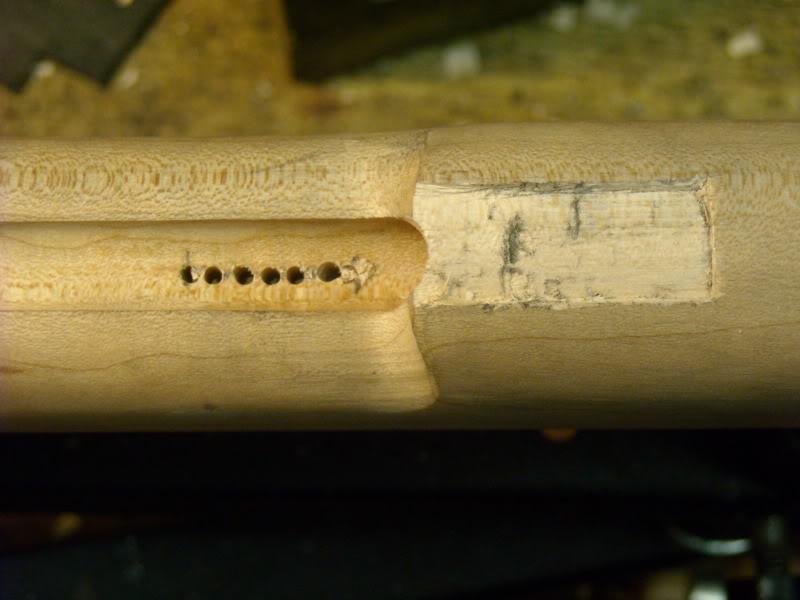
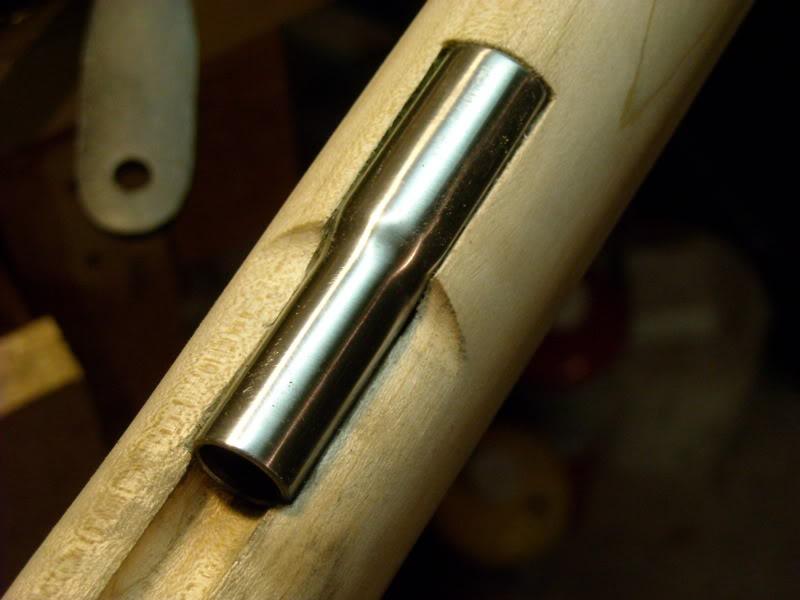
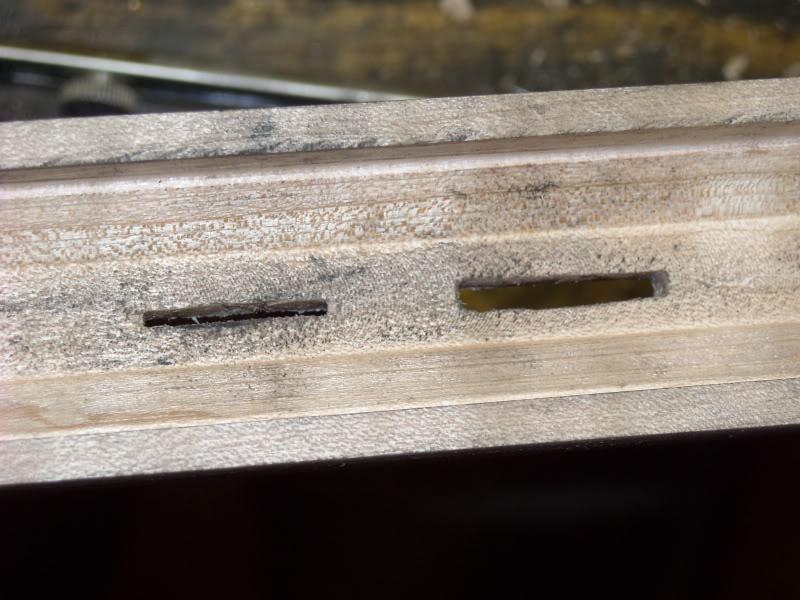
    ok, well next I decided to inlet the rearmost ramrod pipe. There are three ramrod pipes on this type rifle and the rearmost is by far the most difficult to inlet (so you start with it - lol). It's also the easiest to locate for obvious reasons. See the photo, there is a step in the forestock where it goes.


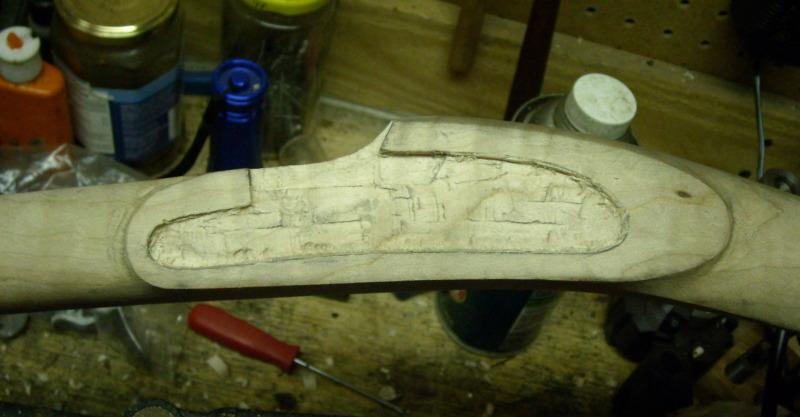
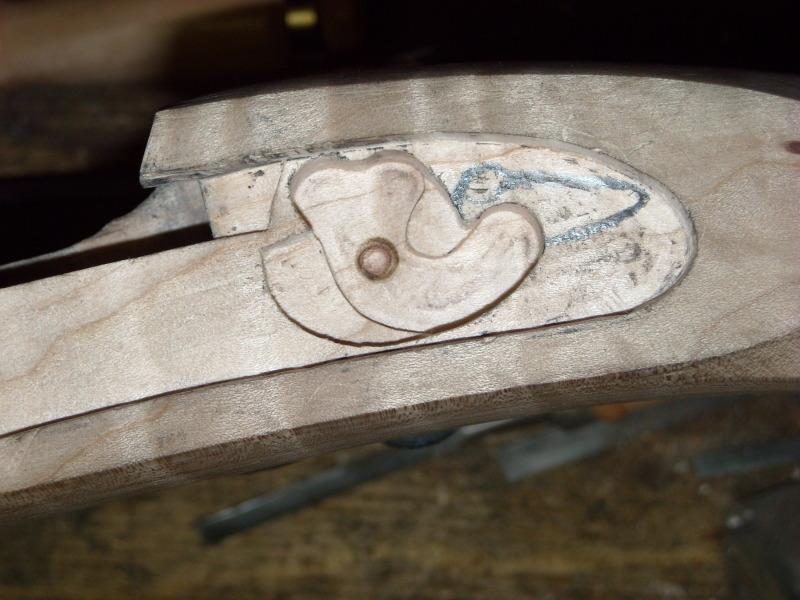
    Now there is the easy way (i.e. lazy and improper way) to inlet the rear ramrod pipe and then there is the right way. The right way is a lot harder to do but has the advantage of being right - lol. The easy way is to simply mill or chisel out the area under the pipe flange, leaving it unsupported by the wood of the stock. The right way is to carefully inlet it so wood remains under the flange to support it. You do this by outlining it with pencil, chiselling smaller than the pencil lines and ultimately by switching to inletting black until you can inset a length of ramrod dowel.

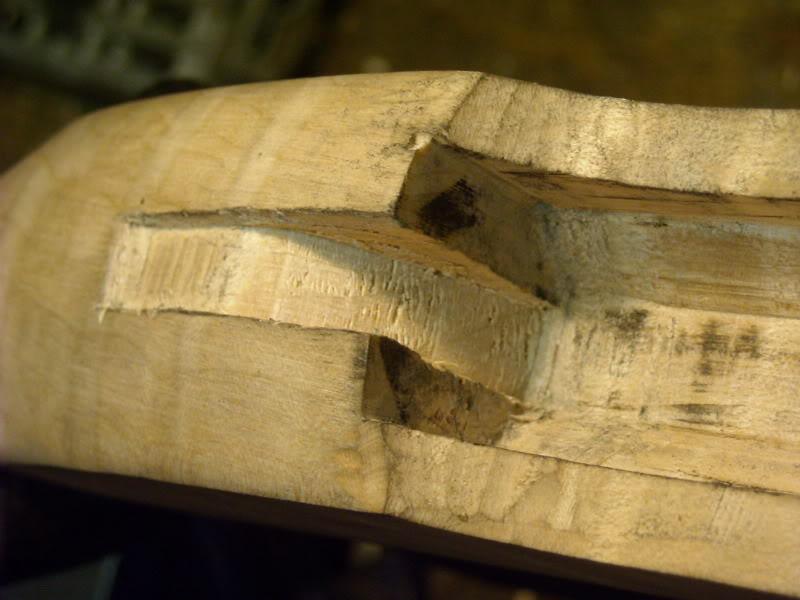
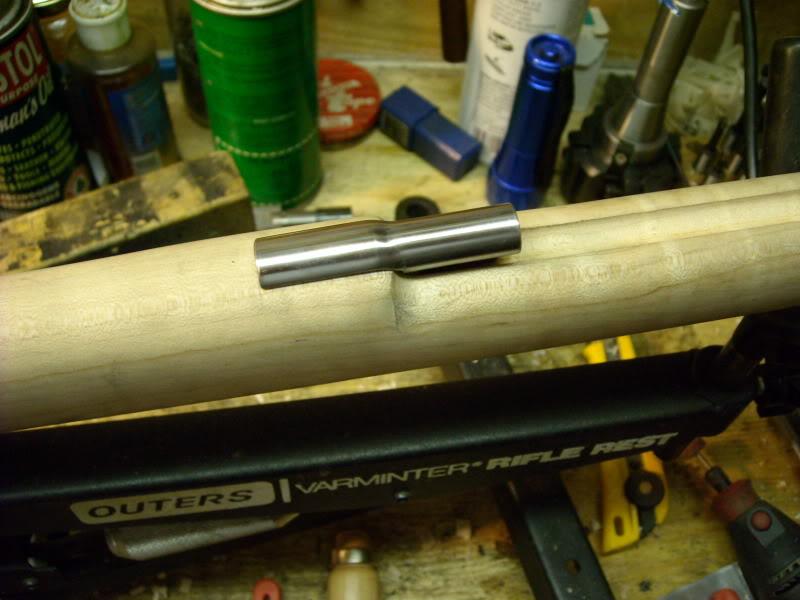
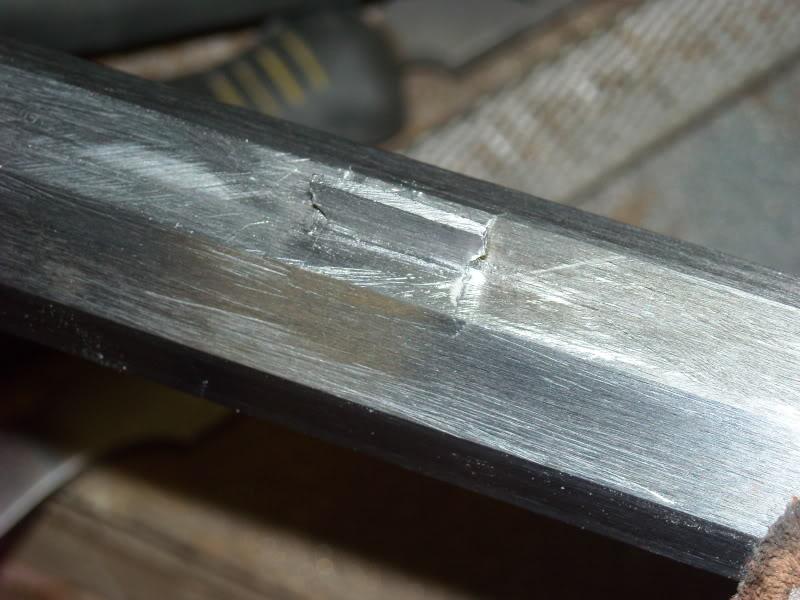
    There is also a tab on the bottom of the pipe to allow you to pin it in place. I inlet these by drilling a series of under-width holes and then filing them into a slot.


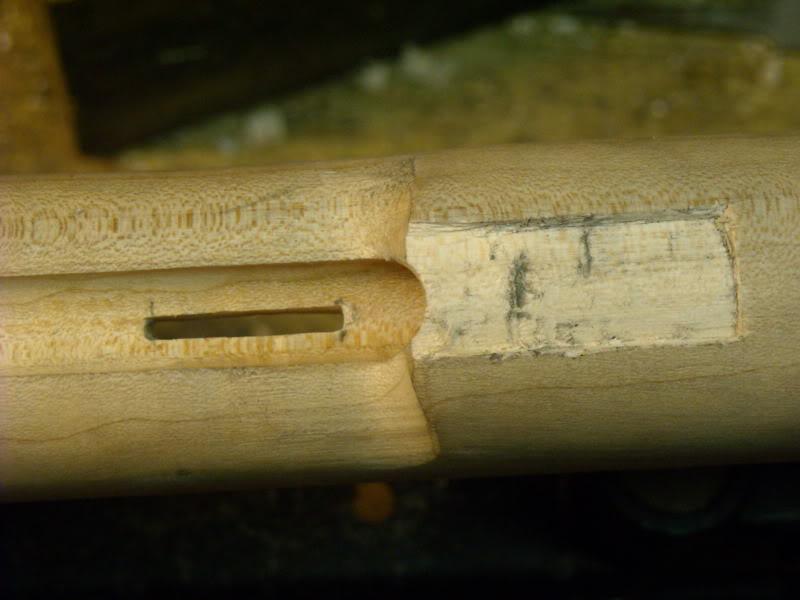
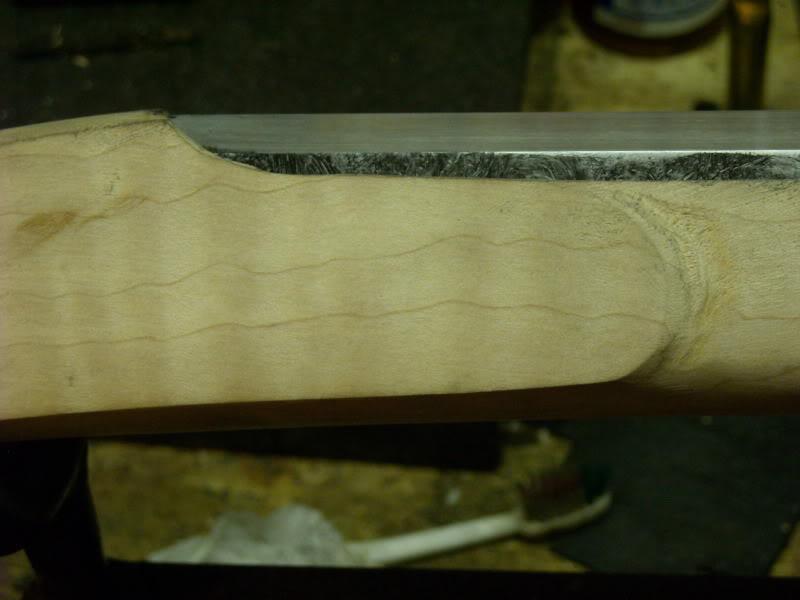
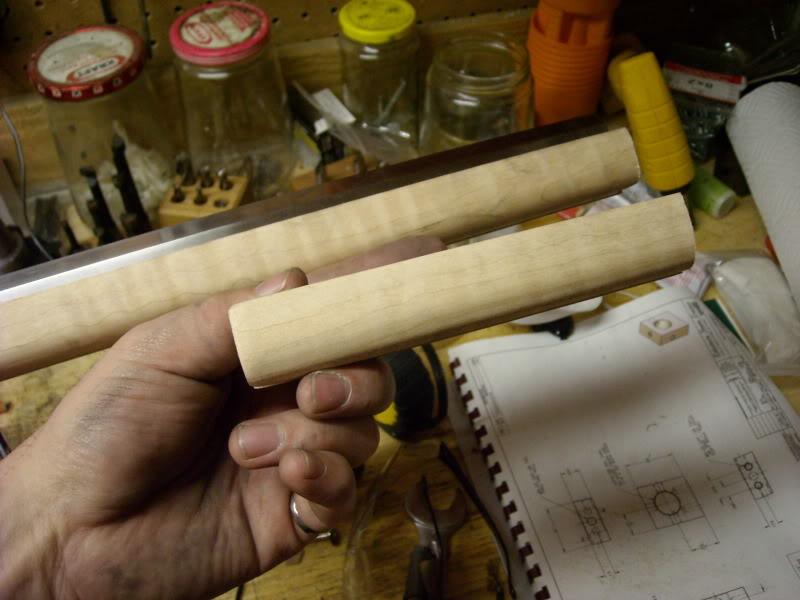
    You will notice the forestock is too big in this area and you will have to rasp or plane the stock down so it blends well with the ramrod pipe as you progress and don;t forget inletting black - your best friend! Also, use a small round file to slightly bevel the entrance to the stock's ramrod channel hole.


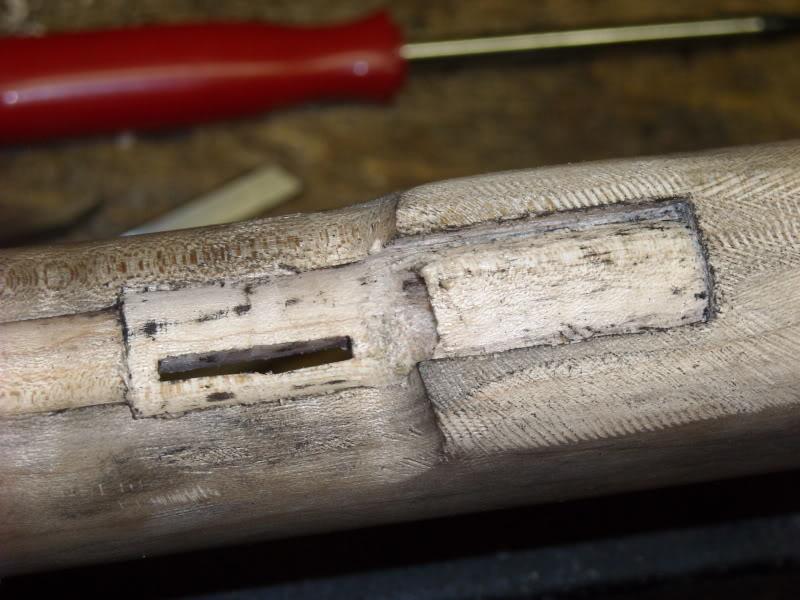
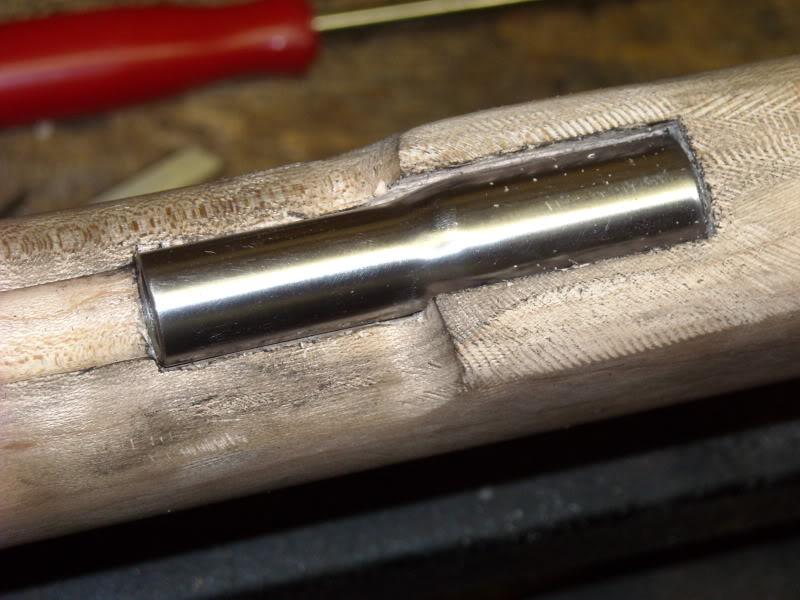
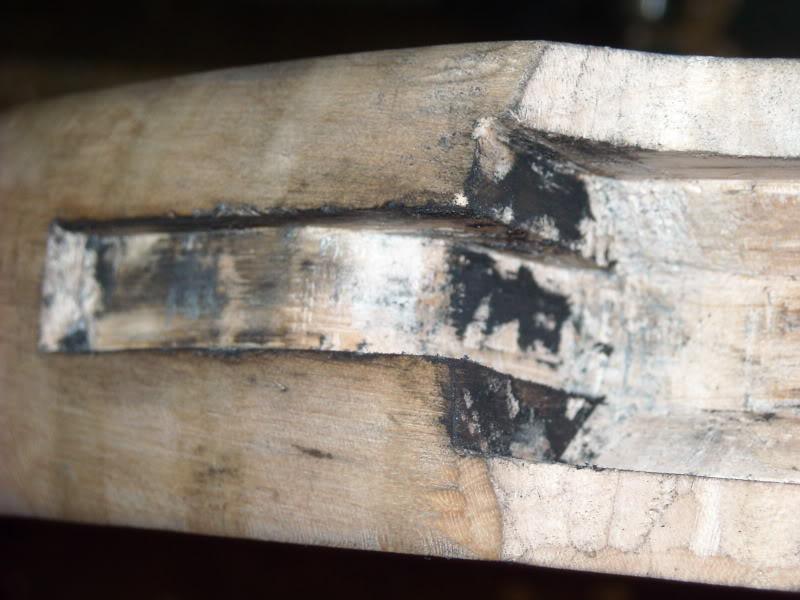
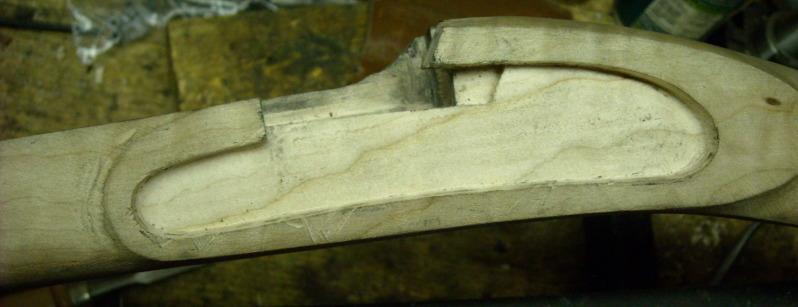
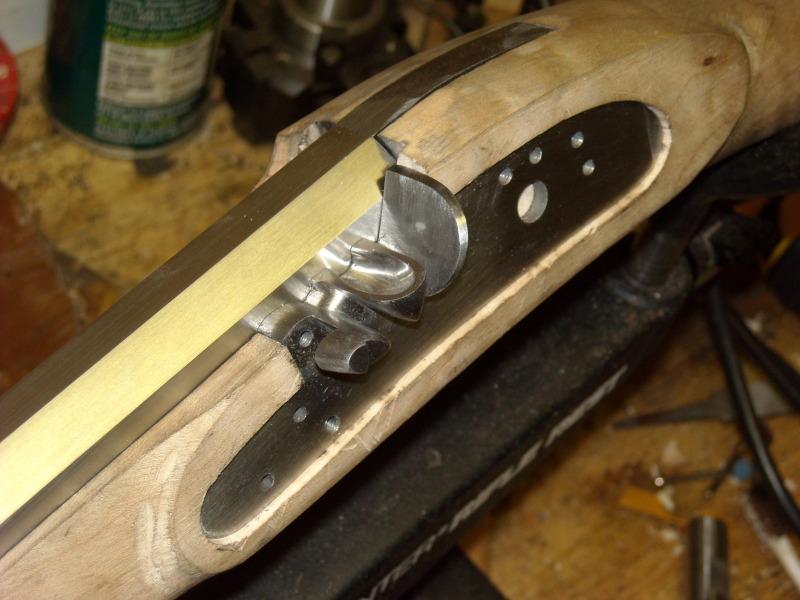
    And finally, you will be done.


    See how nice and proper that inletting looks compared to if I had just milled the wood away under the pipe flange? Before you pin it (later as I will do them all at the same time in the mill later on), make sure one last time that the ramrod will go through all three ramrods without binding - this last one is the most finicky - by far.

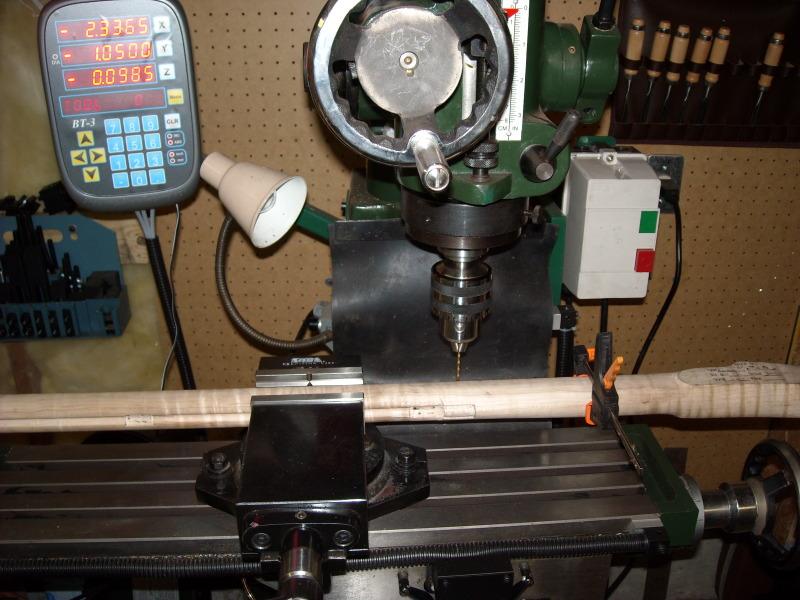
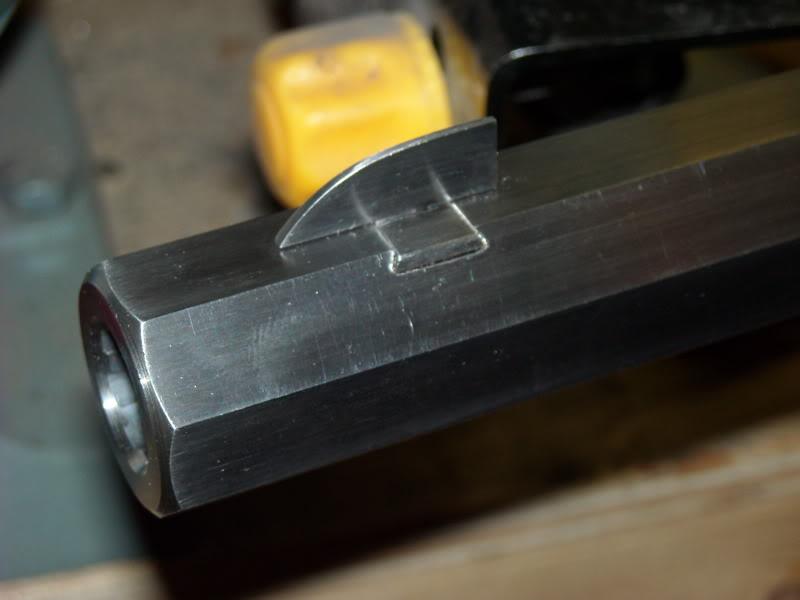
    Now the next step now that the rear ramrod pipe is located is to use it to dimension off the drawing and mark (in pencil) the location of the three barrel tenons and cut the dovetails into the barrel to hold them. These are on the bottom flat. You always install the one back at the tang first and work your way forward.

    There are LOTS of ways to install these that will work, but if you have the right gear (a large enough milling machine) - this is the BEST way to do it. As I said, mark the locations in pencil. The exact position of the tenons doesn't need to be precise, but you want them to looks uniformly distant from where you will be mounting ramrod pipes. It also helps if the tenons are more or less equidistant from each other. Mount the barrel with the bottom flat facing up. I use a .375" end mills to make starter cuts and then measure the TOP of the tenon dovetails at the tenon. I subtract 10 thou and this becomes the width of my cuts. Each tenon is hand made and you need to measure each one individually and mate it to a dovetail cut. They are NOT INTERCHANGEABLE. Measure twice and cut once.


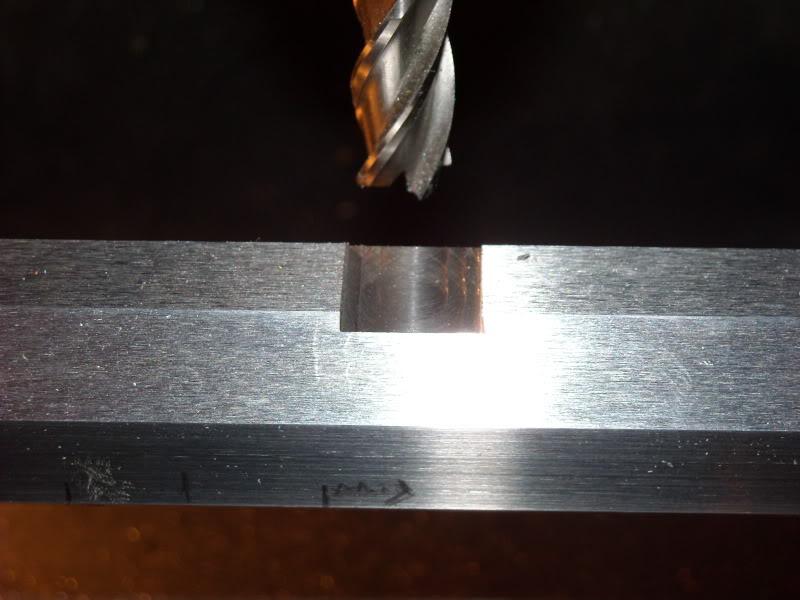
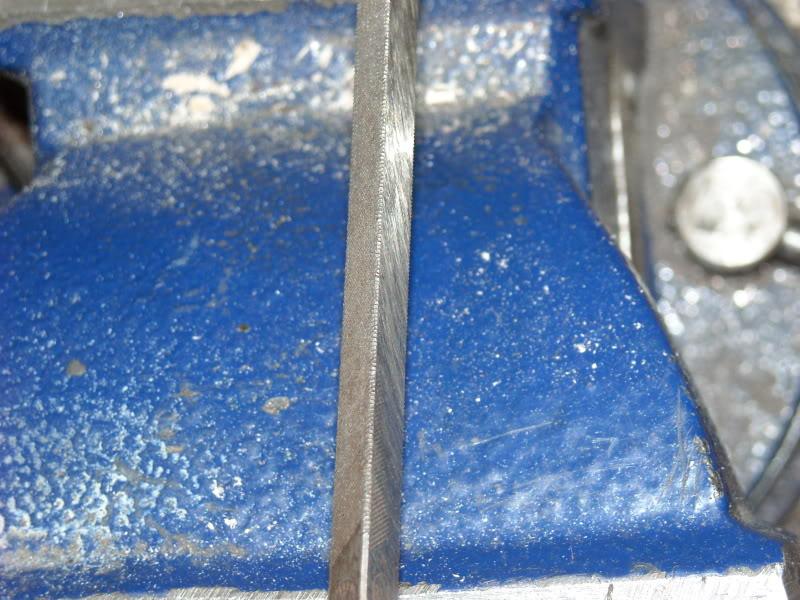
    Once all three dovetails are roughed out by and end mill you COULD use a dovetail end mill, but in my case the tenons themselves are not that uniform and the sides aren't very parallel, so I'm cutting the dovetail angles with a file. Here is where a home-made tool REALLY comes in handy. I took an equilateral triangle file and un a large grinding wheel I ground one flat smooth so it won't cut. Place the smooth face against the bottom of the dovetail rough-out and file your dovetail relief angles - the file won't cut down, only laterally to make a nice dovetail and you can control the angle to match the tenons TOTW sent you.


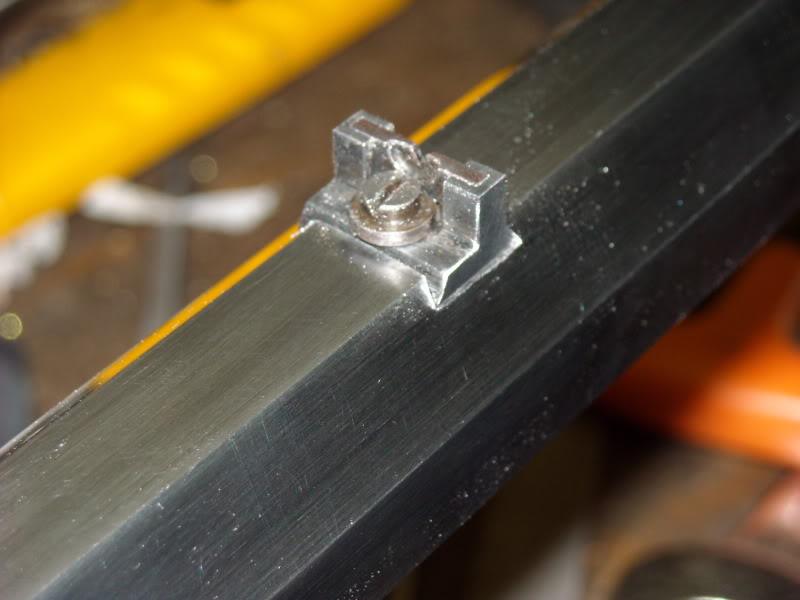
    Do not overdo the filing. While the dovetail is still slightly too small, choose the smallest side and start it in with a small jeweller's hammer, then use a brass punch and a larger ballpeen to beat it in. It should be VERY hard to beat in. I like it if the barrel actually shaves a little material off the tenon itself - then you know you have a wickedly tight fit. You never will remove these tenons again, so get 'em in there tight.


    Now because we don't want to booger up our inletting all sloppy-like, we file the sides of the tenon and the top of it os that it is seamless with the contours of the barrel flats. Before filing, I take a small punch and push the burred edges of the barrel's dovetail down tight to the tenon's top edge with a few good hammer smacks (the dovetail top edges expand from beating in the tenon). when done, the tenon should almost look like it grew there. Next we will inlet this one into the stock before we install the next tenon.

    Союз нерушимый республик свободных Сплотила навеки Великая Русь. Да здравствует созданный волей народов Единый, могучий Советский Союз!

  7. The Following 3 Members Say Thank You to Claven2 For This Useful Post:


  8. #14
    Moderator
    (Lee Enfield Forum)


    tbonesmith's Avatar
    Join Date
    Sep 2007
    Last On
    03-05-2024 @ 02:45 AM
    Location
    Sydney, Australia
    Posts
    1,076
    Real Name
    Thomas Smith
    Local Date
    03-19-2024
    Local Time
    05:45 PM
    Is "inletting black" something you can buy at a specialized wood working shop, or something you make up?

  9. #15
    Senior Moderator
    (Founding Partner)


    Site Founder
    Claven2's Avatar
    Join Date
    Oct 2006
    Last On
    08-09-2023 @ 10:17 PM
    Location
    Scandaltown, Ontario
    Posts
    3,242
    Real Name
    Ronald
    Local Date
    03-19-2024
    Local Time
    01:45 AM
    Thread Starter
    brownells and TOTW sell it, among others. It's a sold product like shoe polish except a lot more viscous (wet). It goes on like paint but doesn't dry like paint does.

    This is the stuff I use. A little goes a long way.

    http://www.trackofthewolf.com/catego...um=INLET-BLACK
    Союз нерушимый республик свободных Сплотила навеки Великая Русь. Да здравствует созданный волей народов Единый, могучий Советский Союз!

  10. Thank You to Claven2 For This Useful Post:


  11. #16
    Senior Moderator
    (Founding Partner)


    Site Founder
    Claven2's Avatar
    Join Date
    Oct 2006
    Last On
    08-09-2023 @ 10:17 PM
    Location
    Scandaltown, Ontario
    Posts
    3,242
    Real Name
    Ronald
    Local Date
    03-19-2024
    Local Time
    01:45 AM
    Thread Starter
    ok, well not much progress in the last few days as a couple things have come up, firstly I got the flu and secondly I got two vintge BP guns in that need restoration and preservation before I can get back to this project, so likely this will be on hold for a couple weeks.

    Nevertheless, I did inlet the first tenon and dovetailed in the second tenon to the barrel. When inletting the first tenon (closest to the breech) you dap some inletting black on it and carefully insert the barrel in line with the stock until the black transfers. I use a very small drill and drill out a line of narrow holes then use a tiny file to elongate them into a slot.

    the tenons should be about 1/2" to 1" behind where the ramrod slots will be positioned os that there is meat between them - this will lower the chance of lateral stock splits over time.


    More to follow.
    Союз нерушимый республик свободных Сплотила навеки Великая Русь. Да здравствует созданный волей народов Единый, могучий Советский Союз!

  12. #17
    FREE MEMBER
    NO Posting or PM's Allowed
    Midmichigun's Avatar
    Join Date
    Sep 2010
    Last On
    01-10-2017 @ 10:06 PM
    Location
    Michigan
    Posts
    459
    Local Date
    03-19-2024
    Local Time
    01:45 AM
    Claven,
    I have done some restoration work on some pretty beat up rifles... almost a "kit" rifle in nature based on the parts that I got. Anyway, I wish to think you for the step by step method. From what work I have done, I will attest to the difficulty of doing a good job. I appreciate the time and effort. Looking forward to more!

  13. #18
    Senior Moderator
    (Founding Partner)


    Site Founder
    Claven2's Avatar
    Join Date
    Oct 2006
    Last On
    08-09-2023 @ 10:17 PM
    Location
    Scandaltown, Ontario
    Posts
    3,242
    Real Name
    Ronald
    Local Date
    03-19-2024
    Local Time
    01:45 AM
    Thread Starter
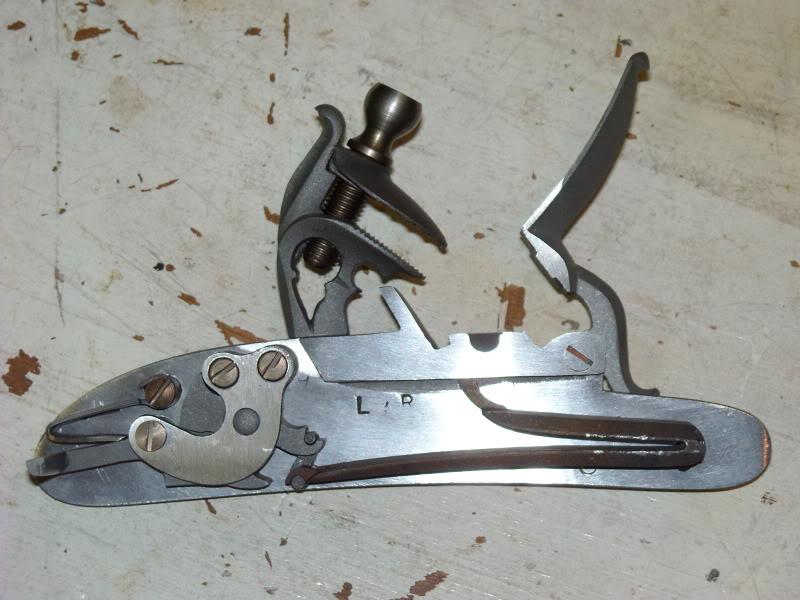
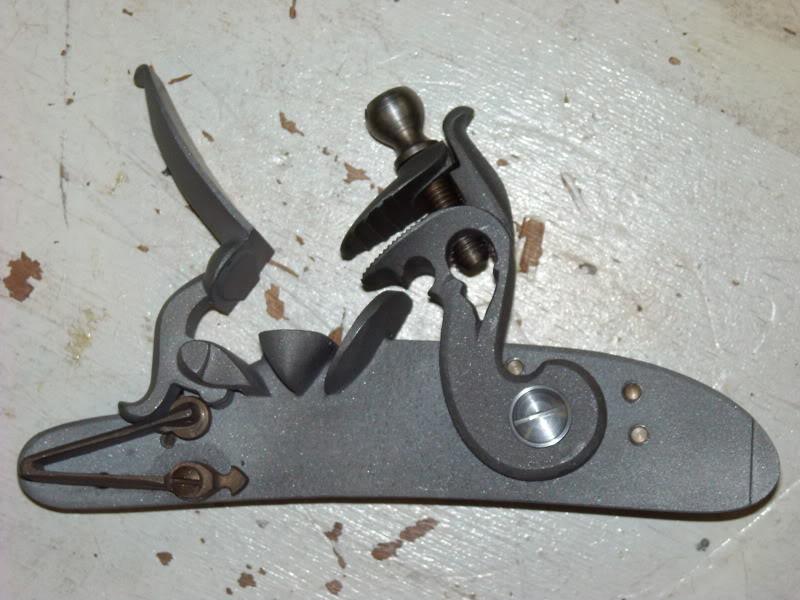
    Well, sorry for taking so long since my last post. I've actually done a bit of work on this gun here and there over the last few weeks, but with the holidays, etc., progress has been very slow. The lock showed up about 3 weeks ago as well. It's mostly rough cast with machining only on the areas necessary to assemble it. It will need a lot of finishing work, but will be nicely serviceable.

    I also inletted the rest of the ramrod pipes, I'll post photos of those later, but for now here is the barrel sight work I wanted to do before fixing the barrel to the stock.

    The barrel dovetails were cut on the mill as stright end-mill cuts and hand-fitted with the above safe-edge triangular file.


    The rear sight is off an old anschutz rifle that I milled narrower. Not period correct, but it more or less looks the part and is elevation adjustable, though discreetly.


    The L&R lock:


    Союз нерушимый республик свободных Сплотила навеки Великая Русь. Да здравствует созданный волей народов Единый, могучий Советский Союз!

  14. Thank You to Claven2 For This Useful Post:


  15. #19
    Senior Moderator
    (Founding Partner)


    Site Founder
    Claven2's Avatar
    Join Date
    Oct 2006
    Last On
    08-09-2023 @ 10:17 PM
    Location
    Scandaltown, Ontario
    Posts
    3,242
    Real Name
    Ronald
    Local Date
    03-19-2024
    Local Time
    01:45 AM
    Thread Starter
    Well I made some progress since I last posted, albeit the progress is slow - lol. For starters, I polished the lock to 200 grit and started inletting it. I also drilled the stock to retain the barrel tennons (still have to drill for the ramrod pipes)

    Getting ready to drill (a mill SOOOO helps):


    Pinned in:


    Lock inlet for the powder tray and lock spring boss, the remainder of the lock plate scribed on the stock:


    And the lock plate inlet is roughed out with chisel work:


    Sorry for all the slow progress guys, this is what I do when I have spare moments between ongoing M14icon and AR15 builds and several milsurp restoration jobs, nevermind my day job!!
    Last edited by Claven2; 03-29-2011 at 10:05 AM.
    Союз нерушимый республик свободных Сплотила навеки Великая Русь. Да здравствует созданный волей народов Единый, могучий Советский Союз!

  16. #20
    Senior Moderator
    (Founding Partner)


    Site Founder
    Claven2's Avatar
    Join Date
    Oct 2006
    Last On
    08-09-2023 @ 10:17 PM
    Location
    Scandaltown, Ontario
    Posts
    3,242
    Real Name
    Ronald
    Local Date
    03-19-2024
    Local Time
    01:45 AM
    Thread Starter
    ok, well I know I am not progressing fast enough on this rifle for some people's tastes, but I'm just ridiculously busy so I apologize. I do have some more progress to show off though.

    Much of the lock is now inletted, though I still have some work to finish off the mainspring area.

    Cut to depth for the bare lockplate:


    Trial fit:


    Starting the inlet for the lock internals:


    You go one piece at a time, mark where you need to remove material and go from there

    Союз нерушимый республик свободных Сплотила навеки Великая Русь. Да здравствует созданный волей народов Единый, могучий Советский Союз!

  17. The Following 3 Members Say Thank You to Claven2 For This Useful Post:


+ Reply to Thread
Page 2 of 7 FirstFirst 1 2 3 4 ... LastLast

Similar Threads

  1. Recommended gunsmith for building a NO 4 (T) reproduction?
    By rascal32 in forum The Lee Enfield Knowledge Library Collectors Forum
    Replies: 0
    Last Post: 11-01-2010, 09:30 PM
  2. Building a better mousetrap: The red rifle front sight tool.
    By Claven2 in forum Gunsmithing for Old Milsurps
    Replies: 1
    Last Post: 03-21-2010, 06:56 AM
  3. building a L42A1
    By J Tal in forum The Lee Enfield Knowledge Library Collectors Forum
    Replies: 5
    Last Post: 02-17-2010, 01:48 AM
  4. Building a match #4
    By sdh1911 in forum The Lee Enfield Knowledge Library Collectors Forum
    Replies: 6
    Last Post: 12-14-2008, 02:32 PM
  5. Building a British arms collection
    By sdh1911 in forum The Lee Enfield Knowledge Library Collectors Forum
    Replies: 4
    Last Post: 11-18-2006, 06:50 PM

Tags for this Thread

Posting Permissions

  • You may not post new threads
  • You may not post replies
  • You may not post attachments
  • You may not edit your posts
Raven Rocks