-
FREE MEMBER
NO Posting or PM's Allowed

WOW! Patrick,
Where do you keep that thing, your bathtub?
We used to joke that the real name of Sarco was “Shallow Water Storage” but I think you’ve got them beat by a mile.
The owner of the rifle accepted my offer and I’ll pick it up Monday.
I would like to get the stains out of the stock and put some oil on it. What would get them out and what oil would approximate the original that Remington would have used?
The action will probably need to be completely taken apart and all of the rust killed. I was thinking of using Evapo-rust or making my own electrolytic rust killer with a DC power supply and baking soda. Any body used either of these? Either way the metal will end up in the white and very prone to rust. I’ll need something that works good to stop any additional rust.
Would it be ok to refinish as long as I stayed true to Remington’s original finishing methods?
-
11-13-2010 01:24 AM
# ADS
Friends and Sponsors

-
Advisory Panel


["Where do you keep that thing, your bathtub?"
- No, but I had to build a special carrying case to fit into the boot of mycar.
"We used to joke that the real name of Sarco was “Shallow Water Storage” but I think you’ve got them beat by a mile."
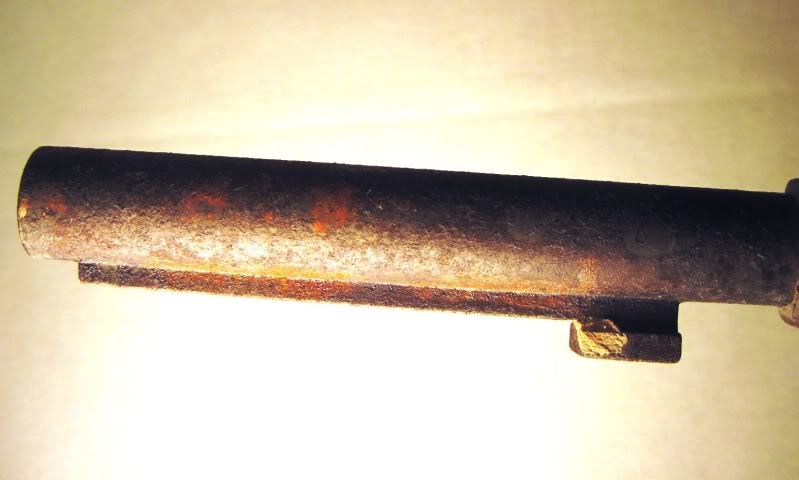
- I think someone "privatised" it when new, as there are no unit markings on it at all, so it never got to a regiment, let alone a soldier. And also none of the dings that appear even when a rifle is just shunted around an arsenal. Woodworm and rot. The privateer must have stored it in his barn or roof for the next century, lying on the side that looks so impressively archaeological. Fortunately he plugged the bore before hiding and forgetting it.
"The owner of the rifle accepted my offer and I’ll pick it up Monday."
Great news!
"I would like to get the stains out of the stock and put some oil on it. What would get them out and what oil would approximate the original that Remington would have used?"
Whoa! Not so fast! That is cosmetics, we are going to checkout the barrel first.
"The action will probably need to be completely taken apart and all of the rust killed."
Yep, you can be sure of that.
" I was thinking of using Evapo-rust..."
Don't know that stuff. What is the chemical basis?
"... or making my own electrolytic rust killer with a DC power supply and baking soda. Any body used either of these? "
Yes, in combination with an ultrasonic cleaner that will free up the backsight without brute force being required.
"Either way the metal will end up in the white and very prone to rust. I’ll need something that works good to stop any additional rust."
True, but no problem if you follow what Grandpa says, without cutting corners!
"Would it be ok to refinish as long as I stayed true to Remington’s original finishing methods?"
I don't know what those methods were, but I will be posting a list of things you should have for a start. Your cash expenditure will be low. The time will be considerable.
More later (the shopping list). Off to the range now, with one of the world's first purpose-built small-bore .22 trainers - take a look on the 22 forum!
Patrick
-
-
-
FREE MEMBER
NO Posting or PM's Allowed
I’ve been doing some digging and found a site that has spare parts if I need them.
They sell a reproduction cleaning rod that I definitely do need.
Untitled Document
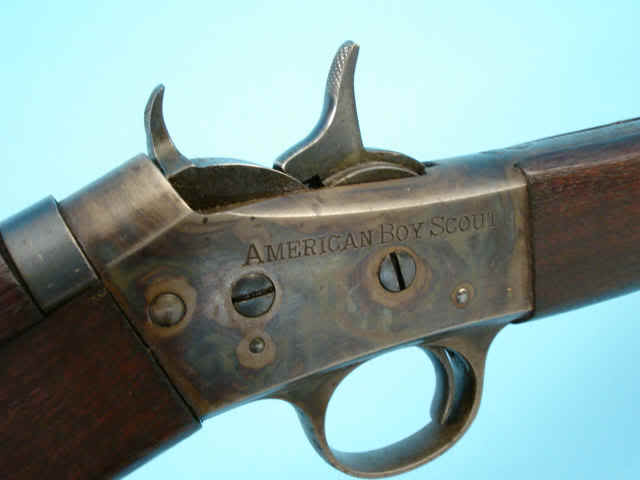
I also found a couple images that would indicate that Remington was Color Case Hardening during this era. I wish I had the time and money to learn CCH. It’s such a beautiful art.
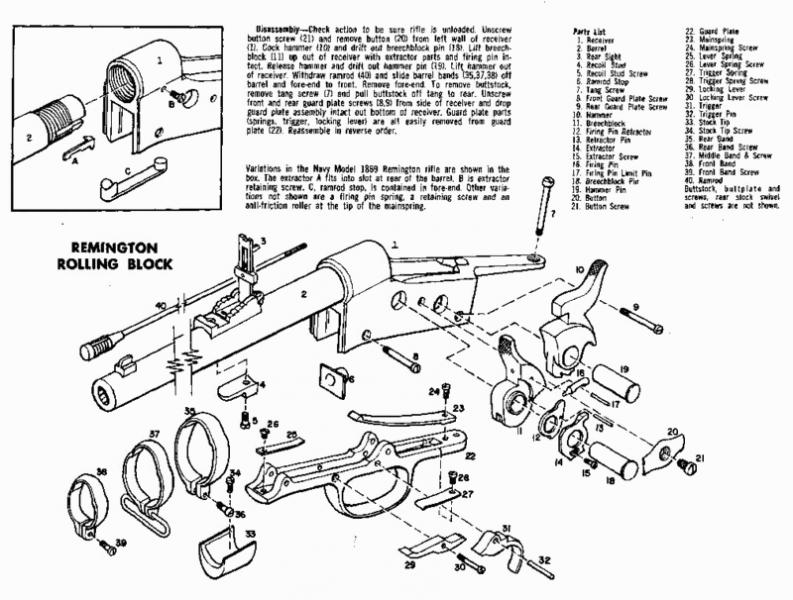
I also found this exploded view that should prove helpful.
I still don’t know how Remington treated the stocks but I’m guessing linseed oil .
.
It’s hard not to get ahead of myself; you would think I was having a baby. Is it Monday yet?
Patrick,
Very impressive what you accomplished with that old and rusty 1871. I would have loved to have seen the fancy Frenchman’s faces when you nearly swept them with it.
Reminds me of my friend that likes to beat up on all of the high dollar over-under crowd at the trap club. He uses an old rusty 870. The last time I stopped by to pick him up for some trap shooting, he just tossed the old beater into the bed of my pickup and it bounced around back there all the way to the club. He only missed one clay that night and out shot everybody.
I have another friend up the street with an FFL. He handles a lot of estate sales. He’s going to keep an eye out for old rifles just like your old 1871. I told him that if Bubba hasn’t totally trashed them that I’d buy the junkers.
Evapo rust is just one of many rust removers that rely on the Chelation process.
I found many references about good old Molasses doing just as good a job though.
Here’s a quote from some Australian chemist that explains it pretty well.
Question
I have a friend who uses molasses to clean rust off old iron items collected from the bush. The rusty iron article is placed in a jar of molasses solution (nine parts water, one part molasses) and left for two weeks. After this time, the article comes out clean and almost shiny. What is happening here?
Answer
“Molasses contains chelating agents. These are made of molecules that are shaped a bit like the claws of a crab--the word chelating comes directly from the Latin word chele, meaning claw. They can envelop metal atoms on the surface of an object, trapping them and removing them. Molasses owes its properties to cyclic hydroxamic acids which are powerful chelators of iron.
More of these compounds are found if the molasses is derived from sugar beet rather than cane sugar. The plants from which molasses is made presumably use these chelating agents to help them extract minerals from the soil. Interestingly, there are aerobic microorganisms that use similar cyclic hydroxamic acids to scavenge iron. So plants and microbes appear to use the same chelation strategy to obtain their daily ration of iron.
The same process is at work when you clean old coins with vegemite or cola. The power of chelating agents also explains why the insides of tomato tins need to be lacquered. The citric acid in the tomatoes would dissolve the metal of the container if the lacquer were not present. Household cleaning agents, especially detergents and shampoos, also rely on chelation. These soften water to make it more effective during the cleaning process.
Chelation has its uses in medicine, too. EDTA or ethylenediamine tetraacetic acid is used as a chelating agent to control levels of calcium in the body and can reduce the effects of mercury or lead poisoning.”
Ben Selinger, Department of Chemistry, Australian National University. Ben Selinger is the author of Chemistry in the Marketplace and Why the Watermelon will not Ripen in your Armpit (Allen & Unwin)
That’s all fun and interesting but I can cobble together an electrolytic rust remover for next to nothing and probably achieve similar results without attracting a house full of flys.

Originally Posted by
Patrick Chadwick

I don't know what those methods were, but I will be posting a list of things you should have for a start. Your cash expenditure will be low. The time will be considerable.
Looking forward to it!
By the way, one of my friends calls me “Hand File”. I’ll spend all day hand shaping a part rather than pay the parts man a nickel.
I’m all about “Your cash expenditure will be low. The time will be considerable”.
Is it Monday yet?
-
-
-
FREE MEMBER
NO Posting or PM's Allowed
Geez Patrick,
I’m a gun addict in desperate need of my next gun fix… And you toy with me.
I’m just glad there is a pond that separates us. Otherwise in my current uncontrolled needy state of mind, I would be forced to strip your gun cabinet bare. The last glimpse of your beloved treasures would be tightly wrapped in my greedy arms as I gleefully romped off into the woods screaming
“MINE, ALL MINE, HA, HA, Ha, ha, ha, ha, ha….”

Actually I’m jealous, if I were in your time zone, I would have it by now.
As we say in church “God willing and the creeks don’t rise” I should have some new pictures up tonight.
Joel.
-
FREE MEMBER
NO Posting or PM's Allowed
-
Advisory Panel
Congratulations!
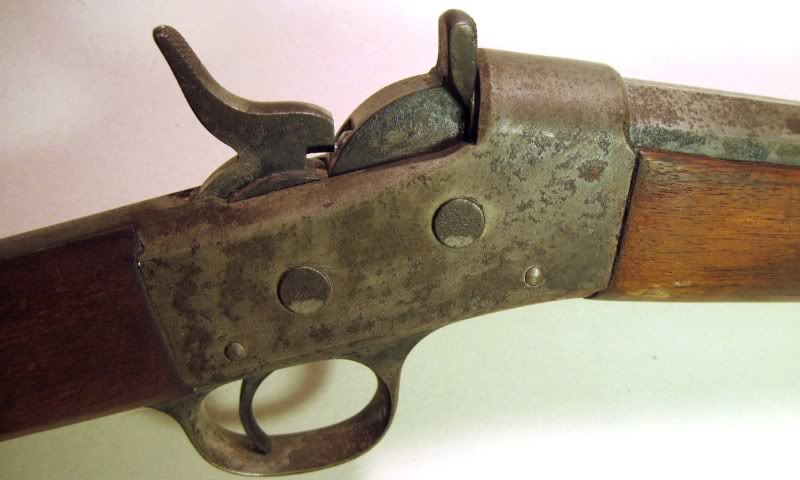
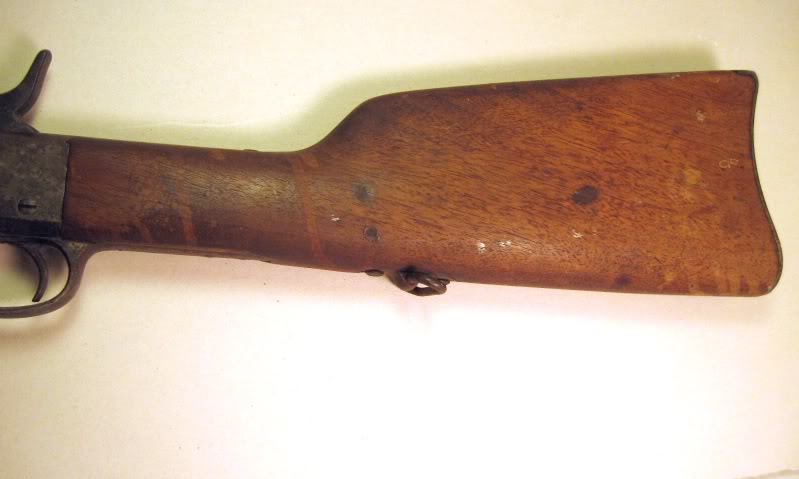
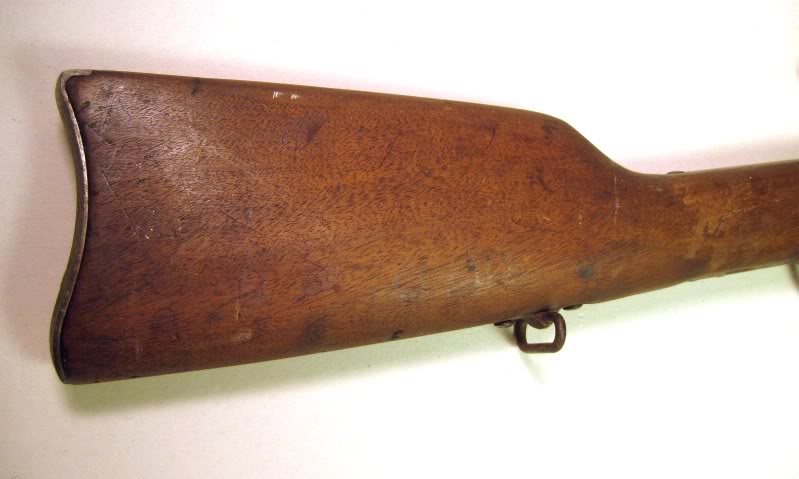
Be reassured, that rifle was well worth the 50 or even 150. It will obviously shoot, but how well remains to be seen. It looks like a really good prospect for refurbishment, as there are no serious problems with the woodwork.
Later on today I will post the first of what is going to be a series on how to deal with this rifle.
But in the meantime, DO NOT DO ANYTHING TO THAT BARREL JUST YET.
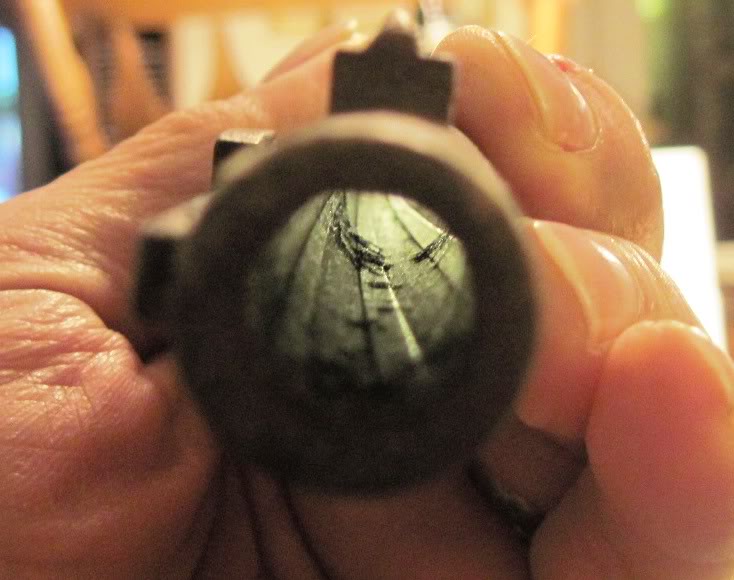
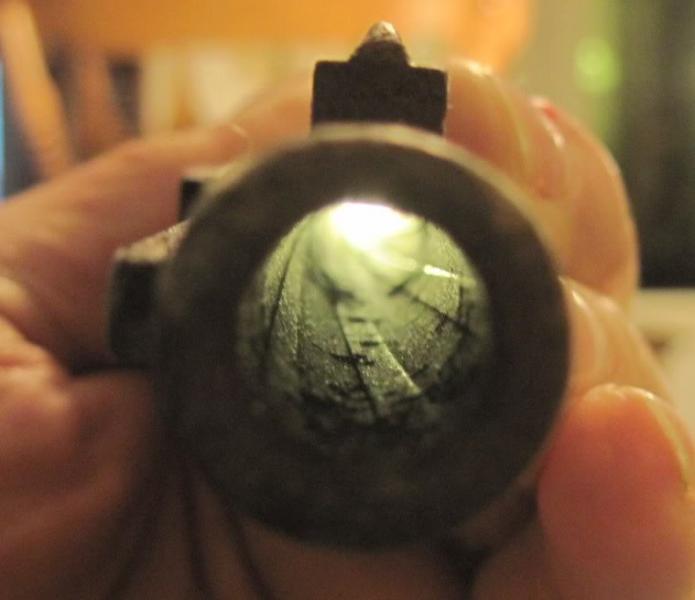
I have seen barrels where someone has obviously used a wire brush and an electric drill to remove rust spots in a barrel. The result was to ruin the rifling as badly as if the barrel had been ringed. The rifling looks quite strong. and by the time we are finished, you may well be positively surprised.
Patrick
Last edited by Patrick Chadwick; 11-16-2010 at 01:53 AM.
-
-
Advisory Panel
Refurbishing an Argentine RB - Part 1
Before we get started, I would like to be clear about the direction this is going to take.
The methods I will describe are not those that would be used for a museum restoration. I have talked with museum restorers (Kunsthistorisches Museum Vienna, Veste Coburg, Royal Armouries Museum, Leeds), and their exquisite work is not intended to be handled by grubby fingers on a shooting range at temperatures ranging from the plus thirties down to the minus tens. The "don't touch it, it's antique" attitude is contra-productive if you want to achieve a shooting rifle as the final result.
We (if you are going along with this) are going to refurbish rather than restore - to get the rifle performing as well as it can (for its age and condition). To do what a conscientious user would have done over the last 120 years to keep the rifle in working order, not as a showcase item. This does not cost much money, but it does take time. Think of it as a century of maintenance packed into one operation, and it will be clear that this is not going to be a 5-minute job.
Every now and again I also discover a better way to do something. Someone may well chip in with alternative suggestions and better methods. So much the better, and the old saying that the man who never made a mistake never made anything also applies here.
And the first major mistake I made, early on, was to over-restore a rifle. Encourage by the brilliant examples of "as new" restoration I had seen on the forums, I gave one of my early projects the full treatment - metal stripped, polished and reblued. Wood stripped, dings steamed out - all the tricks. It looked almost like new.
And then the doubts started. I gradually became unhappy - somehow, it did not look quite right. It took me a long time to work out why. In the end, I recognized that, visually, it was an old artefact pretending to be new. I had not restored it, I had falsified it.
A word of caution: once your friends and acquaintances know that you are working on an old rifle, you will receive advice on how to do it from well-meaning people who, quite frankly, do not know what they are talking about. Please check here before trying out anything someone tells you.
And now to the first list. I find it very difficult to make an accurate list, as I have accumulated the tools and materials over years. I have to stop and reflect that you are, presumably, starting pretty much from zero. So the list will not be perfect.
These are some things that are vital to make a start on the metalwork:
A set of the best quality hollow-ground screwdrivers (or hex socket handle plus screwdriver bits) that you can find. Just one ruined system screw in an obsolete thread will make you regret using a cheap, badly fitting screwdriver. I have done that, and it is an expensive way to learn.
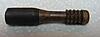
A brass (NOT steel) cleaning rod that is long enough to pass right through the barrel from end to end. I have never found one long enough, and made my own from a length of 8mm brass rod drilled and tapped to take a knob at one end and a wire brush or cleaning jag at the other.
Or you can put together shorter sections, as used for muzzle-loader rifles.

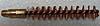
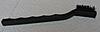
Several bronze (much better then brass) bore cleaning brushes for cal.45.
They look like this:
But by the time you are finished, a couple may look like this:
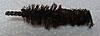
Which is why you need more than one!
A jag to take cleaning patches for cal.45.
A fistful of patches. Square or round - that does not matter.
A spray can of penetrating oil.
Hard-bristle (nylon or brass) brush in "toothbrush" form - or even old toothbrushes - good for cleaning the action.
Plastic boxes to hold the rifle components.
To this end, I strongly suggest that, if you have not already done so, you join a club where there are experienced black-powder or muzzle-loader shooters, as they have know-how that you will need, and can help you get the materials.
As soon as you can, spray penetrating oil down the barrel, if you have not already done so.
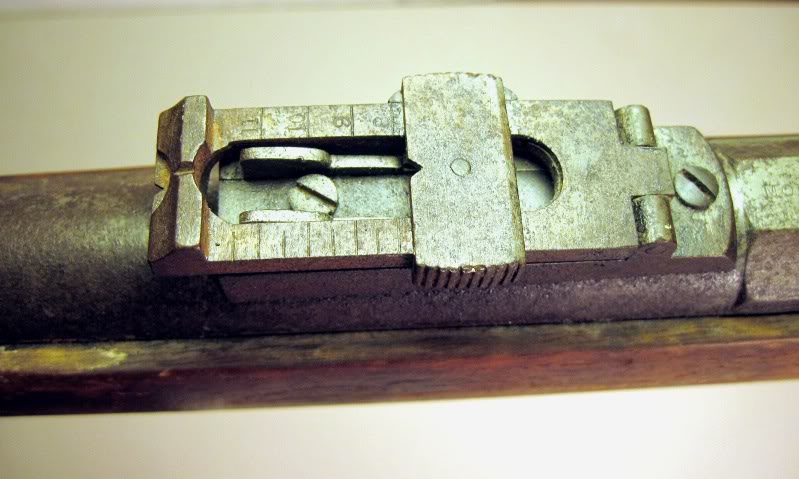
To do a good cleaning job, you will have to disassemble the rifle. The exploded diagram that you posted is going to be very helpful.
Another caution: if you make a good job of this rifle, you are likely to become addicted (like me) to turning hopeless-looking wall-hangers into properly functioning rifles again. It is so much more satisfying than just handing over wads of cash for an expensive showpiece.
So order the following two books:
"Military Rifle Disassembly and Reassembly"
by Stuart C. Mowbray & Joe Puleo
ISBN 1-931464-32-4
and
"Remington Rolling Block Military Rifles of the World"
by George Layman
ISBN 1-931464-45-6
And for this and the sections that are to follow - please post progress reports with pics!
End of Part 1
Last edited by Patrick Chadwick; 12-27-2021 at 04:46 PM.
-
The Following 2 Members Say Thank You to Patrick Chadwick For This Useful Post:
-
FREE MEMBER
NO Posting or PM's Allowed
Patrick,
Your advice is greatly appreciated.
Thanks and keep it coming.
My job is close to a large sporting goods store, so today during lunch I’ll see what I can put together for a cleaning kit. If I’m not able to find a long enough brass cleaning rod, I’ll make my own. Grainger (our local industrial supplier) has .375” X 3’ brass rod for $15. I could thread and tap the ends to fit a handle and cleaning attachments. That would take some time so tonight I’ll probably cobble something together that will be long enough by combining together a couple aluminum shotgun cleaning rods.
My hollow ground screwdriver set is fairly limited in sizes but it will have to do for now.
My budget is very limited so I may have to be creative at times. I’m ok with that.
My goal for tonight will be to remove the barreled action from the stock and scrubbing the bore. The only thing that might hold me up is stubborn barrel band screws.
I’ll keep you posted,
Joel.
-
Advisory Panel
Refurbishing an Argentine RB - Part 2
Don#t start on the bore just yet. It will need a very thorough job, and there is no point in sweepinng all the muck into the action. It is better to proceed as follows:
---------- Post added at 09:23 PM ---------- Previous post was at 09:21 PM ----------
DisassemblyNumbers refer to the diagram that you posted.
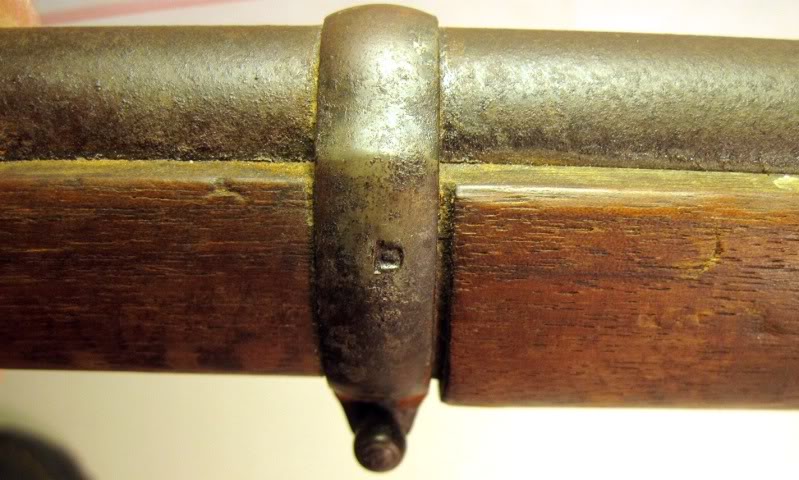
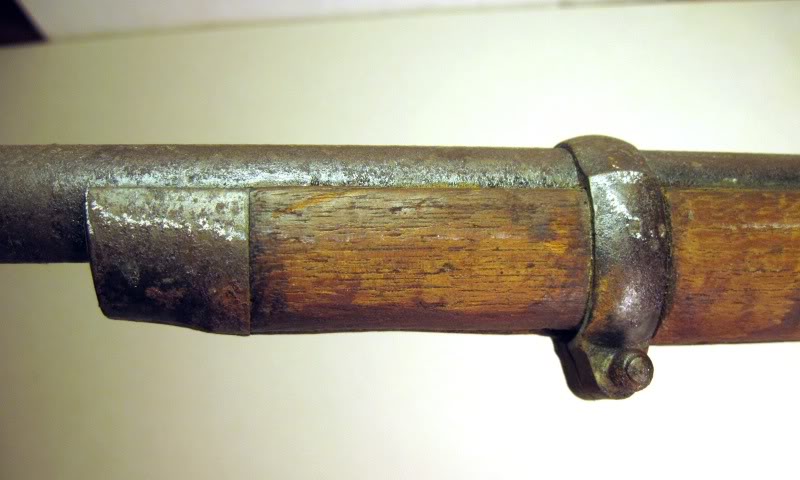
Note which way the barrel bands are facing before removing them. I am not sure which is the "right" way around, but I suspect that the U should face towards the muzzle - so that the U is upright if the rifle is standing in a rack. But whatever the theory, after so many years the bands will have "set" so that they fit best one way round, and you should preserve that orientation.
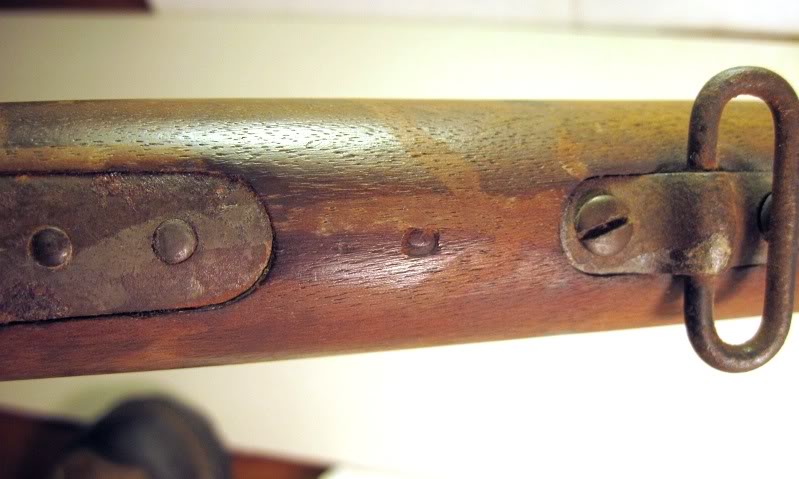
Loosen the screws (36, 39) and press in the band spring to release the barrel bands. Slide them carefully off the rifle, as any rough or rusty edges on the bands may scratch the woodwork!
Place the bands in a compartment in the plastic box that you have acquired for holding the components. If you have not got such a box, get it now - before things start getting mixed up.
The fore-end wood is now loose, but should not fall off. The back end is shaped to form a short tenon that fits into the front of the action body, and there is a recoil boss (4) on the underside of the barrel. So pull down the wood slightly and pull it forwards to remove it from the system.
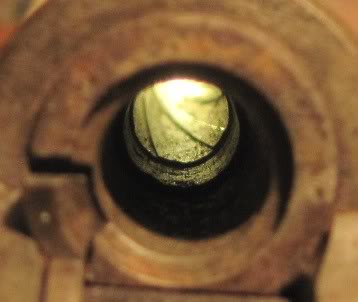
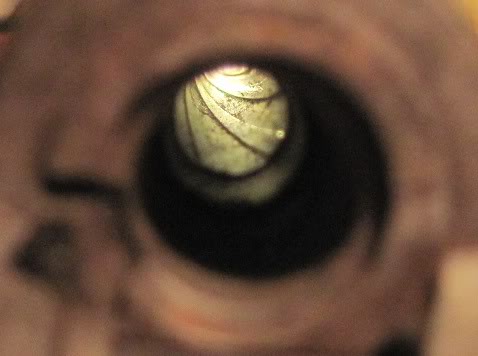
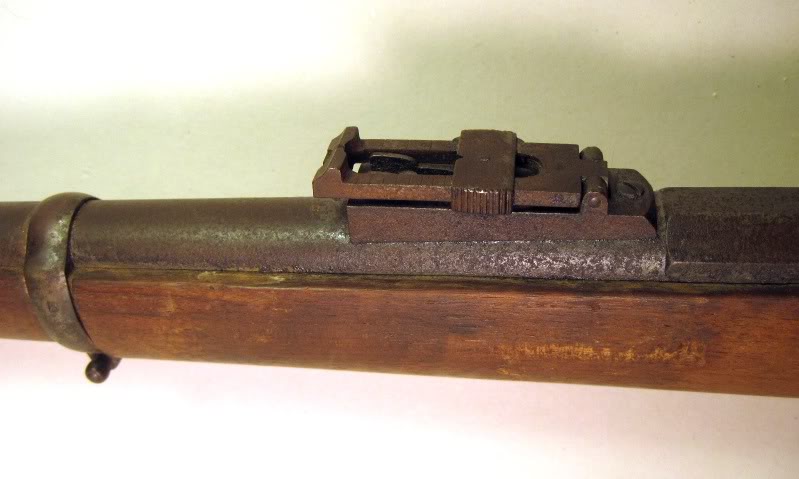
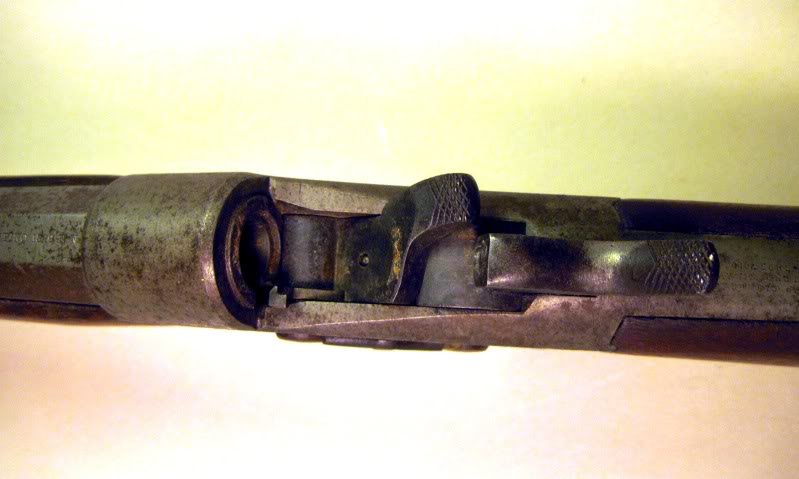
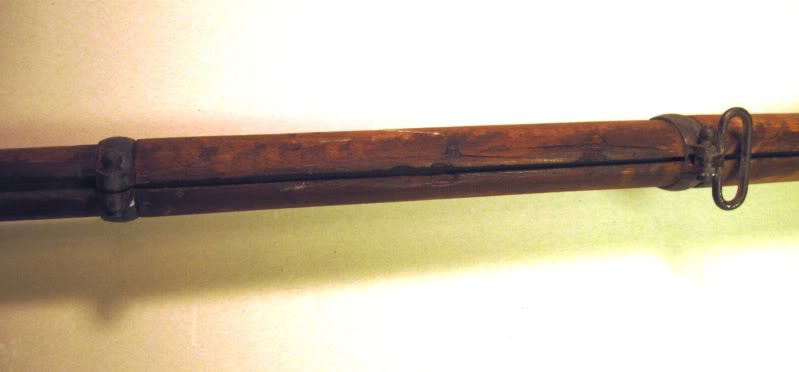
This is the point at which you may receive a slight shock. Many old service rifles are heavily rusted "below the waterline". Or full of nameless crud. Please post a picture of the underside of your barrel.
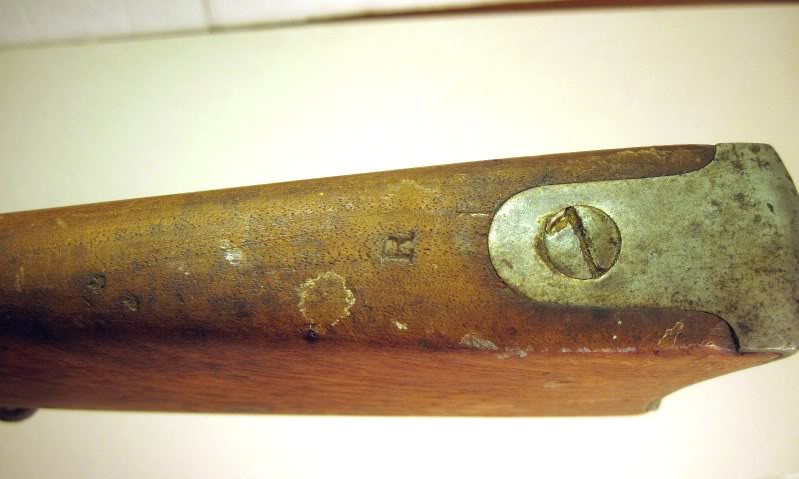
Place the wood in a safe location (not leaning against the table!) and proceed to remove the buttstock. This is where you start to use the good-quality hollow ground screwdrivers that you have either acquired or are going to just as soon as you can!
The tang screw (7) holding the butt may be difficult to remove. Clamp the rifle in a soft wrapping (folded cloth) in a bench vice, with the tang horizontal and make sure that the screwdriver is applied vertically. If this all seems a wee bit pedantic, there is nevertheless a good reason. If the screwdriver slips when you apply the torque to remove the screw, then you will achieve one or more of the following: a) ruin the screw slot b) gouge the butt c) gouge yourself, if you are holding the butt when the screwdriver slips. We want to avoid any of that happening, so please bear with me if I seem picky about such things. Use these techniques for all screws that show resistance.
If the tang screw (7) is stuck fast, do not use brute force. This increases the likelihood of an accident. Turn the rifle upside down, squirt a bit of penetrating oil onto the trigger guard plate where the screw is embedded, and go for a walk or make a cup of coffee. Then replace the rifle in the clamp or vice and remove the screw. If it still resists, try the old dodge of tightening the screw (even if it doesn't appear to move) and then loosening it. This often helps to break a rust bond. If the screw is still resistant, then you can apply the most torque by holding the screwdriver bit in a two-handled tap wrench (but this requires enormous care to avoid a slippage). This really will work - I have removed staked screws in this way - but you have to apply heavy downwards force to hold the bit in the slot, and you will really appreciate having the rifle firmly clamped as described above.
When the tang screw (7) has been removed, place it in a compartment in your plastic components box.
It should now be possible to pull off the butt. As it has been sitting there for over a century, do not expect it to just slide off smoothly. You may have to loosen the grip of the wood on the metal by tapping sharply on the back end of the trigger guard with a plastic hammer, and then pulling, or both at the same time.
By the way, there are two things that you will never need in this kind of work - steel hammers and sandpaper. Steel hammers and sandpaper mark wood and metal. They are taboo.
If the butt is still "welded" to the tang and trigger guard, remove the rear trigger guard plate screw (9) and loosen the front trigger guard screw (8). This will loosen things a bit more, helping you to remove the butt, and is anyway the next step in disassembly.
Once you have removed the butt, put it in a safe place.
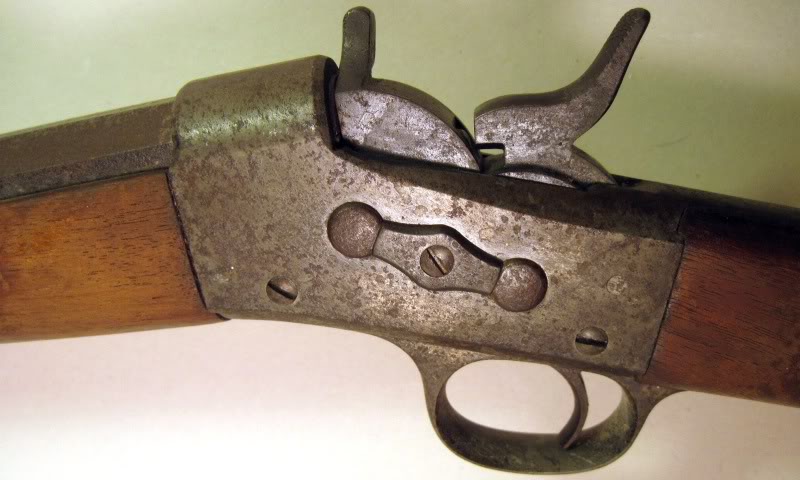
You should now find that you can swing down the trigger guard some way, thus removing any pressure on the hammer from the trigger spring. Now remove the front trigger guard screw (8) completely.
You should now be able to slide out the complete trigger assembly. You mentioned right at the start that the hammer action was very weak. So I expect you to find one or more of the following:
Rusted, broken, or partially detached mainspring.
General rusting of the inside of the action.
Action plugged by muck.
At this point, another picture would be a good idea.
You are now ready to remove the rest of the action components.
CAUTION: the two action pins are NOT quite the same. Maybe they were when new, but after a century they will have different wear patterns. Use a felt pen or stick on a label to mark which is which when you remove them. And to mark the 12 o'clock point on each
Use a felt pen to mark the front end of the elongated button (20). This is another component that is probably no longer be quite symmetrical, regardless of its condition when new. Then remove the screw (21) that holds the button in place. Place the marked button in the component box.
The two pins - the breechblock pin (18) and the hammer pin (19) can be pushed out from the RIGHT sight of the action body. If everything is rusted or the pins have been peened over a bit, then use a BRASS drift (just a piece of rod) and the plastic hammer to drive them out. To do this, lay the action body on its LEFT side on wood blocks so that the pins can be driven out without flying all over the workshop. Remove one pin, mark it for identification, place it in the components box, remove the second, mark that and place it in the box.
The hammer (10) and block (11) sub-assemblies should now fall out, but may have to be eased out, because of whatever was holding the hammer back.
At this point it should become clear why the hammer was so sluggish. Muck? Rust? Metal fragments?
Now is the time to make pictures, post them here, and stop for today.
In Part 3 we will get to grips with the barrel.
End of Part 2
Last edited by Patrick Chadwick; 11-24-2010 at 05:49 PM.
Reason: Title line added
-


 Register To Reply