-
Legacy Member

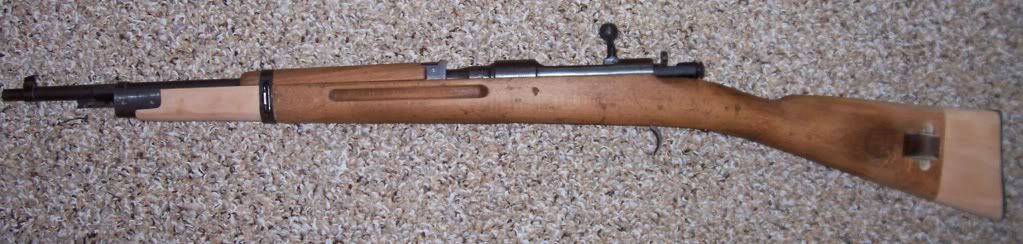
My M38 reminds me of Charlie Browns Christmas tree
Now that I know what it is ……..and what it needs…….
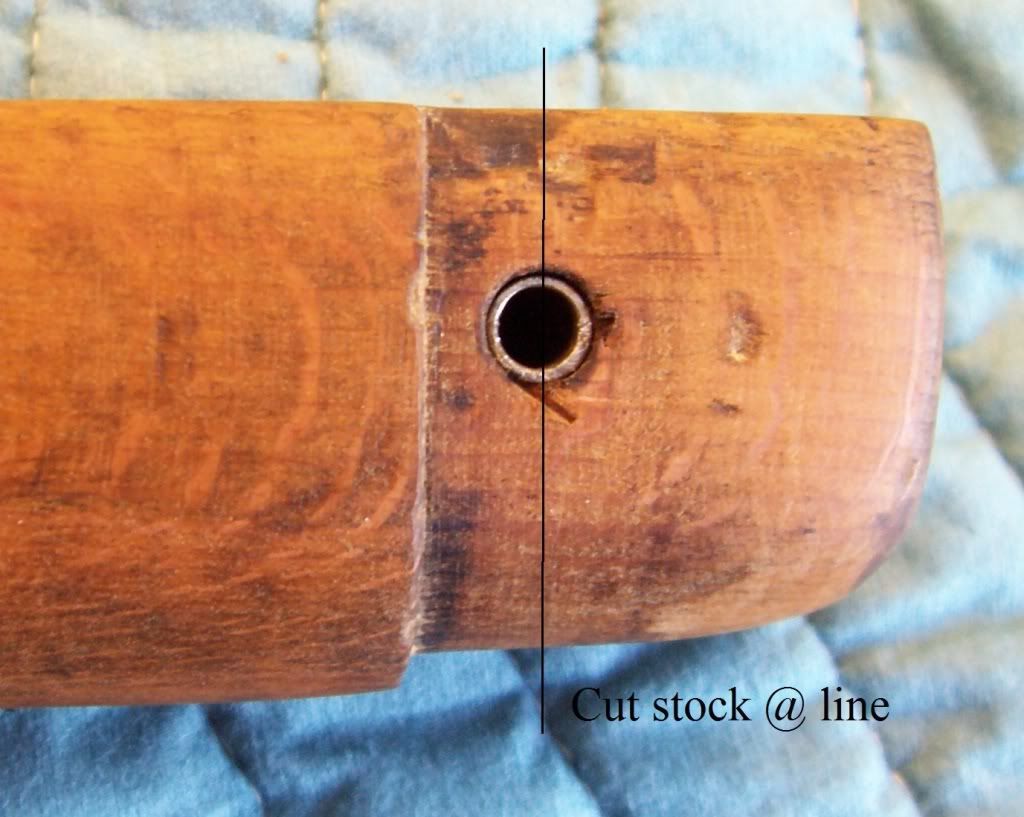
“ I believe you have a type 38 short rifle that has a cut stock. Cavalry carbines have a different front sight and do not have finger grooves in the stock.
So you need a new stock, a new upper hand guard, a new middle band and a bayonet end band. “
Originally Posted by Aragorn243
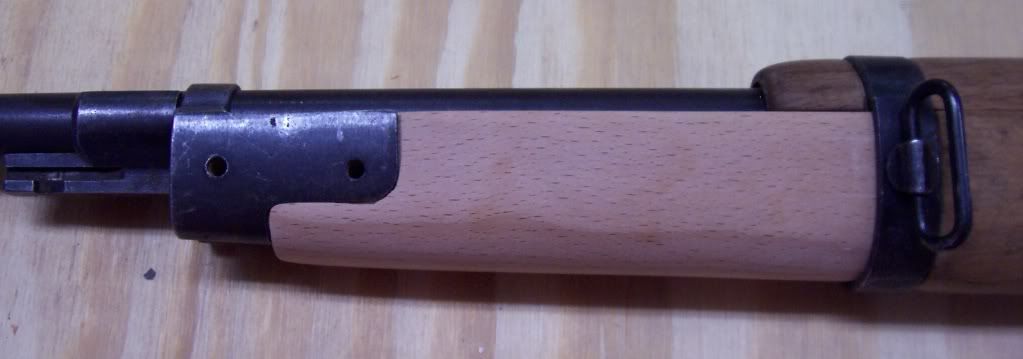
It’s kind of like Charlie Brown’s Christmas tree…all it needs is love, and some parts, which I bought from Numrich for not too much money. The front and middle bands “look” like they are the same age as the rest of the hardware and the upper hand guard is a good color match with the stock, which I did not replace and will try to repair. I ordered some pieces of beech from a supplier in Calif. and the plan is to cut back the front of the stock so that the seam between the old and new wood will be underneath the middle band. This should give my skills as a woodworker a good workout. After shaping the fore stock and fitting the front band to the new wood I will refinish the stock using BLO and attempt to match the coloring of the old and new wood. I haven’t started yet so if anyone would like to add their two cents I am open to suggestions and welcome your comments.
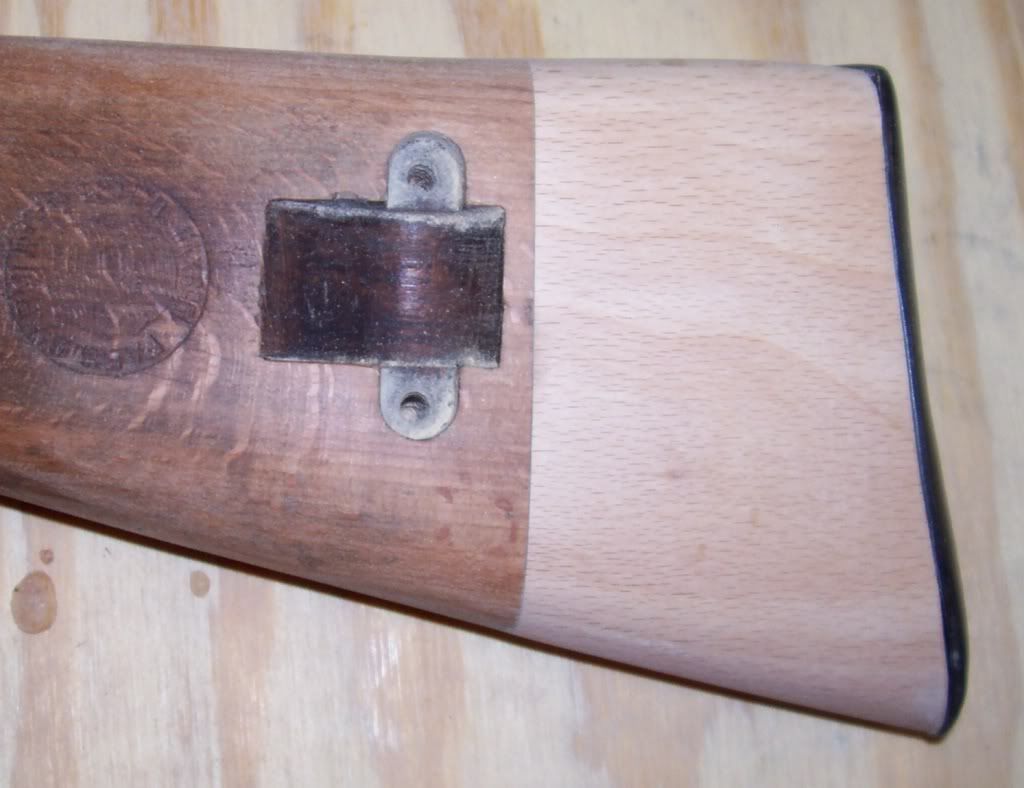
These are the before pictures.


Information
 |
Warning: This is a relatively older thread
This discussion is older than 360 days. Some information contained in it may no longer be current. |
|
Last edited by Bionicback321; 06-25-2012 at 09:25 PM.
-
The Following 3 Members Say Thank You to Bionicback321 For This Useful Post:
-
06-25-2012 08:55 PM
# ADS
Friends and Sponsors

-
Contributing Member


Sounds like a good plan. Keep us updated with photos as you progress.
-
-
-
FREE MEMBER
NO Posting or PM's Allowed

I look forward to this! Good luck and keep us posted!!!
What type of glue system are you planning on using for the splice? Any mechanical wood joint for strength???
Generally, I insure that the wood is not saturated in oils and then use a 2hr epoxy (2 part) system.
-
Legacy Member
The stock seem fairly dry...no oil to speak of…and thanks for the heads up on the epoxy. The big problem right now is the company I ordered the beech from sent birch. I called them when it arrived and they said "we'll get that beech right out to you". Another week goes by, no wood, so I finally talk to the owner and of course he apologizes, says "we'll get that beech right out to you" ( where have I heard that before?) but the real kicker is that when he looked at the invoice he commented "I can't believe we charged you that much for shipping". The wood they sent, which cost me $15, had splits and checks throughout (I ordered two blocks of beech that were 3x3x8) , they charged me $17 for shipping and they sent the wrong species of wood  . I don't know how these people stay in business. Hopefully the beech will show up this week and I can get started.
-
Thank You to Bionicback321 For This Useful Post:
-
Legacy Member
Bionic, I have made and spliced many forends onto cut down military stocks (mostly 1903 Springfields). Here are the steps I use. Sorry if it's alittle long.
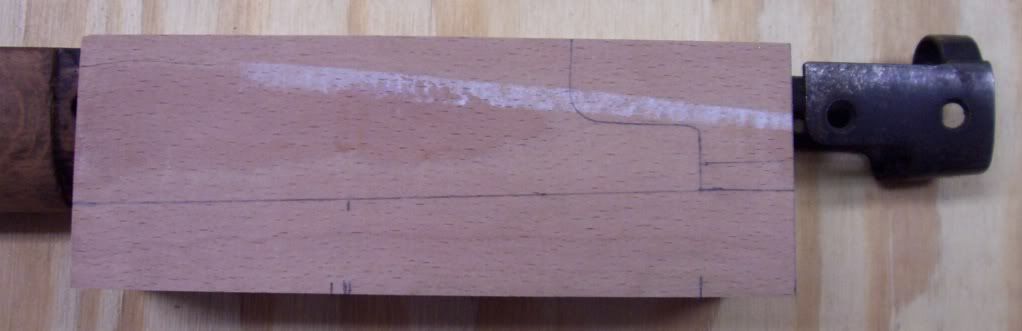
1) Rough cut fore end piece, leave 1/4 all the way around.
2) Layout barrel channel onto the block of wood. Use an ulltra fine black sharpie for layout.
3) Cut the Barrel channel. Cut it a shade deeper than you need. You can sand any excess off later. I use a milling machine but careful chiseling and scraping will work. Old lipstick can be rubbed on the barrel which will show high spots during trial fitting. work slowly. The fit upto the barrel will show on the carcano because the handguard doesn't cover the forestock.
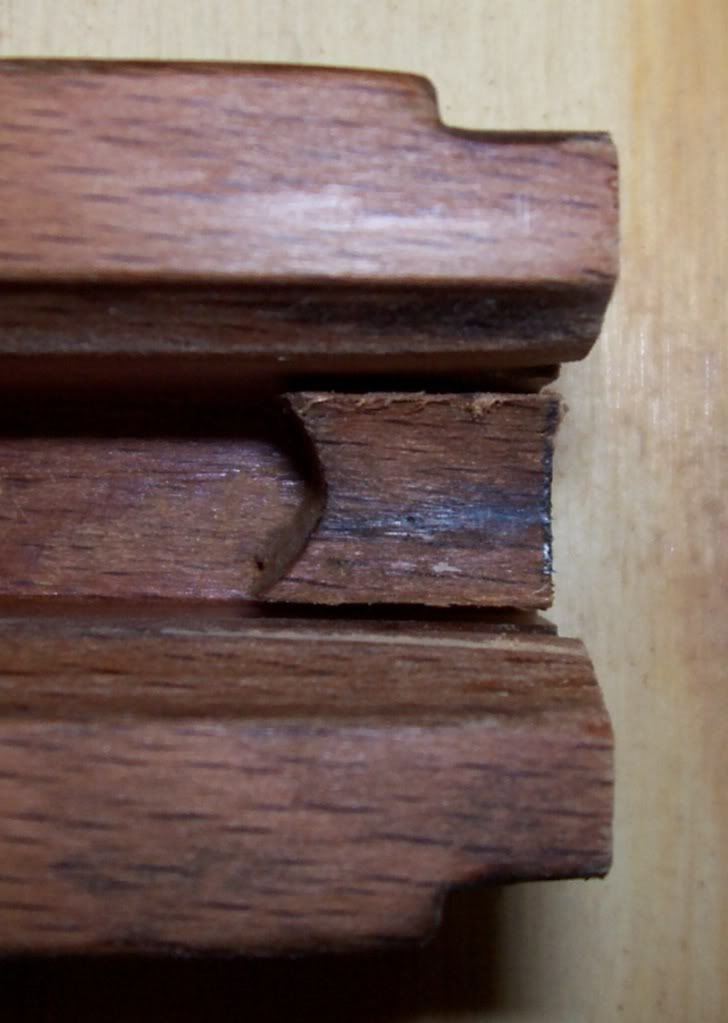
4) Square up the joint area on both the stock and forestock piece. This should be right in the middle of the rear band. (I like the ultra thin japanese type hand wood sawsfor this.). Then fit them up tight. Layout and center punch both pieces for 1/4 inch steel rod. Make the rod about 2-3 inches long and drill the wood pieces for a clearance fit. Remember you have a band screw going crosswise all the way through the stock at this joint so make sure you position the rod so that the band screw will clear it.
5) Position the forepiece on the stock and use the sharpie to mark the forepiece around joint. This will be the shape of the band. Now you can rough shape the contourso n the sides and bottom.
6) Put some parting agent (Simonize wax or fiberglass release agent) on the barrel in the area where the joint will be glued so the stock doesn't stick to the barrel.
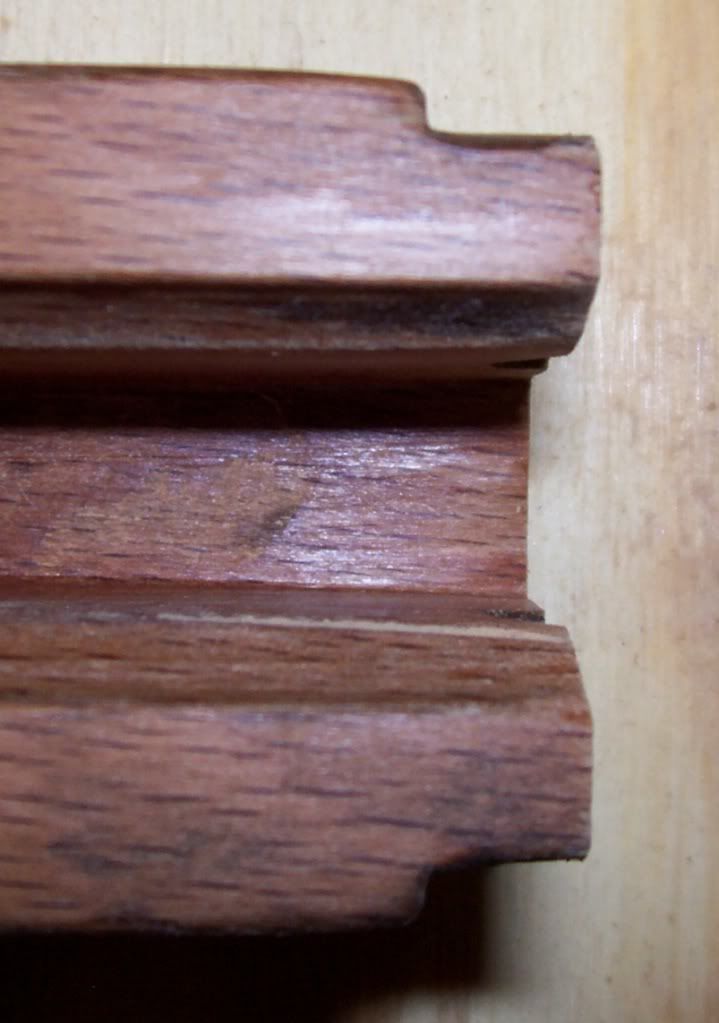
7) Mix up some epoxy, fill the holes. slide the pieces together and clamp the forepiece to the barrel. Or You can use masking or duct tape to hold it in place. I like the epoxy that is more like a gel as it won't drip out.
8) After cure take it all apart. now you can trim the top surface in a flat plane to match the back top edge of the barrel channel.
9) Fit the rear band while shaping the contours a little closer. I like using a horseshoe rasp which has both rasp and double cut surfaces. Rasp for the roughing , double cut for smothing when you get close to finishing.
10) Fit the nosecap. This will be the hardest part. Draw the side shape onto the wood using the nosecap as a template. Use small carving type chisels. Lots of trial fitting. Drive the cap on a little at a time as you go with a mallet. Be careful because you can split the wood.
11) Finish the contouring and fairing, sand and finish.
Good Luck! Salt Flat
-
Thank You to Salt Flat For This Useful Post:
-
Legacy Member
And I thought this was going to be difficult. The steps have been copied, printed, and placed in my Carcano notebook; this is the kind of info I was looking for. Thank you!
-
-
Legacy Member
-
Thank You to Bionicback321 For This Useful Post:
-
It may not need much aging. The oil will darken it anyway. But you might rub on it with a little after getting your hands grimy with old grease. Just get most of it off your hands first! A teeny amount goes a long way.
-
-
Contributing Member
I'd probably try to locate a stain color to stain the new wood to match the old before putting any new oil on it. The dirty grease is a good suggestion after you get it close. That will help hide the differences in color.
-
-
Legacy Member
Your wood work came out very nice. Inletting that nose piece is quite a challenge. If you refinish the whole stock I think it will darken up fairly even. I would use Bolled linseed oil. I tried some dark Walnut stain on my Carcano and the beech sucked up the stain too much. It came out dark and blotchy and i had to sand it again. (Normally I refuse to sand a stock but it was a Sarco replacement that had no finish to begin with). Use some scrap pieces of the beech and try all your options first. Post some pictures - this is an interesting project. By the way I was in my local pawnshop today and they had an average looking 7mm Rem. Rolling Block priced at 1500! The point is I think as the gun prices and competition for collector guns increases these cut down military rifles look more and more like fun for "real" people. Salt Flat
-
Thank You to Salt Flat For This Useful Post:


 PM
PM


 what would be the best way to " age " the new wood before I refinish the whole stock?


