-
FREE MEMBER
NO Posting or PM's Allowed

No 1MK 111* forend draws-too far gone to repair?
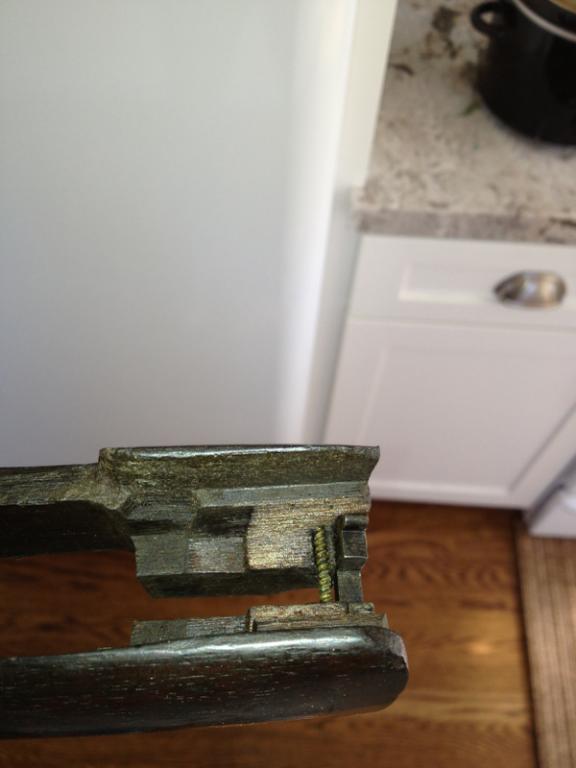
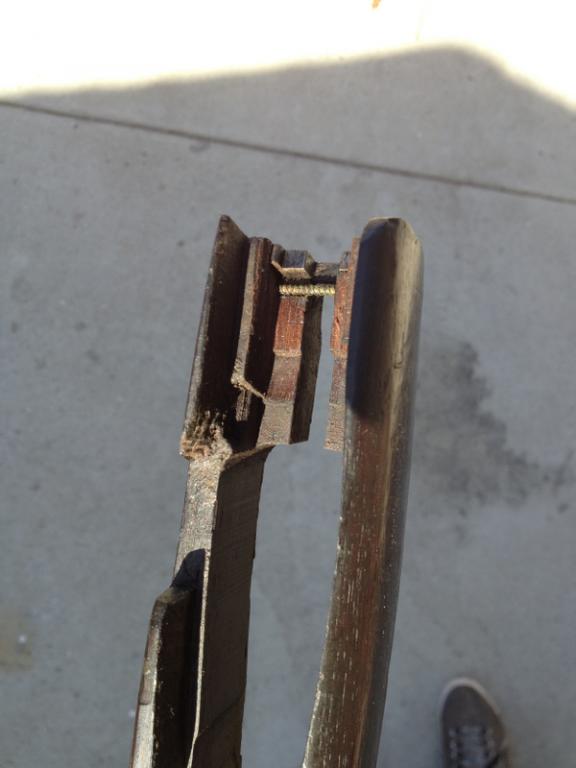
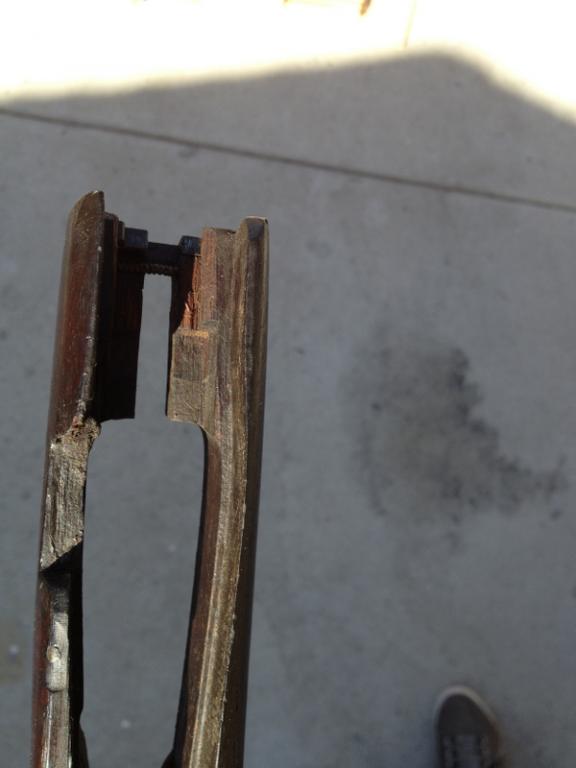
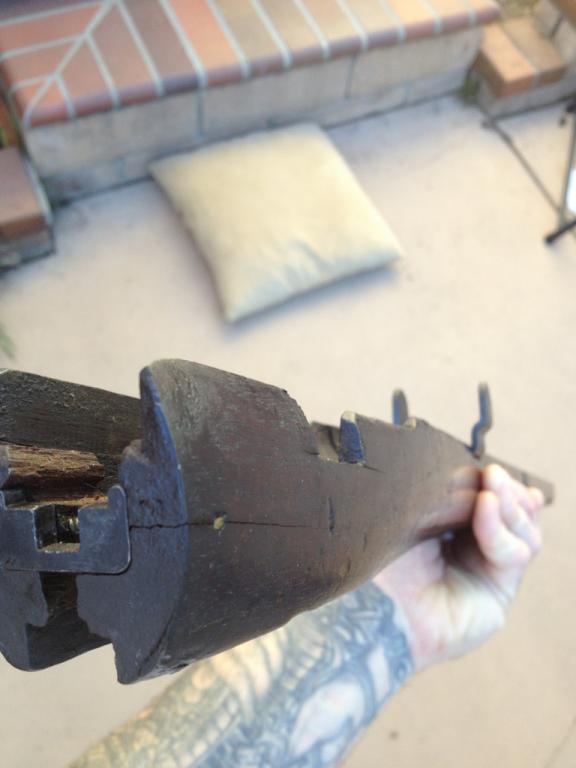
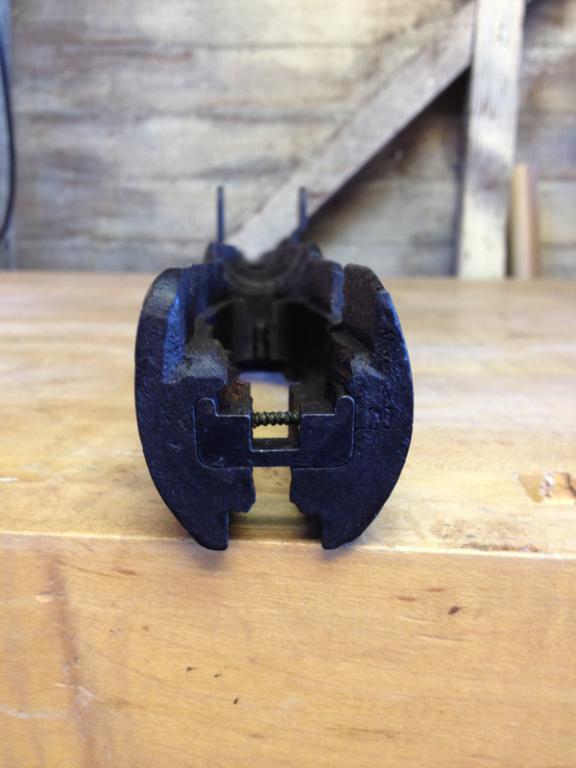
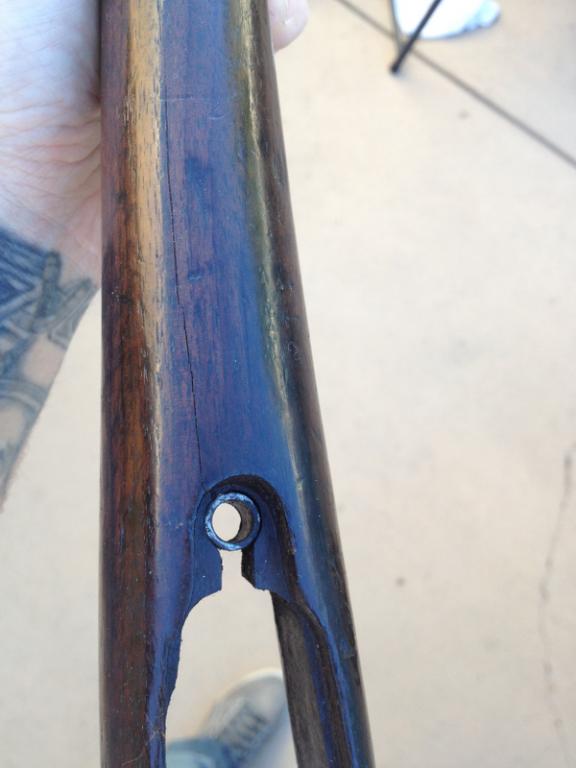
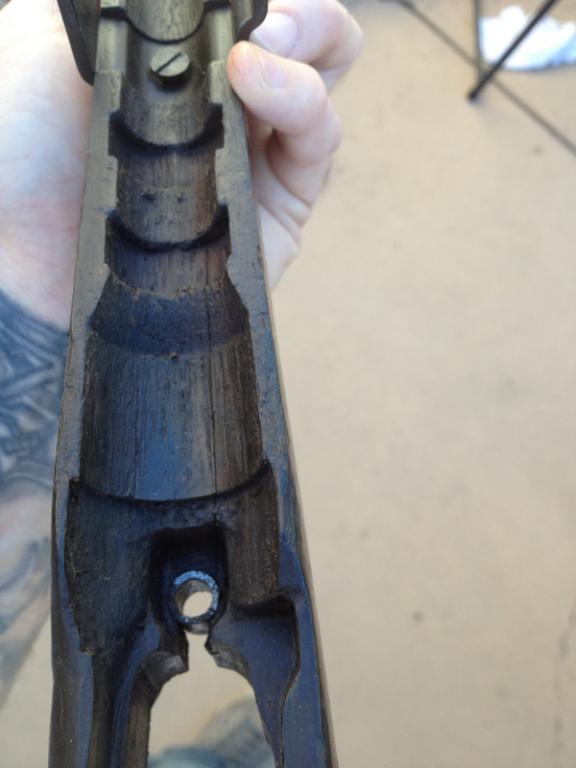
After posting pics on a different forum with little response as to whether or not this forend could be repaired and how to go about it someone directed me to the articles here. The tutorial on repairing draws was extremely informative but still leaves me wondering whether this one can be repaired as the draws are completely gone, the thread wire exposed with a crack at bolt side at wire, the meat below the plate the stock bolt goes into gone as well, and a 5"crack in front of trigger guard that goes all the way through. I am a cabinetmaker -woodworker by trade so I believe as a nonarmorer I am capable of the task. The tutorial pictured a set of draws that still had a lot of meat left and reference lines to go by for pairing away a square pocket to glue in a new piece of wood, while mine presents a bit more of a challenge. As for the crack I was thinking of drilling for a few dowels to help inject some glue throughout the crack. In my trade nothing is stronger than a clean joint and glue, but is glue strong enough for this? As for the missing connecting piece that used to be under stock bolt plate should I try adding a new piece to bridgethe rear of forend together? Any thoughts for the crack on action side at thread wire? This is a 1918 made at Enfield and reissued to Irish Freestate FF. the stock is numbered to the rifle and I would like to be able to shoot it with this stock. Thanks for any input
Cheers
Information
 |
Warning: This is a relatively older thread
This discussion is older than 360 days. Some information contained in it may no longer be current. |
|
-
01-01-2013 03:21 PM
# ADS
Friends and Sponsors

-
FREE MEMBER
NO Posting or PM's Allowed
-
-
It's no good posting a picture elsewhere and expecting us here to comment on it is there? For heavens sake, just mill the crap wood out, make a patch and glue it in with modern aero type wood glue. If you're a chippy, then only YOU will know the answer when you've seen the patch after it's been dressed off a bit
The pic in the tutorial DIDN'T have a lot of meat left, it'd been machined back so as to insert a complete new block of hard wood. If you want to beef the completed insert up a bit, just peg it with an oak dowel too.
Don't take offence. My sharp and to the point answers sometimes have that effect on people
Pics added after this thread was posted..........
Just machine back to good sound wood and follow the patching thread. It is well capable of being saved
-
Thank You to Peter Laidler For This Useful Post:
-
Legacy Member

Thanks guys! I have a 1920 "Smiling Tiger" with forend in similar state which is going to be my next project. I was also wondering if the forend was too far gone but I now feel it can be done.
Ridolpho
-
-
I hope you do attempt a re-build. Complete with blow-by-blow photos. Including mistakes! It's not only educational but inspiring. You might even set things in motion towards the repair of these sad bits:
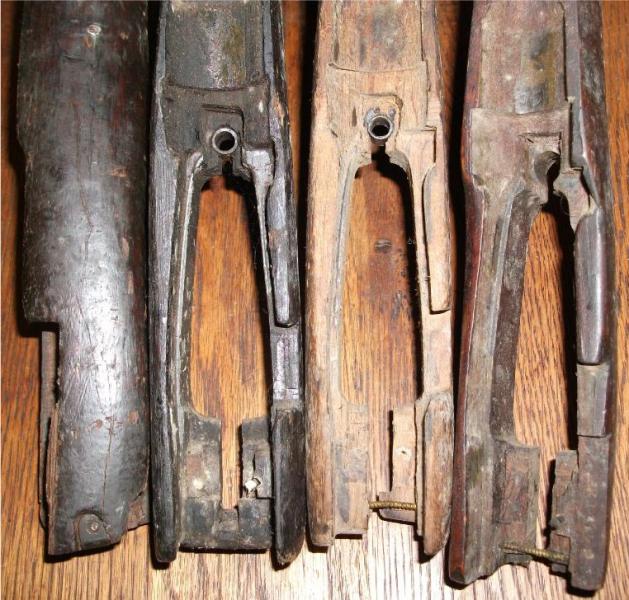
Goodness knows I can use all the help I can get when it comes to woodwork.
-
-
FREE MEMBER
NO Posting or PM's Allowed
It's no good posting a picture elsewhere and expecting us here to comment on it is there? For heavens sake, just mill the crap wood out, make a patch and glue it in with modern aero type wood glue. If you're a chippy, then only YOU will know the answer when you've seen the patch after it's been dressed off a bit
The pic in the tutorial DIDN'T have a lot of meat left, it'd been machined back so as to insert a complete new block of hard wood. If you want to beef the completed insert up a bit, just peg it with an oak dowel too.
Don't take offence. My sharp and to the point answers sometimes have that effect on people
Pics added after this thread was posted..........
Just machine back to good sound wood and follow the patching thread. It is well capable of being saved
Thank you, that is what I needed to hear. No offence taken and I apologize for adding pics after post, as I stated they couldn't be posted with the computer I originated the thread with. I will post pics of rebuild once I commence on the project, and yes,even the mistakes. Is this aero type wood glue the same as the acraglass resin I have heard of? Thank you
Cheers
Last edited by Father Ted; 01-01-2013 at 04:19 PM.
-
NO...... Wood glue is wood glue. Don't use accra glass or any epoxy. We used to use that foul smelling animal bone stuff but it's not as good as modern aero standard glue. They all lookm easily repairable. I don't know how you'd remove the brass wire but as I understand it, new wire is available. The last one I did for someone as a favour was in a similar dire state. I dragged the brass rod out and replaced it with a No4 Mk2 type nut and bolt. But as it was just a simple 'shooter' and not a concourse wall queen, it didn't matter much. And he's still shooting it. There is also a thread about pegging and plugging the fore-end ahead of the front trigger guard screw without using a big steel screw known as the Ishapore screw. It's not in fact, it's a UK Military invention!
-
The Following 2 Members Say Thank You to Peter Laidler For This Useful Post:
-
Contributing Member

Yeah that screw was a bit like the convicts, you just couldn't get rid of them quick enough.
Funny how some things come back to bite you on the bum.
-
-
FREE MEMBER
NO Posting or PM's Allowed
NO...... I don't know how you'd remove the brass wire but as I understand it, new wire is available. The last one I did for someone as a favour was in a similar dire state. I dragged the brass rod out and replaced it with a No4 Mk2 type nut and bolt. But as it was just a simple 'shooter' and not a concourse wall queen, it didn't matter much. And he's still shooting it.
If anyone knows where I could obtain a replacement brass threadwire I would greatly appreciate it. This one is already a wee bit loose so it may not be too stubborn to remove but I'd like to put another back in rather than the no4 nut and bolt option. Thank you
Cheers
Last edited by Father Ted; 01-02-2013 at 01:46 PM.
-
Advisory Panel


There should be no need to destroy the threaded rod to remove it. If you grab the exposed center section with miniature locking pliers, you should be able to turn it. Continuing to do so, about 1/4 turn at a time, should eventually expose one end far enough to grab it with the pliers (or a drill chuck) and screw it out completely. Peen or dress any protruding damage to the threads, make your wood repairs, drill through the old hole and new wood with a bit just large enough to allow the rod to pass, coat it with your favorite glue, and press into the hole. With the right glue, this will be stronger than the original and visually identical.
Brownell's sells 3/32" threaded pins, but the quantity (12), price, and shipping makes this uneconomical when only one pin is needed. STOCK REPAIR PIN KIT | Brownells
-


 Register To Reply