-
Contributing Member


Desporterizing a No4 Mk1/3 and converting to repro T status
Hey guys it was pointed out that I should post this over here too.
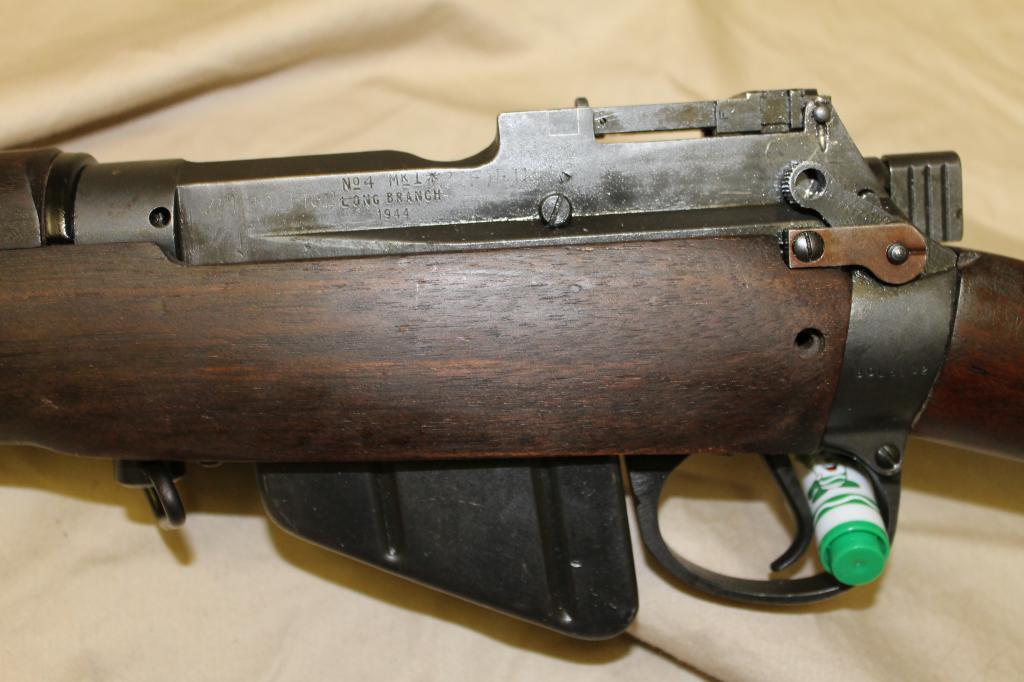
I have a very fresh '44 Longbranch that was FTR'd to No4 Mk1/3 status at Faz in '51. The rifle had been bubba'd but barely even shot (or handled).
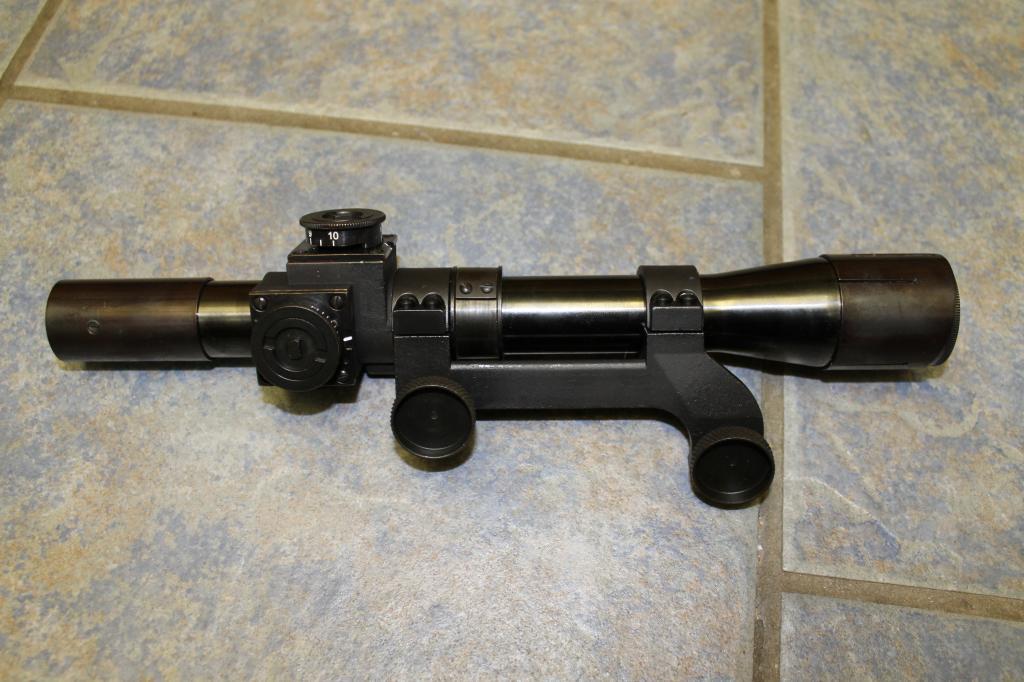
I am restoring it back to full wood and installing a Repro No32 MkI scope on a repro mount and pads, and all the T trimmings.
Can anyone tell me the exact drill bit sizes and tap sizes I need to do the conversion?
I also need some pointers on the soldering procedure for the pads, what type of solder to use etc.
Thanks!
Range report hopefully to come after the weekend (sans scope)
Information
 |
Warning: This is a relatively older thread
This discussion is older than 360 days. Some information contained in it may no longer be current. |
|
-
-
02-01-2013 09:02 AM
# ADS
Friends and Sponsors

-
Contributing Member
I'm going to continue with project updates on this thead rather than clutter the LE forum with updates and questions on my project.
The drawings for the pads and mounts were a tad hard to read, that's 1/4 x 26 BSF for the thumb knobs and 4 BA for the screws?
Sorry again for the 9 million questions. Better to be a fool who asks than a fool with a ruined project.
Edit: ugh. Reading comprehension has never been a strong point. Found it all in Peter's articles. Good to go now.
Last edited by flying pig; 02-01-2013 at 08:30 PM.
-
-
-
Contributing Member
-
The Following 3 Members Say Thank You to flying pig For This Useful Post:
-
Advisory Panel


Very nice project - the "before, during, and after" photos are impressive, and should be encouraging for others.
-
-
Contributing Member
Thank you Patrick.
It seems to be a good shooter too so I'm going to move ahead with its conversion. Updates to come!
-
-
Contributing Member
Update...almost finished with the conversion. I'm over halfway through Peter's step 3. Holy ungodly hell is that receiver hard on the last few mm's under that rear pad! I was able to drill the front 4ba hole and tap it with no trouble just like the front pad holes but the rear 4ba was very tough going at the end of drilling and I tapped it as deeply as I could but the tap was getting super tight in there trying to go through the last bit so I didn't chance breaking the tap off. Now just chiseling away at the 1/4 BSF hole and it is every bit as hard. Any tips for doing this? At work if a bushing is this hard I usually torch it red then drill it but I don't want to do that here, afraid it would affect the heat treating in the receiver? Also tapping a red hot hole sounds like a good way to have a tap sticking out of the side of an otherwise nice rifle permanently...
Probably just take my time and keep chewing away at it slowly even if it takes me all month! I bought lots of bits and a few of each tap to do the conversion.
-
-
Legacy Member


Looking forward to seeing some pictures
-
-
Contributing Member
Lots of them coming shortly. I wound up getting through the 1/4 BSF hole last night, now to tap it and get on to finishing things up. To anyone else who wants to do one of these, buy lots of extra bits. The best ones you can get. I would have bought cobalt or even carbide bits had I known that rear pad area was that insanely hard. I've drilled lots of bushings on main pins on excavators when the bushing turns and the grease track becomes interrupted and that steel there has nothing on this stuff. I wound up using a 1/8 masonry bit to pilot my way through and then basically let the 5.3 bit spot anneal its way through using tons of rapid tap oil on everything. My drill bit is now about an inch shorter than it was when I started and I have tons of filing to do to clean it up on the inside. But its done!
-
Thank You to flying pig For This Useful Post:
-
Contributing Member
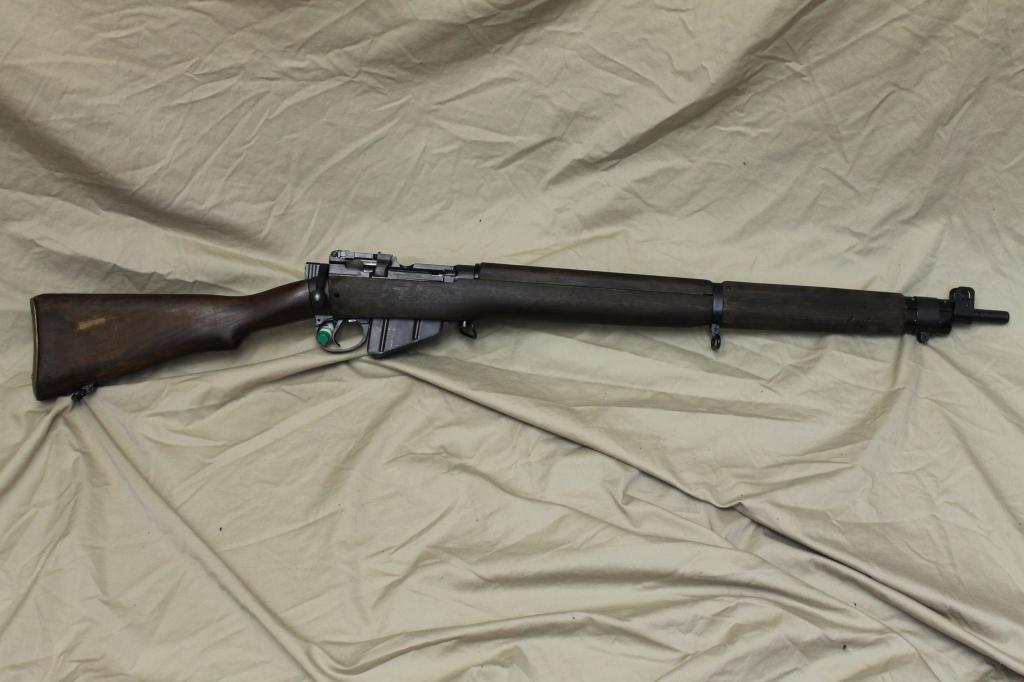
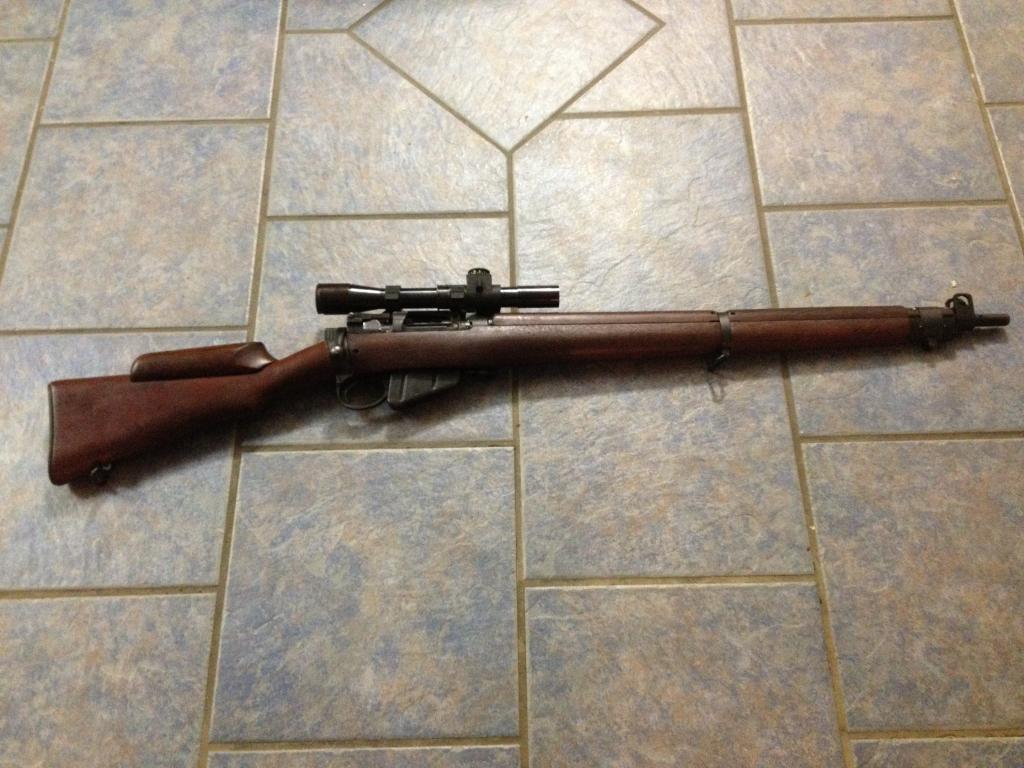
 Now finished! Can't wait to print some targets...
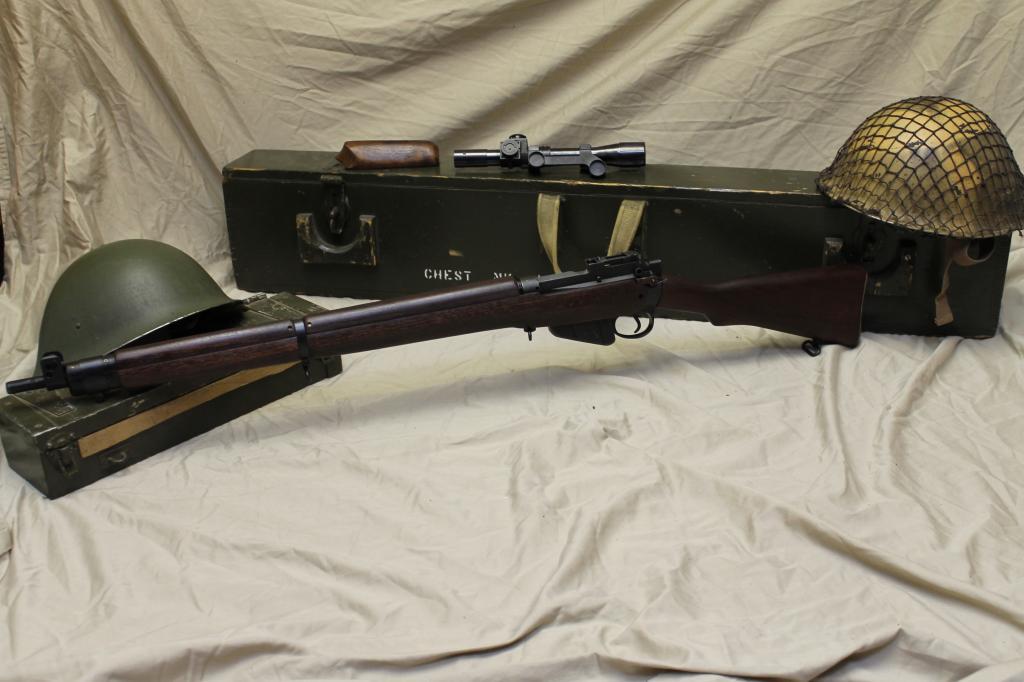
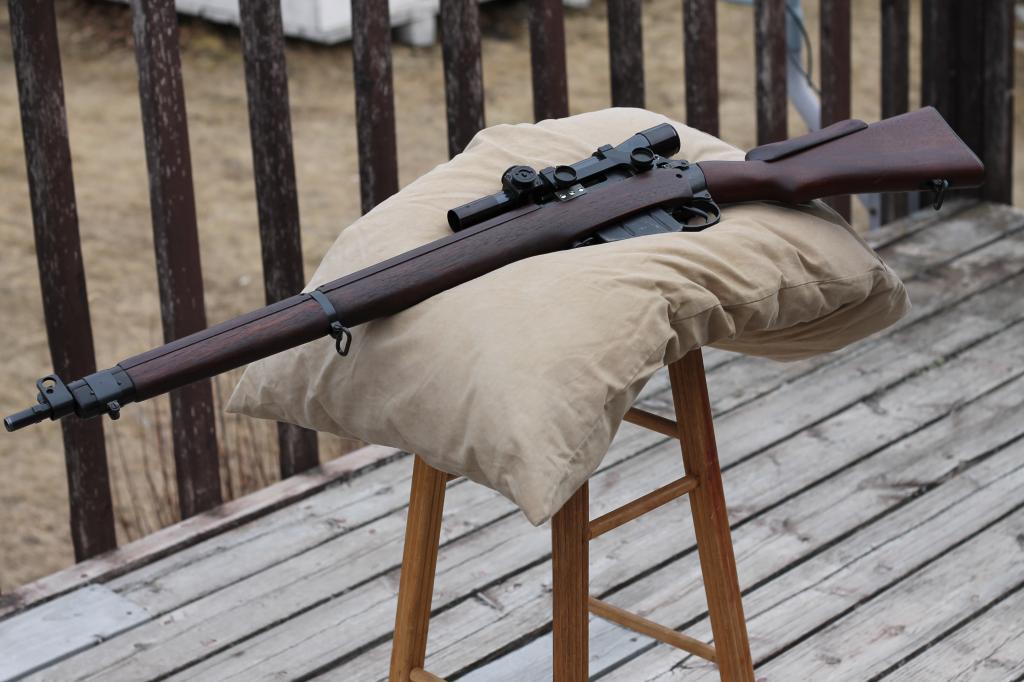
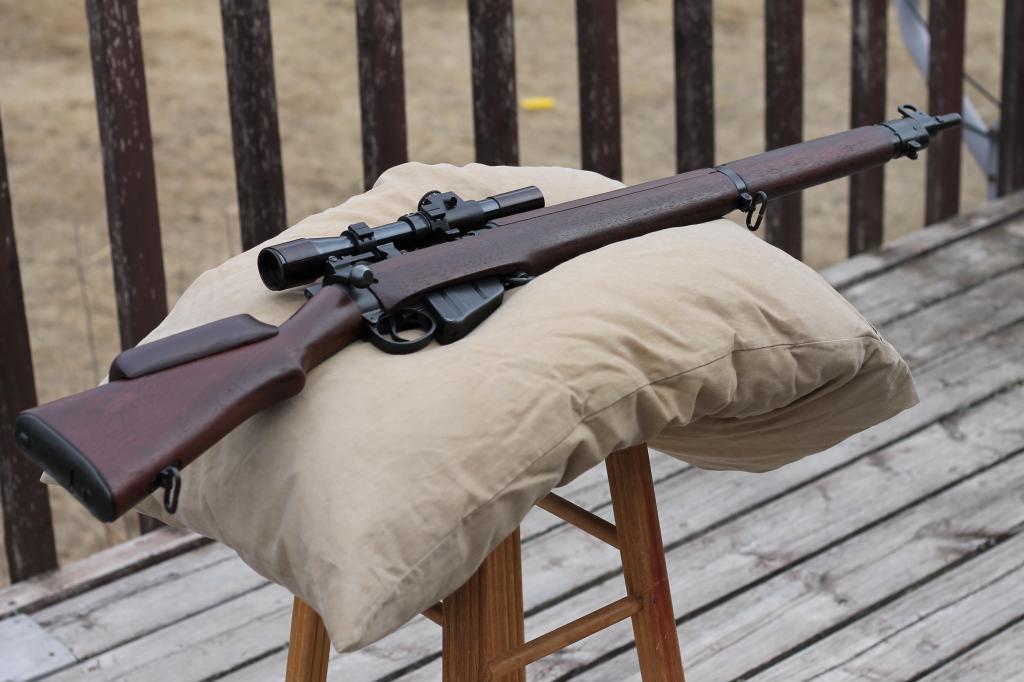
Well its finally done, 11 months after I originally decided a repro 4T was what I wanted. I guess a poor man's fantasy Longbranch No4 Mk1/3 T.
From start to finish:
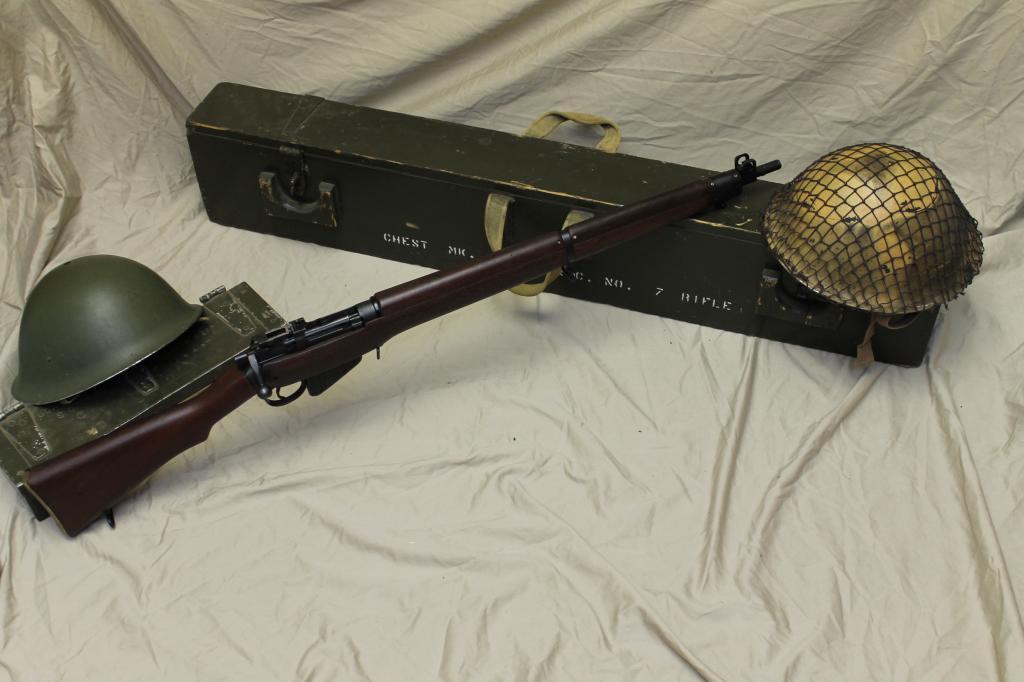
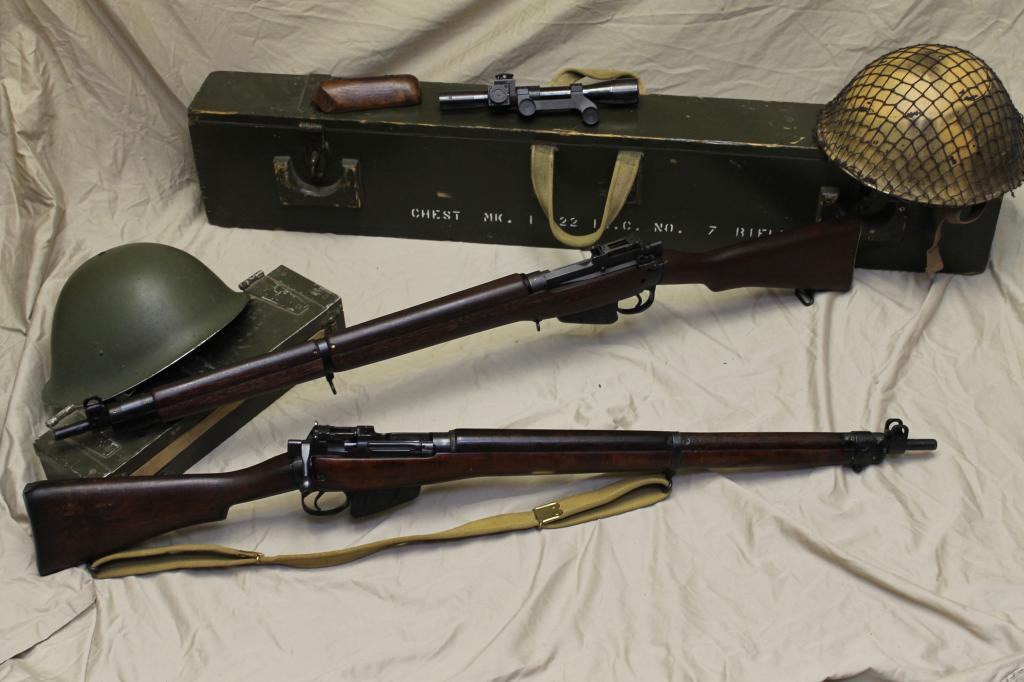
Started off as a VERY lightly used No4 Mk1/3 Longbranch originally built in 1944 that was upgraded to Mk1/3 at Faz in '51. The previous owner claimed a very low round count, 4 to be exact and the bore shows it.
This photo does not do it justice...
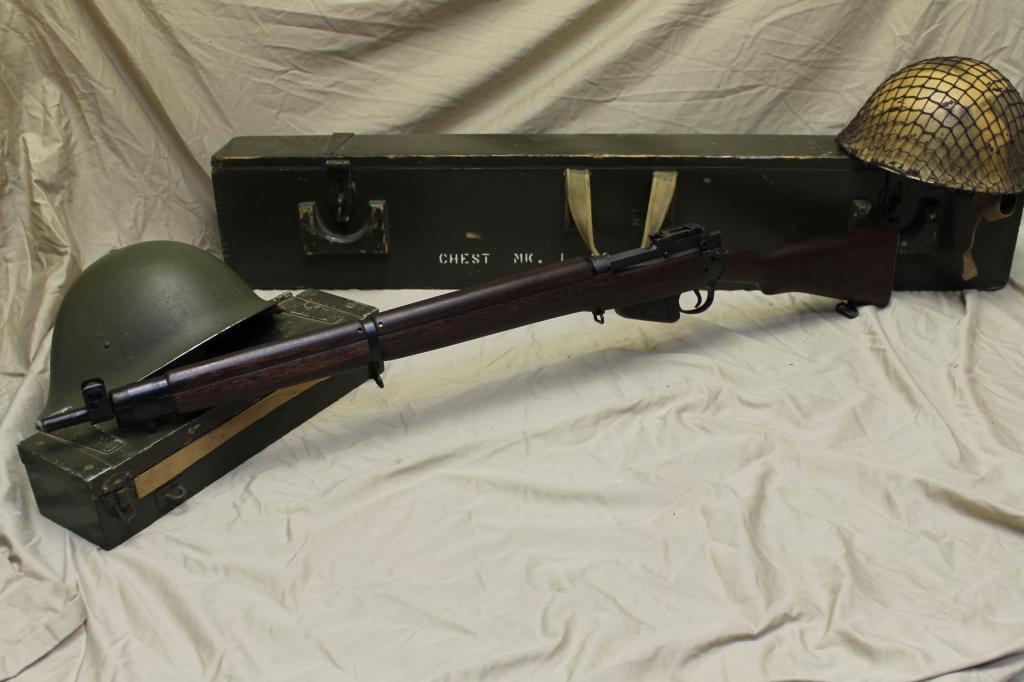
Part way through fitting up the very chubby Pakistani woodset.
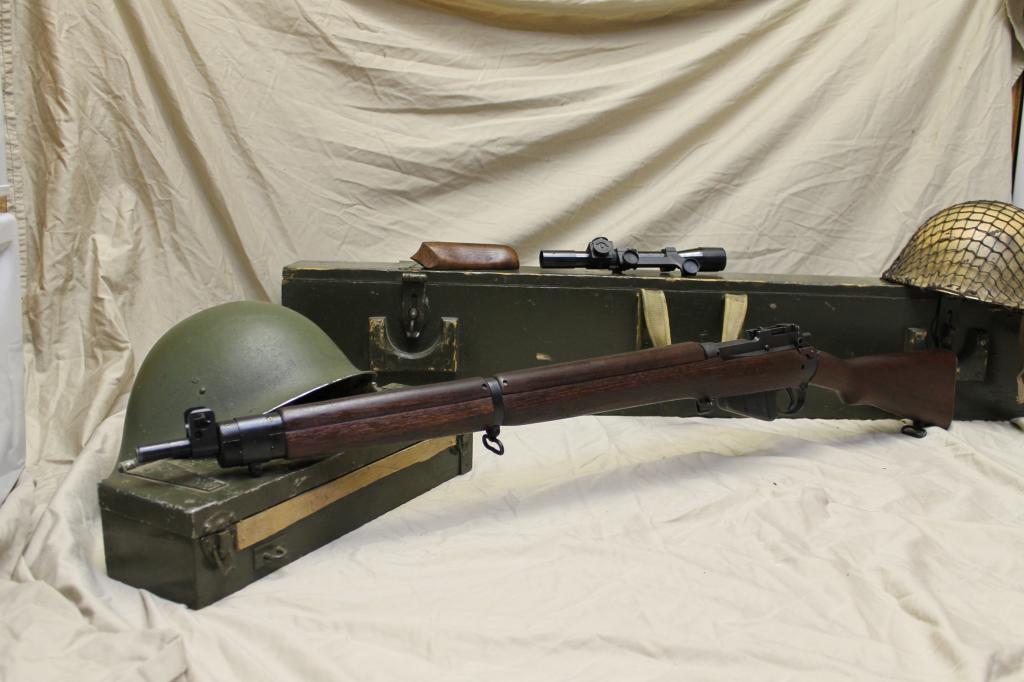
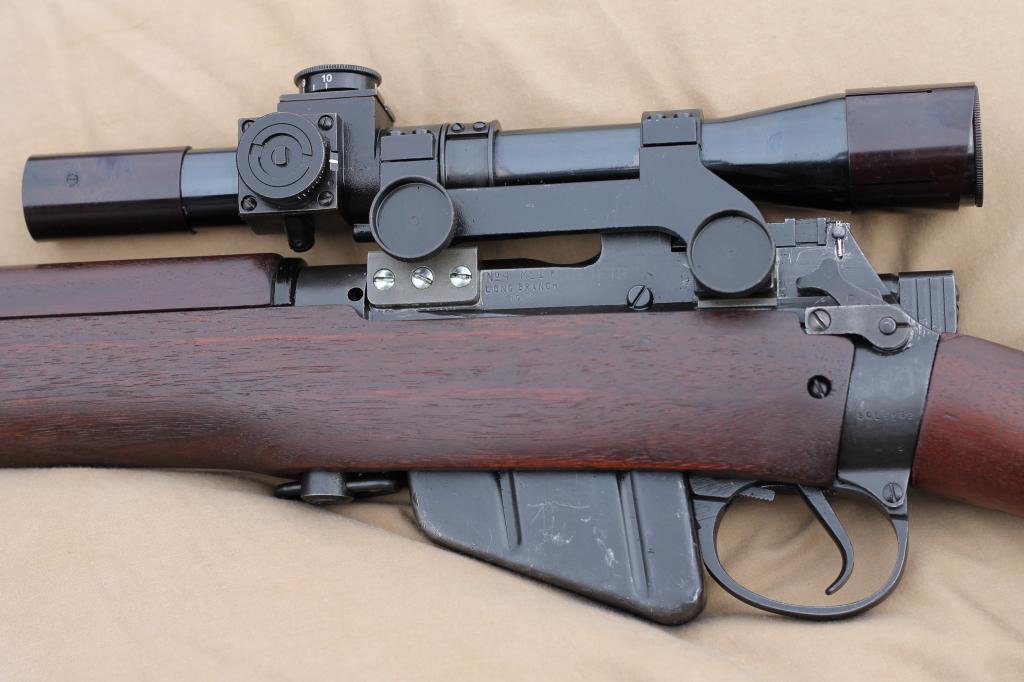
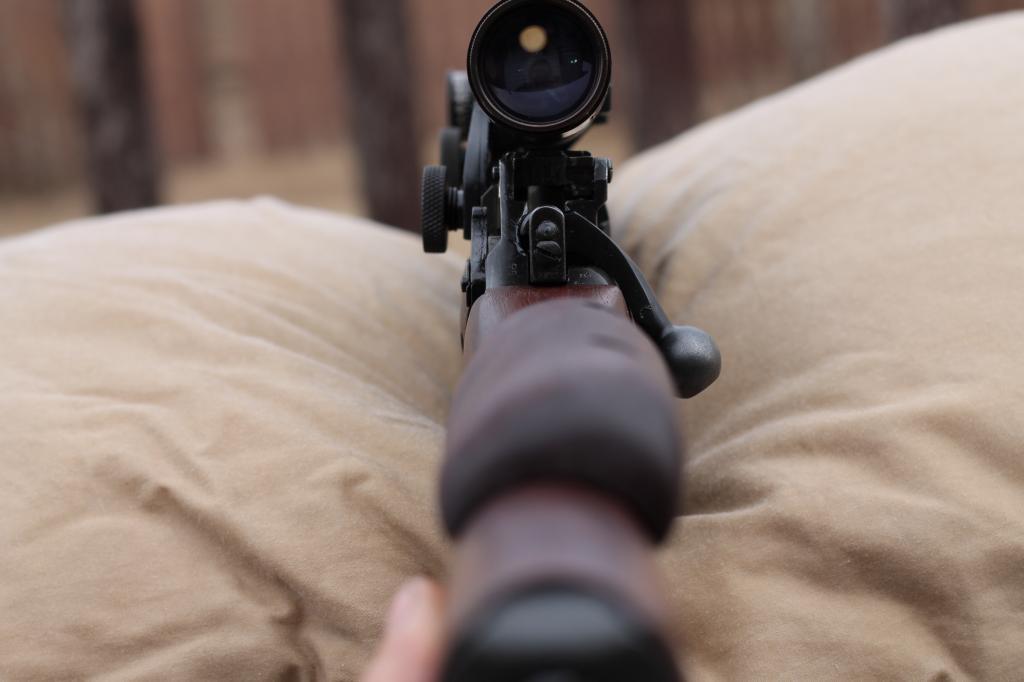
Reproduction No32 MkI scope that I got from Wheaty on CGN. Great fellow and very very helpful in this whole project.
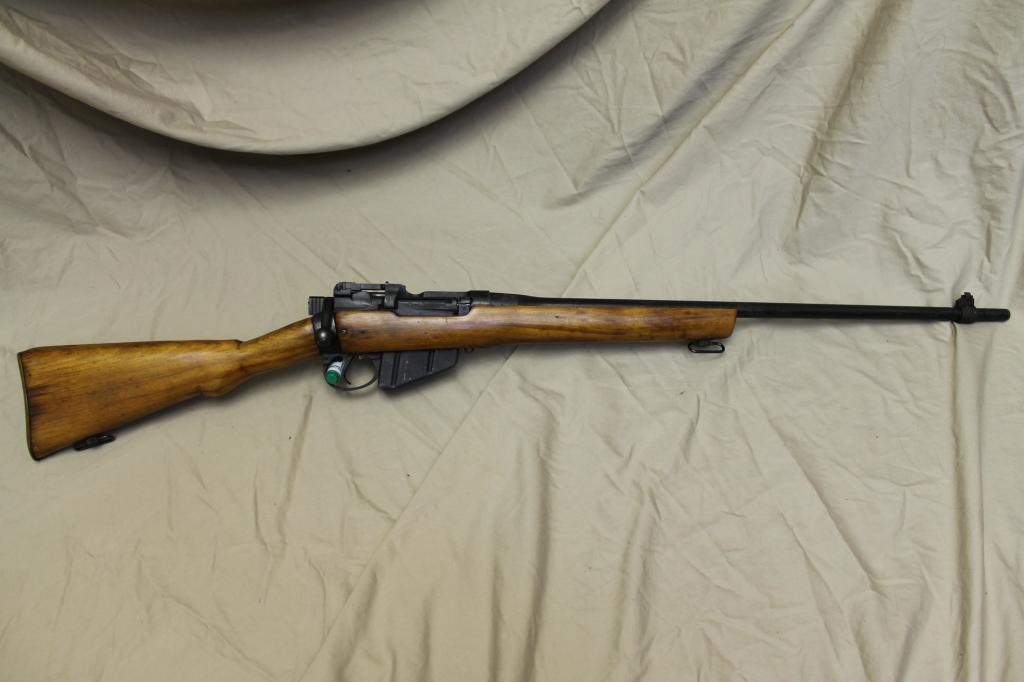
After the initial return to military configuration.
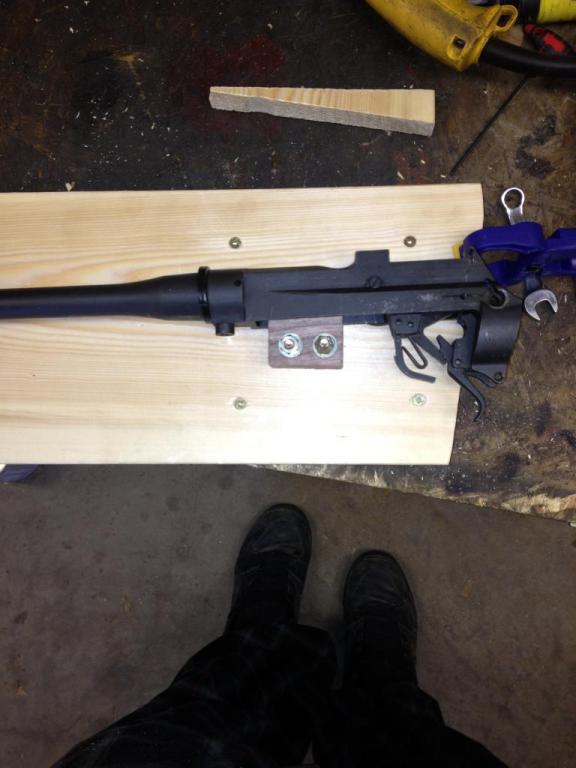
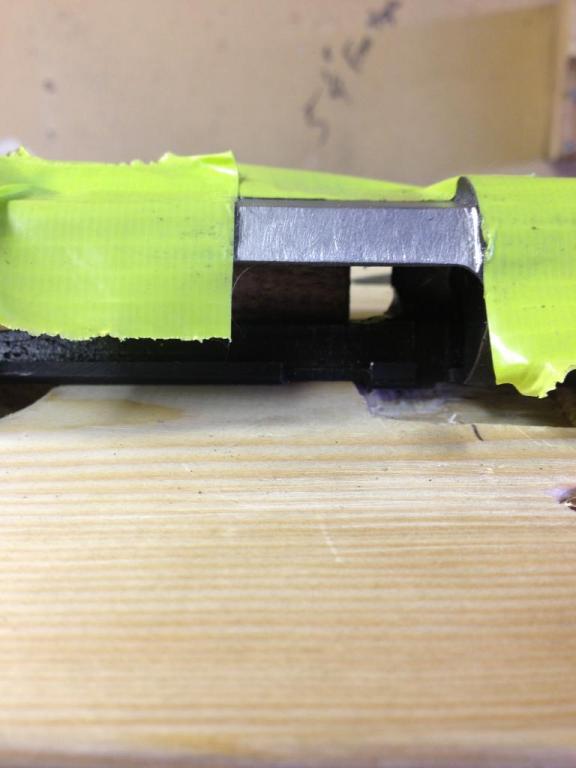
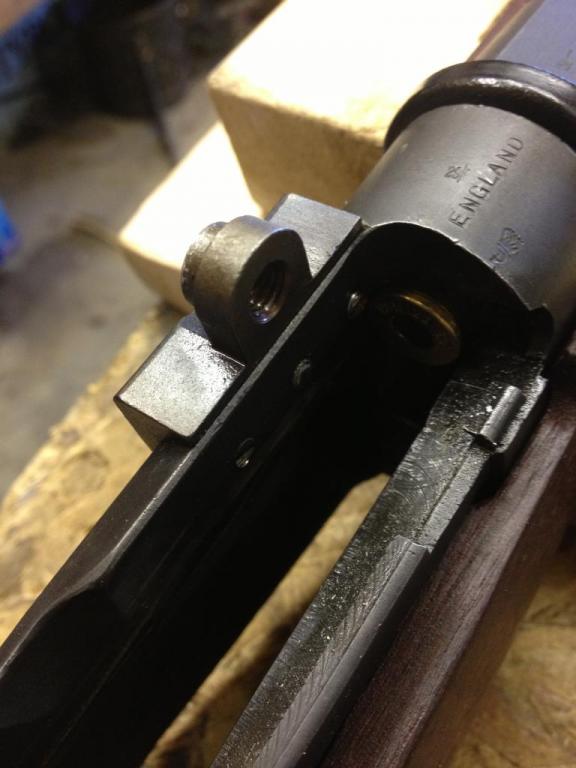
This shot shows the wooden jig I built for this project. It has a hole for the charger bridge and a recess that allows the body side to go down flat. I used a pair of small vise grips with teflon tape over the jaws to hold the rear sight ear down during drilling and tapping as well as filing the receiver.
I found that the sloped portion of the pad rocked on the receiver a fair bit in original form so before I began the fitting I filed the surface true.
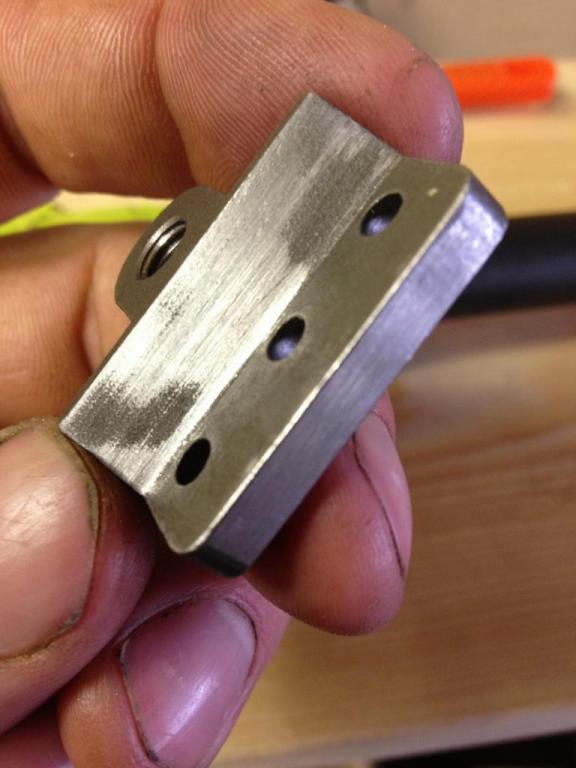
File job under the surface of the front pad. I hope I did this part properly. I got things down as flat as I could and removed all of the finish. I also squared up the front edge so the pad would but up perfectly
Drilling one of the front pad 4BA holes.
Front pad after the initial fitting. You can't see it in this photo but I cleaned the metal down about 1-2mm outside of the area the pad covers all the way around to make sure it sat flush.
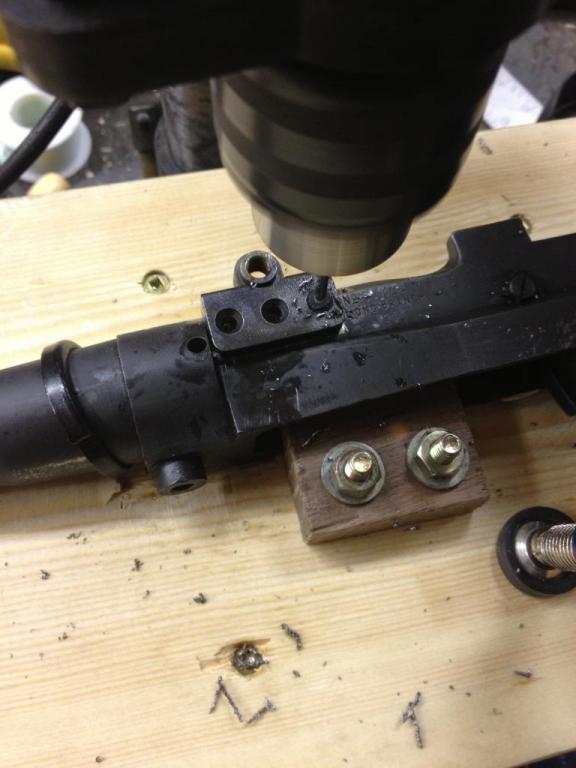
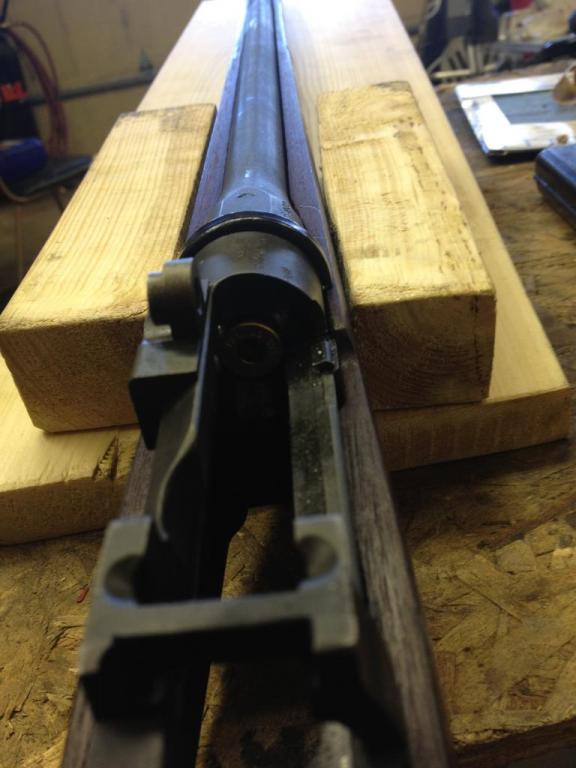
inside shot of the screw heads after the first cut. This shot also shows the once fired case/less primer I used to sight it for the fitting of the pads
The bottom side of the jig had a section of 2x4 that I cut at a slight angle and placed about the width of the forestock apart. This held the rifle quite firmly in place while getting things lined up and allowed me to use another 2x4 under the front of the jig to act as a ramp. I was only able to use a neighbors chimney rain cap as a target. It was only about 150m out but I made it line up perfectly and set the range drum accordoingly when doing the rear pad.
The rear pad sitting on its soon to be permanent location. I wound up having to shim it up 0.048" to line it up with the front pad. I used strips from an old feeler gauge stacked up to build the shims. It seemed a lot easier than machining something and it was only a princess auto $5 gauge.

This shot shows how much shim I had to add to get it where it needed to be.

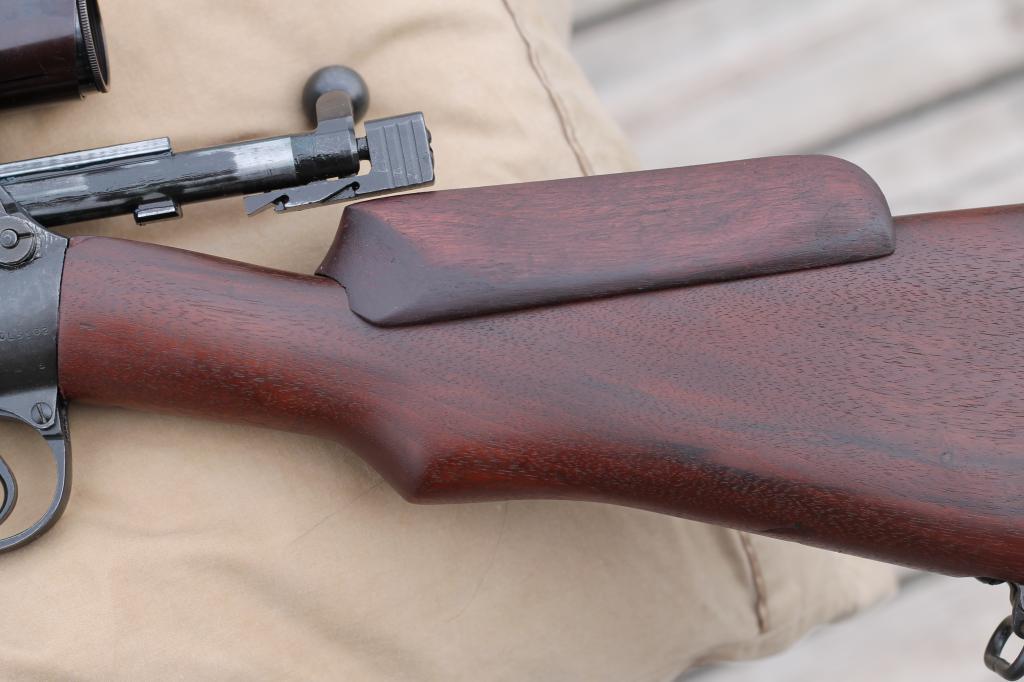
Being a rookie I never took into account that the bolt has to operate. Ha ha. I wound up spending about 2 more hours fitting this cheekrest, then about another hour trying to get it to take stain. Whatever they use to make those repro rests seems to hate stain!
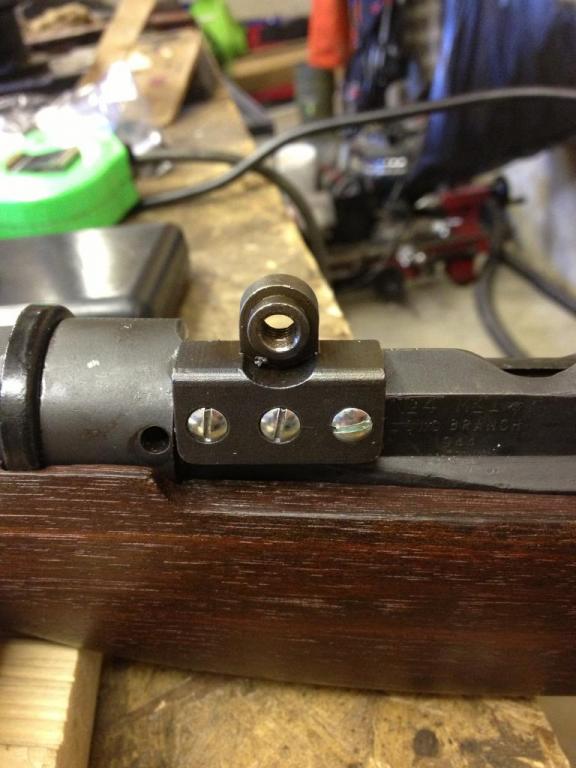
And here it is, ready for page four of Peter's instructions, then off to see how she performs this weekend.
Well there it is, a year long project. I really hope that it shoots well, and that I never missed anything in the instructions. If any of you armorers out there have any input or suggestions on things I could have done better or differently please do let me know, I'm all ears and eager to learn. I haven't had the pleasure of even seeing or handling a real 4T yet so all of this was done using photographs I found on the internet and through reading posts on here and other milsurp related sites, and of course through reading and re reading Peter Laidler 's articles in the MKL probably a hundred times in the last year.
Total cost for this project came in at around $1200 CDN if anyone else was thinking about going this route. That includes a Turner repro '07 sling that hasn't shown up yet, all the bits and taps, the screws etc that came from the UK and US.
Thanks to everyone here who has helped me with this and my other projects, without you guys I'd still be dreaming about having one of these in my rack.
-
The Following 6 Members Say Thank You to flying pig For This Useful Post:
-
Contributing Member
-
The Following 4 Members Say Thank You to flying pig For This Useful Post:


 PM
PM


 Quick update: rifle is now what I would consider restored. I'm going out to test the bedding and sight it in with the aperture tomorrow.