-
 Restoring a Lee Enfield No1 Mk3* (chambered in .410)
Hi everyone ..... 
I've been thinking of doing this post for a while, and a few members have suggested it, so I thought I'd take the time to do it tonight.
I don't have pictures of everything, but at least it's a start; I may try to update it as I take pics of the steps that don't have any at this moment.
Recently, I refurbed a CGN member's Lee Enfield No1 Mk3*, chambered in .410. This good man was kind enough to trust his rifle to my somewhat beginner's hands, and I thank him again for this.
Here's the rifle as received. Typical Bubba'ed rifle, except it had a rear handguard, and the grain matched the butt stock - both nice looking but varnished.

(Click PIC to Enlarge)
First, I completely disassembled it.

(Click PIC to Enlarge)
Then, I knew what parts I needed; some I already had, some I needed to order.
The butt and rear handguard were keepers, so I stripped them with paint stripper (don't use sand paper to remove earlier finish), here's what the butt looked like.

(Click PIC to Enlarge)
The part that can take time and patience is the proper fitting of the wood parts to the action and barrel. In this case, the barrel channel of the forearm did come in contact with the barrel in some places where it shouldn't have; so I had to sand off some wood from these spots.
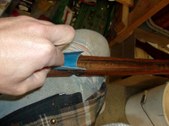
(Click PIC to Enlarge)
Often, you also have to adjust the fit between the sear lugs and the part of the forearm that come in contact with the rear portion of the sera lugs. In this case, I found a forearm that fit almost perfectly. Sometimes, you need to remove some wood from the forearm, or the opposite, use shims to fill in some extra space. I'll try to take some pics next time that happens.
Also, the butt, when the big butt screw was removed, showed some free play in the socket. So, I fixed this, by:
First, cut a band of brown paper (grocery paper bag) that'll wrap around the butt socket portion:
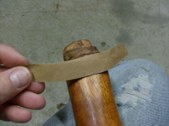
(Click PIC to Enlarge)
Then, in theory (according to a 1931 armorer's instruction booklet), I should have used varnish to glue the paper band. I used Epoxy glue, because that's what I had around (West Epoxy System, I use it to repair the wood stocks, so I though it'd be ok for this task). Here, rubber bands are holding the paper in place while the glue cures.
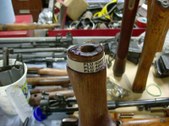
(Click PIC to Enlarge)
Here's the result, after the glue is cured:
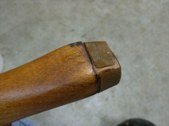
(Click PIC to Enlarge)
Here's the adjustment so it'll go in the action socket with light force, and fit quite snuggly:
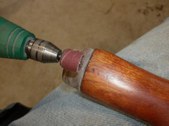
(Click PIC to Enlarge)
Here's how deep it did go in before I used a rubber mallet:
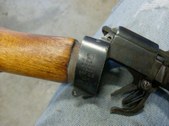
(Click PIC to Enlarge)
Next came the adjustment of the handguards. Both needed some fine tuning, but here's a picture of the removal of a little bit of wood from the front handguard's base. After this adjustment, the handguard did fit on the forearm without a gap between the two.
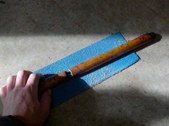
(Click PIC to Enlarge)
Ok, then I moved on to the finishing with boiled linseed oil. Colour matching was a bit of a challenge with this project, since the grain and initial colour of the used parts I provided and the two parts that I kept from the rifle were quite different. I use some pure BLO , and also some BLO
 that has walnut colour mixed in with it. Sometimes I also use other stains, but in this case I don't think I needed them. Here's the rear handguard with a fresh coat of BLO (it's shiny because the oil just got rubbed on it).
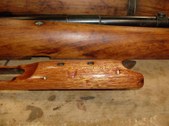
(Click PIC to Enlarge)
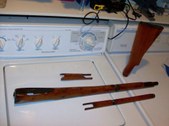
It got cold, so I moved the finishing job inside; I don't have a basement, so here's the wood curing in the laundry room. I probably used about 20 coats.
(Click PIC to Enlarge)
After that, I moved to the cleaning of the metal parts. Some of them needed some reblueing, which I did (cold reblueing job), but I don't have pics of that. The butt plate got cleaned with a metal polish (stuff for mag wheels) and got quite nice.
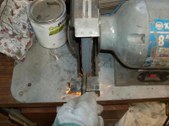
The big bolt that holds the butt in place had to get its tip ground off (the surplus forearm I got wasn't made to receive the butt bolt tip):
 (Click PIC to Enlarge)
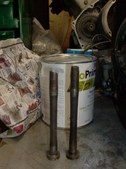
Once all the metal parts were ready, I made sure all the parts were clean, I oiled all the metal parts, and assembled the rifle. Some more tweaking here and there, during the final assembly, should be expected, but eventually, you get the job done.
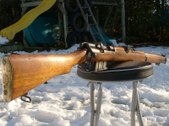
Here's a pics of the finished, reassembled rifle:
 (Click PIC to Enlarge)
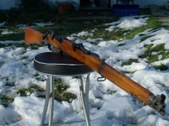 (Click PIC to Enlarge)
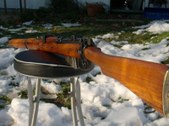
It's not perfect, far from it; for one, I would have liked to achieve a lighter colour. In total, I probably put in about 15 to 20 hours of work. The rifle, his owner, and the owner's uncle's memory were worth it, I sincerely believe.
Cheers!
Lou
================================================== =====
Addendum ......
Here are a few pics that I thought I'd add to this post, pics of steps that I didn't describe above.
Fitting the butt in the socket requires that there's a small gap between the socket "edge" and the wood; here, the before and after pictures:
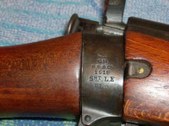 (Click PIC to Enlarge)
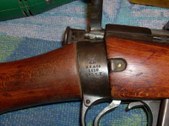
NOTE: Thanks to Claven who offers some appreciated clarification about when this is needed and when this isn't needed!

Originally Posted by
Claven2

Lou, making sure the face of the butt contacts the recess of the socket is a simple matter if you have access to a vernier caliper.
The reason the indians prefered to have a small clearance is twofold:
1) Fitting time is less than halved.
2) Since the late-made indian buttstocks are oversized circumferentially and made of a cheaper less-strong wood than walnut, they did not want the back of the socket flange to split the buttstock under the shock of firing.
By blending, I mean that the back of the forestock was made narrow to the same dimension of the buttsocket so that if you ran your finger over the buttstock, across the buttsocket and onto the forestock, on a well-fitted
British
Lee Enfield, you would not feel the lip between the metal and the wood. They fitted them to be as close to seamless as possible.
Indian stocked guns are a whole 'nuther matter though!
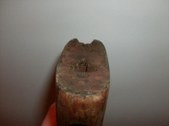
Buying "Drill Purpose" wood sometimes provides surprises. Here, a butt I recently worked on. It came... unfinished; the butt plate could not sit on properly on this flat surface! I used a rasp and other handtools to carve the required curved shape.
(Click PIC to Enlarge)
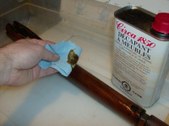
Stripping old wood before refinishing it is not as hard as many would think. It's messy though. Here I am stripping a No1 MK3 for end, simple and effective technique to prep the wood without sandpaper!
(Click PIC to Enlarge)
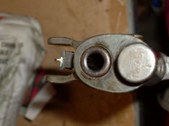
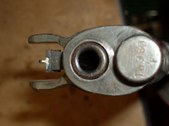
The nose cap of a No1 Mk3 shouldn't interfere with the muzzle. It's hard to see on these pictures, but in the first one, there's solid contact between the muzzle and the hole in the nose cap; second picture, some grinding and reblueing later, there's no solid contact.
 (Click PIC to Enlarge)
Information
 |
Warning: This is a relatively older thread
This discussion is older than 360 days. Some information contained in it may no longer be current. |
|
-
The Following 3 Members Say Thank You to louthepou For This Useful Post:
-
01-09-2009 09:19 AM
# ADS
Friends and Sponsors

-
FREE MEMBER
NO Posting or PM's Allowed

lee enfield
do you speak french ? i have some questions for you about the lee enfield n°1 mkIII.

-
-

Originally Posted by
spizaete

do you speak french ?

Effectivement!
N'hésite pas à m'envoyer un message par le biais de ce forum.
Lou
-
, and also some BLO
that has walnut colour mixed in with it. Sometimes I also use other stains, but in this case I don't think I needed them. Here's the rear handguard with a fresh coat of BLO (it's shiny because the oil just got rubbed on it).
(Click PIC to Enlarge)
(Click PIC to Enlarge)
(Click PIC to Enlarge)
(Click PIC to Enlarge)
(Click PIC to Enlarge)


 PM
PM


