-
Legacy Member

That is a very good idea, I went out in search of some suitable brass today but all I could find is tiny 3/16" 0.18" diameter rod. I will look around my spare parts bins and see what I can find later that might be suitable.
I will see about dismounting the barrel and making some vise blocks out of wood, from there I will see what can be done.
One another note I did manage to find some Oak dowel in various size and length which I need for another project. Hardwood dowel can be a challenge to find these days, loads of useless poplar and other softwoods are the most common.
- Darren
1 PL West Nova Scotia Regiment 2000-2003
1 BN Princess Patricia's Canadian Light Infantry 2003-2013
-
-
03-03-2016 05:35 PM
# ADS
Friends and Sponsors

-
Advisory Panel


A "quick & dirty" solution for the brass driving plug
After thinking about it, this could be a better solution than the countersink-head method!
If you haven't got a lathe, and can't find a suitable countersink-head brass screw, try this:
Get hold of a 1/4-28 brass screw. Saw off the head, to leave you with a threaded stub - 1" is quite long enough. File the thread right down to the core at both ends, to leave about 2 turns of thread in the middle (minimum: 1 turn with overlap). The core diameter of 1/-28 should be a sliding fit in a .22 bore. Check that it really is so, and file to suit. You now have a very simple driving plug, which can be driven from both ends, the remaining 1-1/2 to 2 turns of thread serving as the driving band.
Oil the bore, hold the rifle/barrel vertically, muzzle down, and drop the plug into the chamber. Use a good (yard?) length of 5mm or 3/16" brass rod to drive the plug down the barrel. The initial resistance will be quite stiff, until the thread has been formed to fit the rifling. If the obstruction is dried crud, this will shift it. If not, you can drive the plug back out from the other end.
Last edited by Patrick Chadwick; 03-04-2016 at 10:22 AM.
-
The Following 2 Members Say Thank You to Patrick Chadwick For This Useful Post:
-
-
Legacy Member
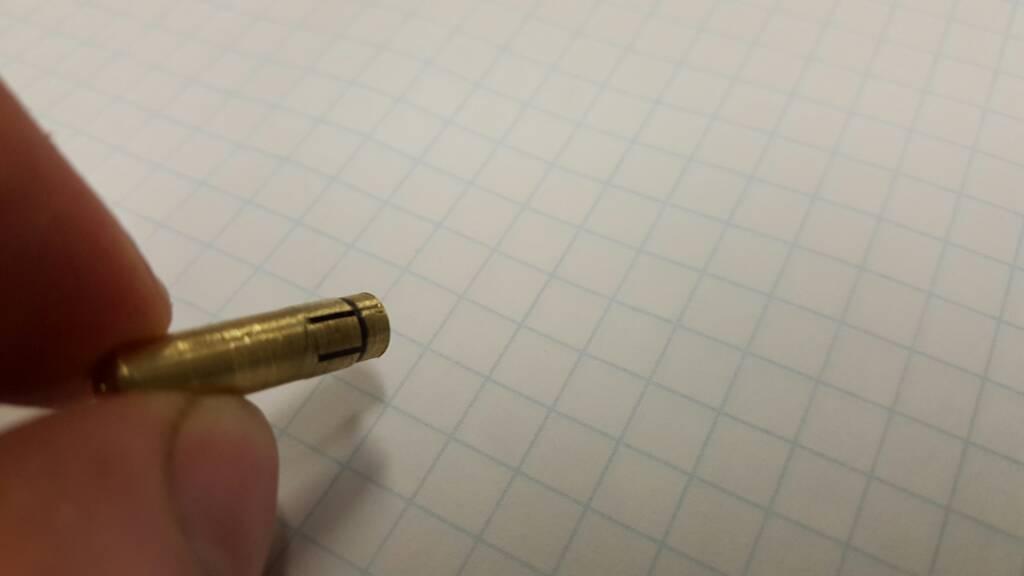
Misusing the drillpress this morning:
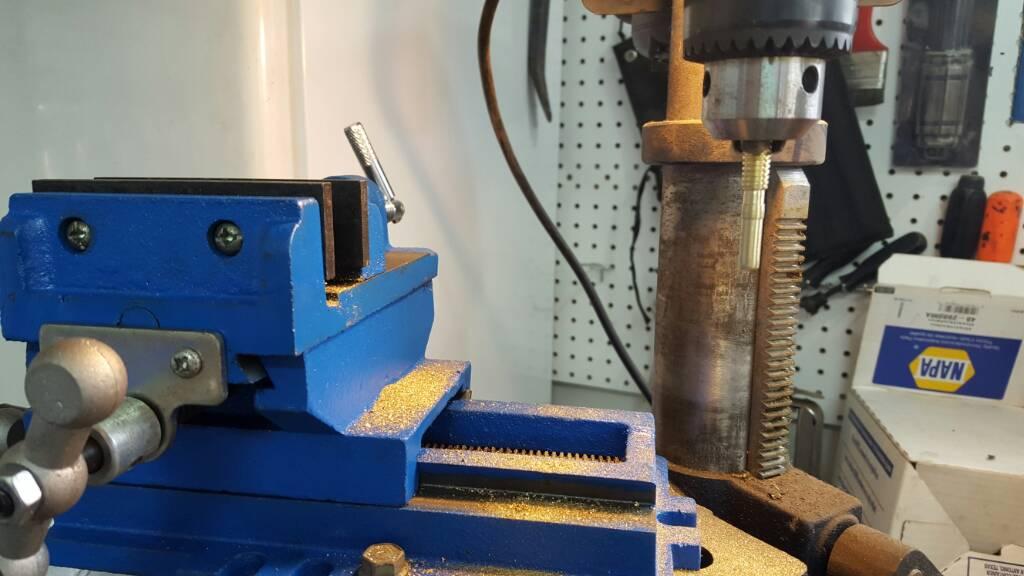
.22 soft brass rifling burninsher completed:
I will see if it will start with a driving band of .234" and swage down. If not, I will turn it down a little more. Bore on this rifle lead slugged out to .219" so I may have to shrink it a little more yet.
Sent from my SM-G920W8 using Tapatalk
---------- Post added at 12:38 PM ---------- Previous post was at 12:36 PM ----------

- Darren
1 PL West Nova Scotia Regiment 2000-2003
1 BN Princess Patricia's Canadian Light Infantry 2003-2013
-
-
Legacy Member


Originally Posted by
Sentryduty

If not, I will turn it down a little more.
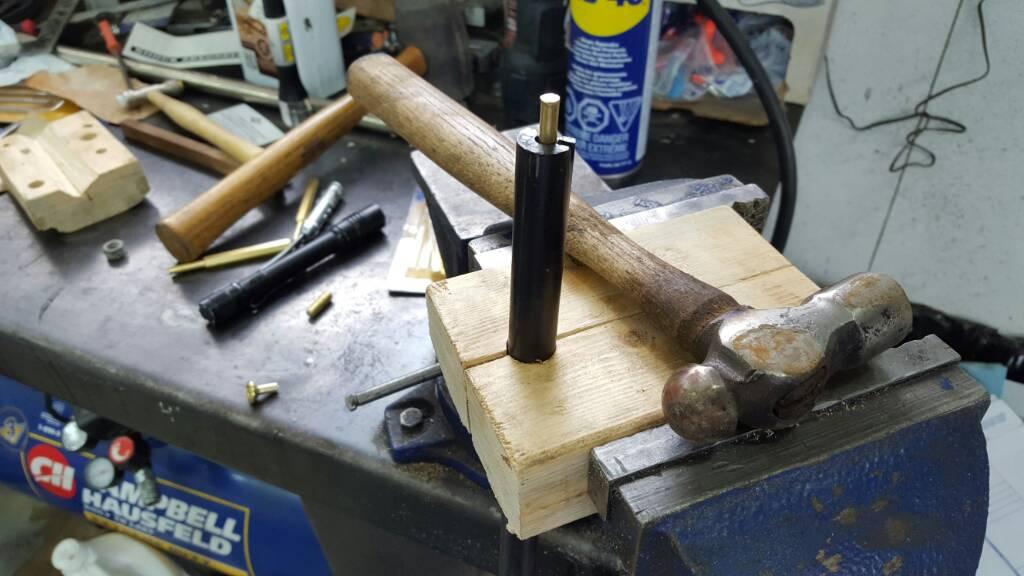
That's where the BIG hammer comes in. 
-
-
Legacy Member
Underway!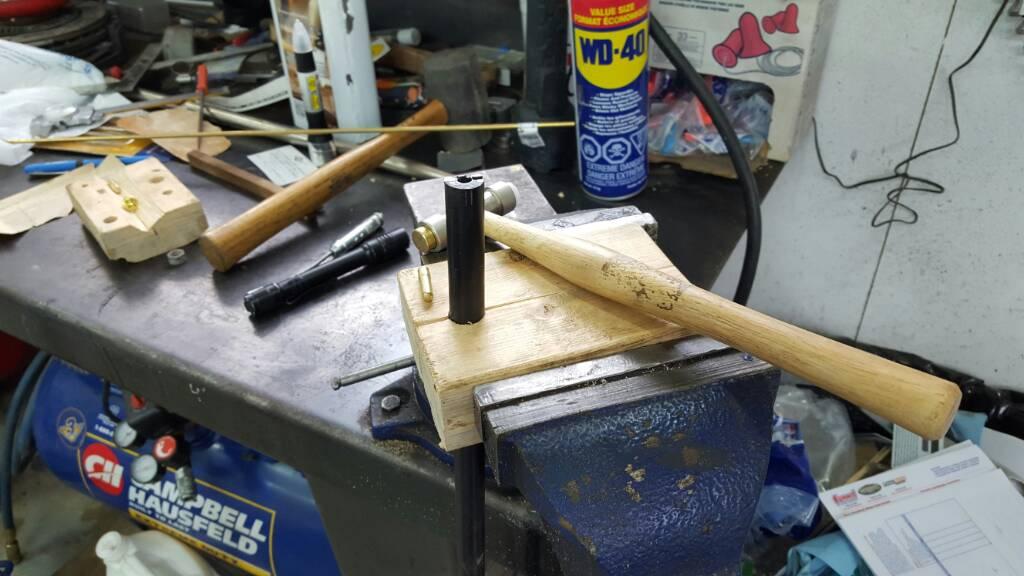
Sent from my SM-G920W8 using Tapatalk
---------- Post added at 02:44 PM ---------- Previous post was at 02:36 PM ----------
It is done, and the defect is still there. Looks like it is there for good. A barrel swap is about a 10 minute job, I may look for a donor gun and swap to a better one.

- Darren
1 PL West Nova Scotia Regiment 2000-2003
1 BN Princess Patricia's Canadian Light Infantry 2003-2013
-
Thank You to Sentryduty For This Useful Post:
-
Legacy Member
Using a marker and a bit of 1500 grit sandpaper I was about to blacken the rifling cuts.
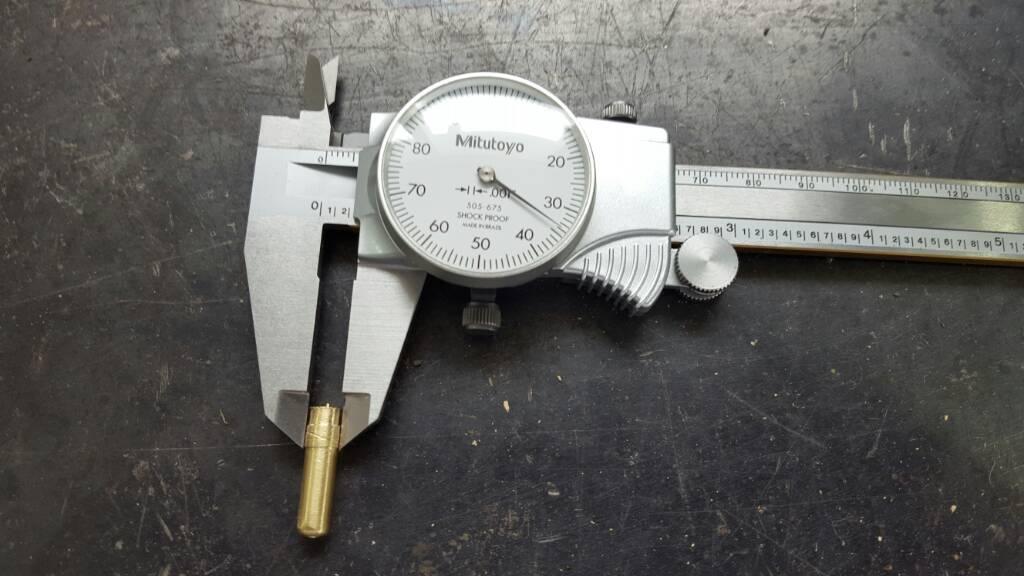
I did have to thin the driving band down to a 0.224" in order to get the burnishing plug to run without excessive resistance.
Taking some further measurements, I found most of the groove to groove diameters measured 0.221" but one spot has been swaged down to 0.219" which is probably where the inclusion is.
Looks like a 0.003" defect in the bore.
Shame it wasn't able to be removed but I think the whole thread proved a good exercise and experience.
- Darren
1 PL West Nova Scotia Regiment 2000-2003
1 BN Princess Patricia's Canadian Light Infantry 2003-2013
-
-
Legacy Member
-
Thank You to WarPig1976 For This Useful Post:
-
Legacy Member
As a conclusion to this topic, I would like cover the following points:
The rifle will be fully cleaned, reassembled, and then moved on to the family member for whom I was holding it, with disclosure about the artifact in the barrel. For the purposes of idle plinking the rifle will perform well enough to punch holes in a tin can as it is.
In the mean time I will keep an eye out for a replacement barrel in better condition.
The lessons about bore photography should hopefully offer a bit of insight to future visitors when it comes to buying firearms based on bore photos alone.
The burnishing process may prove insightful to someone wanting to see the process with ersatz tools.
And finally I'd like to express a personal thanks to Patrick Chadwick for his insight guidance in this little project, as well as the members who followed along.
Next projects are to finish up that No.4, put my Carbine into a proper stock, and get around to actually putting rounds down range.
- Darren
1 PL West Nova Scotia Regiment 2000-2003
1 BN Princess Patricia's Canadian Light Infantry 2003-2013
-


 PM
PM


