-
Legacy Member

No 5 Carbine project- Input welcome and appreciated
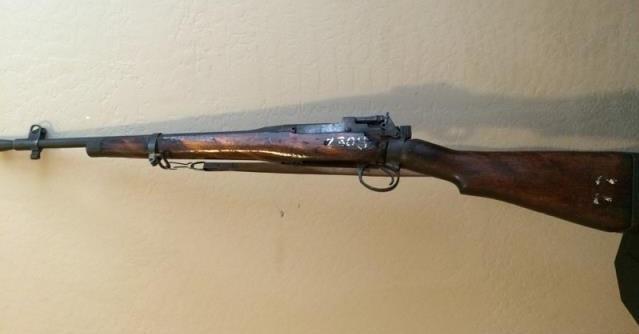
I made a fairly spontaneous purchase recently of a No 5 carbine that's in need of some work. The price was right, so I figured what the heck.
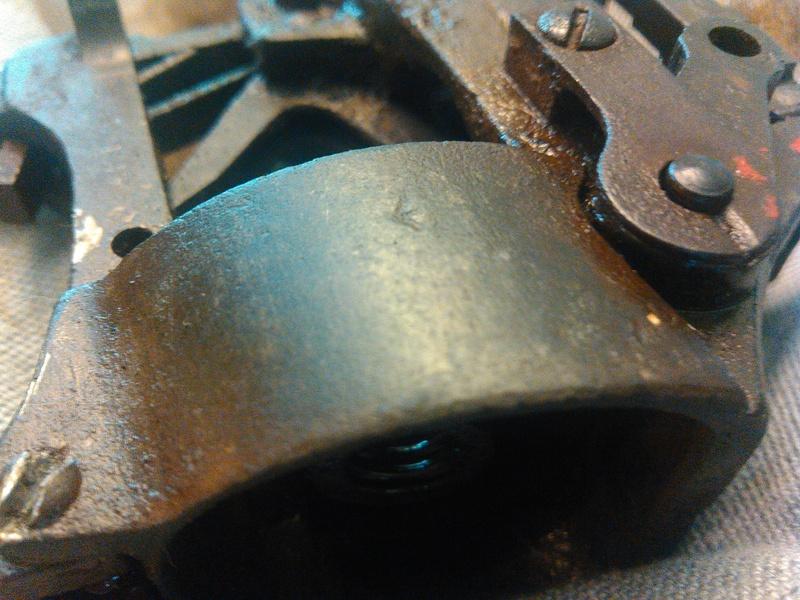
I haven't dove into it too far just yet. The forestock is missing a small piece at the rear, next to the receiver. The buttstock is loose as a goose, though I haven't gotten far enough to tell if it's a loose screw or if it's worn where it goes into the wrist (I think the latter). I'm also going to have to find a handguard and magazine.
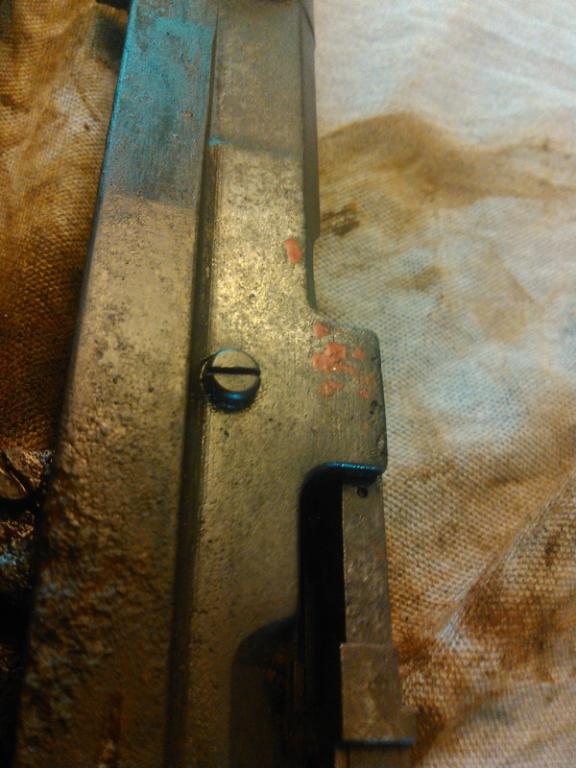
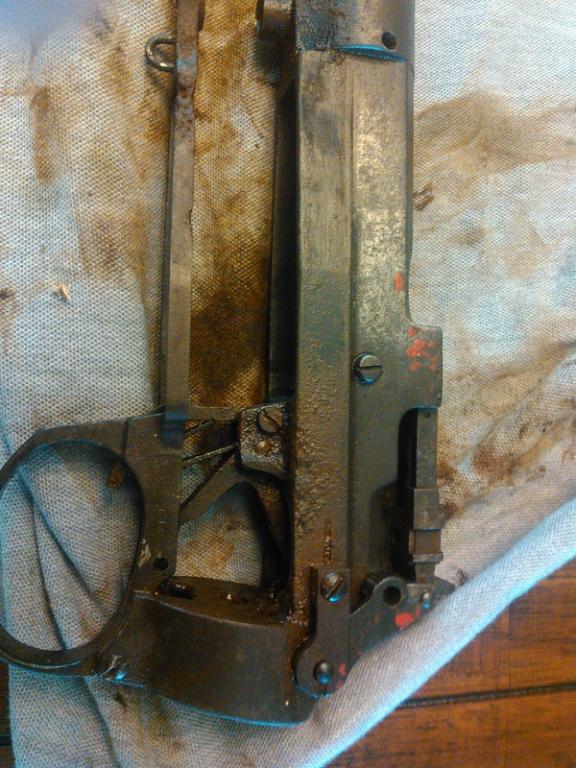
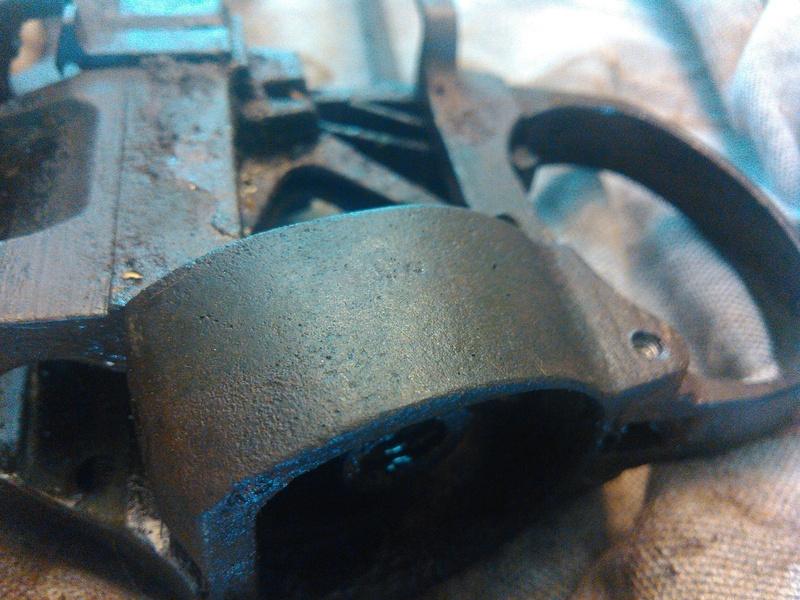
I can't make out much for markings just yet. I need to disassemble and give it a good cleaning. Poor things been used and abused, it appears. There's some minor pitting on it, though I won't know how bad until I get the wood off. What I can see at the woodline isn't major, but is enough to shake my head at the past owners' lack of maintenance.
So, I'd like to get some input and advice from guys that know a bit more than I.
The finish seems to be some kind of lacquer or something. From what I have always understood, Enfields typically are an oil-finish (dipped in hot linseed oil ). Not a big deal if that's what is appropriate, I've done some work on a couple other Enfields in the collection and used BLO with success on them. Is that the route to take to keep it in more of an original finish when I restore?
With the lack of handguards, I'm looking at getting a No 4 handguard and doing the work to replace what's missing. I've found a couple without the grooves and I have the ability to groove it for the bands. My biggest concern there would be differing woods. However, I don't see a way of avoiding that without finding a complete stock set, which is like finding a Leprechaun riding a Unicorn.
I'm also likely going to have to replace some screws and other parts as I go along, as someone's not done it any favors. But that's the fun of restorations, i guess.
Any input and advice is more than welcome!
Information
 |
Warning: This is a relatively older thread
This discussion is older than 360 days. Some information contained in it may no longer be current. |
|
-
The Following 4 Members Say Thank You to Catch22 For This Useful Post:
-
05-21-2016 10:19 PM
# ADS
Friends and Sponsors

-
Legacy Member

First order of buisness ditch the AK sling. Looks like a fun project. Lots of No 5 parts on ebay sprigfield sporters etc..
-
-
-
Advisory Panel

Pull it apart and let's see...then you'll know where you are.
-
Thank You to browningautorifle For This Useful Post:
-
Legacy Member
What browingautorifle said. First step to any restoration is to strip it and see what you have. It doesn't matter if it is a car or a rifle, without getting to the bare bones you can't plan for the end result.
Last edited by Bear43; 05-22-2016 at 01:45 AM.
Reason: spelling
-
Thank You to Bear43 For This Useful Post:
-
You've GOT to strip it first. But looking from here, that fore-end is totally finished too. Then get a pro to finish the body and barrel assemblies plus the other metalwork by bead blasting, phosphating, painting properly and then baking hard.
-
-
Legacy Member

Originally Posted by
HOOKED ON HISTORY

First order of buisness ditch the AK sling. Looks like a fun project. Lots of No 5 parts on ebay sprigfield sporters etc..
The sling is long gone. I've been watching SS as well as some other sites and have located a lot of the parts. The hangup is that handguard. Like I say, I'm going to be looking at making one out of a No 4 I found that has no grooves.
Maybe I'm using the wrong term with "restoration", as I'm not wanting to completely take it down to bare metal. I like the used look on my milsurps. What I'm more after is making sure I have it looking correct with correct parts with the right finish. If BLO is the proper finish, then that's what I want to go with. If some kind of other finish is more appropriate for the No 5, then I want to try to replicate it.
A bit of a situation where I know it's never going to be completely original, but I want it as close as I can make it without doing something I shouldn't to maintain some level of accuracy.
-
-
FREE MEMBER
NO Posting or PM's Allowed
Strip the wood down with Circa 1856 wood stripper and then use a 50/50 mix of BLO and turpentine for the first few coats along with light use of some brass wool. Raw linseed is the correct product to use for a finish, but I like to use the 50/50 for penetration and the brass wool will not create black spots if your stock sees a bit of moisture in the future.
If your rifle has not been Suncorited I have had good results with Birchwood Casey cream blueing to restore worn areas on the metal.
If you have a scrap sporter forearm you could salvage the area that is damaged and glue in a patch and peg with dowels. Just be sure to use acetone to rid the wood of oils in the area you intend to glue. To tighten up a loose butt stock some brown paper in glue and wrap the butt where it fits in the socket and allow it to dry. If you add a little to much file it down or not enough add another wrap or two.
Last edited by mr.e moose; 05-22-2016 at 02:18 PM.
Reason: spelling
-
Regarding woodwork, when we were refurbishing hundreds of them in the late 60's, some of the woodwork we were supplied with from Ordnance was visibly converted No4 stuff. Butts and fore-ends definately were so I would guess that so were rear handguards. Forget all about whether you have grooved or plain handguards. It was all the same to Armourers - and I might be wrong, but I don't ever remember grooved No5 handguards!.
I see the point about appreciating the worn look, but are you going to have that 'worn out look' with your new woodwork and screws and bands and magazine? Nope..... Just as easy to do it fully. Just my thoughts. Like fixing your old MGB really. Don't have to win prizes but it's got to look half decent. Annanuvverfing.......... your old No5 is a grand old lady now. She deserves better
-
The Following 2 Members Say Thank You to Peter Laidler For This Useful Post:
-
Legacy Member
-
-
That's EXACTLY how 90% of them were when we took the woodwork off. Quite deeply pitted and full of rust. But once they'd been through the main workshop/Armourers system they came out like new. All the steel that was hidden by the wood was lathered in a special grease to keep the monsoons and everything else out!
The grand old lady deserves the full treatment
-
Thank You to Peter Laidler For This Useful Post:


 PM
PM


 [/IMG]