-
FREE MEMBER
NO Posting or PM's Allowed


Originally Posted by
Patrick Chadwick

...Oh, I forgot ...get a few old 3.5" diskettes as well.
I am not kidding

Huh????
Is there a less aggressive alternative to paint stripper? That stuff is so nasty. I’ve read that it can break down wood fibers on old stocks. If I have time, I’ll try to search up some alternatives and get your opinion.
Thanks, Joel.
P. S. Mahdi Link Please.
-
11-18-2010 12:27 PM
# ADS
Friends and Sponsors

-
Advisory Panel


Originally Posted by
killforfood
P. S. Mahdi Link Please.
Nope. It's a surprise
Originally Posted by
killforfood
Huh????
It's another surprise
Originally Posted by
killforfood
Is there a less aggressive alternative to paint stripper?
We will only use that if we have to. Ask around for alternative suggestions. But you will need the acetone.
It will all become clear in Part 4
Last edited by Patrick Chadwick; 11-18-2010 at 01:20 PM.
-
-
-
Advisory Panel
And get a can of NATURAL TURPENTINE. And a can of (preferably boiled ) linseed oil . Good DIY stores or paint suppliers will have these materials. Paint stripper is negotiable. These two items are not!
-
-
FREE MEMBER
NO Posting or PM's Allowed
Patrick,
I re-read what gave me concerns about using stripper and it seams my recollection is a bit off since they were warning about using oven cleaner as stripper.
When we get to the re-bluing of small parts stage, what’s your opinion on Hot Bluing?
I have the chemicals and the desire to give it a try. Is it an appropriate finish for small parts of this era?
-
Advisory Panel
Please wait one more day. The choice of materials will be explained. I have no experience with hot bluing, but the rifle that bothers me because it looks falsely new was hot blued by a professional. He did it well, but it just looks too new for a 100 year old rifle, although that is indeed how they were usually finished - the kind of "blue" that looks black, of course. And color case-hardening is NOT appropriate for military rifles.
Last edited by Patrick Chadwick; 11-18-2010 at 03:39 PM.
-
-
FREE MEMBER
NO Posting or PM's Allowed
Patrick,
Just a quick update before I turn in for the night.
I made good progress de-rusting all of the small parts tonight (sorry no pictures, too tired). Not wanting to drag parts back and forth to work for ultrasonic cleaning, I went ahead and bought a small ultrasonic cleaner. It worked like a champ and I’m happy to say that the rear sight is completely de-rusted and moving freely (in fact a little to freely). It will need to be tightened just a tad to hold position.
I short circuited my transformer and had to splice my alligator clips onto a new one. I was tired and in a hurry and inadvertently reversed the polarity. Fortunately I only had some hanger wires in the bath when I hooked it back up. You weren’t kidding about CAPITAL letter warnings. The damage to the hanger wires was almost instant. I’m so glad I didn’t have any gun parts in there.
I haven’t built the barrel de-rusting tank yet but I should be able to find some time this weekend.
My bed is calling......
-
Advisory Panel
It's surprise time! - Refurbishing an Argentine RB - Part 4
Refurbishing an Argentine RB - Part 4
Bear with me if we make a temporary diversion from your rifle...
Did you ever see the film “Khartoum” with Charlton Heston playing the part of General Gordon, and Lawrence Olivier as the Mahdi? If you did, you will remember the scene where the expatriates are escaping on a Nile steamer. The Europeans are firing back with Martini-Henry rifles at the Mahdi’s followers on the river bank, who are blasting away at them with 1867 model Rolling Blocks....
Meet "The Mahdi"

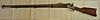
Yes, this is indeed one of those Egyptian RBs. Take a look at the finish - a century of sand produces a "soft-line" styling!

This rifle has Been There.
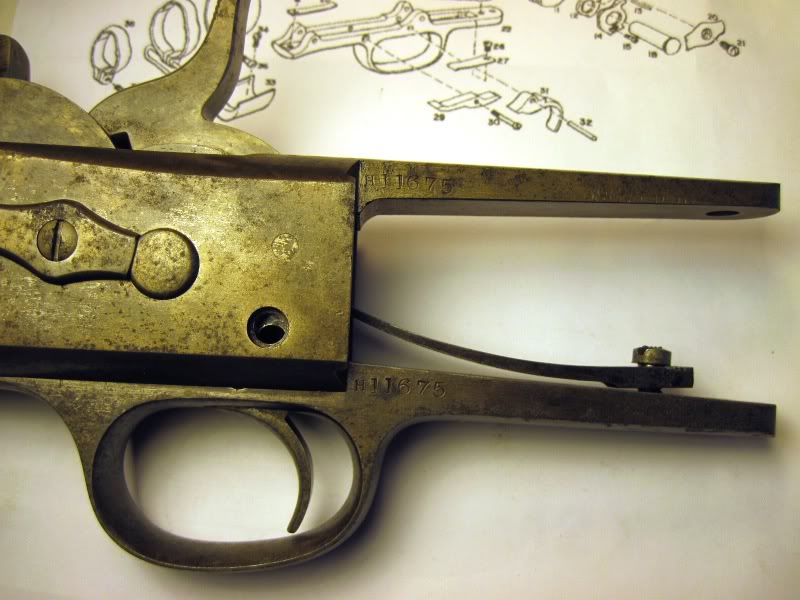
As to the markings, I was grateful to Remington that they marked the number on the tang (as mentioned in a previous post), where not even Ali Bubba could rub it off.
The markings on the barrel are mostly Arabic numerals, as the rifle was repeatedly captured and re-marked somewhere in that ever-dangerous region on the fringes of Egypt, Ethiopia and the Sudan.
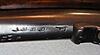
I can read the numbers, but I cannot decipher the text markings.
This one looks like "?azara", which would mean "reprove, rebuke, correct" but I am no Arabic expert, and it may be Amharic. I have also heard of a marking called "the Mahdi mark". Unfortunately I can find no trace of such a thing in that definitive work "Remington Rolling Block Military Rifles of the World" by George Layman, so maybe that is another myth.
If any Rolling Block experts are reading this, and can interpret the markings, I would be very pleased to hear what they have to say.
This was the first time that I bought a rifle for the sheer historical interest, in spite of its poor internal condition. Basically, I paid for an RCBS die set and got a free rifle and a dozen cartridge cases with it.
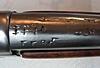
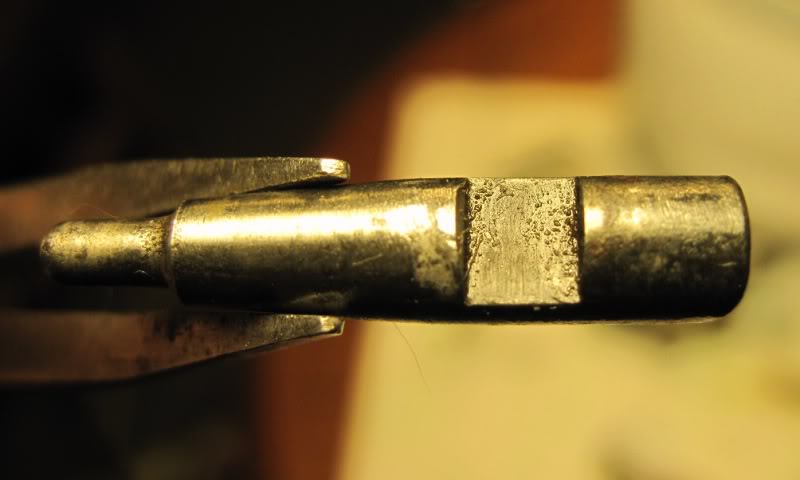
Now please take a look at the muzzle.
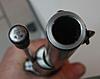
When purchased, the muzzle wear was worse than on the Argentine RB. It shot so badly that it couldn't hit the paper at 100 meters, and the few bullets that hit the paper at 50 meters were going through sideways.
In a word - wall-hanger.
Now look at the side-on view of the muzzle.
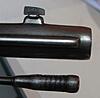
It is strongly rounded off. Originally, the muzzle was about 1/8" longer, and the rounding was so extreme and off-center that the end was not even square to the bore. No trace of rifling in the muzzle. In fact it looked more like a worn-out shotgun muzzle than a rifle. The foresight blade is a replacement (I kept the original - it had been sanded down to a stump)
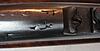
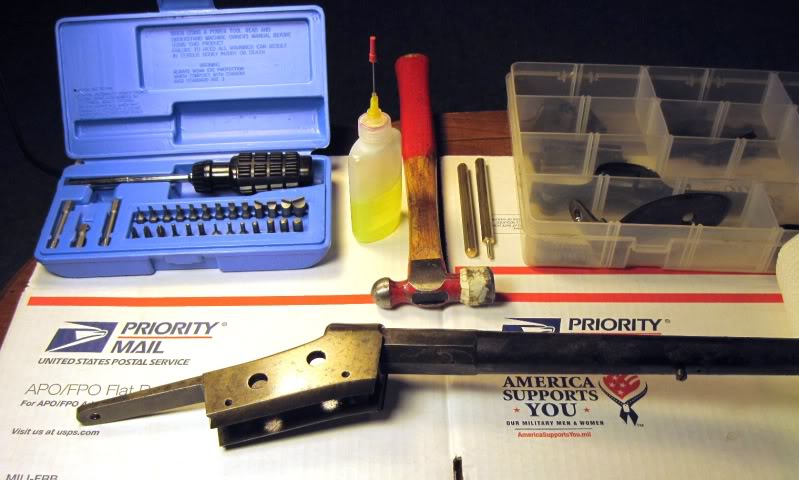
And this pic illustrates what happens if you are not very careful in removing a barrel band
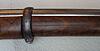
"Honest sarge, it wasn't me, it was that Ali Bubba!"
At that point I had to make a decision - and the point of this excursion is that you, too, will have to decide: Do you want a good-looking wallhanger or an every bit as pretty but functioning rifle. That will determine how we proceed with the barrel. "Shooter" means a serious bit of recrowning. If you choose that option, I can help you through that too - the proof is in the pics of The Mahdi.
Your decision may be easier to make when you see how the rest of the rifle turns out.
I therefore propose that, for the moment, we leave the barrel on one side, well-oiled to prevent further rusting, and turn our attention to the action components. Woodwork will follow in Part 5..
Action components
As you are now busy cleaning up the components, it is time to look at the results.
If you have not yet cleaned up the two action pins, you need to know that the cleaning will remove the markings you have made. The answer to this problem is to mark the pins by filing a tiny notch on the cylindrical surface at the right-hand end, no more than 1/16" long. In this position, the mark sits in the hole in the frame, so it is invisible after assembly and is also not subject to wear. The snag is, you will probably need a diamond file to make any mark at all - those pins have a very hard surface indeed.
The block assembly will have to be dismantled, so that you can clean the firing pin. A firing pin sticking in the block is one cause of uncertain ignition!
As I already wrote, springs should not be electrolytically cleaned. Any hard rust should be scraped off, and the spring then rubbed down on the rusty sections with grade 000 wire wool (i.e. the finest you can get) and then oiled. Springs are not visible after re-assembly, so they just need to be mechanically clean, and saved from further rusting.
When you have got everything, including the inside of the action, as clean as you can, then re-assemble the action with lightly oiled parts (without the mainspring) for a feasibility check.
1) Is anything binding? If so, back to cleaning! Check for hard muck or fragments caked onto the inside of the action body. If there is no obvious binding, then
2) Does everything move freely throughout the complete arc of the block and hammer? If so, then
3) Is anything too loose? This indicates excessive wear. That would be something that I could hardly evaluate at long range - it depends on exactly how much wear and where. If the action pins are seriously worn, it will not be possible to fix this with kitchen table/backyard methods. But the rolling block action is simple and tough. The Mahdi had no significant wear in the pins, and no loose sockets. Remarkable after a century of sand!
But what it did have was
4) A block that did not close properly, leaving a gap of about 1/4 mm at the bottom and 1/2 mm at the top. Although it would have been possible to fire the rifle, every case would have acquired a skewed base. And yes, it would not have been a good idea from the point of view of safety. To think that some people worry about a couple of thou in their headspace clearance!
Unlike a bolt-action rifle, this can also be fixed.
Depending on results, you may need to post pictures of any parts that appear to be dubious
Cleaning rod
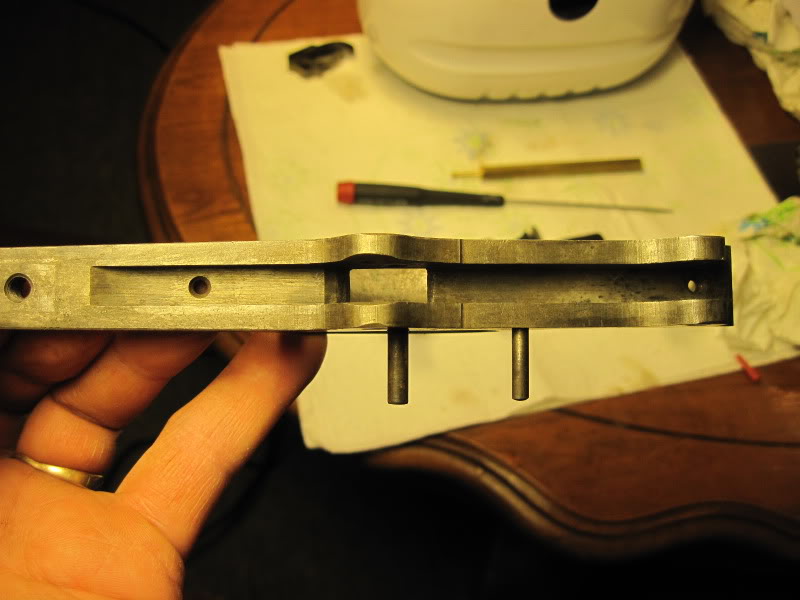
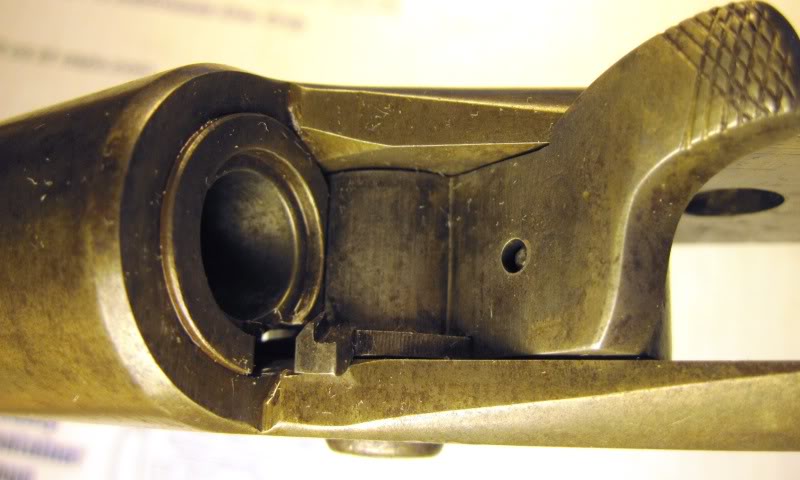
If you look at your picture that shows the action from below, you will see a plate closing off the action towards the front, below the end of the barrel. This plate should have a threaded hole in it to take the screwed end of the cleaning rod. It will probaby be a wierd thread, and the metal may be glass-hard, so that recutting it is a problem. Take the opportunity to measure it now - it will, be a bit of "see what fits" trial and error, I'm afraid, as it is probably no longer a clean thread - before the rifle is completed and re-assembled.
If anyone knows what the thread is supposed to be, please tell us!
You need to know the thread size (i.e. what is a practical fit) as the chances are that a replacement rod is
a) impossible to find
b) if found, excruciatingly expensive
c) the thread does not fit and finally
d) annoyed by a) b) and c), you decide to make a replacement.
If the test fitting of the action components is OK, then you have a potential shooter. If not, then post details - as you have to evaluate any defects in conjunction with the barrel condition to make that fateful shooter/wallhanger decision.
You are now going to have to face up to another decision: What kind of finish to apply to the metal. The condition of the rifle is such that there is no original finish to be preserved. So you have a free hand - it is your rifle - it is your decision. However, as always, I will offer a few thoughts for consideration.
1) Hot-bluing (but for a black surface, not actually blue).
As I mentioned, with regard to "one I did earlier", hot bluing can look very, very good. Unfortunately it can also look too good, and in combination with wood that is undeniably old, can give a "mutton dressed as lamb" effect.
2) "Struck bright" as the N-S skirmishers would say.
No finish, but everything polished. Then it would look like The Mahdi.
3) Cold blued.
This is the method I prefer, as with a little practice you can tone the result to look less crassly new, more like an original finish would look today - if it had not rusted.
Let me know how you feel about this before I continue.
That is enough for today
End of Part 4
Last edited by Patrick Chadwick; 12-27-2021 at 06:11 PM.
-
-
FREE MEMBER
NO Posting or PM's Allowed
Just a quick update,
I’ve completed the de-rusting of all small parts. Yesterday I cobbled together a tank large enough to de-rust the barrel and it’s done as well. Don’t waste your time with those small wall transformers that I’ve been using. I burned up three in short order.
The fit up and function of the action went well.
Sorry out of time for now. I’ll work on getting a nice big wordy and full of pictures post soon.
Joel.
-
Advisory Panel
Originally Posted by
killforfood
Don’t waste your time with those small wall transformers that I’ve been using. I burned up three in short order.
Now you know why I recommended a power supply (battery charger) with an adjustable current limit.
I do hope you remembered to dry and oil everything as soon as you took it out of the tank!
Looking forward to your illustrated progress report.
Patrick
Last edited by Patrick Chadwick; 11-21-2010 at 06:35 PM.
-
-
FREE MEMBER
NO Posting or PM's Allowed
Patrick’
First off, thanks for revealing the mystery of the Mahdi. An old rifle is always more than just wood and metal but also a fascinating history (the stuff movies are made of). Your beautiful results are an inspiration for me to continue my restoration project.
I completed the de-rusting of all the small parts. It’s surprising just how mucky the water and soda solution gets. The vast majority of debris is sloughed off from the sacrificial anodes. I don’t know that it’s necessary but I did change out the gunky solution for fresh when it got this bad. Also as mentioned before, I didn’t heed Patrick’s advice to use a proper current limited power supply and burned up three of the cheap “wall warts”. Basically they would get too hot to touch and die (probably a fire hazard).
Quite a few of the how to web sites were using full sized car chargers. One person even said he found they worked best in the 50amp start mode . I’ll bet that was a foaming mess.
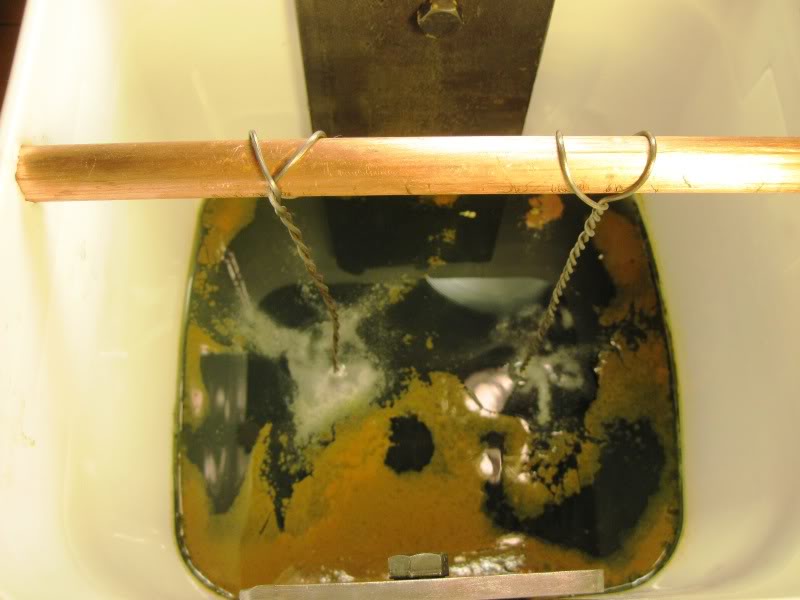
The next challenge was to build a de-rusting tank large enough for the barrel. My budget is very tight so I had to make do with things I could scrounge from around the house.
This piece of 4” sch80 PVC pipe was going to have to suffice . I would of preferred something larger but it’s what I had. It wasn’t deep enough to fully submerge the action so that end was done in the bucket.
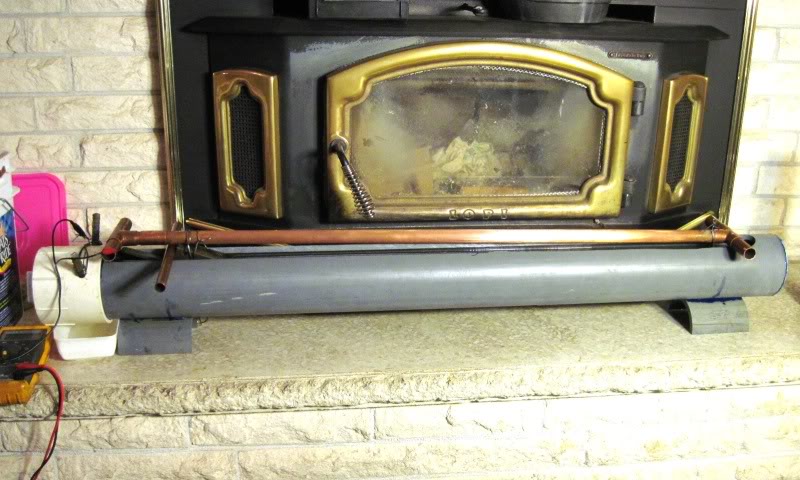
As I mentioned earlier, I needed a more robust power supply. My wife says I’m a Pack Rat but she doesn’t know how handy an old power supply might be down the road.
I stripped this off of an old machine a few years ago. Free is a very good price.
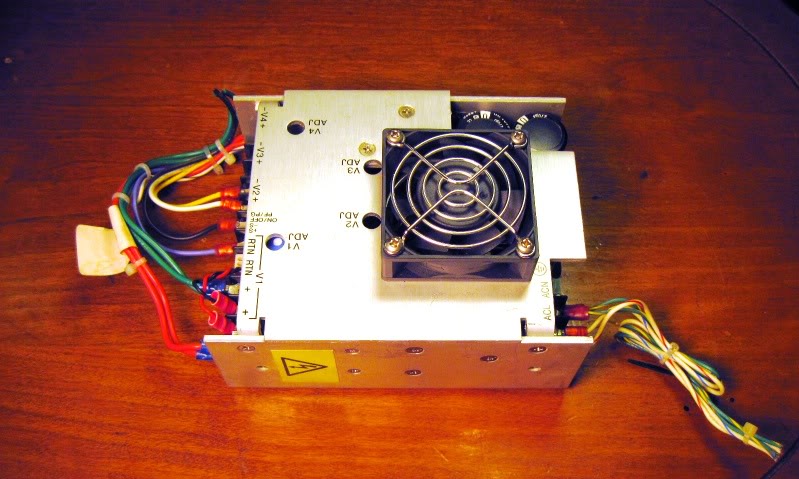
Here’s what it’s rated for.
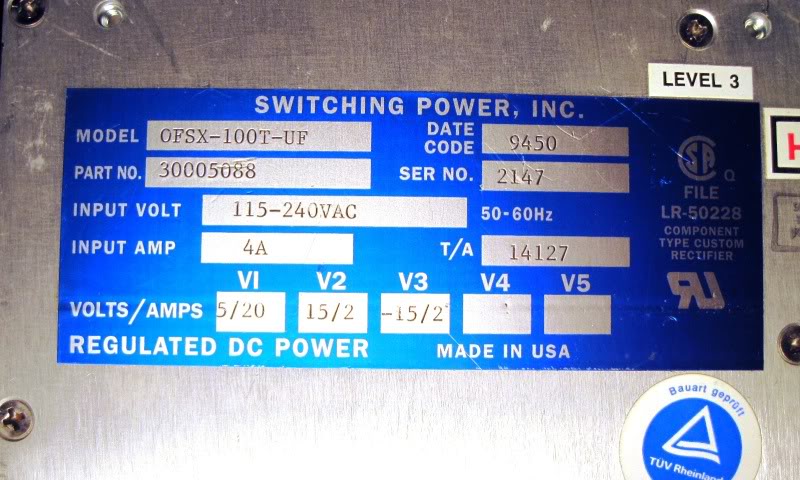
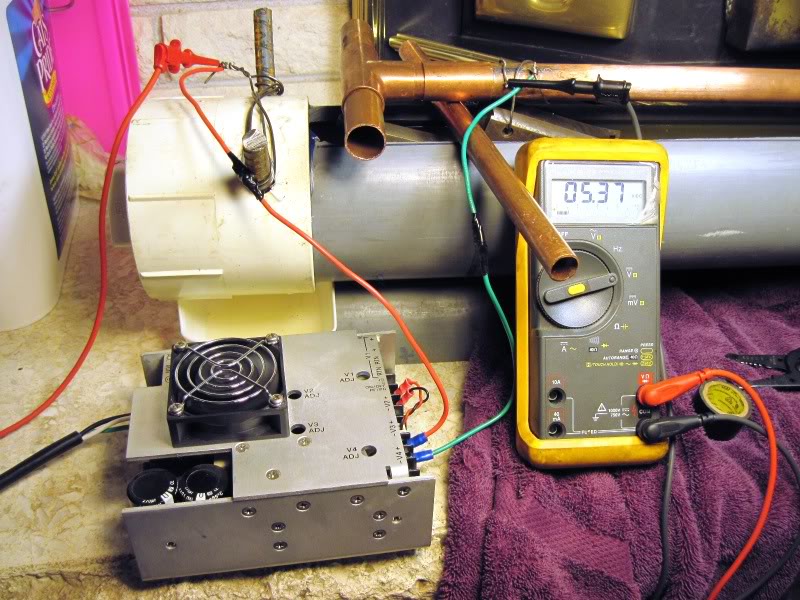
I tapped into the +15V 2A terminals but from this photo you can see that it pulled it clear down to 5V. That fan must help some because it never did feel hot to the touch even though I ran it for hours without interuption. The two rebars sticking up make a 90 degree angle and run the full length of the tank.
I knew the barrel would still be heavily pitted but most of this will be below the hand guard and not show. Considering how bad it looked before, this isn’t so bad.

Remember that photo that I posted just after removing the forearm and exposing all of that rust? Here’s a before and after shot.
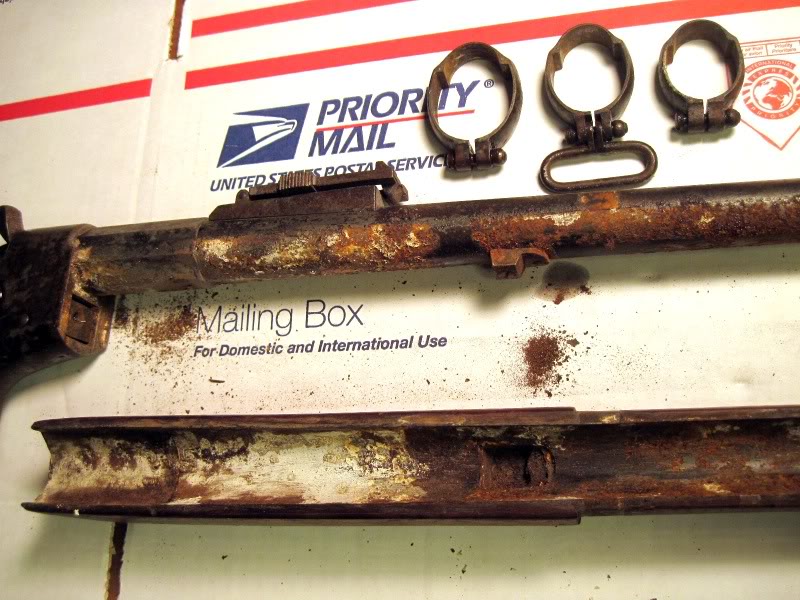
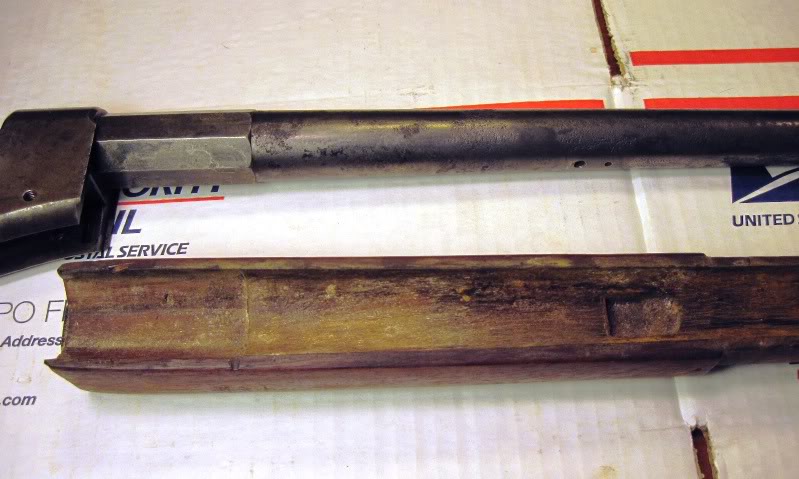
The worst spot on the barrel was the very end. Here’s how it came out.
Patrick, Should I try to smooth any of this out, or leave it as is?

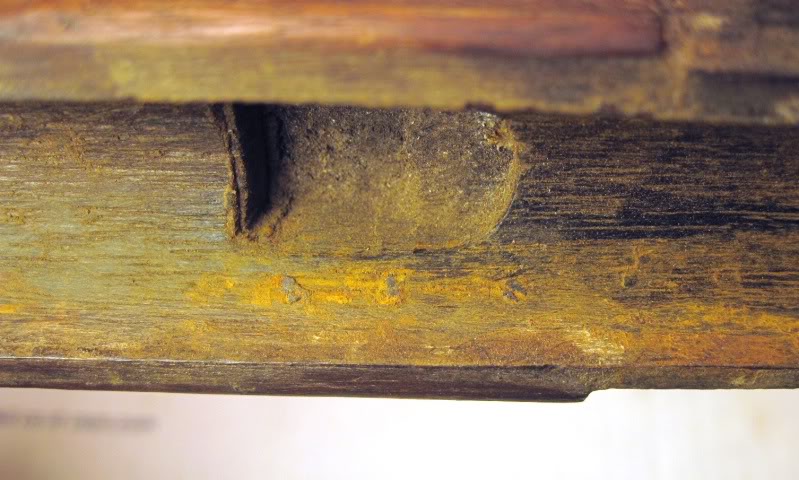
I did manage to get most of the crud out of the stock but a few chunks of stubborn barrel rust remains.
Patrick,
One other piece of your advice that I heeded and don’t regret was to purchase a cheap ultrasonic cleaner. I picked this one up at Harbor Freight for 25$. It really sped up the process by allowing me to quickly go back and forth between de-rusting and ultrasonically cleaning. It worked wonders freeing up my rear site.
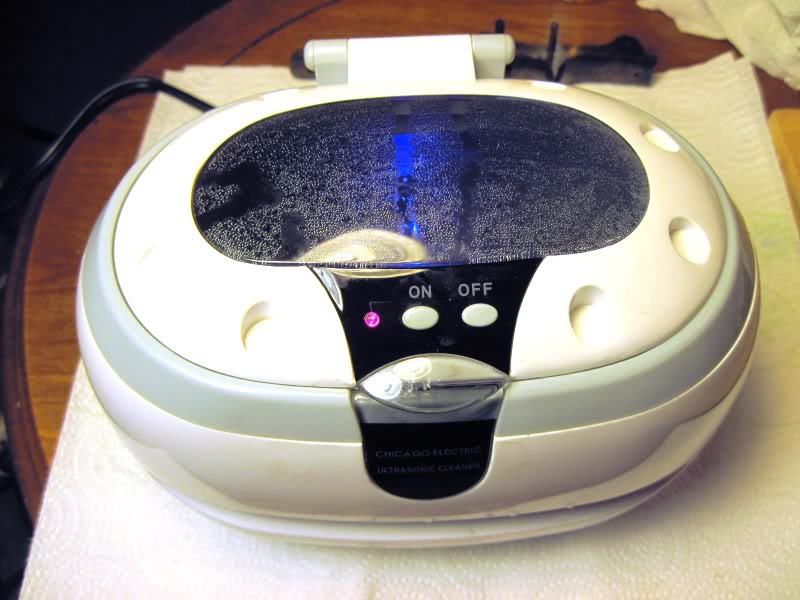
I added some dishwashing detergent to the water to help things along.
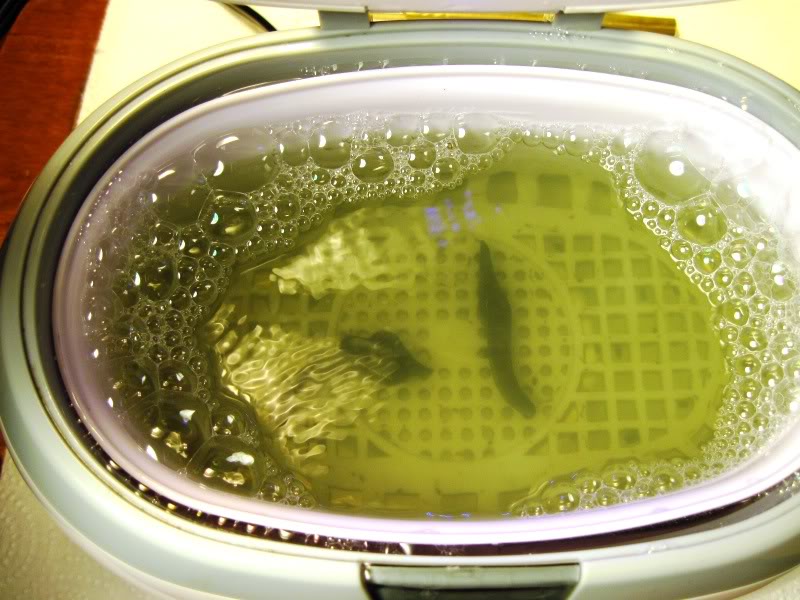
Before long the water would be nearly black and full of dislodged crud.
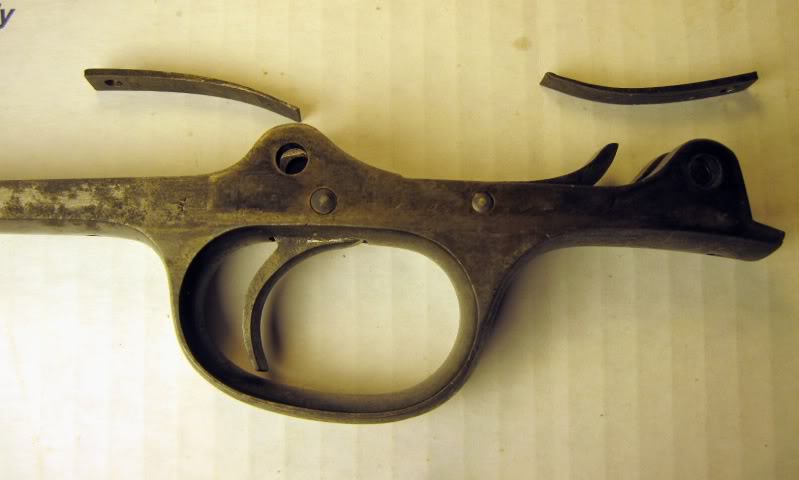
If money were no object I would have bought one twice the size. Or at least long enough to fit the whole trigger guard.

Even though I could only fit one end in at a time, I think the trigger guard cleaned up nice.
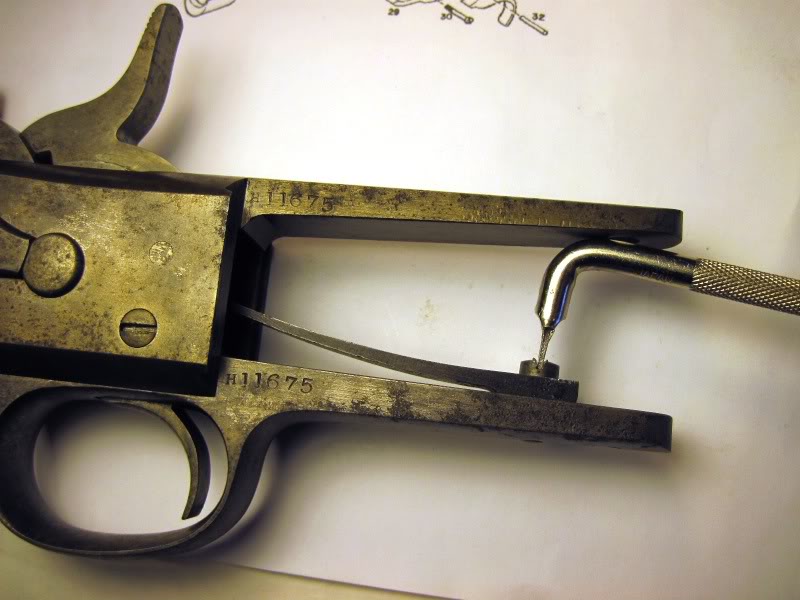
On a side note, I ran into a problem trying to removing the firing pin. The firing pin retractor fits in a slot that is cut into the firing pin. This slot had a raised bur where the retractor comes into contact with it. This bur was just enough to prevent me from removing the firing pin. After some gentle persuasion I finally managed to dislodge it.
Here you can see on the top left edge of the slot, the little bur that was just enough to give me fits.
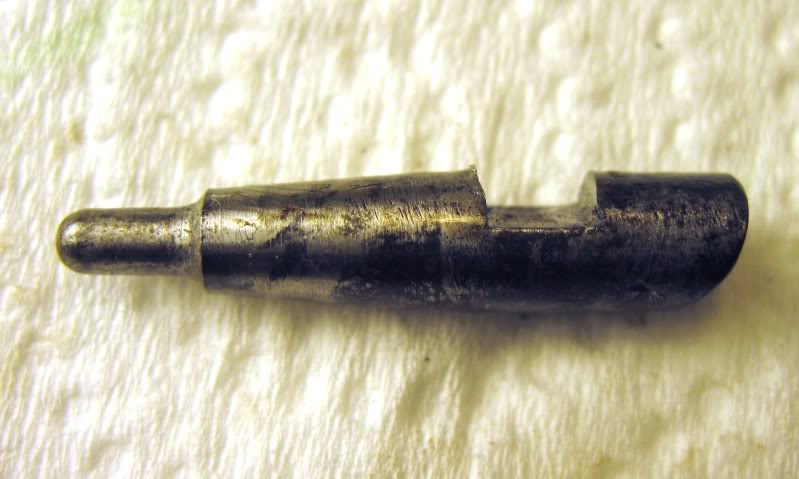
Some minor touch up with a file and we’re good to go.
OK time to test these parts for function.
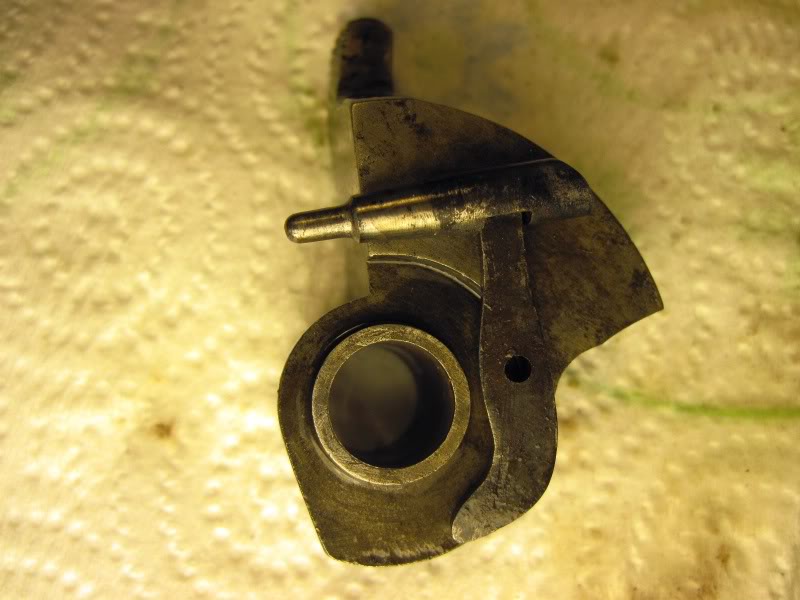
In this photo you can see the small unique file mark in the breechblock pin that denotes rotation and location. The hammer pin is marked also. Good tip Patrick.

Maybe I should’ve said “Let the confusion begin”.
Right off the bat I’m looking at two nearly identical springs and can’t remember which goes where. Notice the greater curvature indicating that one will be stronger than the other. I really don’t want these to get mixed up.
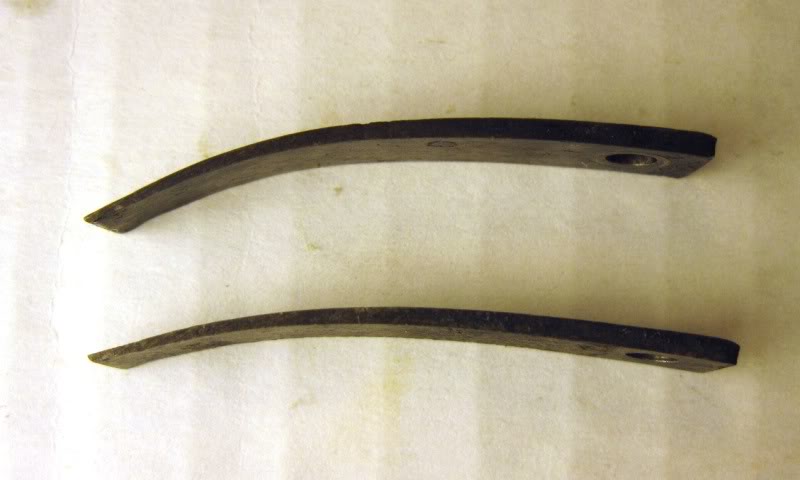
Fortunately the mystery is solved by observing the marks left by the screws. It’s now obvious that one spring pushes up and the other down.
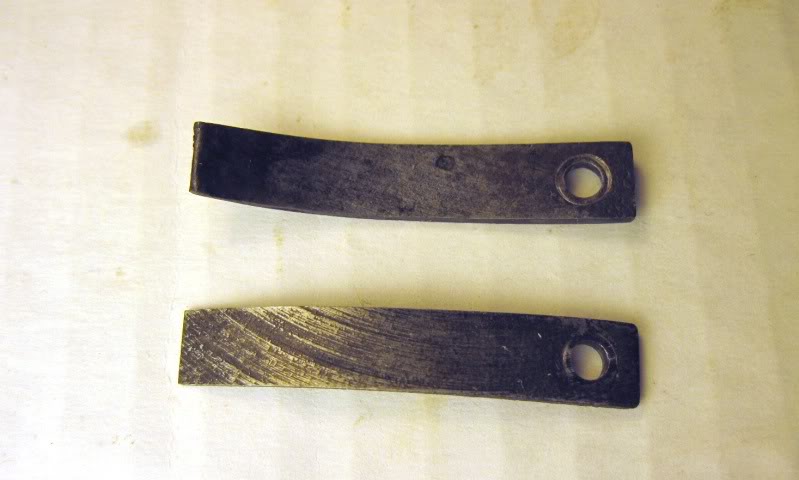
So the one that pushes down is for the trigger and the one that pushes up is for the locking lever.
The next mystery is which screw goes with which spring? They are both identical except one is slightly longer than the other.
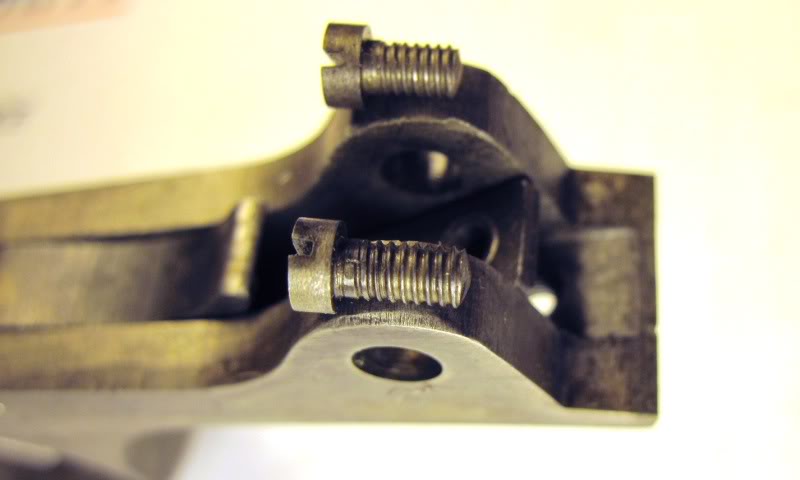
Install them incorrectly as I did and you will quickly see that one will stick out a mile and the other will be recessed. Hey’ I’m allowed one screw up. I swapped them and they’re now flush.
Sure pays to have friends at work. My tool and die guy turned this 1/8” brass drift punch out for me so I wouldn’t harm the trigger pins.
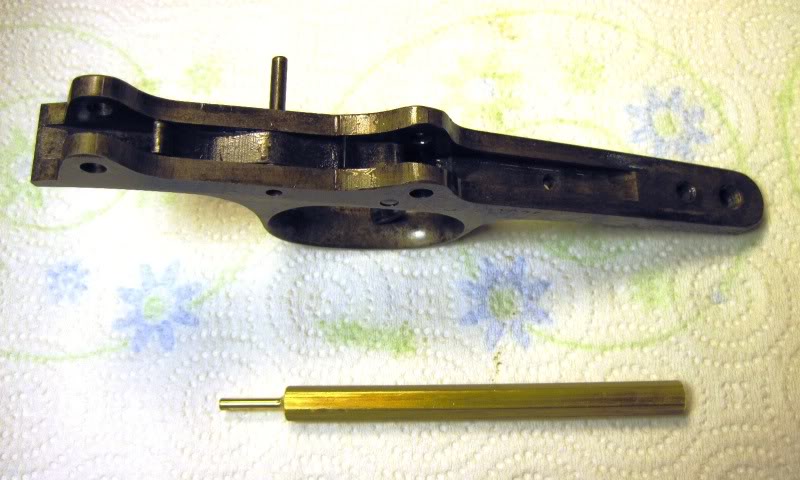
The next mystery was how to get the main spring back in. Basically I just reversed Patrick’s removal instructions, with one added twist. Install the front screw and swing the guard partially into place. Then install the main spring but leave it fairly loose so that it can droop down and engage the hammer properly.
Next squeeze the trigger guard into place and install the rear screw. Now the tricky part. Finish tightening the main spring screw with one of those short bendy screw drivers that allows you to get into the tight confines of the action. Now I know why the main spring screw was so marred up. Somebody must have tried to do this without proper tools.
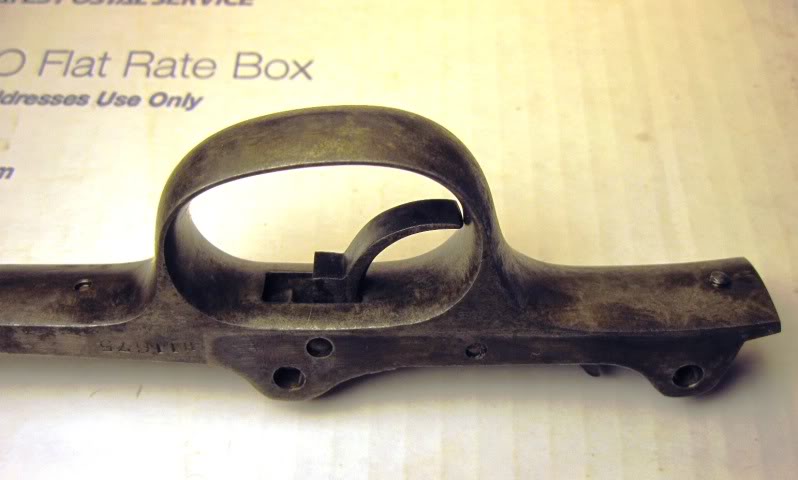
Now the good news, everything functioned flawlessly. The breechblock locks up tight with no visible gap.
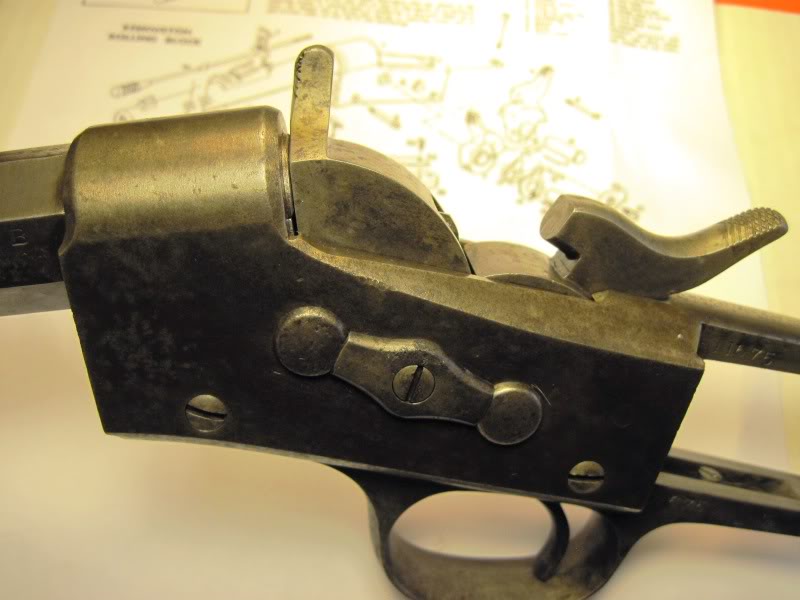
The extractor looks sharp with almost no visible wear.
The hammer ran smooth also and NO I did not dry fire it.
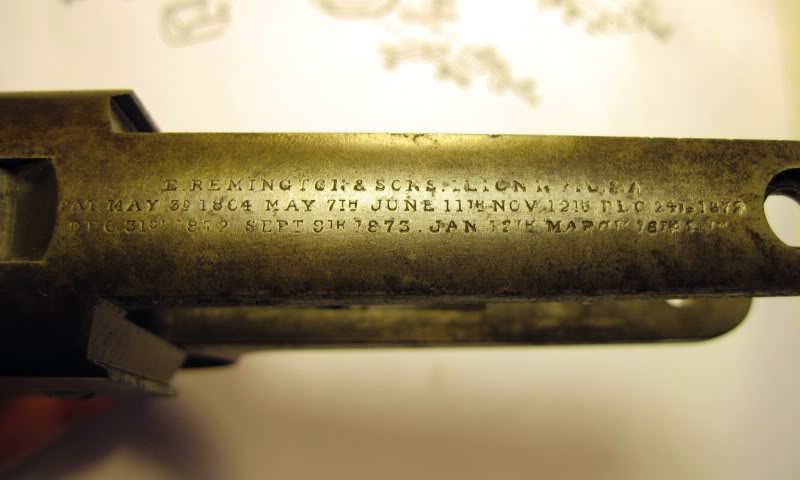
On a happy note the patent date is well preserved.
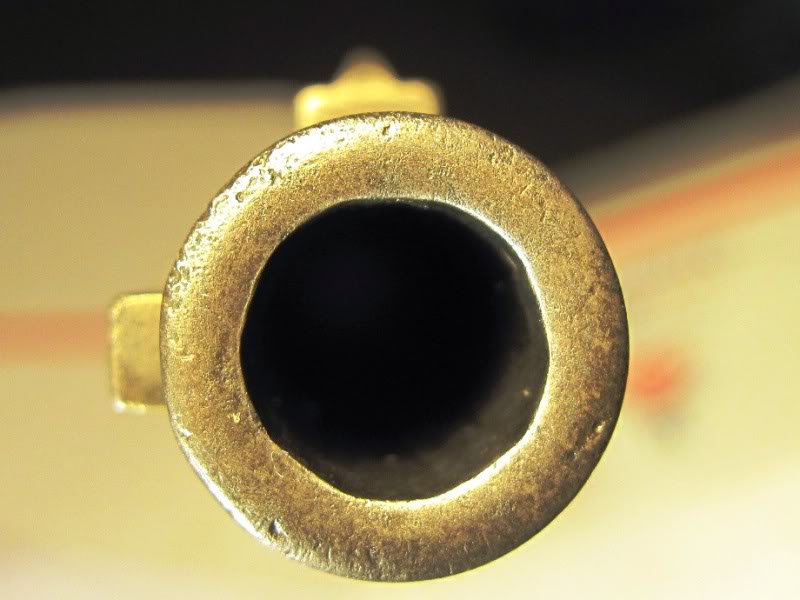
The crown looks better without the rust but is obviously still not happy. I want this rifle to be a shooter so at some point we will need to cover this.
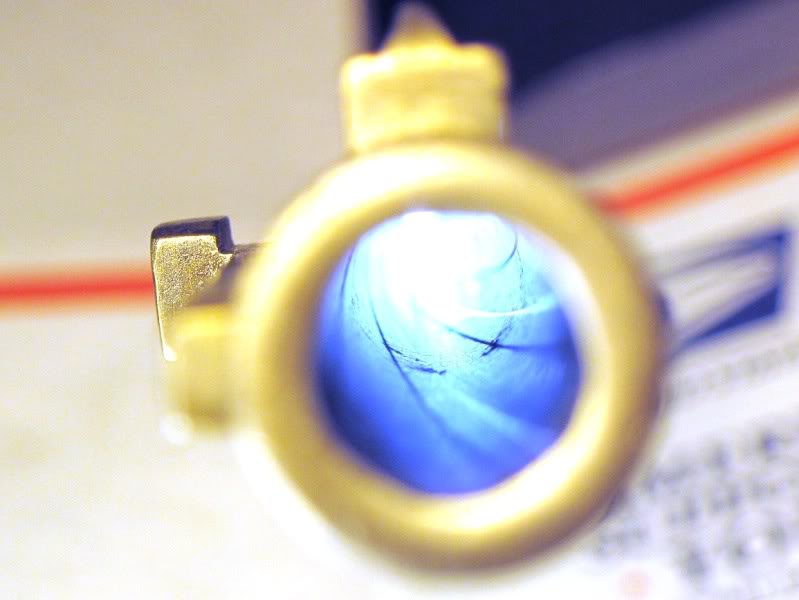
I had hoped that the bad spot near the muzzle would have come out better but it appears that some of the rust is still hanging on.
Well that’s all for now. I’m very pleased with the progress so far and I’m anxious to learn the next step.
Patrick thanks for your excellent instructions and I patiently await the next installment.
Joel.
Last edited by killforfood; 11-22-2010 at 05:36 PM.


 Register To Reply


