What's all this now? Other than a scolding waiting to happen for taking over the kitchen table?
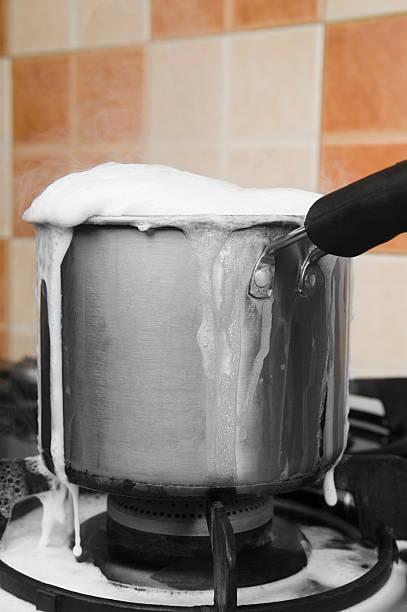
Seriously though, my current temp controller is just the simple on-off type, and doesn't hold temp too well. The min. differential is 1 degree, and will either boil over or just sit there.
So, we (my kids) wired up a PID controller. The PID and solid state relay was $25. The enclosure was a splurge at $15. I wanted something that would dissipate the heat from the SSR without needing a heat sink attached. The rest I had in a box in the attic - leftovers from when I made my brewery a decade ago. Should hold a perfect simmer now.
Not to change the topic. I think I posted these once...before the great milsurps blackout.
First test went well. Obviously the settings for the thermocouple need tweaked. I get a nice roaring boil, but because the element is pulsing it doesn't boil over the tube. Went from room temp to boil in about 15 minutes. The element is a 120v 1500W water heater element (shorty). Definitely a bit over powered. The solid state relay heated up pretty good. While the element was continuously on during heat up, the temp of the enclosure underneath it topped off at ~160F. Not too hot to touch, but don't leave your finger on it. Once it got to the set point and started pulsing, it immediately cooled down and stayed at ~90F while it held station.
At some point, I plan to build a bluing rig with a boil tube and cleaning tube - a 15 minute dip in brownell's 909 sure beats getting yelled at for scrubbing a barrel in the kitchen sink!. Heck, I can even do a second boil tube for parking. Cartridge heaters are pretty cheap. I'm thinking two 800w cartridge heaters for the boil tubes, and a 500w cartridge heater for the 909, and it should all fit on the same 20amp circuit.
This will do for now though. I suppose I'll do a big how-to thread when I build the rig. I've got a backlog of barrels and magazine tubes to do. I'm tempted to pause this, build it, and clear the backlog in a weekend.
Years ago...I was active on a homebrewing forum. I don't recall which. I did a thread on on it.
It was pretty easy. The blue box on the inside has bare bones computer with several discrete inputs/outputs, and temp probe inputs. Its firmware is basically a simple web server. Everything is held in text files, accessed with ftp, and a web page(s) to display it all. The displays on the panel are just 7segment displays - the blue box as two I2C ports that makes those work....but the whole thing can be pulled up as website too.
I chose to build a propane rig, rather than switching high voltage. The gas plumbing is all inside and under the rig...just 24v solenoid valves, lit with an intermittent pilot light like you would install for your fireplace to turn it on from a switch. The panel itself is only lighting up and switching off the control signal voltages to relays that switch 24v for the burners and 120v for the 3 pumps. The hot liquor tank (on the left) has a coils of 1/4 stainless pipe. Wort from the mash (center) is pumped from the bottom, into the top of the coil, then out the bottom, and into the top of the mash. Thus, but tweaking the temp in the HLT, I can dial in and hold various steps of mash temps to get exactly what I want. Basically, different temps activate different enzymes in the mash that make different sugars and other compounds. Lots of chemistry books have been written about this if anyone is interested I'll point in the right direction.
The brewery has been covered in the garage for a few years no. My free time for making and drinking beer progressively vanished as the kids got older. But just before all that...I was responsible this happening at a local brewery. https://www.beeradvocate.com/beer/profile/25435/130563/
The guy that ran the place was nice enough to give me a tour of their setup one afternoon. I thanked him with small growler, and he called the next morning to ask more about it. Couldn't believe it was full flavored with only 2% alcohol. He increased that a bit in production so it would sell better. It turned out pretty good...I'd say it's still better in my garage at 2%, 10 gallons at a time instead of 10 barrels.
Well, I got an itch last weekend and started making a bluing/parkerizing rig (disclaimer: no silly it's not for hot salts bluing!). Then I waited all week for Bezos to deliver a $5 4.5inch hole saw to make it extra pretty.
I haven't glued up the tubes yet. Cartridge heating elements are on their way. x2 800 watts for boil tubes and a 500w element for the 909 cleaner tube. As you can see, it's 4 inch sched. 40 pvc pipe, 4in x 3in reducer at the bottom, and then 3in slip x NPT fitting at the bottom. To this I will epoxy in place a 1/2 NPT nipple, then a tee with ball valve on the horizontal and my cartridge heating element on the underside.
why 5 tubes? I wanted to reserve the right to parkerize in the future. Plus, when I rust blue I like the last iteration to convert in clean water (depends on the solution. some need a final baking soda boil to neutralize, some just need a clean water boil.) So two boilers, one to heat 909 to 180F, a cold water rinse tube, and a water displacing oil to soak tube when it's all done.
I do need to get slightly larger casters for it so I can put ball valves under the tubes, and of course build the control panel. Until then, my existing boil tube doesn't need bungied to the workbench.
Couple lessons I learned the hard way bluing this way for a while:
1) a regular water heater element doesn't have enough threads to screw into pvc directly. As the tubes heat up, the pvc will stay rigid, but deform at pressure points - like where it's leaning against workbench, or at the threads if there is and side-load on them which will cause it to leak. To prevent leaks, use a pipe nipple in the pvc, and instead of teflon tape to seal it epoxy it in place with jb weld. I've been using my current tube this way for dozens of projects for a couple years now. Other than the dent where it leans against the bench, it is still serviceable and will last years more.
2) don't leave your tube on the porch over any period with large temp swings. the bottom reducer, which is harder than the tube, will crack if it starts off very cold and you go to heat it up.
3) don't move it until the pvc has completely cooled. any weight or side-loading on threaded fitting, like holding it while you dump it, will flex the threads while the pvc is malleable and potentially cause a leak.
that's it. very cost effective compared to buying or building metal horizontal tanks, not to mention heating them. Not that I needed such a nice setup, but it's compact and removes most of my time-suck when bluing...which is clearing out space, fighting to use the kitchen sink to degrease the hard way, etc. After using 909 on some receivers, I'm sold. Soak for 15 minutes and rinse. No scrubbing needed! I might put a shelf on front of the rig for prep and applying my solution.


Originally Posted by ssgross


 PM
PM