-
Legacy Member

Sten jig
Is it a jig for welding the trigger mechanism housing to the casing?
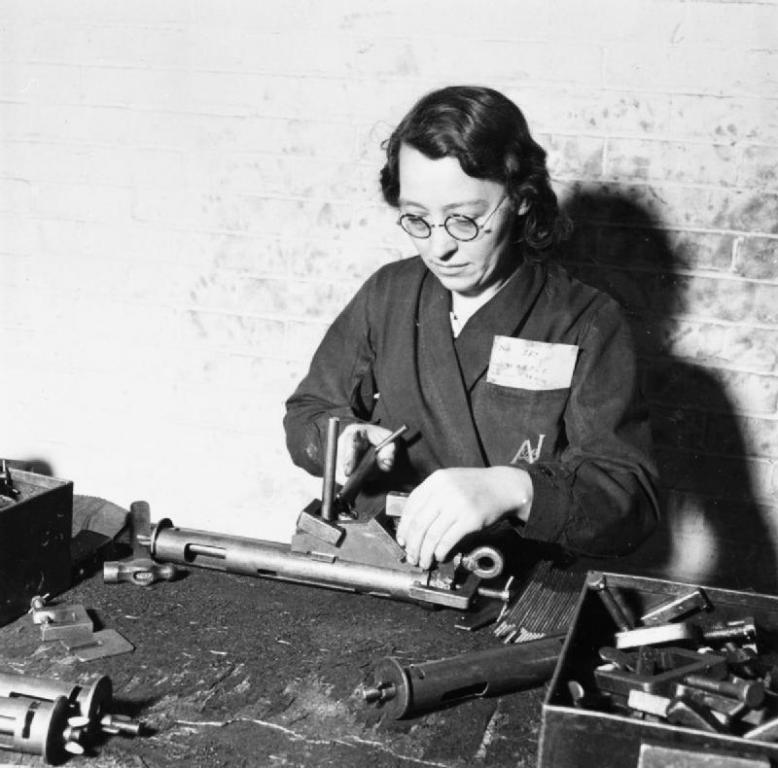
It looks like there’s also a backer/heatsink inside the casing that’s held in place with large washers and wingnuts.
Information
 |
Warning: This is a relatively older thread
This discussion is older than 360 days. Some information contained in it may no longer be current. |
|
-
The Following 5 Members Say Thank You to Vincent For This Useful Post:
-
08-26-2016 12:41 PM
# ADS
Friends and Sponsors

-
You're right Vince. The two front ears of the TMH casing can be seen. I think that it is a multi-jig because at the rear, where the looped finger nut is, the rear head casing looks like it's being positioned ready for welding at the same time, which would make perfect sense.
You can shoot 'em with a £50 Thompson gun or a £2:7:6d Sten gun. But you can only kill someone so dead........
Don't you just love those Heydrich spectacles......?
-
Thank You to Peter Laidler For This Useful Post:
-
-
Legacy Member
You're right Vince. The two front ears of the TMH casing can be seen. I think that it is a multi-jig because at the rear, where the looped finger nut is, the rear head casing looks like it's being positioned ready for welding at the same time, which would make perfect sense.
So the trigger mechanism housing was put together and welded to the casing in one operation. That’s interesting. For some reason I thought was assembled first then welded to the tube.
I just noticed what looks like a pile of trigger mechanism housing side plates on the workbench below her left arm.
-
-
I'd never really thought about it but I'd say with almost certainty that the TMH box section was put on in secured sections, rear head casing slid on, all aligned using those jigs and welded. Top of rear head casing, front left and right ears. TMH box and head casing now secure and aligned. Now front of TMH box and rear of TMH box where butt spigot slides. Mind you, every casing assembler will have has their own preferred method.
You will notice that some of the TMH box side plates are longer at the front and as such, were folded over to form the front of the box, then welded to the opposite box side. Don't forget, that while the side plates could have been punched out as symmetrical (or not-handed), they immediately became handed when the holes were punched and/or the ear was bent over
-
Thank You to Peter Laidler For This Useful Post:
-
Legacy Member

Notice the little "G" clamp on the bench, just in front of the hammer which looks like it's been made in-house. Such clamps are still being made today in Factories here in the U.K.; I've produced a few very similar to this example myself over the years.
-
-
When the big Command Armourers shop at Xxxxxxxxx closed down in 2005 or so they still had the calibrated BESA gauges (obsolete since 1966), rolls of copper wire for No1 EY rifles, thing for putting the wire ends onto No1 bayonet scabbards and wooden jigs for patching SMLE handguards, steel templates for re-earing front and rear handguards. All locally made by generations of Armourers - except for the gauges!
-
Thank You to Peter Laidler For This Useful Post:
-
Advisory Panel


they still had the calibrated BESA gauges (obsolete since 1966), rolls of copper wire for No1 EY rifles, thing for putting the wire ends onto No1 bayonet scabbards and wooden jigs for patching SMLE handguards, steel templates for re-earing front and rear handguards
Imagine how handy that stuff would be today for someone to set up in business? A bit of a pain to do some of those things but it would be VERY profitable.
-
-

Originally Posted by
Flying10uk

Notice the little "G" clamp on the bench, just in front of the hammer which looks like it's been made in-house. Such clamps are still being made today in Factories here in the U.K.; I've produced a few very similar to this example myself over the years.
When we were making them as part of our apprentice ship it was called a Grab, started with scraping all sides of a square block flat and square then so many cuts with a hacksaw then hand the saw back in.... then the fun started with a Hammer and Chisel only, plus safety glasses..............a board of approx 3ft x 3ft was between you and the next guy on the bench.
We went on to make two small ones but didn't need to use the chisel......
-
-
Same as us Big Duke. Chipping......... hard on the hands or what!
-
-
Legacy Member
The little "G" clamps which I have made over the years, very similar to the example in the photograph in post 1, have been made purely because small clamps have been required to do certain jobs. All I have done is to machine them out of a piece of mild steel and then drill and tap a thread through for a screw.
-


 PM
PM


