


Note: After you click on images to ENLARGE them, you may find they automatically size smaller in your browser's window making them hard to read. The auto sizing is your browser's way of keeping images entirely within the screen size you have set. If this happens, you will see a small box in the bottom right hand corner of the pic with four arrows point outwards. Click this box and the pic will EXPAND and open up to its normal size, so you should now be able to read any text and make out small details.
"The L42 and 39 Fore-ends"
(How to put matters right!)
By Peter Laidler
By Peter Laidler
You read previously in the first article titled "The fore-end and handguards of the L42" (click here), about the absolutely disgraceful state of the modified/converted fore-ends fitted to the L39 and 42 rifles. Here, I’ll attempt to describe in words and pictures just how to repair yours if it’s broken or chipped away at the front end
On the basis that one picture does indeed describe a thousand words, I have photographed the complete sequence of a REME Armourers repair right from the word go! So using this as a guide, I’ll put words to it as we go along.
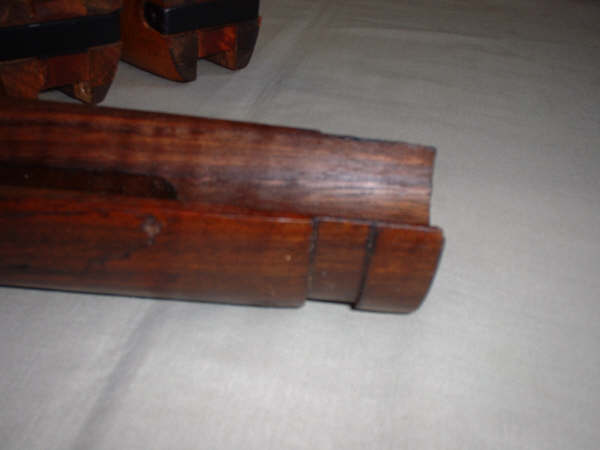
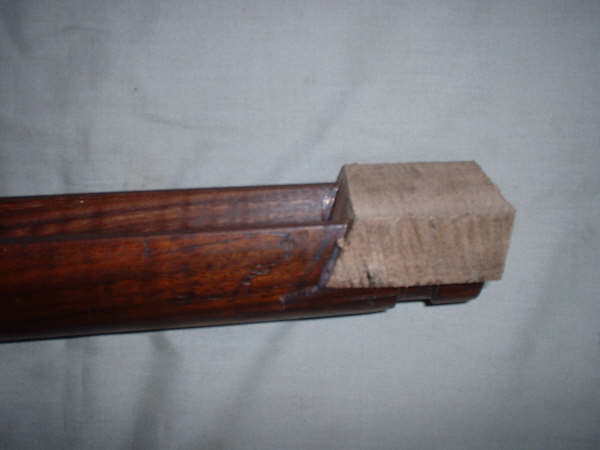
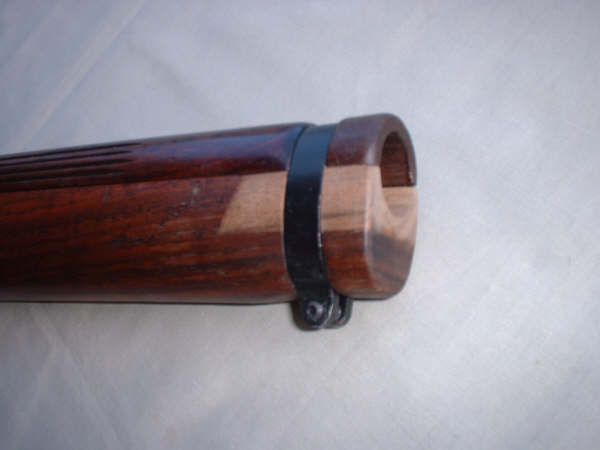
The problem. This is where the bodged fore-end is at its weakest, even if the oversized 1” diameter groove is central. If it’s slightly off-central, it’s guaranteed to fail. Alas, most are!
 (Click PIC to Enlarge)
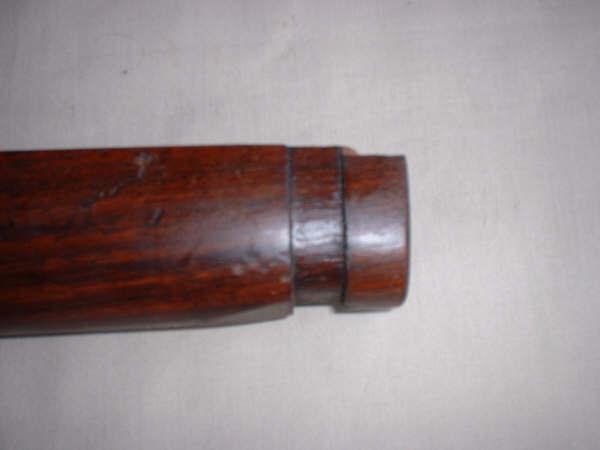
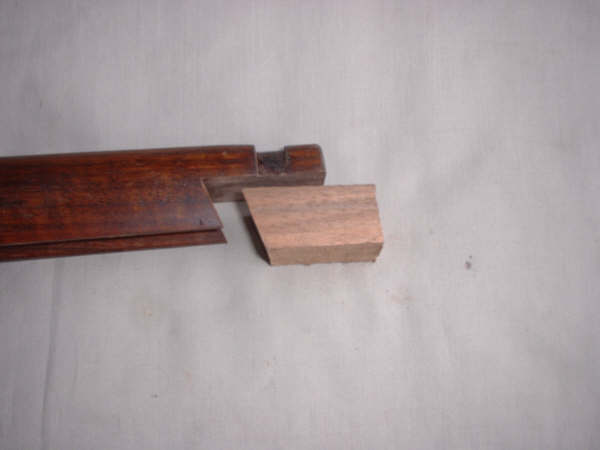
The dovetail undercut section, to this approximate proportion is cut out, square to the front and parallel to the top. It is finished off smooth with a file. An oversize patch is cut out and with a file or wood rasp and finished off to fit EXACTLY. There will be no daylight showing or gaps that you hope the adhesive will miraculously fill. It won’t! It must be a PERFECT fit.
(Click PIC to Enlarge)
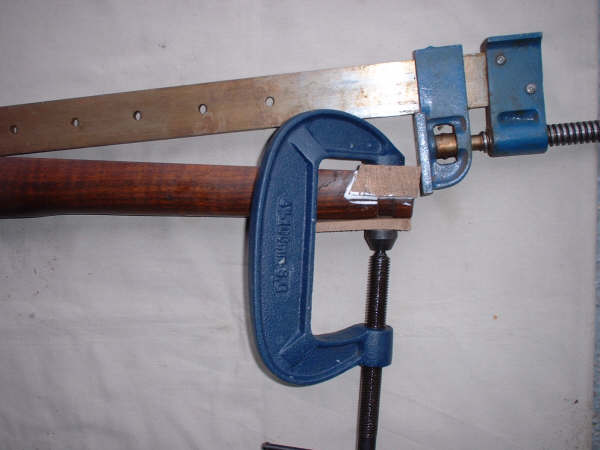
The wood patch and fore-end glued and the wood adhesive rubbed in then cramped tight, end to end and top to bottom as shown here. Don’t be mislead by your dad if he tells you that this modern woodworking adhesive is rubbish compared with the old hot animal bone glue he used in his day. The fact is that modern adhesives are FAR superior!
(Click PIC to Enlarge)
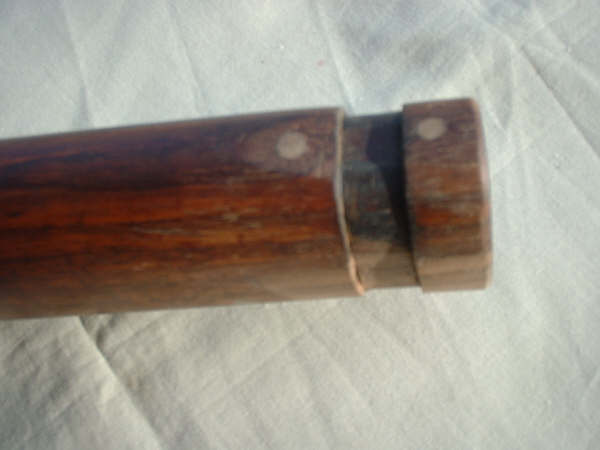
Here it is, after having been left cramped up for 24 hours. This is a piece of true walnut fitted into a black walnut L42 converted No4T trials rifle fore-end. Make sure you match the wood up for colour as best you can. The patch is there to stay, but…………
(Click PIC to Enlarge)
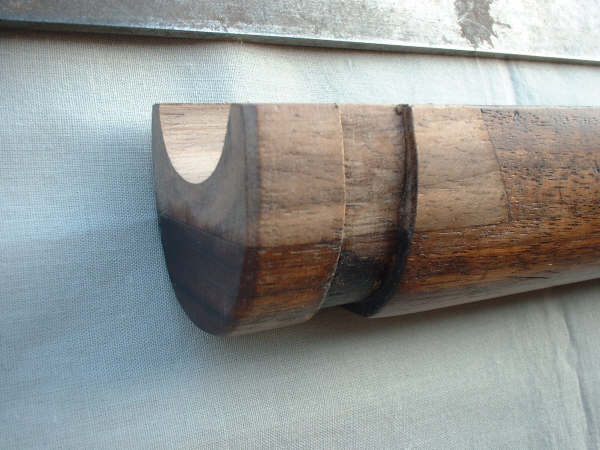
Here you can see that the patch has been roughly finished for silhouette, ready for the next part. And it’s here that you can always identify a real, true Armourers patch as opposed to those ‘…enthusiastic amateurs’. They’re always pegged. We were taught to always use hand made hardwood oak pegs. Here you can see two hand made slightly tapered walnut pegs glued and hammered into the holes.

(Click PIC to Enlarge)
The pegs have been cut off and made good and the patch finished externally. Notice that it’s parallel so that we don’t get into the situation where it narrows slightly towards the front. Notice also that the top of the patch follows through the line of the top of the fore-end. If it dips, it’ll bend the handguard down. If it tips up, the band will twist the handguard. Both things we want to avoid like the plague! If nec essary, use a straight-edge or steel ruler to get it absolutely correct.
Also note that a band has been put around the remaining section of band recess and a slave handguard so that you can score very close to the edge with a craft knife blade. All you need to do then is to CAREFULLY chisel out the wood to the depth of the band. It’s not deep. Just remove sufficient wood so that the surface of the band is JUST below the level of the fore-end. Easy on that chisel………………….

(Click PIC to Enlarge)
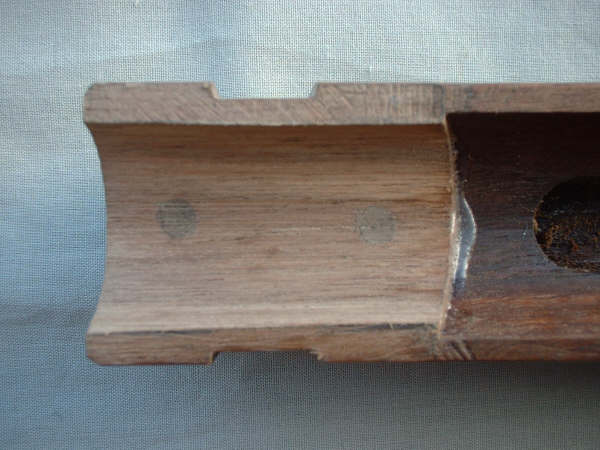
Almost there……….. All you need to do now is with the careful use of a tenon saw (or any saw if you’re careful….) cut down into the centre of the trough for about .4” then from each side, take out a ‘V’ shape. Now, using you ‘FLOAT fore-end’ from your Armourers tool kit ….., or failing that, a round wood rasp from a good hardware shop, and rasp out the centre channel.
But remember, you only need to take out sufficient to clear the barrel PLUS .020”, that’s twenty thou, from around the edge. To achieve this, just fit the fore-end, wrap a piece of .020” or so thick card and draw it up and down between the barrel and the fore-end. If it’s clear, that’s all you need. This way you have only taken off the wood you NEED to remove. The remainder adds to the strength of the patch and the fore-end.
(Click PIC to Enlarge)
From the top. Take the band groove out first then you can see what's left before you start taking out the barrel groove. Remember, only .020 clearance required

(Click PIC to Enlarge)
Make sure that the top edges of the patch are exactly level with the remainder of the fore-end. Use a straight-edge if you’re not sure or are a bit of an amateur like me

(Click PIC to Enlarge)
Thar she blows…., ready for another 40 years sterling service. The finished article. Notice how the wood is full and only the minimum removed, just sufficient to clear the barrel. The depth of the band recess is similar. JUST sufficient to cater for the depth.
(Click PIC to Enlarge)
View from inside. Once again, note the hardwood dowel pegs and that there loads of meat at the top front of the fore-end. You’d have thought that they could have converted them to this spec to start with!
(Click PIC to Enlarge)
The finished article. All that you’ve got to do now is to stain it to match the colour or in this case, apply a few coats of linseed oil and within a few weeks you won’t see the patch at all. But a patch like this all starts with the preparation. Go on then, marks out of ten……..
(Click PIC to Enlarge)
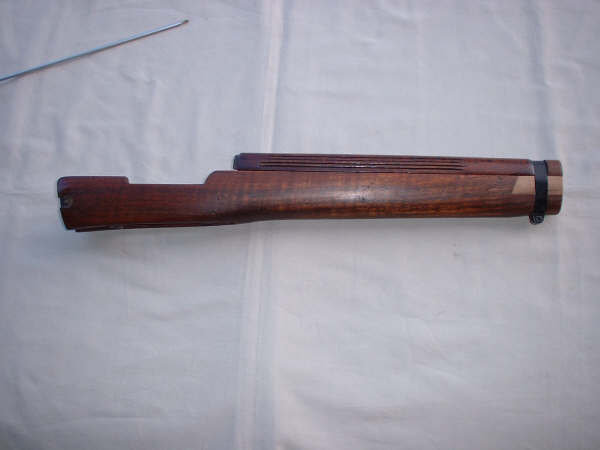
Saved by the bell. A Mk1 fore-end taken from an L42 converted trials rifle, ready for a further 60 years service.
(Click PIC to Enlarge)
Copyright ©2006 - 2009 by Peter Laidler and MILSURPS.COM
Collector's Comments and Feedback:
1. Besides this terrific article by Advisory Panel Member Peter Laidler, there are a few other Knowledge Library entries relating to wood failures and repairs on these old milsurp rifles. A few examples are:
Repairing a Split Stock on a Lithgow SMLE by turkmcl and O_P (click here)
Lithgow SMLE ... Causes of Cracked Foreends by Son (click here)
Repairing a K98k "duffle cut" by Hambone (click here)
There's also an excellent photo pictorial, designed to help the average collector identify the different wood types and finishes on K98k's.
German K98 Stocks and Wood Types by rcmauser (click here)
....... (Feedback by "Badger")
2. In addition to being a trained and highly experienced military "Armourer", Peter Laidler has authored two excellent books about the No.4(T) sniper rifles and their No.32 scopes. They are titled "An Armourer's Perspective: .303 No.4(T) Sniper Rifle", which he co-authored with Ian Skennerton and his own dedicated work, "Telescope Sighting No.32".
If you're really interested in some in-depth learning about the No.4(T) sniper rifles and the No.32 series of scopes, their history, evolution, repair and adjustments for shooting, I'd highly recommend those two books, which are pictured below. ....... (Feedback by "Badger")
 (Click PIC to Enlarge)
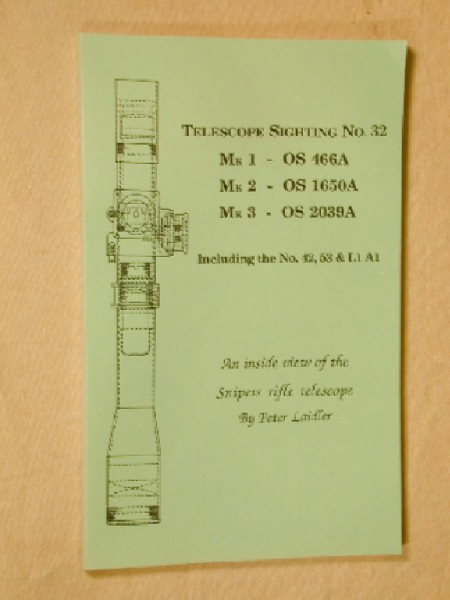
Note: The opinions expressed herein or statements made in this article are solely those of the author, and do not necessarily reflect the views of the Military Surplus Collectors Forums, or the ownership and moderation group of this site. MILSURPS.COM accepts no legal liability or responsibility for any claims made or opinions expressed herein. Also, please note that neither the author nor MILSURPS.COM recommends that any member of these forums, or a reader of this article, try this type of experimentation without the proper knowledge, equipment and training.

 Reply
Reply
 Countries
 Categories