Note: After you click on images to ENLARGE them, you may find they automatically size smaller in your browser's window making them harder to view. The auto sizing is your browser's way of keeping images entirely within the screen size you have set. Move your mouse pointer to the bottom centre of the pic and you will see an options panel appear. There will be a small square box next to the large X, which will have a pointer arrow sticking out of it. If it's illuminated, it means the pic you're viewing can be enlarged, so click on this box and the pic will EXPAND and open to its normal size.
Making Up a Useable No.4 Sniper
(Part 1 - The telescope and the bracket)
By Peter Laidler
If you’re about to embark on making yourself a repro No4 sniper, then this is where we start. Firstly, by now, you should have yourself a bracket, a set of pads and most importantly, a telescope.
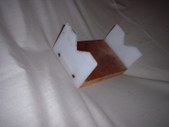
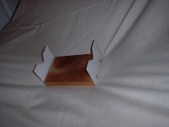
There’s something else you’ll need before you start. It’s a little cradle thingy so that you can rotate the telescope. On the basis that one picture describes a thousand words, the photographs here show something that will do the job as well as anything. This was knocked up by me in 10 minutes using two bits of plastic sheet, cut with a hacksaw and screwed to the end of a bit of wood. No measurements needed because the telescope shows it all in proportion and the two ‘vee’s hold the telescope in position while you roll it.
The ideal ‘vee’ frame. A simple made jig to rotate and ‘centre’ the telescope
 (Click PIC to Enlarge)
Next, we’re going to do something very important for the whole process. If you think you can proceed without doing this, then don’t bother reading any further – because you can’t ….., at least, not properly! What we’re going to do is go through the process of making up a No4 sniper that will be competitive and useful. I appreciate that it’ll be a repro, but it’s going to be a GOOD repro. When you’ve finished, you won’t have know-alls like me taking a look at the collimation and workmanship and spouting off that it’s a heap of butchered tat. Are we ready for the off?
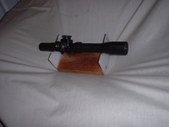
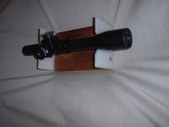
Put your ‘vee’ frame onto a rigid surface, somewhere close to a window. A pile of books on the window ledge will do…., where you can see for a long distance. Set the range and deflection drums to ‘0’. Now place the telescope onto the vee frame and slowly rotate the scope body, looking at the image transcribed by the point of the graticle as it rotates its way around a 360 degree circle. Look at it in relation to the image/picture you can see.
(In our workshops, we have something similar that is adjustable for ‘aim’ and we’ll ‘aim at a distant aiming point (a DAP) at several miles away). If you are using a commercial ‘look-a-like’ scope in the No32 bracket, then do this too because what we’re about to do will ensure that the bracket is set optically perfect. More later!
A telescope in the ‘vee’ frame to give a loose idea of the dimensions and to illustrate a typical telescope being rotated
 (Click PIC to Enlarge)
Loosen the lead screw locking nuts very slightly so that you as you rotate the telescope, you can use the lead screws to bring the point of the grat into the centre of the optical axis of the telescope. That is, as you rotate the telescope the point of the graticle remains in the same place relative to the image you see in the screen. This action is called CENTERING or COLLIMATING the telescope – or ensuring that the optical axis is true to the centre line of the tube. You can now grease the bracket cradle and caps, mount the telescope into the bracket and screw the taper-lock screws down. Not too tight….., just letting them form their own lock as they’re designed to do. And another thing that I and all our examiners ALWAYS looked for….. There MUST be an equal gap between the left and right side of the cradle caps. Got that?
This is the first and easiest part of making a useful No4 sniper. That wasn’t too difficult was it? Total cost of bits so far, excluding scope, bracket, rifle, pads and screws.., approx 25 pence. Stay tuned for the next part in this series.
Copyright ©2006 - 2010 by Peter Laidler and MILSURPS.COM (Content Policy)
Collector's Comments and Feedback:
1. Capt. Peter Laidler is the senior Armourer in the UK Military, now retired, but based as a Technical Officer at the UK Military Small Arms School. In addition to being a trained and highly experienced military "Armourer", he has authored two excellent books about the No.4(T) sniper rifles and their No.32 scopes. They are titled "An Armourer's Perspective: .303 No.4(T) Sniper Rifle", which he co-authored with Ian Skennerton and his own dedicated work, "Telescope Sighting No.32".
If you're really interested in some in-depth learning about the No.4(T) sniper rifles and the No.32 series of scopes, their history, evolution, repair and adjustments for shooting, I'd highly recommend those two books, which are pictured below. ....... (Feedback by "Badger")
Note: The opinions expressed herein or statements made in this article are solely those of the author, and do not necessarily reflect the views of the Military Surplus Collectors Forums, or the ownership and moderation group of this site. MILSURPS.COM accepts no legal liability or responsibility for any claims made or opinions expressed herein. Also, please note that neither the author nor MILSURPS.COM recommends that any member of these forums, or a reader of this article, try this type of experimentation without the proper knowledge, equipment and training.


 Reply
Reply
 Countries
 Categories