-
Jungle Carbine Bayonet Repair
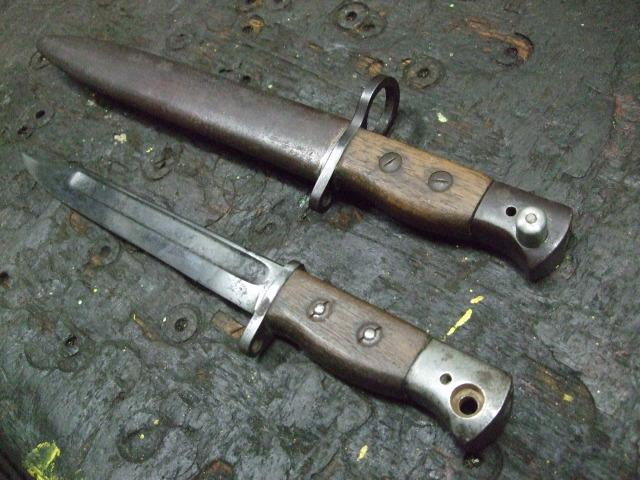
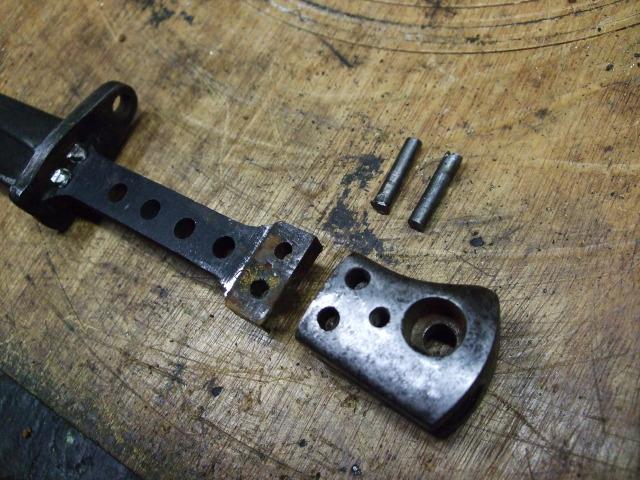
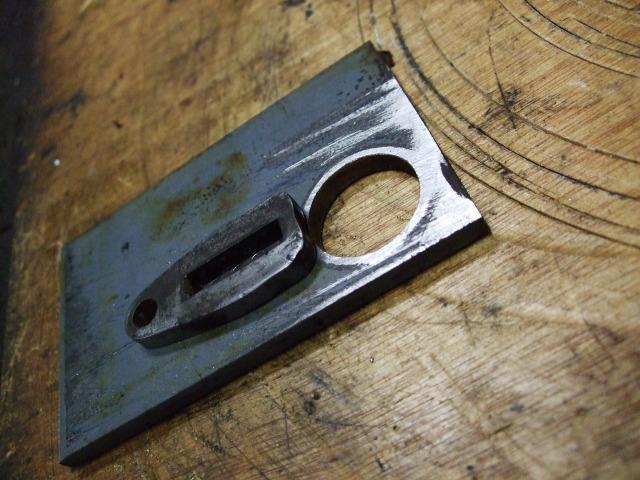
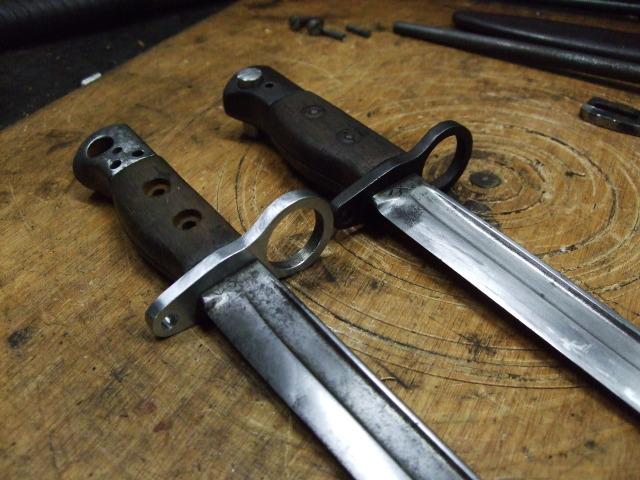
Picked these up at the War and Peace show, as can be seen one was short of the muzzle ring and the press stud and Locking bolt, I,ve made two sets and the top bayonet has one set fitted.
At first I was going to graft a muzzle ring on to the crossgaurd, but didnt have much meat to play with, so decided to make a complete new crossgaurd/muzzle ring and with this thought it may be of use or interest to others who come across Broken or cut down Jungle carbine bayonets, this was 20 pound so didnt break the bank.
This is just the first stage of the repair, as I,m needing some drills which I didnt have with me at the time (at work), so its a two part thread, and am sure Peter Laidler will give us the low down on the re finish work involved when they came his way?
I,m not going to teach anyone to suck eggs but just a few pointers in the process,
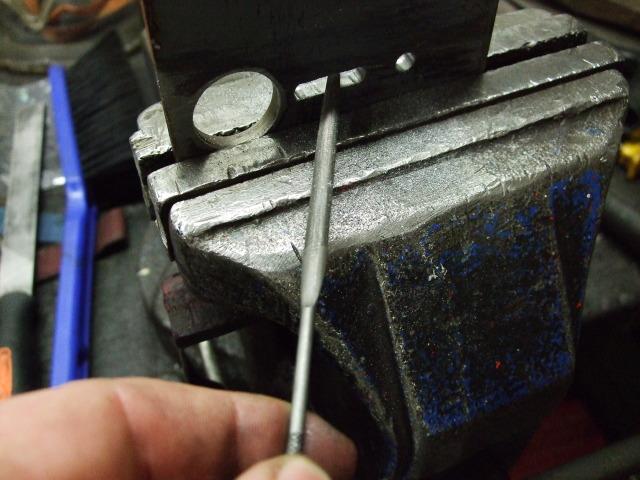
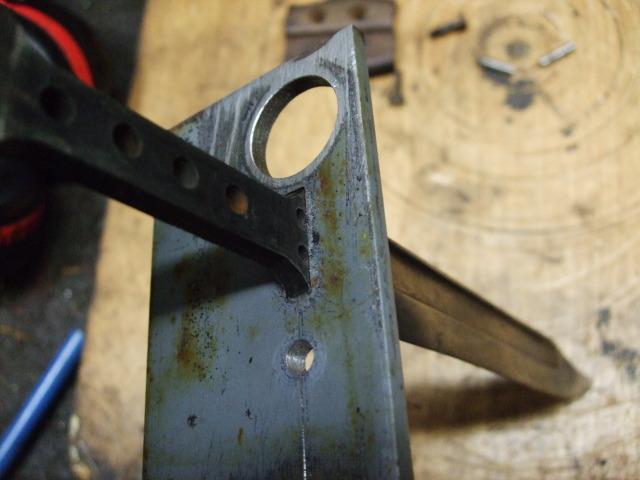
First job remove the grips and to locate the rivets on the pommel, lucky I had the other bayonet in which they are quite clear and give me an idea, as the one to work on, one rivet was just a faint mark, the other I couldn't see and used a measurement taken off the other bayonet, then it was a case of centre punch and drill out the top of the rivet,
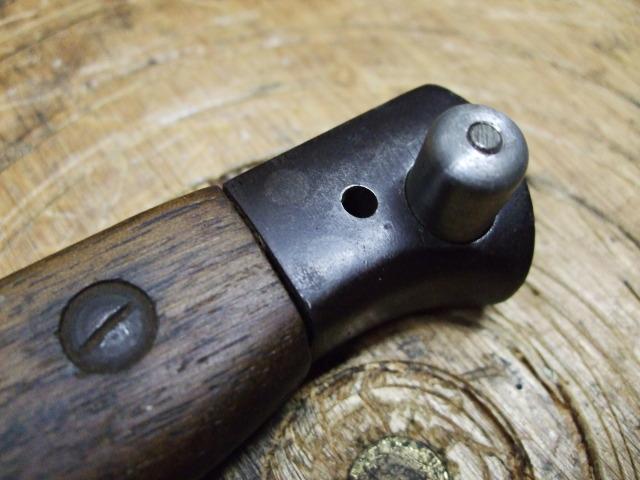
(the pic above is were I had punched the rivet and then the other side this had moved them slightly to make sure I was centre you can see how far off that one was with centre punch) once the very top of the rivet was drilled approx 2mm, it was fun and games with a punch and hammer, (best advice here is to secure it well so you can use some force)
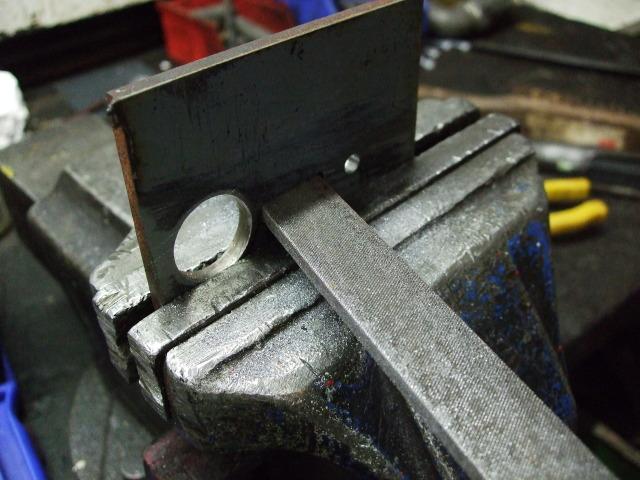
As that old bumper sticker says " Sh** Happens" well it does at times when you least expect it, knocking out one of the rivets I was using most of my body weight on the swing with the hammer when the punch moved, so when the pommel was off a quick fix with the mig, ( slight mishap again as I did the the oil hole instead of the side of the rivet hole) so a bit more to file.
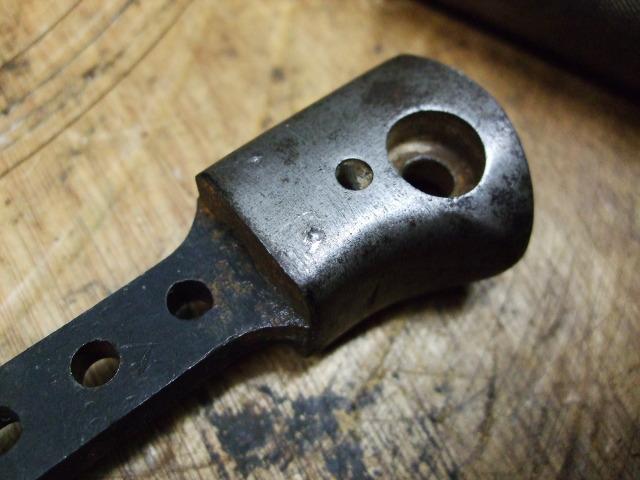
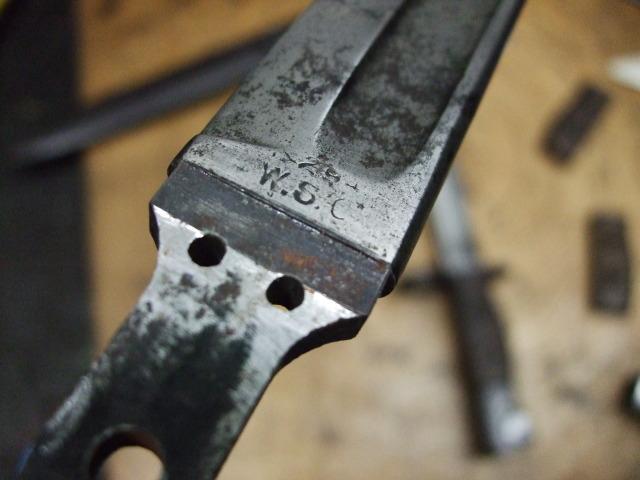
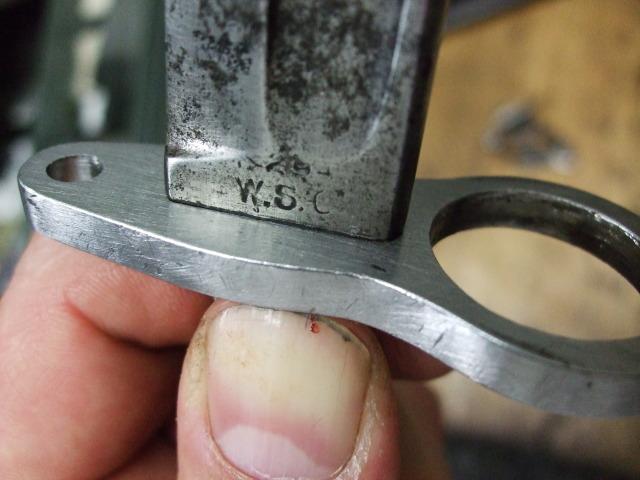
That was the hard bit out the way, next was to file down the rivets holding the crossguard on, easy enough and came out easy.

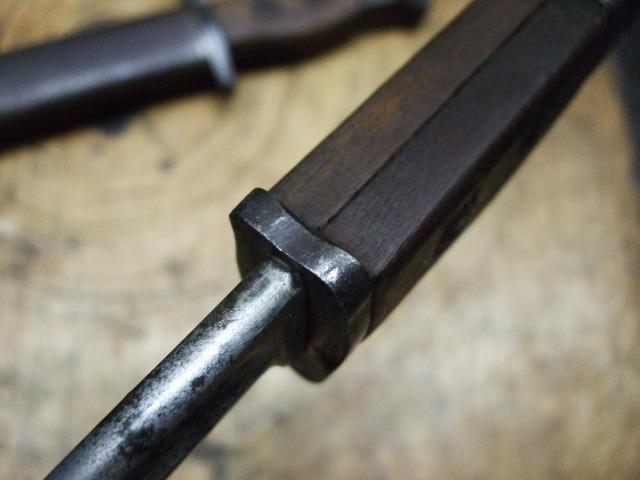
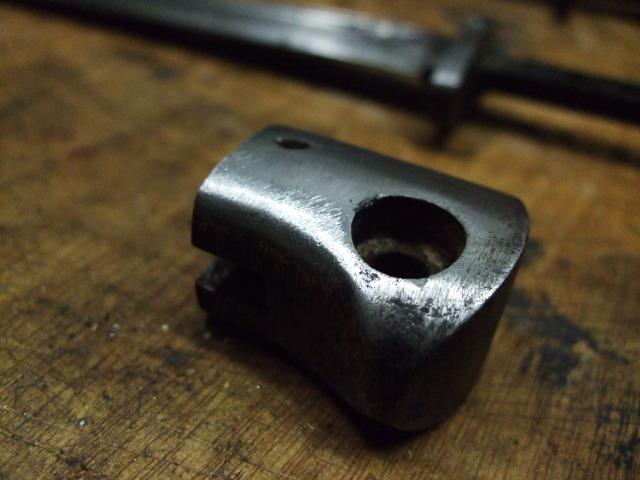
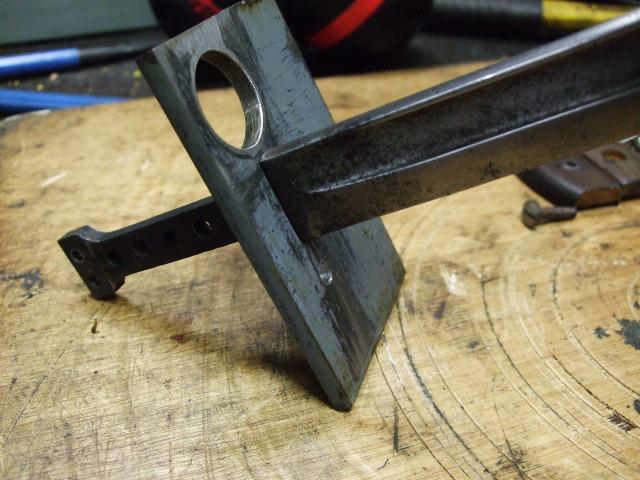
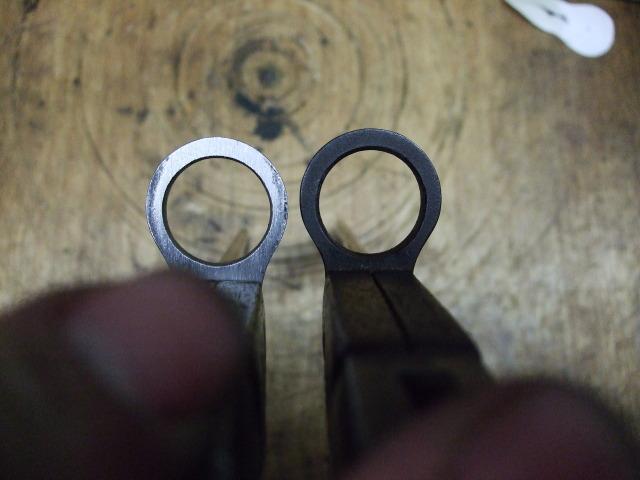
Next stage was to make the new crossgaurd, as I had the old one which still had the inner bottom of the muzzle ring, I could use this as a datum and template.
As they say everything starts with a hole....

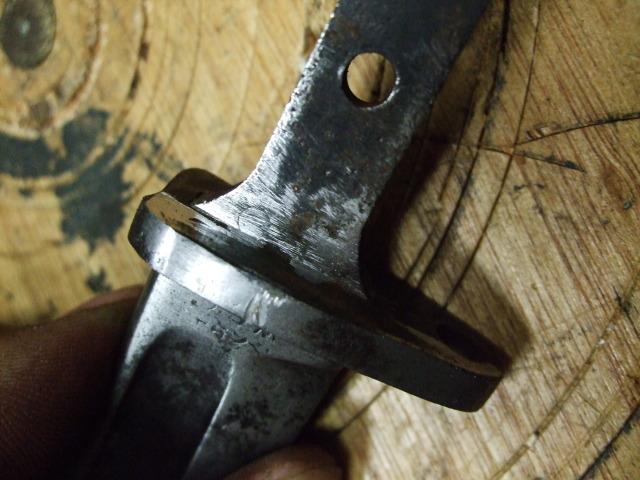
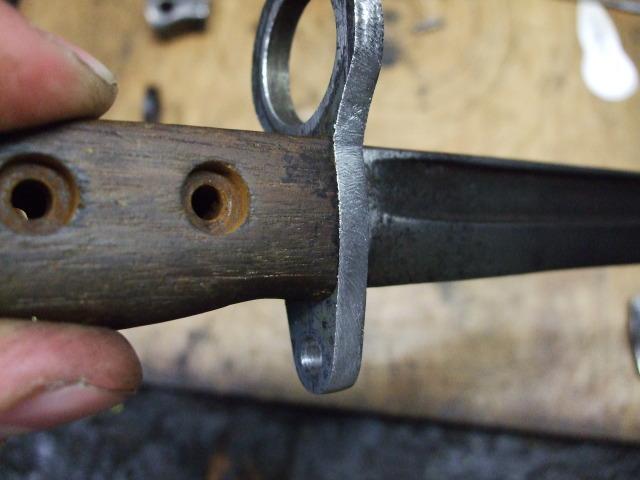
I must stress here that the crucial part was to cut and file the slot that fitted on top of the blade before any kind of shaping etc as any mistake made here you would have wasted hours cutting and filling the outside shape only to find you make a mess of the slot, (seen it many a time when serving my apprenticeship on similar jobs, a weeks work made into scrap in the space of seconds)
The needle file is all I had, no small square or rat tail files, so sore thumbs and fingers, had to take enough out to get the bigger file in, when this fitted there wasnt much to take out only to square it up
Back to the needle file for the last bit, and a perfect fit, the crossgaurd rests on a slight proud part of the ricasso so it needs to be a good push and slight knock with the mallet fit.
After that I marked out the shape and lightly centre punch the outline,this gives a good warning that you are nearly there when roughing the profile plus the punch marks dont wear off !!
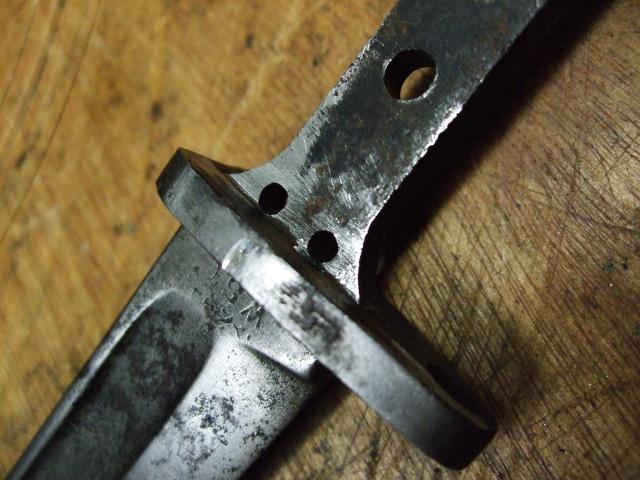
After a bit of sweat with hacksaw and file the outline was not far off, so a quick fit with the grips also to check the profile and still the muzzle ring to file down
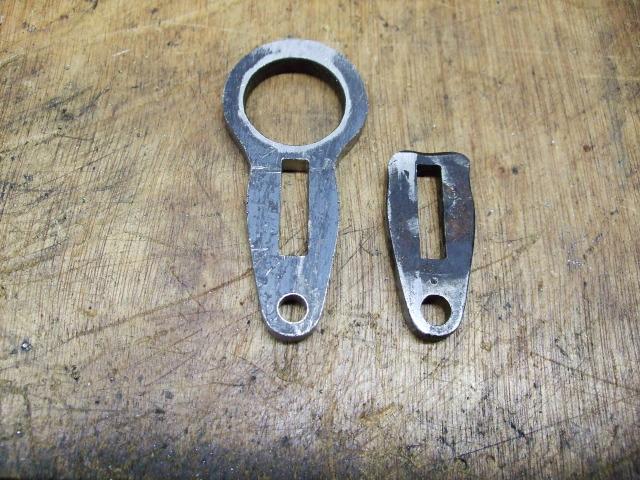
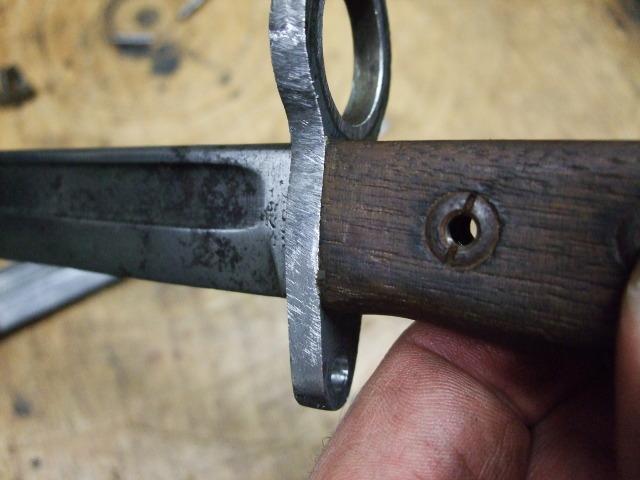
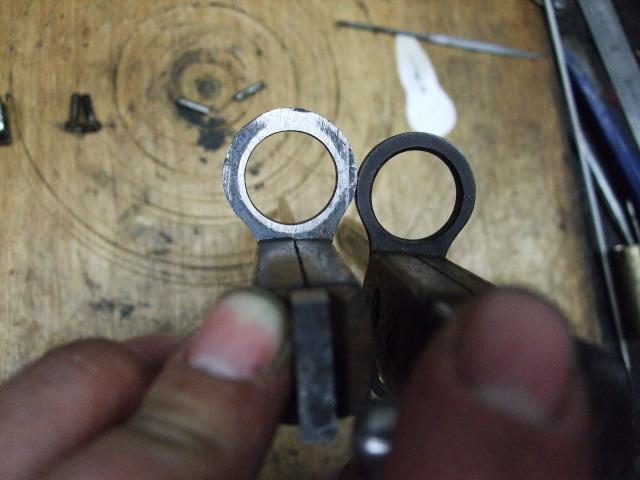
A final file around the crossgaurd and the final contour of the muzzle ring based on the other, also as I mentioned earlier the part of the handle that is machined to leave the blade/ricasso proud were the crossgaurd fits you can see ther is not much room for error.
Part two I will assemble and rivet, the hold up was the pommel that I had to fill in with a weld and didnt have the correct size drills to open up the rivet hole and oil hole, also will finish it as near as I can to an original re finish as done in service, I,ll let Peter talk us through the process before I proceed.
Information
 |
Warning: This is a relatively older thread
This discussion is older than 360 days. Some information contained in it may no longer be current. |
|
Last edited by bigduke6; 10-03-2012 at 06:49 PM.
-
The Following 8 Members Say Thank You to bigduke6 For This Useful Post:
-
10-02-2012 07:00 PM
# ADS
Friends and Sponsors

-
Contributing Member


-
-
FREE MEMBER
NO Posting or PM's Allowed

-
Don't bother making a new catch, bolt and spring, I'll send you one of each! Unless you want to show the manufacturing sequence!
Incidentally, we weren't permitted to weld a loose crosspiece it had to be tightened on the rivets - otherwise the weld would (?) affect the toughness of the blade and hilt. Largely ignored of course so you'll see plenty mig welded tight again I suspect! But don't firget to make extra clearance for the ghastly weld (especially if it's my ghastly weld.....) under the grips. Nice job Big Boy!
Last edited by Peter Laidler; 10-03-2012 at 04:48 AM.
-
-
Thanks Peter,
A catch, bolt and spring would be appreciated, so I can compare it with the ones I made. I will use rivets on the crosspiece.
-
-
Legacy Member

As said above, very nicely done. 
-
-
Legacy Member

Very useful post! As I am to miserly to spend on a bayonet what I can purchase a rifle for I have been looking for a bubbafied No 5 bayo with the same project in mind. Your detailed post will prove very helpful if I can find a butchered bargin basement bayonet.
-
Thank You to HOOKED ON HISTORY For This Useful Post:
-
Contributing Member
One has been sitting on ebay for a month. It is of course gone now.
-
-
Legacy Member

Originally Posted by
Aragorn243

One has been sitting on ebay for a month. It is of course gone now.
How did I miss that?
-
-
Contributing Member
It looked just like this one at the start. Converted to fighting knife, muzzle ring removed. Price started around $70 but had dropped to $50 with no takers and several failed auctions. It may resurface, I don't know if it ever sold or not. I had thought about buying it but never thought you could repair one like this.
-


 PM
PM


