-
Jim just about said it all Cinders. Can't remember the relevant temps for silver solders, but they're quite a bit higher - the process is as much akin to brazing as soft soldering.
-
Thank You to Roger Payne For This Useful Post:
-
06-22-2017 11:39 AM
# ADS
Friends and Sponsors

-
Advisory Panel


If you are handy with a MIG welder, those front screws would be an easy removal. Put a small flatwasher with the appropriate size hole over the highest one, then a larger machine nut over the washer. Hit the top of the broken screw with the mig welder and fill the nut within reason with weld. You can then remove the broken screw by turning out the nut. There will be minimum heat transfer to the actual receiver...the stud will absorb it all and likely melt the solder at the same time.
If you are not handy with a mig welder, then best not try this yourself.
I have removed broken bolts, studs and screws on many items from engine blocks to gun receivers with this method, and have not had to use an extractor in a lot of years.
-
The Following 4 Members Say Thank You to stencollector For This Useful Post:
-
-
Legacy Member
Yes, that was my understanding.
Silver solder is a different animal. You need real heat to do that, soft solder is just lead and won't take much. Too, after the hole is open you can chase the thread with a tap and not hurt the tap. It just cleans the lead out. Basic guide for solder would be... Tin/lead 60/40:361-374°F.(183-190°C) 50/50:361-421°F.(183-216°C) 63/37:361°F (183°C)Melts and flows at same temp.
Lead free, Tin/silver
96/4: 430°F(221°C) Melts and flows same temp.
Thank you for this information!
---------- Post added at 01:16 PM ---------- Previous post was at 01:15 PM ----------

Originally Posted by
stencollector

If you are handy with a MIG welder, those front screws would be an easy removal. Put a small flatwasher with the appropriate size hole over the highest one, then a larger machine nut over the washer. Hit the top of the broken screw with the mig welder and fill the nut within reason with weld. You can then remove the broken screw by turning out the nut. There will be minimum heat transfer to the actual receiver...the stud will absorb it all and likely melt the solder at the same time.
If you are not handy with a mig welder, then best not try this yourself.
I have removed broken bolts, studs and screws on many items from engine blocks to gun receivers with this method, and have not had to use an extractor in a lot of years.
Very interesting technique, i am unfortunately MIG welder inept....
-
-
Looking at them, they look like they're plain and simple soft soldered - as per standard. Do you want to know what Armourers used to do......? Come a bit closer as I don't want to upset the real experts out there. I've done a few in my time and L42's were the biggest offenders....... Right. Just carefully drill into the centre of the remaining screw head and punch a small allen key into the hole that you've drilled......., go on, bang it in hard..... Now heat that part of the body up until the solder turns shiny silver and wind the screw right through or back out. Never failed yet and soooooooo simple!
-
The Following 3 Members Say Thank You to Peter Laidler For This Useful Post:
-
Legacy Member
Looking at them, they look like they're plain and simple soft soldered - as per standard. Do you want to know what Armourers used to do......? Come a bit closer as I don't want to upset the real experts out there. I've done a few in my time and L42's were the biggest offenders....... Right. Just carefully drill into the centre of the remaining screw head and punch a small allen key into the hole that you've drilled......., go on, bang it in hard..... Now heat that part of the body up until the solder turns shiny silver and wind the screw right through or back out. Never failed yet and soooooooo simple!
Perfect thanks Peter!
---------- Post added at 01:33 PM ---------- Previous post was at 01:33 PM ----------
Is there a specific brand of soft solder to look for? Can anyone suggest a retailer where I can order some?
-
-
Advisory Panel
Now heat that part of the body up until the solder turns shiny silver and wind the screw right through or back out.
Yes, that's what I'd do...not weld it over.
-
-
Just soft solder and follow the instructions in the article to the letter regarding the screws.
-
-
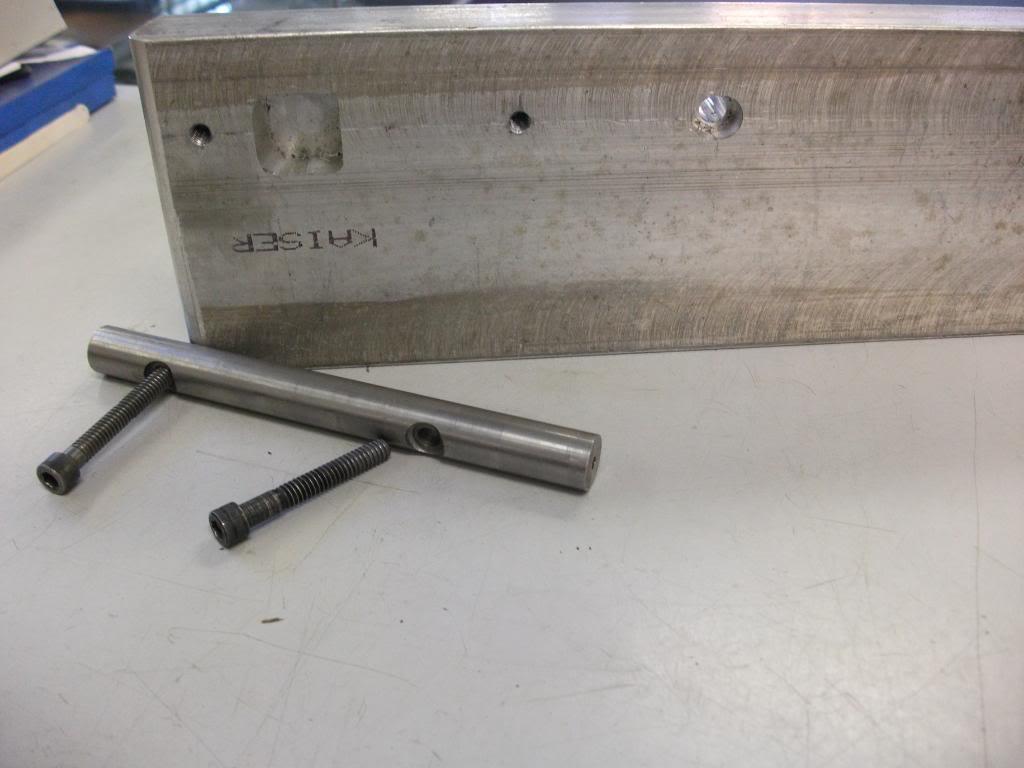
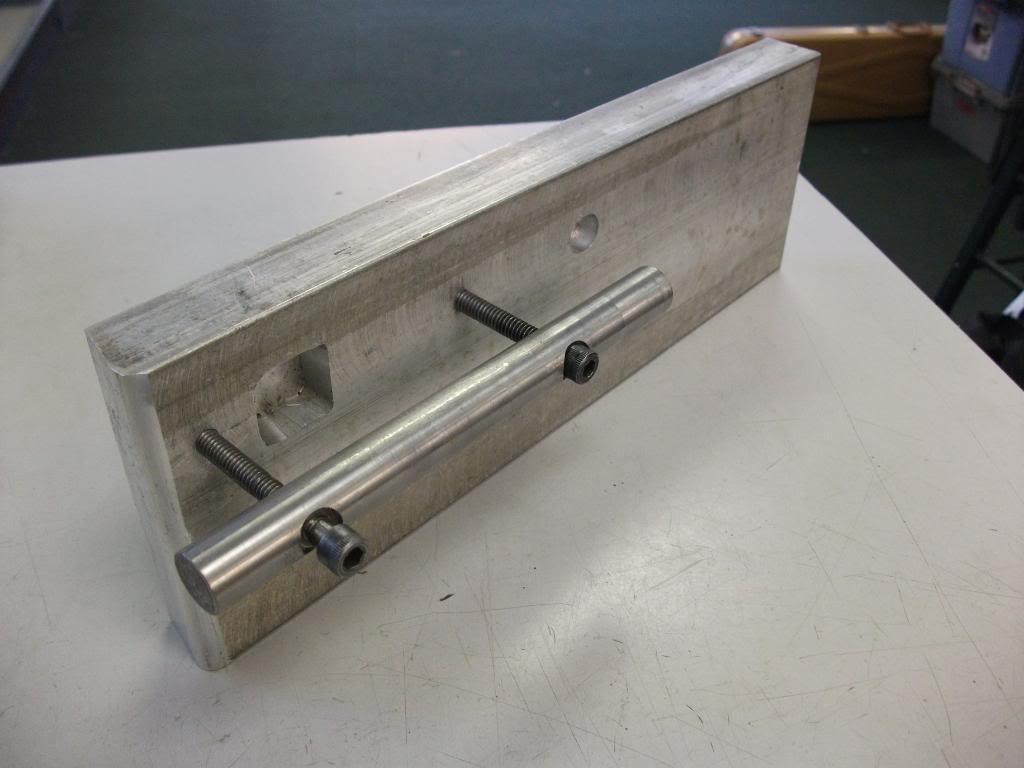
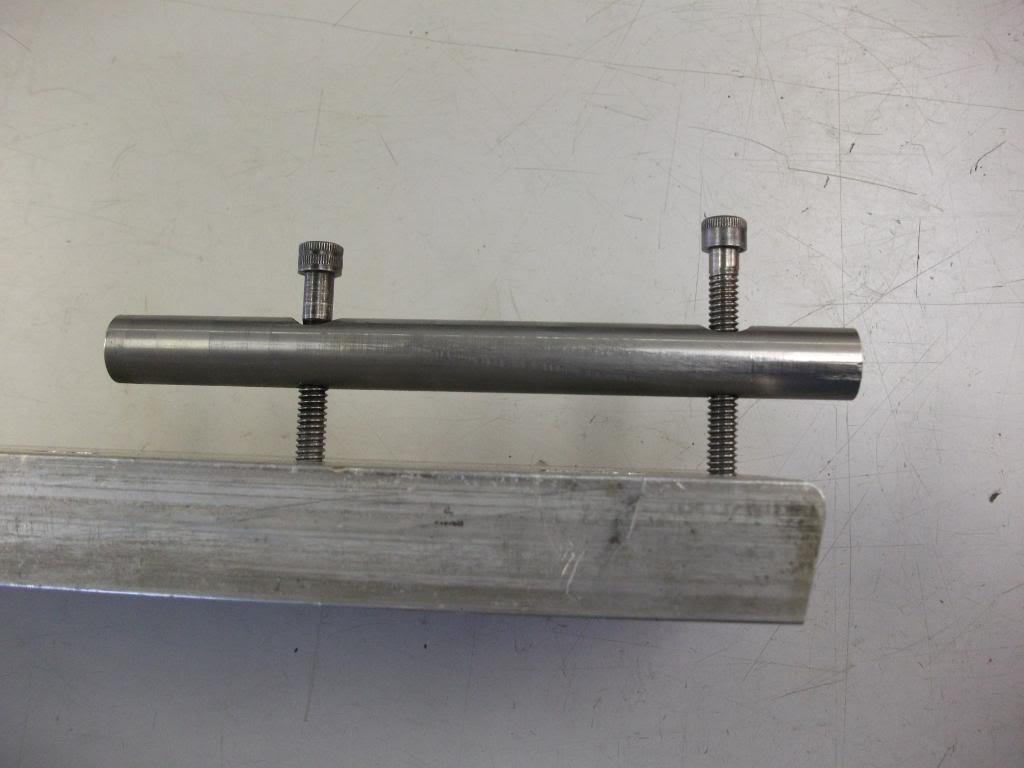
To test for a twisted body we had a BODY PLATE. This was a 3/8 or 1/2" thick steel machined flat plate that had cut-outs of different sizes to cater for the front trigger guard screw and the block for the drawers/sear axis block. This was configured for the No1 rifle on one side and the No4 and 5 rifle on the other side. The plate could be held/clamped in the leather vice jaws. The body is placed on the plate and it should sit flat and not rock left/right or bow front to rear. Nothing too complicated. But the bodies are real basxxxxx to UN twist. We wouldn't bother even trying...... as when they came in to us it was usually for some other reason. I do recall that when a rifle was sentenced ZF for a twisted body it had to go back with the G-1043 paperwork marked in a certain way (forget but will check.......) to the effect that the condemnation was total
My holding plate, fairly basic!:
-
The Following 3 Members Say Thank You to jmoore For This Useful Post:
-
Legacy Member
Originally Posted by
jmoore
That IS a simple setup, thanks for the pictures!
-
-
Originally Posted by
jonh172
That IS a simple setup, thanks for the pictures!
Quite useful for working on the pads/mounting holes, if needed. Hence the extra width, so you can mount the plate in a milling vice or 90 degree angle plate with toe clamps.
-
Thank You to jmoore For This Useful Post:


 PM
PM


