-
Advisory Panel


It may harden more over time, probably will.
-
-
06-24-2017 11:09 PM
# ADS
Friends and Sponsors

-
Contributing Member


I ripped it all out and put the PC7 in it. I popped the receiver out and the filler at the end of the tang just fell out. Experiment a failure. I may have said the wrong thing earlier. I used JB weld wood weld with the stain. The PC7 is almost if not as dark as the JB weld with the stain in it so just going to try that.
-
Thank You to Aragorn243 For This Useful Post:
-
Contributing Member


Originally Posted by
Aragorn243

Great news. I got it apart. Photos probably tomorrow on interior and the state of the barrel shroud. There were three casualties, one fatal. The screw in the nose cap would not move, screwdriver, vise grips, etc so drilled it out. In the process the nose cap suffered some minor damage. The stock has some dry rot and the end cap area was very weak, a third of it had already rotted away and when I pulled the barrel out, it snapped off. Barrel shroud was indeed cut under the barrel band. It looks like they installed a smaller tube inside the two sections. Not sure how it is held together, rust may be hiding spot welds. The rust underneath is pretty bad on the shroud but doesn't appear to have gone through or weakened it significantly. I did not try taking the shroud off. Will wait until after electrolysis to attempt that. There is actually a 1 inch square of good bluing under there. The rest is orange. Receiver is pretty good, only one small area of significant pitting that I saw. Didn't mess with it much it was covered with liquid wrench and I was doing my best to not get filthy. Wife says I failed anyway.
Tomorrow I'm going to set up my electrolysis bath and get it cooking.
Well done on taking this rifle on, all credit to you. The wood damage is unfortunate, but when it's reached this point of decay and become one with the corrosion, it's beyond saving.
Had you not taken this rifle on, it would have gone on someone's wall as a relic and carried on towards oblivion.
I look forward to your restoration updates...
Are replacement parts easy enough to locate?
-
-
Contributing Member
Only replacement part needed was a screw for the nosecap and already have one.
-
-
Legacy Member

Originally Posted by
Aragorn243
I ripped it all out and put the PC7 in it. I popped the receiver out and the filler at the end of the tang just fell out. Experiment a failure. I may have said the wrong thing earlier. I used JB weld wood weld with the stain. The PC7 is almost if not as dark as the JB weld with the stain in it so just going to try that.
Why don't you let me splice a piece of real wood in there for you? The offers there..
-
-
Contributing Member
You give Jeff a challenging job he will get it done.
-
Thank You to mmppres For This Useful Post:
-
Contributing Member
Thanks for the offer but the missing areas are not very big and as rough as the stock is, I think it will blend in pretty well when I'm done. If not, I'll bring it to Oaks sometime.
-
-
Legacy Member
-
-
Contributing Member
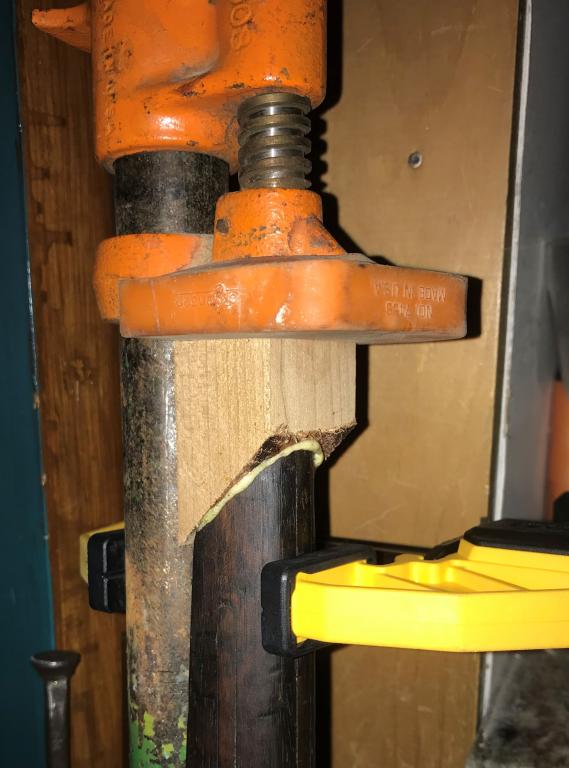
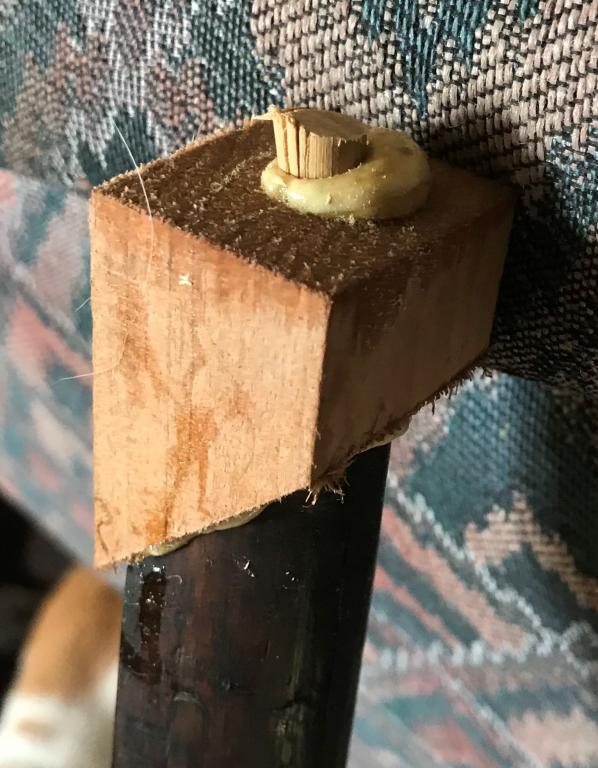
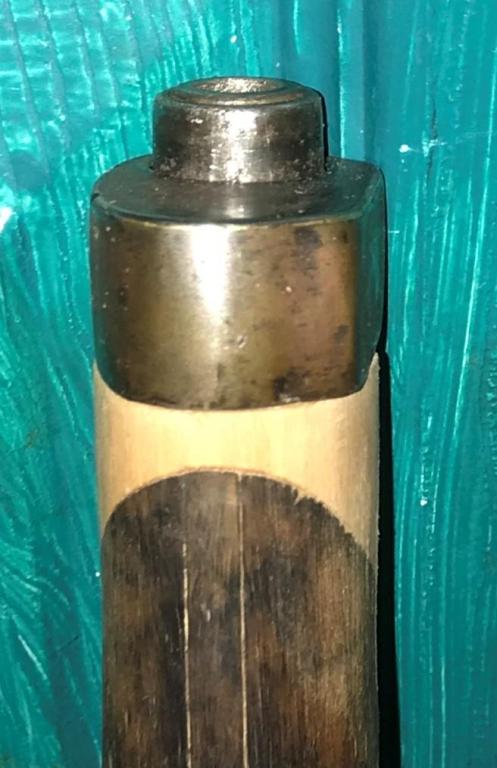
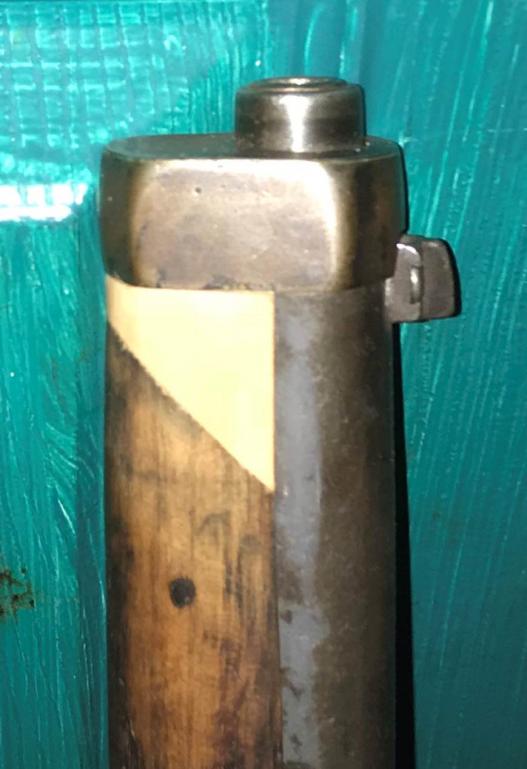
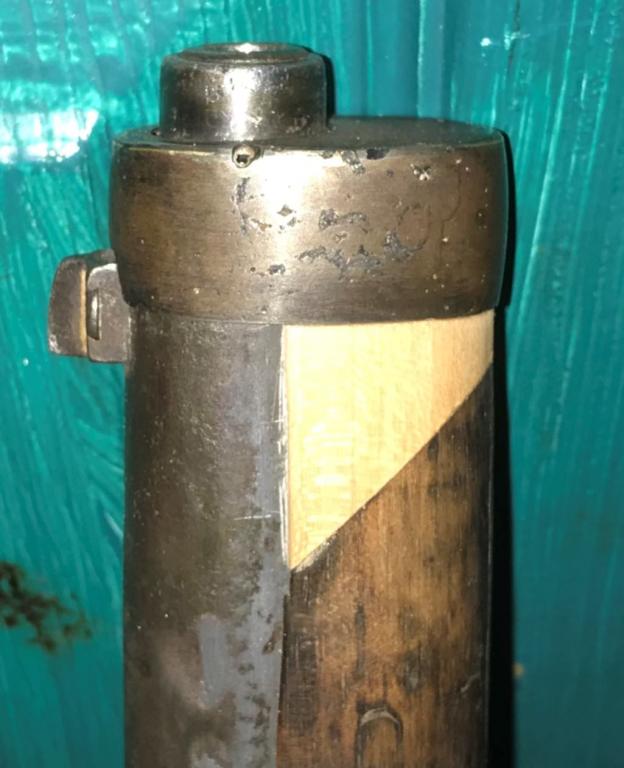
As I wrapped up the East India Company Musket, this one was hiding behind it in the corner and I brought it out again yesterday. The nose cap area is what was bugging me the most about this. Failed attempt at using fill on it just left it sitting. I finally decided I needed to act. Cut the end off yesterday morning and attached a new tip. Cut both at a 45 degree angle to give it more surface area and gorilla glued it together. After drying for two hours, took it out of the clamps and drilled a 5/16th hole in it for a solid dowel. Went in from the end so you can't see that. After two more hours of drying, I started the forming and fitting and got it all finished up except for some slight touch ups by the afternoon. As this stock is reddish in color under all that dark, and the only piece of wood I could find in the house big enough to serve the purpose was cherry, that's what I used. I haven't started trying to color match. I need to find some of those dark stain sticks everyone is talking about. Photos will follow soon, they are on my phone and I need to transfer and upload. I was very concerned about the strength of the repair as gluing end wood together isn't recommended but this held up to all my filing, cutting, grinding and sanding without giving at all. Now I just have to find the nose cap screw that I know I have but misplaced, drill and tap the nose cap and it's basically restored except for the cosmetics. Cap fits nice and tight now so it's on.
-
-
Contributing Member
-
The Following 3 Members Say Thank You to Aragorn243 For This Useful Post:


 PM
PM