-
Legacy Member

Better trigger
In my quest to get a better trigger on my 1941 Lithgow smle I played around with different triggers on the weekend and just happened to fit one that made a smoother let off should of done it ages ago
Information
 |
Warning: This is a relatively older thread
This discussion is older than 360 days. Some information contained in it may no longer be current. |
|
-
-
06-15-2020 05:10 AM
# ADS
Friends and Sponsors

-
Legacy Member

My curiosity is piqued - don't hoard the information - how about pictures and details.
Some do, some don't; some will, some won't; I might ...
-
-
Legacy Member
I would love to post pictures but it just doesn’t seem to happen
All I have done is swap the trigger with another out of my spare parts and it worked better then the original
-
Thank You to pisco For This Useful Post:
-
Legacy Member
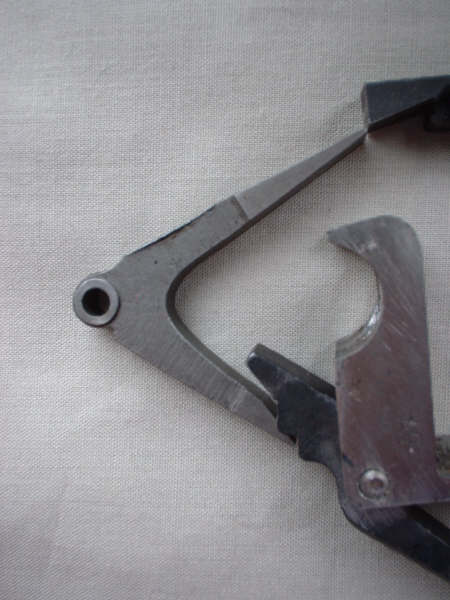
I have successfully done the same just by a simple trigger or sear swap. Some of the triggers have different height engagement bumps on them, that really makes all the difference to the first and 2nd pull, then get 3 or 4 different Sears and I pick the one with the closest distance between the two points as that changes the over all lenght of trigger pull. Its Just a case of trial and error and having a few to try.
-
-
With thanks to Advisory Panel member Peter Laidler, check his article presented in two parts in the Technical Articles for Milsurp Collectors and Re-loaders (click here).
"The Trigger Pull-Off" - Part 1 (By Peter Laidler) (click here)
"The Trigger Pull-Off" - Part 2 (By Peter Laidler) (click here)
This interesting article is accompanied by a detailed photo montage of a previously damaged skeletonised No.4(T) rifle, used as a training piece for budding Armourers to learn with and develop their skills. As Peter says "It appeared that this ‘rifle’ had never been finished as a ‘T’ as the front pad hole had not been drilled. During bead blasting after a hard life as a skeletonised rifle, it was established that the screw had sheared off and simply been made off level. Drilled out and extracted, it’s back to its former self. Waste not, want not as they say…". Other photos in the article show the clear interaction of the sear, cocking piece and trigger during various phases of its operation.
Article Extract .....
Pictorially, this shows the trigger at the end of the first pull, both ribs touching the trigger bent or flat of the sear with the sear nose at the extreme edge of the cocking piece………, just ready for the off.

(Click PIC to Enlarge)
Hope that helps … 
Regards,
Doug
-
-
Legacy Member
They all wear in different spots so replaceing with another old part obviously worked gave all contact parts a rub on the stone bit of lube and it worked better then before
Hoarding all those bits and pieces paid off
-


 PM
PM