-
EIC F Pattern musket restoration
I ordered an East India Company Pattern F musket in .75 smoothbore from IMA a ways back and it arrived through customs last week. These are percussion muskets that came after the Brown Bess but before the P1853 rifle.
Typically, these are supposed to be in better shape than many of the Nepal cache guns IMA has been offering and they do come partially cleaned in that they appear to have been given an external wash-down of some sort, but they are not diassembled, de-gunked, and re-assembled like some of their offerings either. I guess I'll refer to them as "semi-cleaned" lol.
The East India Company didn't really have a military presence in Nepal, so it's assumed these muskets were captured from Sepoy rebels by the Gurkha contingent fighting with the EIC and British forces during the Sepoy Rebellion. Evidently IMA does not have thousands of these, perhaps not even hundreds, so if you've ever wanted one now is a good time to buy while they are still available.
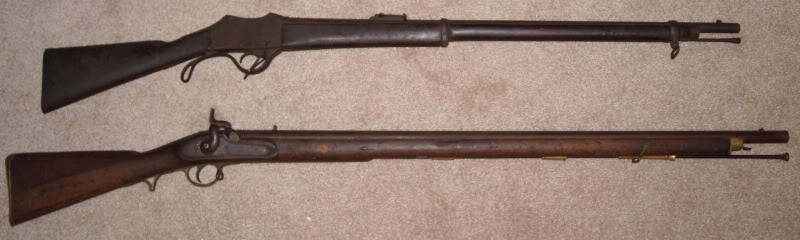
This is how the gun arrived. It's going to clean up well but will need some stock patching. I couldn't resist ordering another inexpensive Gahendra at the same time as they were on sale. The EIC musket is the one on the bottom.
The gun isn't without a few warts, but I think they are all fixable.
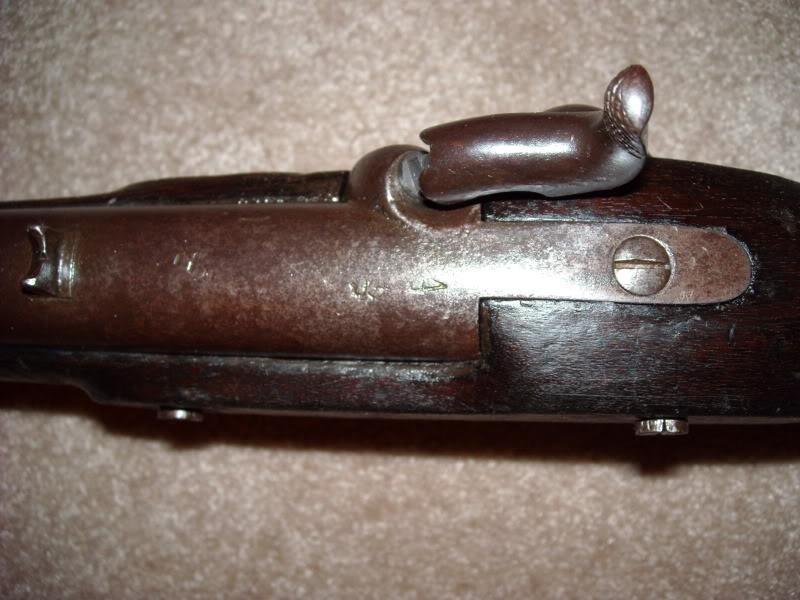
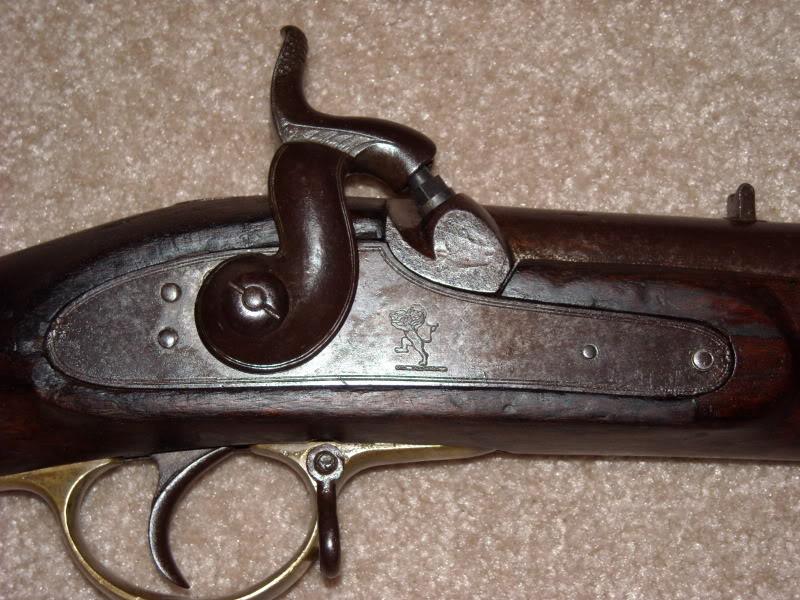
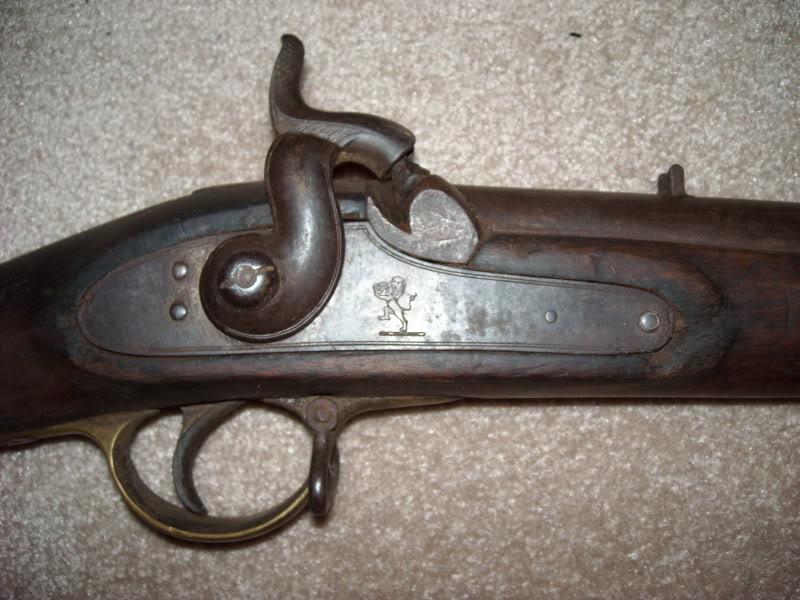
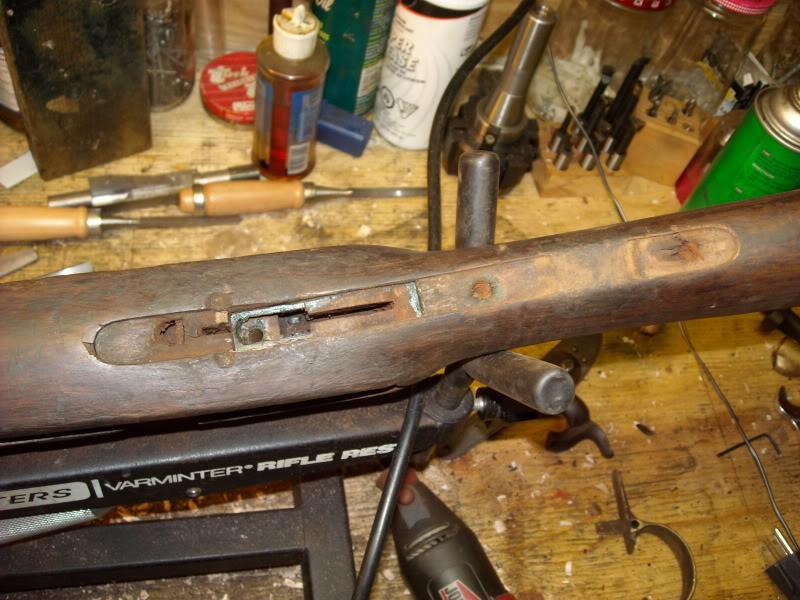
Here's the lock. The wood at the front tip iss totally punky and is crumbling to nothing so I will have to inlet a patch there and re-shape that area. This is before touching it, the damage is much more than shown before I can get to sound wood. It should be patchable.
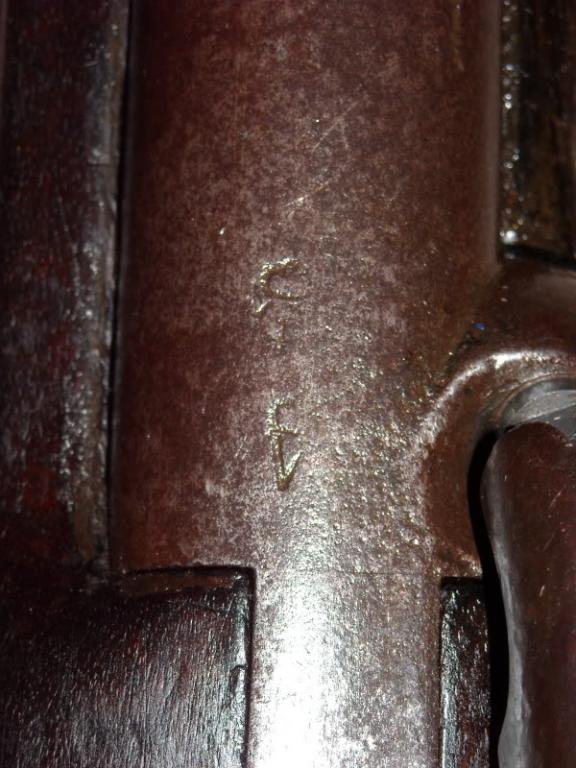
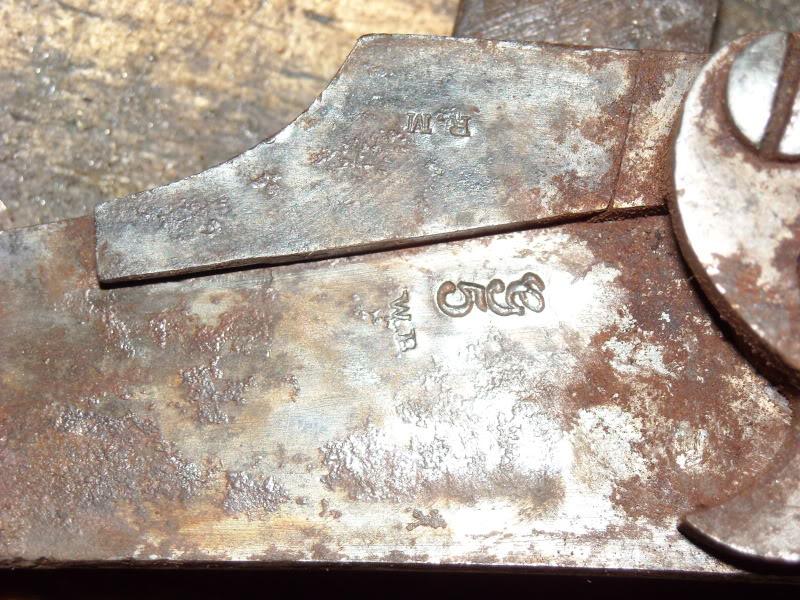
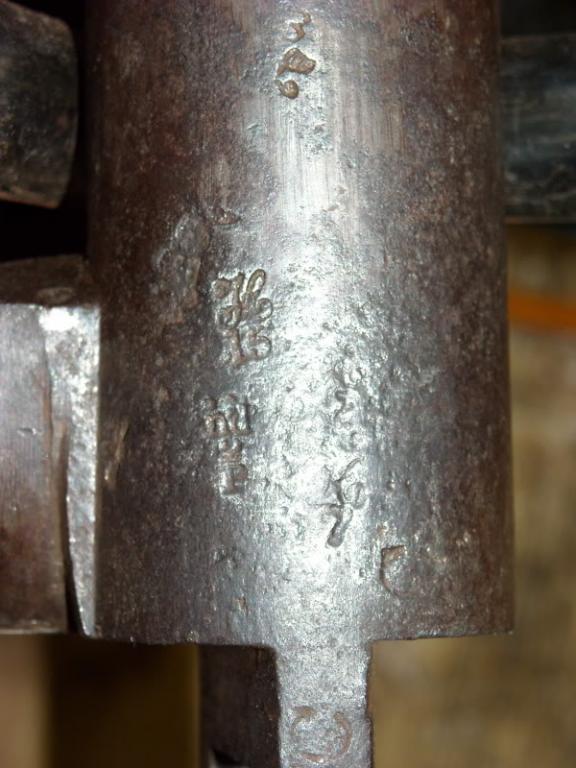
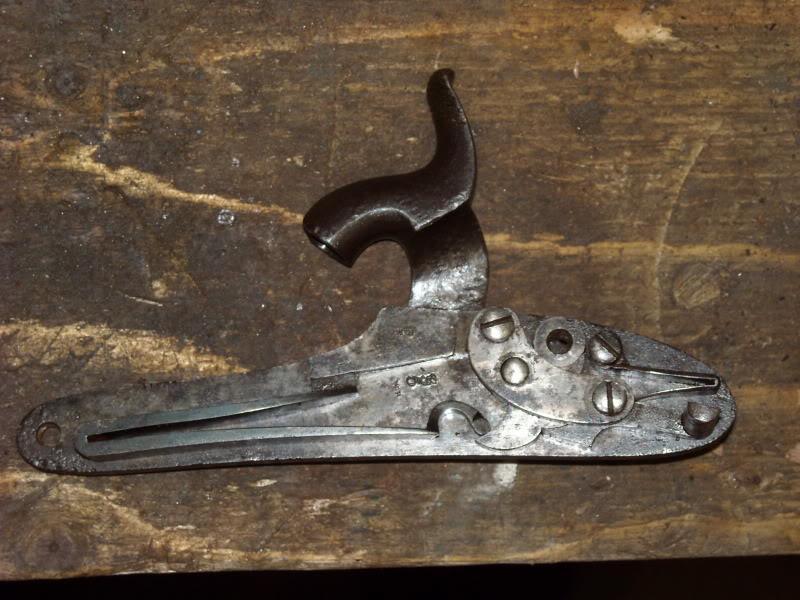
No idea who the lockmaker is, and so far I've only taken off the mainspring, but these are the markings I saw so far:
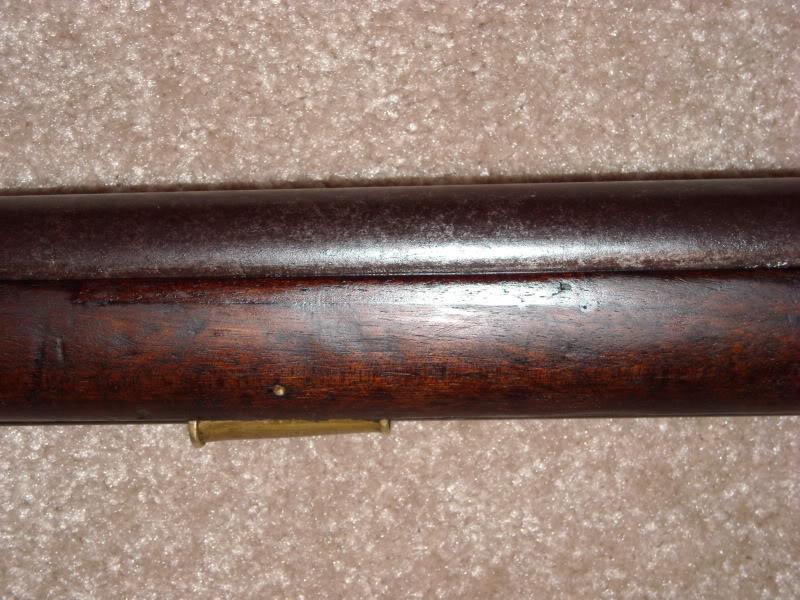
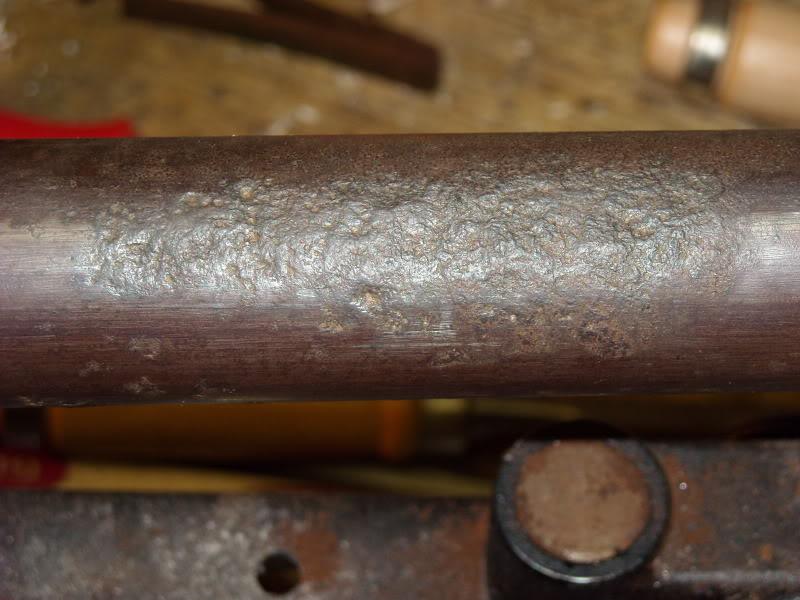
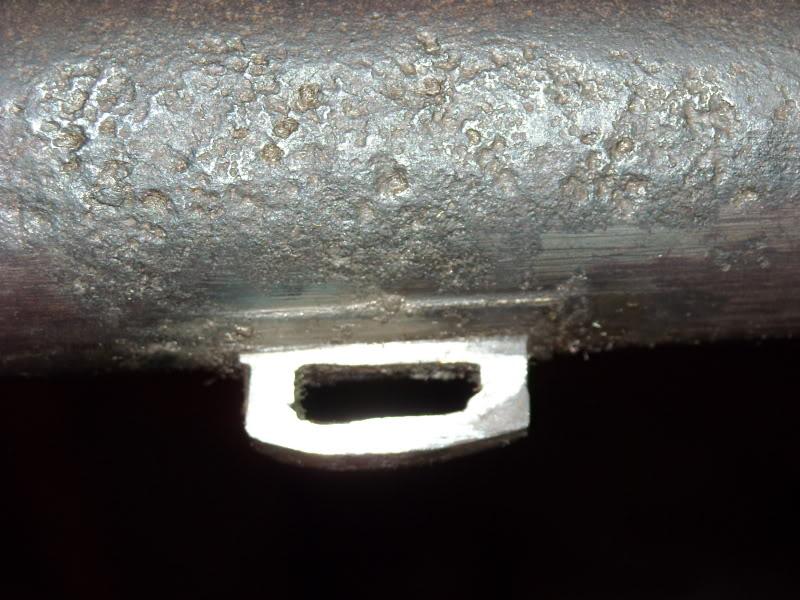
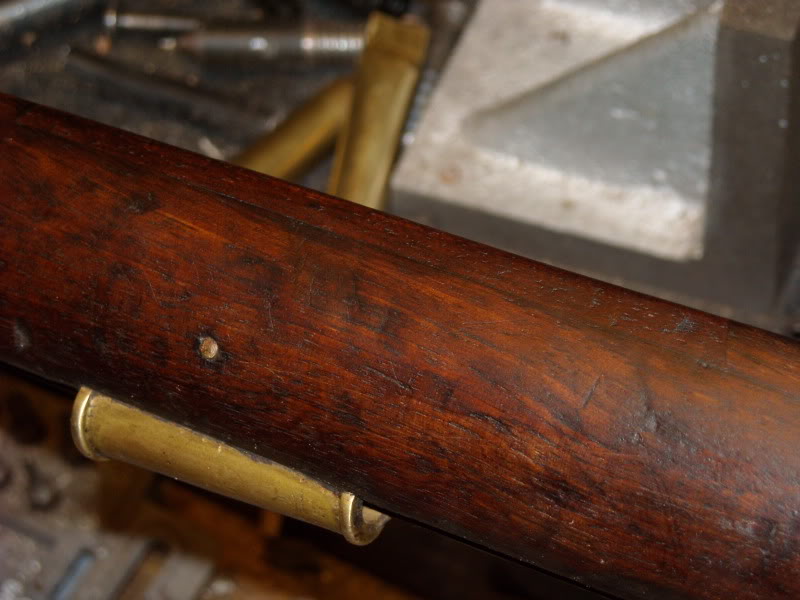
The barrel has a fair bit of corrosion here and there and some dings at the muzzle that should file out. These are the worst spots of corrosion and note that one of the staples for the keys was broken. I don't think either of these corrosion areas will make it un-shootable. Also, from what I have seen of other guns from the same batch, most have less under-stock corrosion than this one does.
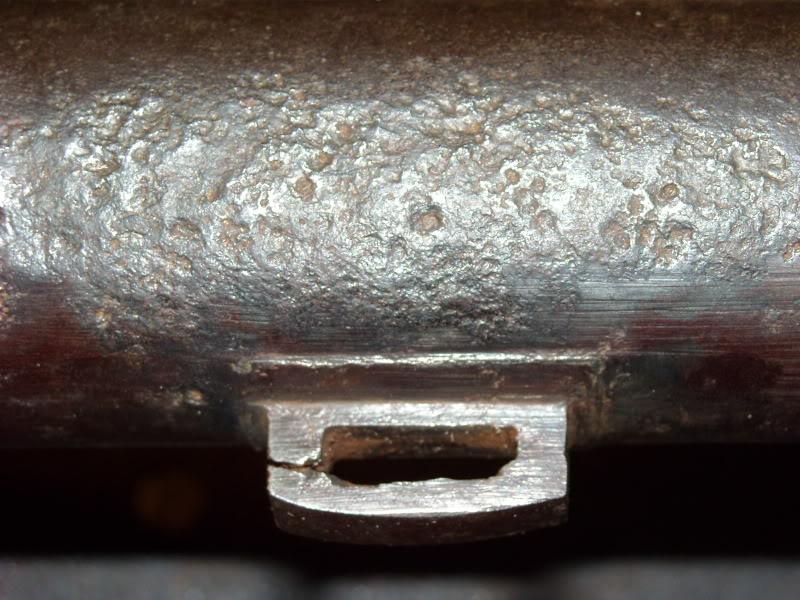
I repaired the staple already by brazing it closed, am now in the process of re-browning it. I used silver braze instead of brass simply because I had some on-hand.
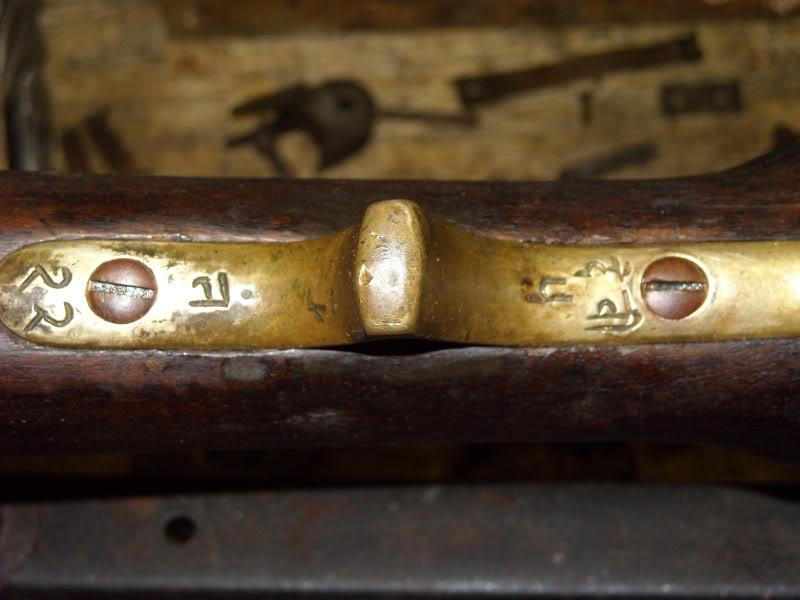
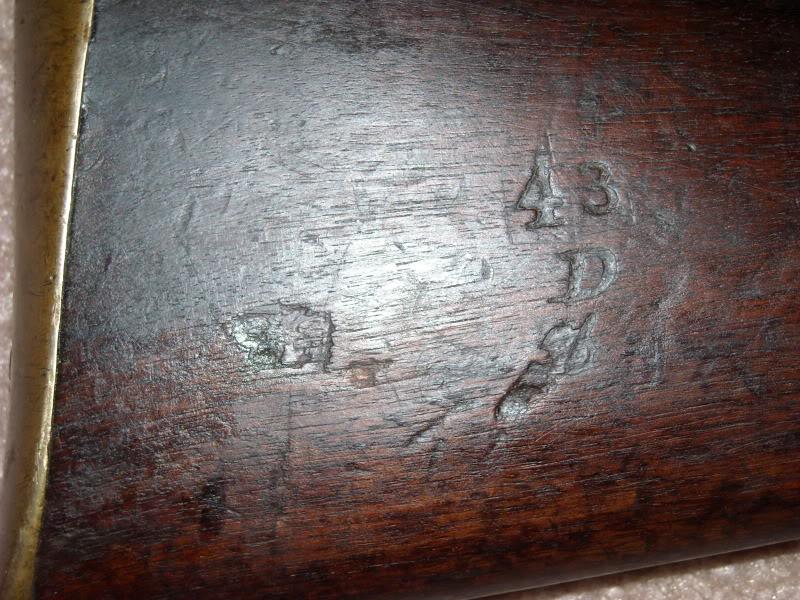
Markings at the breech plug:
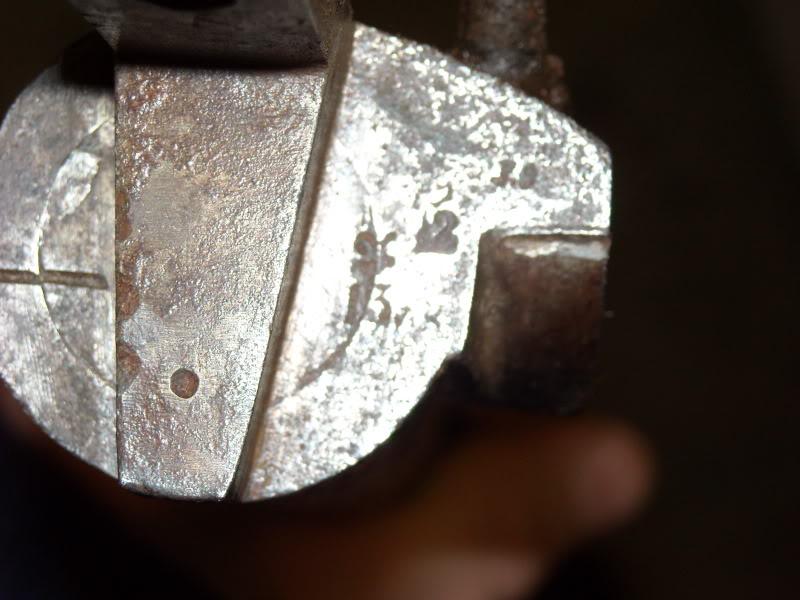
Under the barrel:
This assembly mark (IIII) matches the trigger parts, the keys, trigger guard and some other bits:
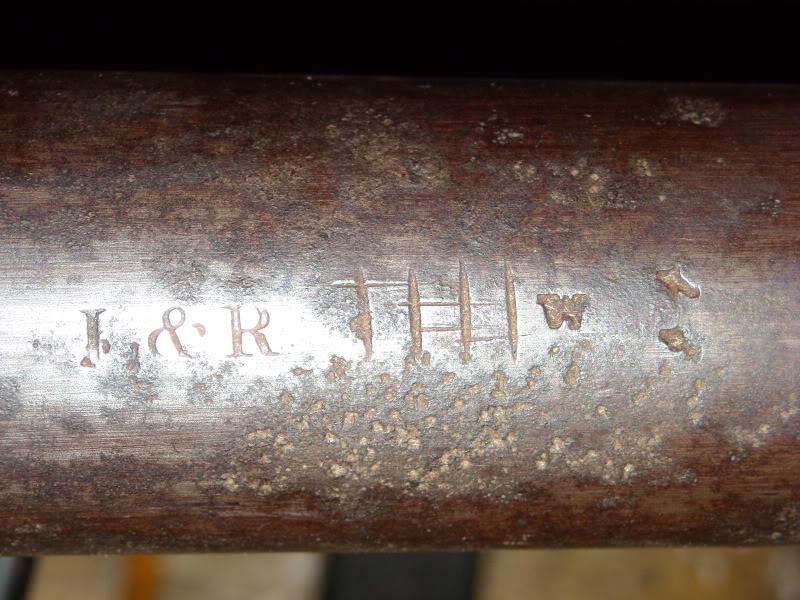
The above mark was struck out and this new mark placed next to it which matches the stock's barrel inlet.

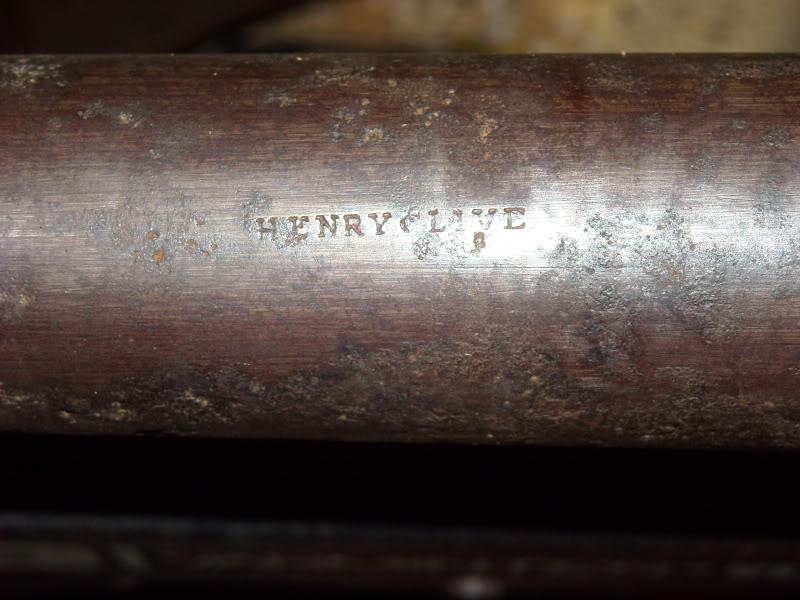
Presumably the barrel contractor is Henry Clive:
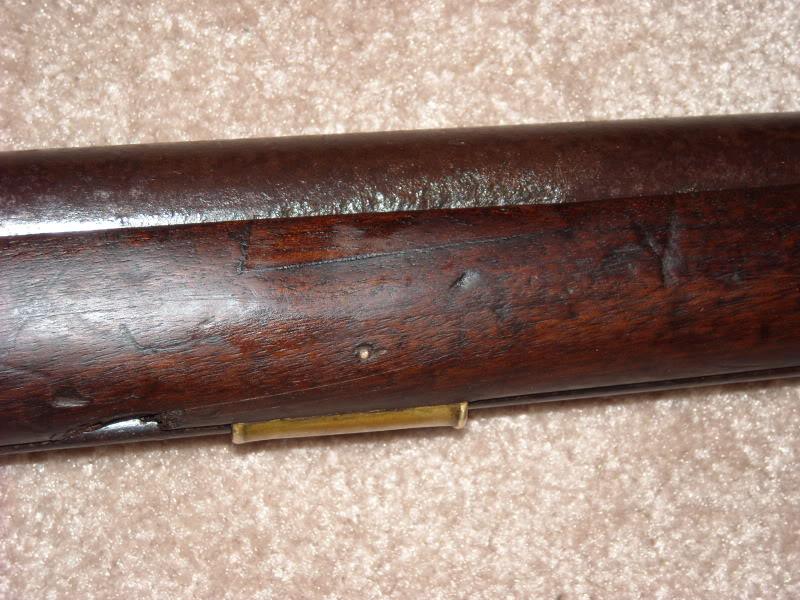
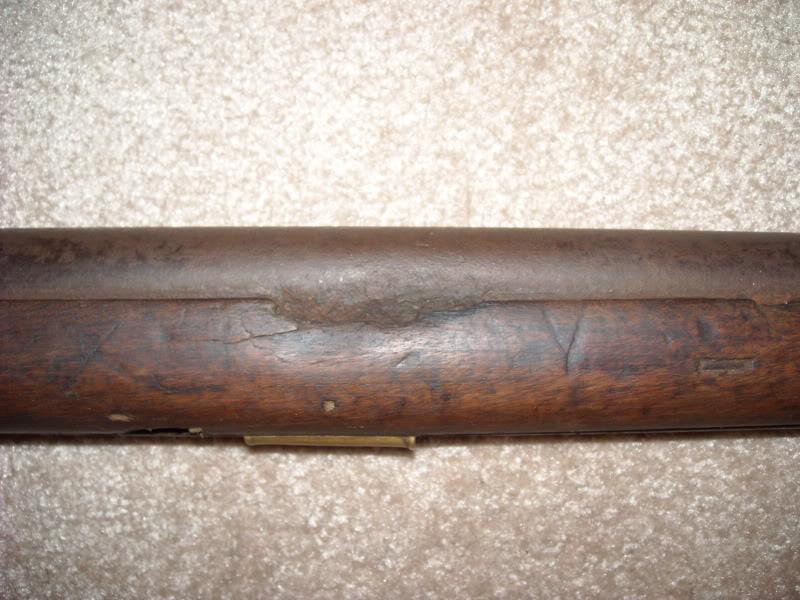
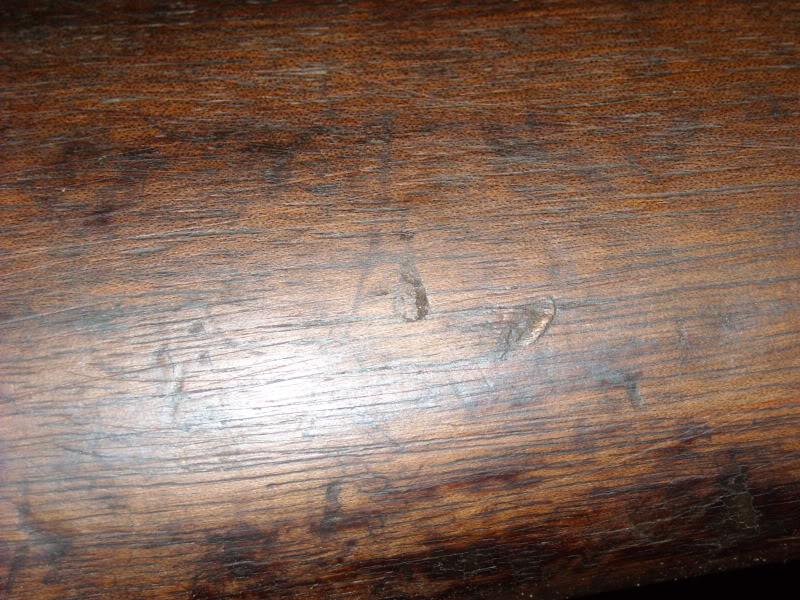
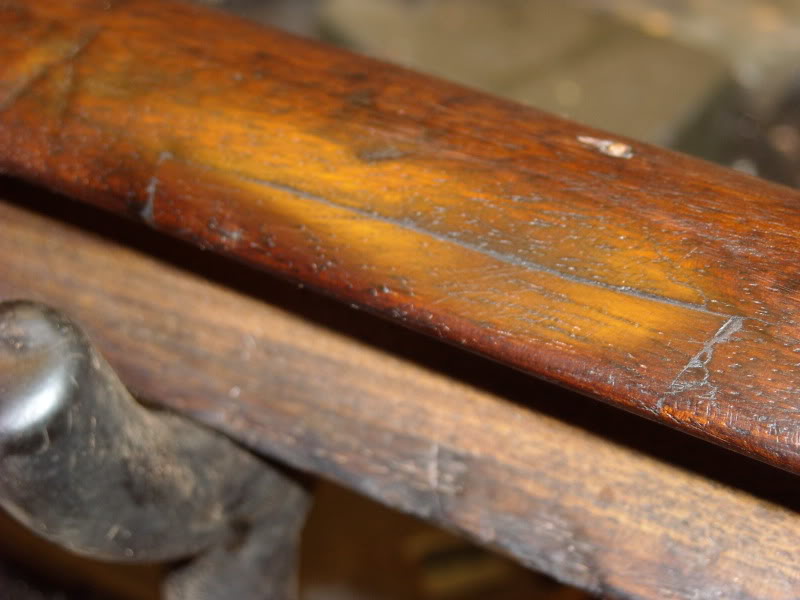
Here is a period crack along the barrel line crudely fixed with an iron nail. I will be repairing this.

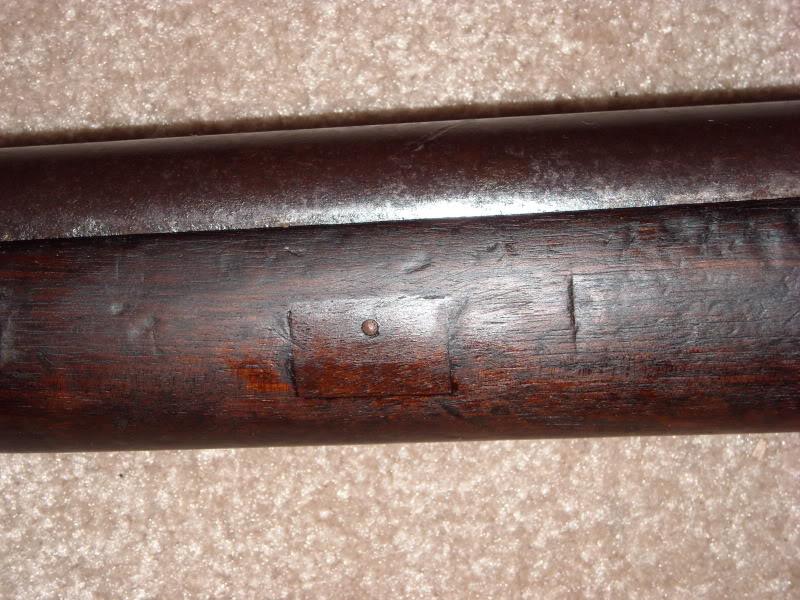
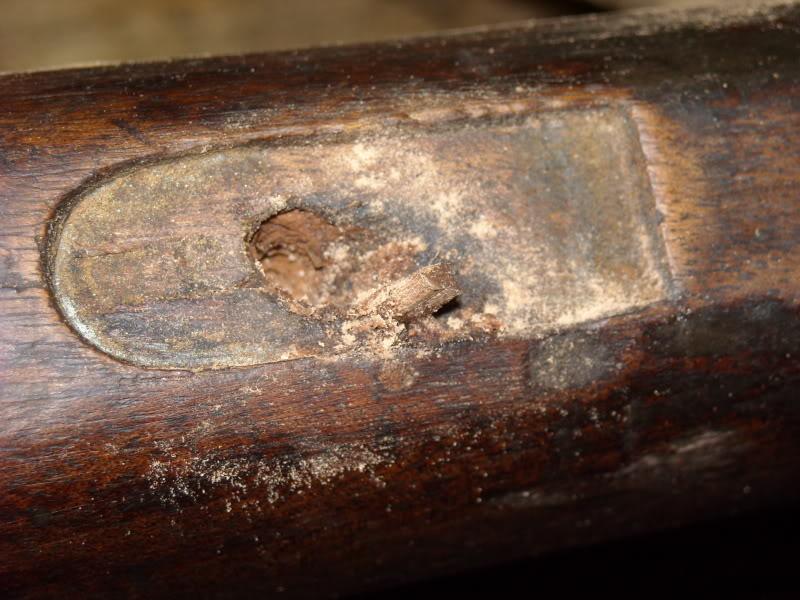
And this was the worst spot of pitting noted above, note that the rust crusties must, at some time in the past, have caused part of the stock to break out. This will get patched.
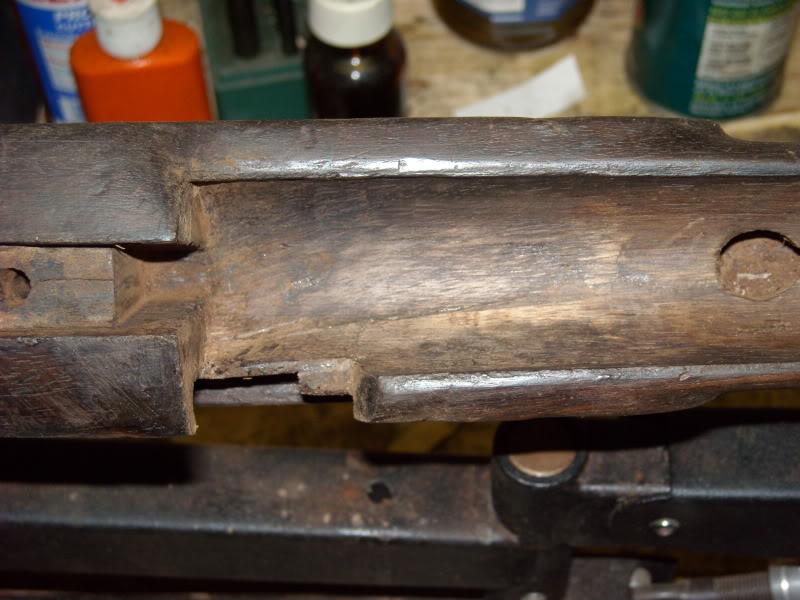
There is also some bad cracking in the lock inlet which will need to be epoxied shut.
The nipple was badly frozen in place. I had to heat it to get it removed after 12 hours of soaking in liquid wrench did nothing. It's intact, thought the corners got a bit rounded. I have a modern spare replacement that is slightly taller, but if the hammer still lines up, I'll use the new one for actual shooting.
Bore is still coated in yak fat/dried cosmolene - so I can't report on that yet.
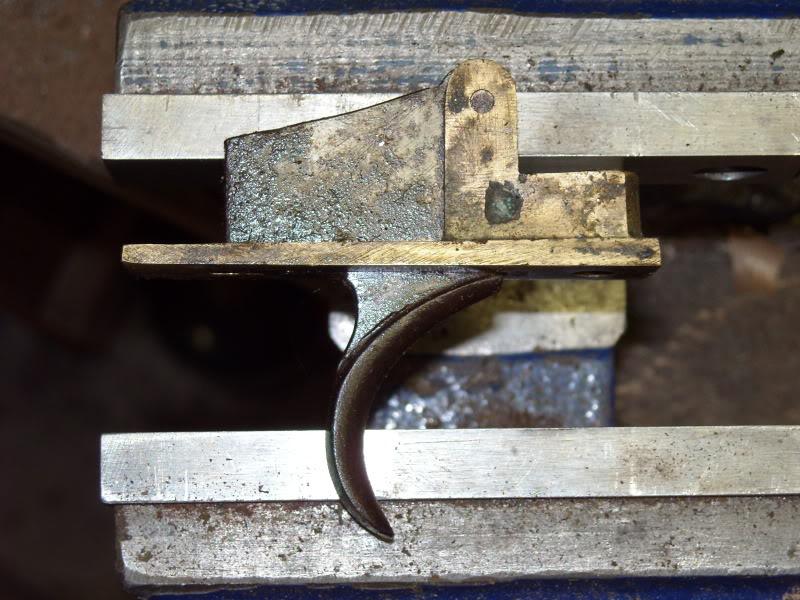
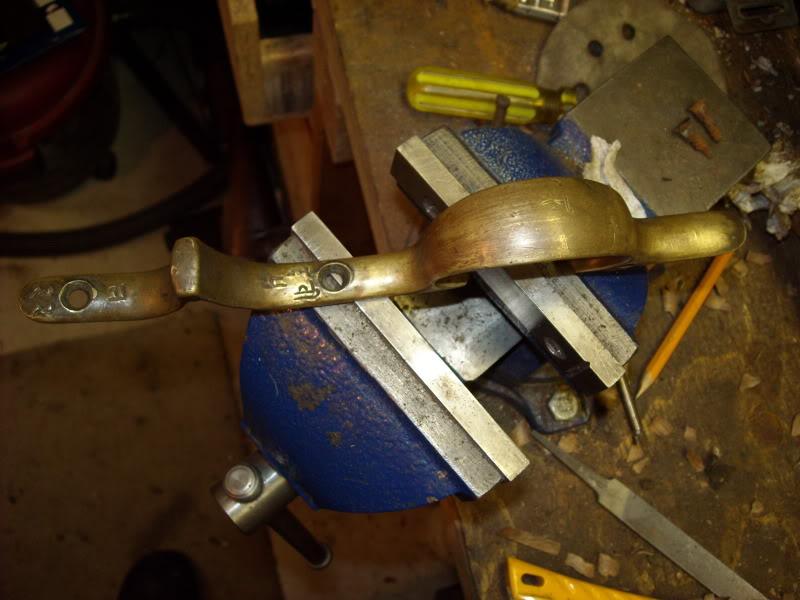
I did get the bottom metal out as the trigger was pretty rusted and needed cleaning, this was making it too slugish to use reliably.
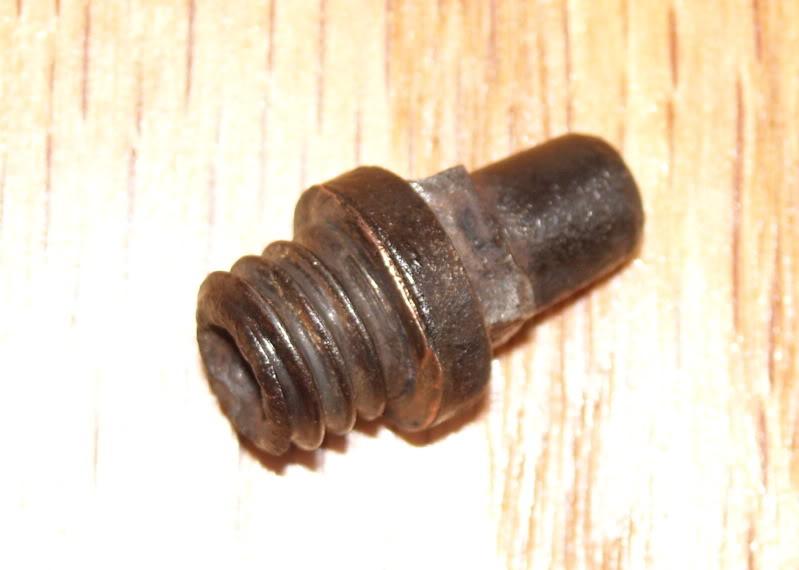
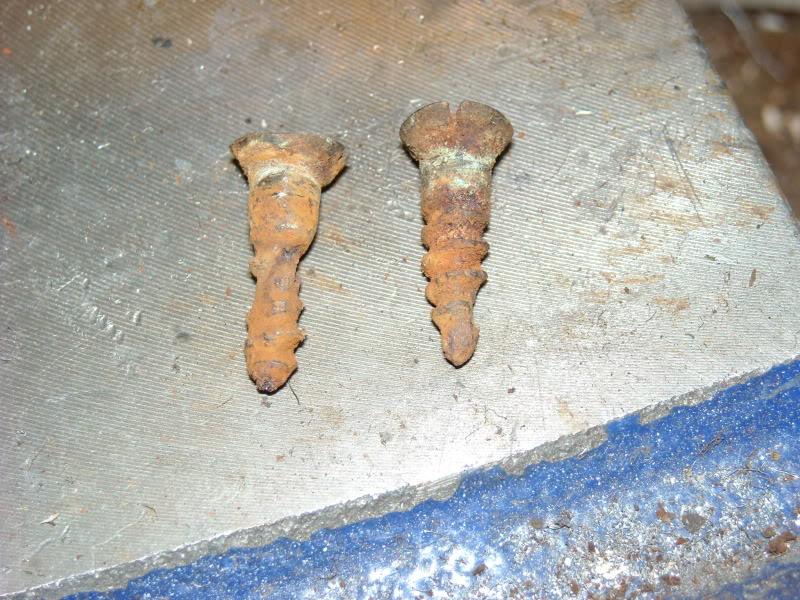
The wood must have had a lot of tanin in it as the trigger guard screws were almost totally dissolved and will need replacing.
Information
 |
Warning: This is a relatively older thread
This discussion is older than 360 days. Some information contained in it may no longer be current. |
|
Союз нерушимый республик свободных Сплотила навеки Великая Русь. Да здравствует созданный волей народов Единый, могучий Советский Союз!
-
-
10-18-2010 12:24 PM
# ADS
Friends and Sponsors

-
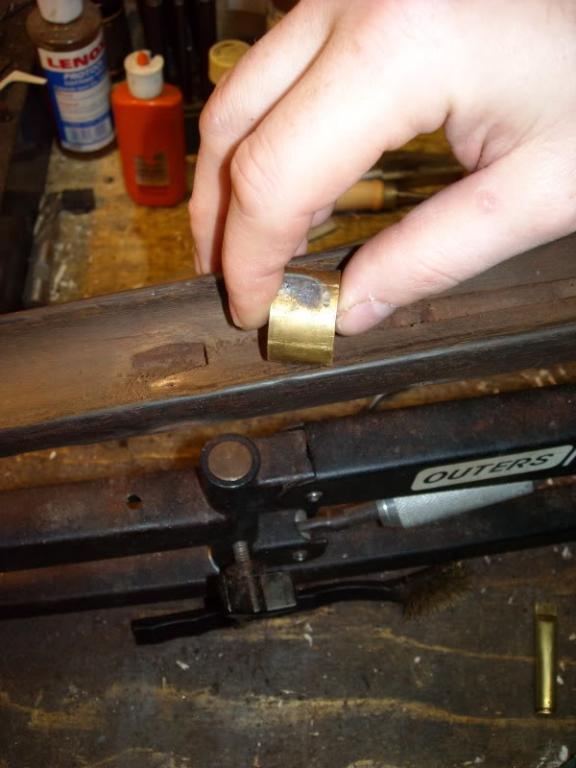
I had to clean dried-on crud and rust crusties from the stock inletting. I have an old short piece of brass pipe I periodically re-sharpedn by facing it on the lathe for this purpose as I can scrape off the crusted rust without damaging hardwood.
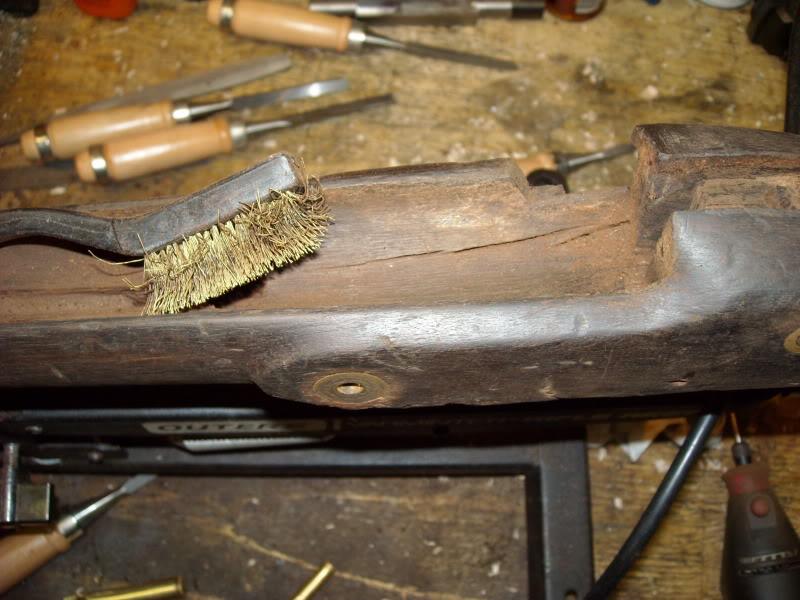
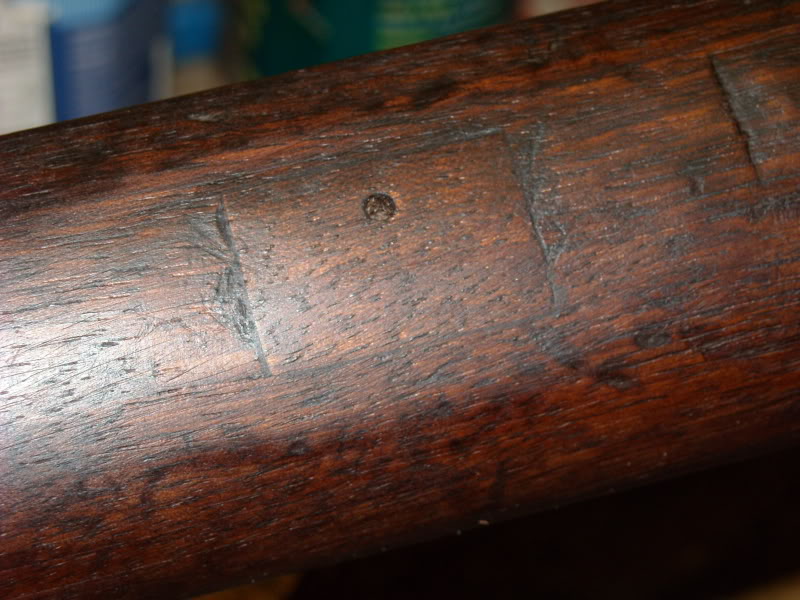
I then give the inletting a good brushing with a brass wire brush. Here you clearly see some wood shrinkage cracking that goes through into the lock inletting. I will have to fill these cracks later with epoxy.
Now for stock repairs, first up we'll fix the old-repair of the stock split. First I pulled out the iron nail and cleaned the crack with methanol. I then mixed 2-part clear epoxy and sawdust and forced it into the crack, then clamped it using a piece of bar stock to distribute the clamp force evenly.
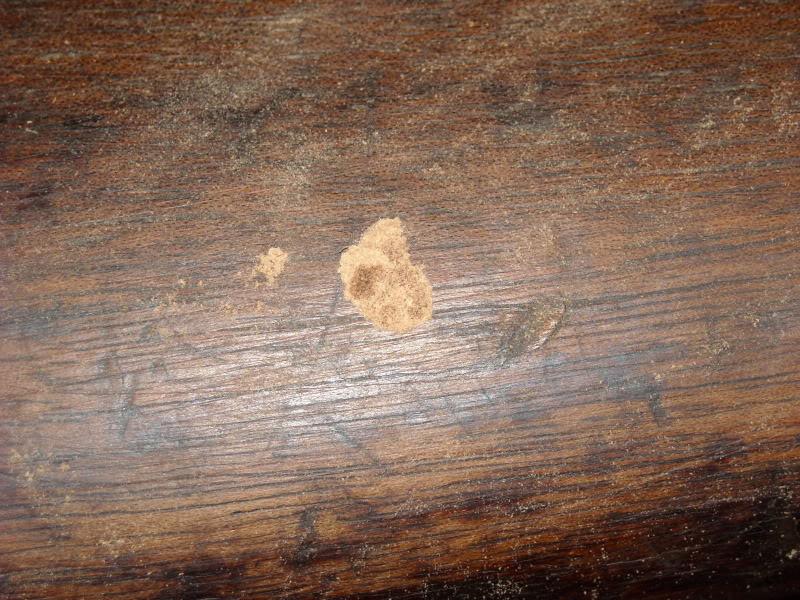
This was the only wormhole I found on the stock, so I've filled it with epoxy/sawdust left over from the crack repair. It's below the surface fo the stock and later I'll dress the surface using another method and cyano-acrylate glue.
After the epoxy dried for the crack split, I cut an elongated dovetail into the stock where material was long-since missing from the woodline along the barrel channel. I cut back into the repaired crack a little until I got to good, sound wood. This type of repair is more in the Indian/British style than the type of repair you would see in Nepal (I suspect the Nepalese repair was that iron nail). A dovetail inlet is really the way to go in these un-supported area of a stock as the angled edges will help support and retain the patch.
Not the trick to getting a good patch is to use similar material and to spend a lot of effort making sure it is a tight fitting patch. I used a piece of english walnut off a broken 19th century muzzle-loader shotgun stock which should be of similar vintage and origin to the musket. Make sure the grain is running in the right direction as well. There should be the most minimal possible seam and the patch should be a tight press-fit into the inletting. I also try to do as much shaping as reasonable before I glue it in to minimize inletting work later. It is glued in place with epoxy/sanding dust mixed together.
After it dries, I use a small hand plane to get the outside surfaces close, then I switch to a bastard file and finally to sandpaper wrapped around a file. For the inside I use a small round carving knife, then a convex chisel, and finally 120 grit paper wrapped around a large wooden dowel to match the existing inletting contours.

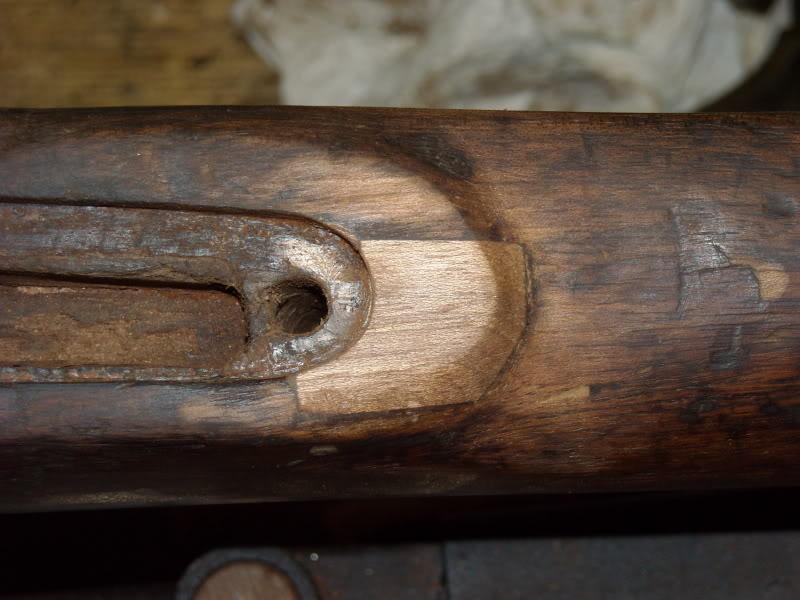
Now onto the other woodline area that needs repairing. Start the dovetail cuts:
You then switch to a chisel and small files to get it nice and straight along the bottom with sharp corners on the ends.
Patch shaped:
And glued in place to dry:
Now onto the front of the lock inlet. To make an angulared patch fit, I had to take a little beyond the dry-rotted wood.
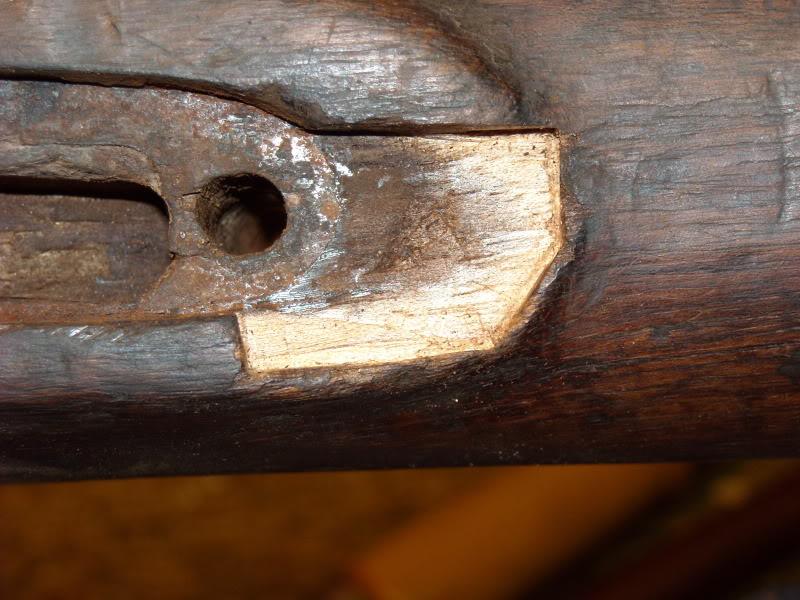
I had to spend a lot of time with files to get the patch to fit as tight as I could. It was then epoxied in to dry.
More to follow.
Last edited by Claven2; 10-18-2010 at 12:48 PM.
Союз нерушимый республик свободных Сплотила навеки Великая Русь. Да здравствует созданный волей народов Единый, могучий Советский Союз!
-
Thank You to Claven2 For This Useful Post:
-
-
FREE MEMBER
NO Posting or PM's Allowed

Very nice, you are a braver man than I.
-
Союз нерушимый республик свободных Сплотила навеки Великая Русь. Да здравствует созданный волей народов Единый, могучий Советский Союз!
-
-
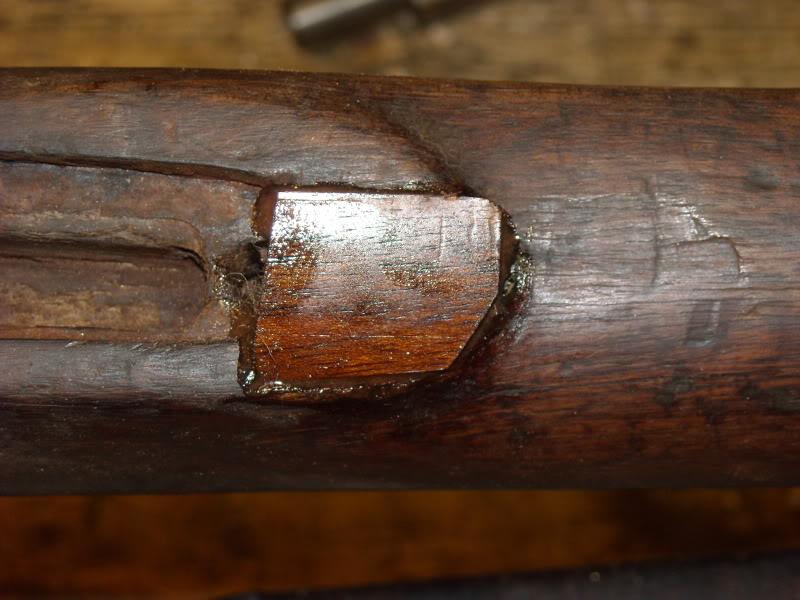
Well I managed to dress the second woodline patch and the lock area patch. Results are rather good in my view, and certainly much more solid that what was there before.
The woodline patch was over a small compression or wood bruise and to retain that service wear, I sanded a small dished area on the patch to match the bruise - this should make the patch look more period.
Last edited by Claven2; 10-18-2010 at 07:48 PM.
Союз нерушимый республик свободных Сплотила навеки Великая Русь. Да здравствует созданный волей народов Единый, могучий Советский Союз!
-
Thank You to Claven2 For This Useful Post:
-
Some more progress.
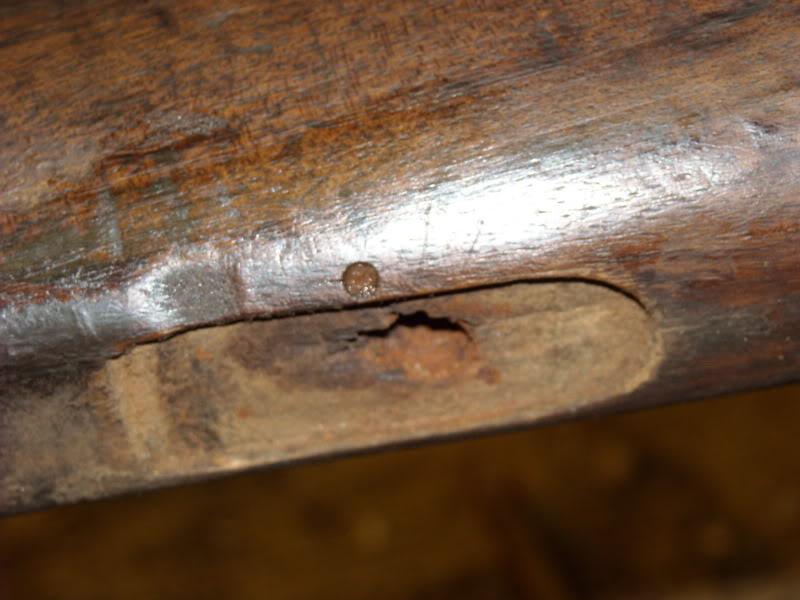
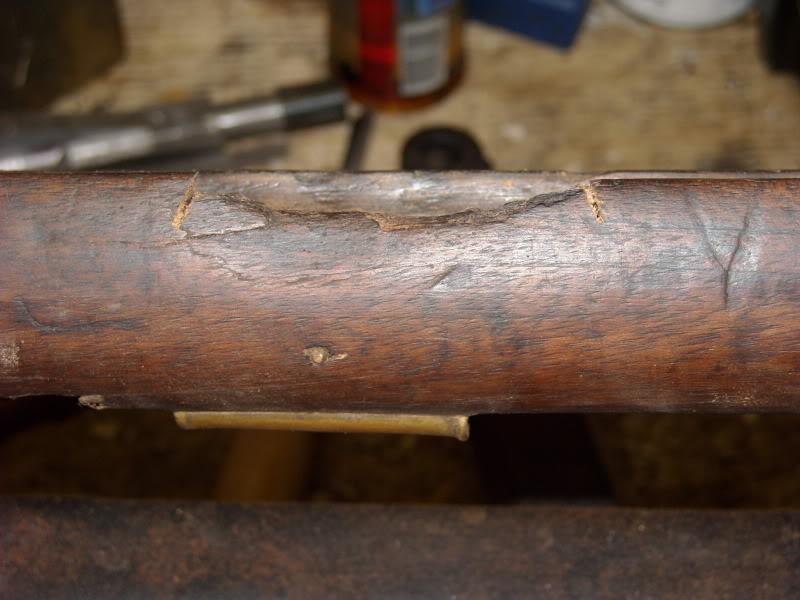
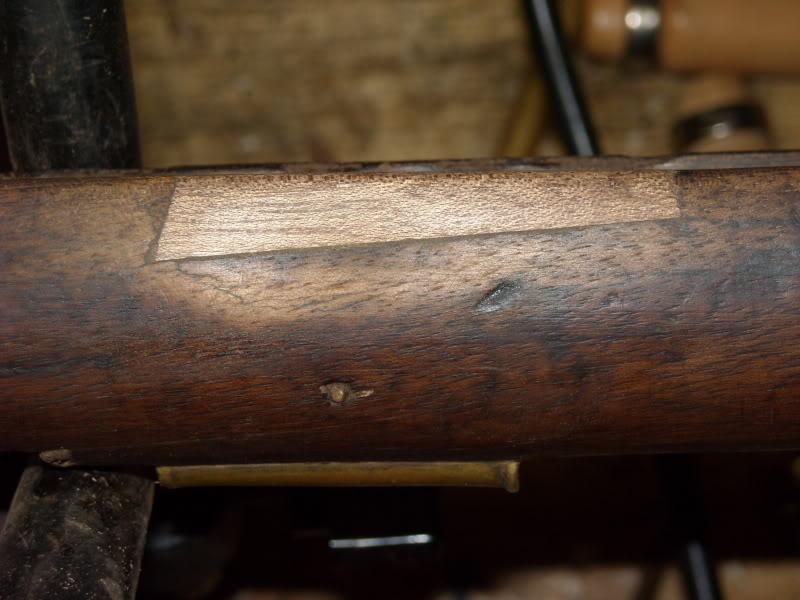
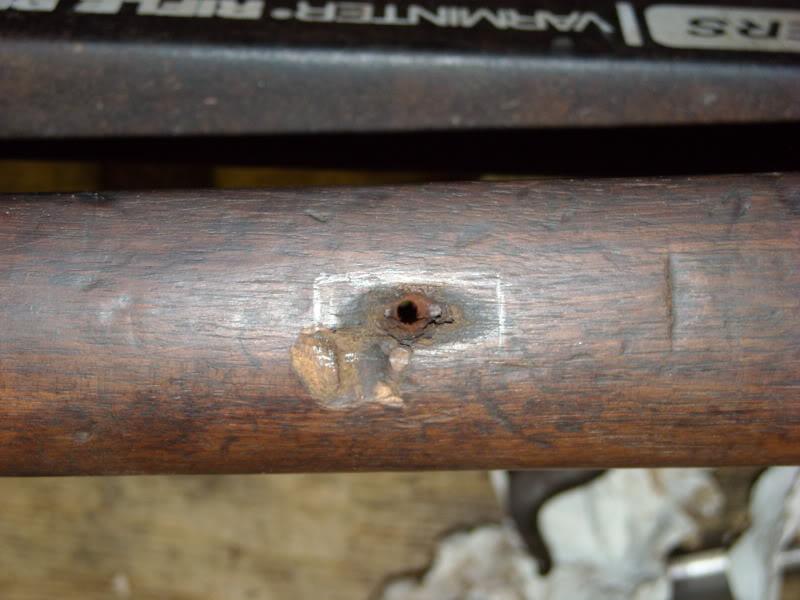
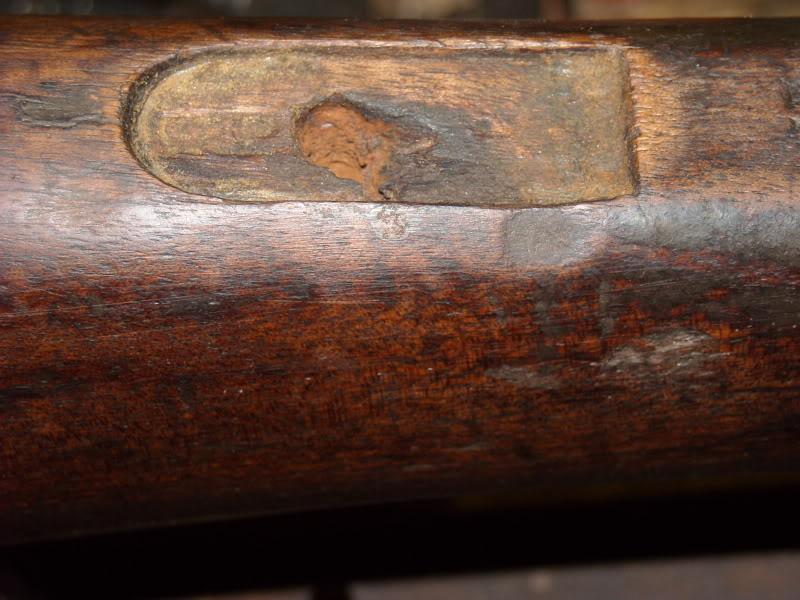
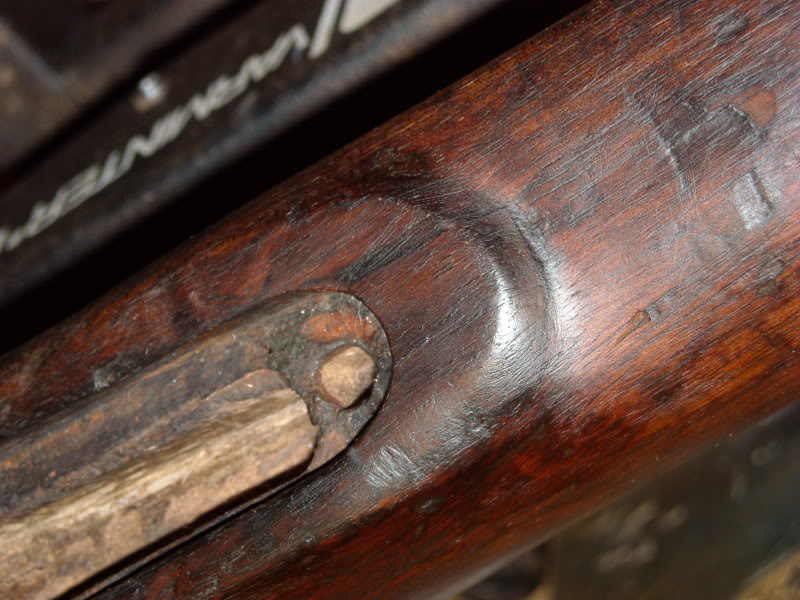
Here is the damaged area near the cleaning rod spring retainer pin. The one side was completely dry-rotted and had a large "ding" with broken wood fibre right around the rot damage. I probably could have left it, but I didn't and therefore can show yo how to make a nice tight fitting rectangular patch.
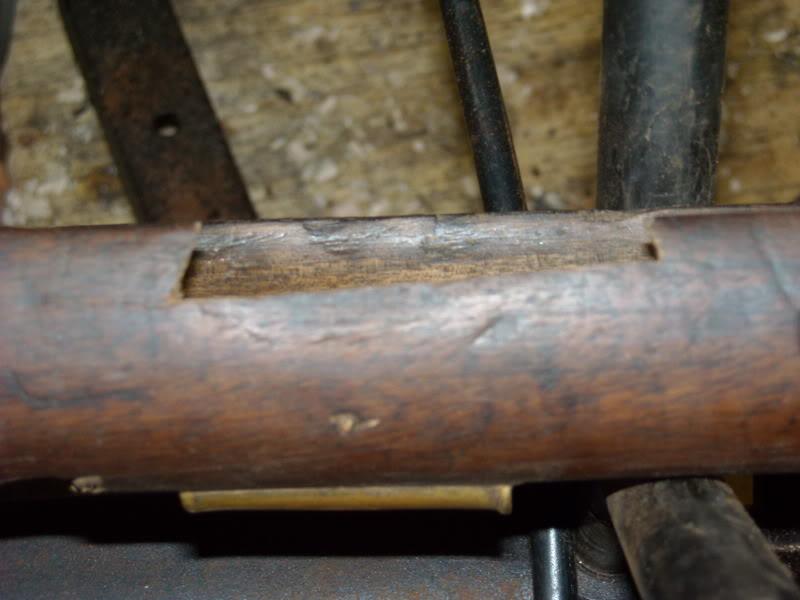
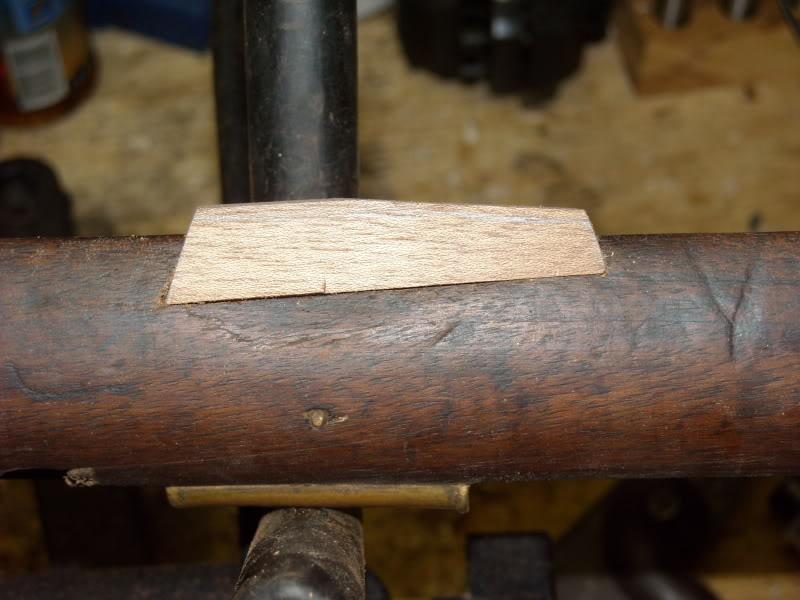
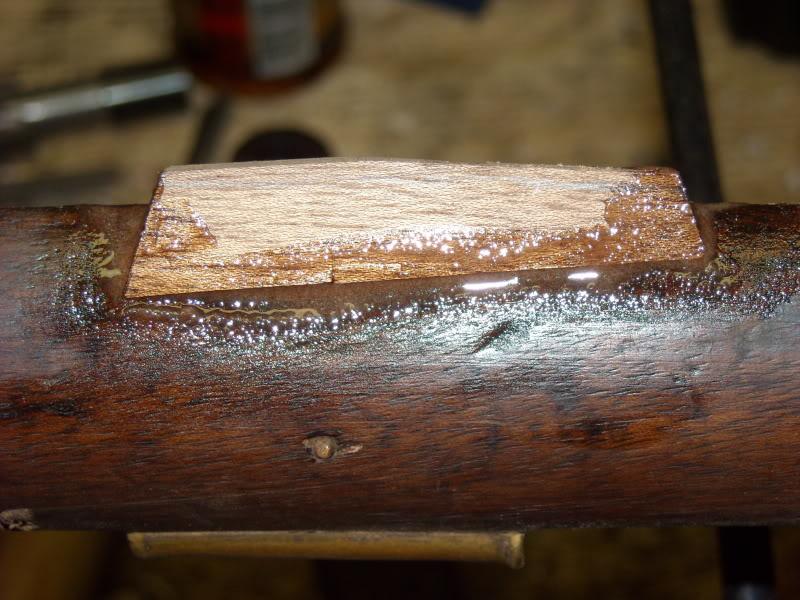
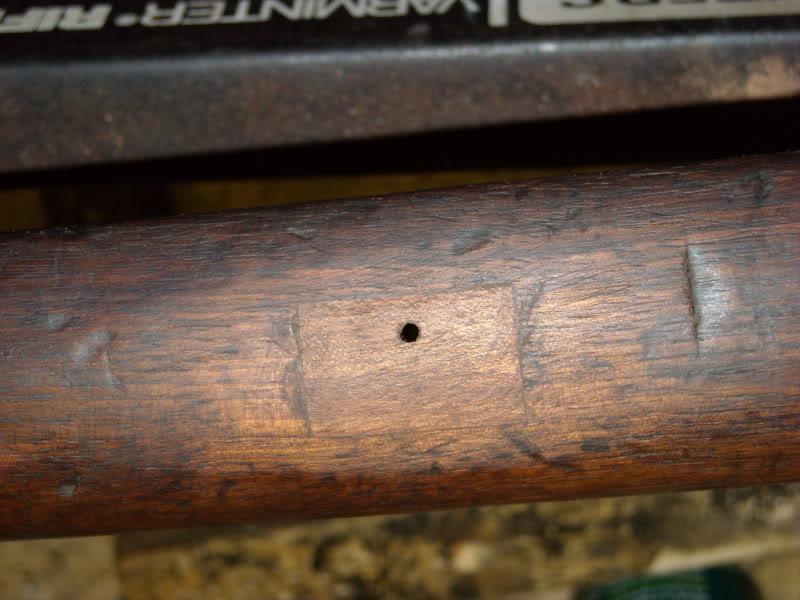
Here is the before. I had pencilled out the area I intended to patch but as I chiselled it out, the broken fibres to the lower left turned out to just flake away and I couldn't terminate the patch against them, so I had to make the patch slightly larger to get to good wood. The patch itself is about 3/8" deep into the stock and was roughly ground to size on a belt sander, but final fit was done with a fine mill file to get nice tight seams all around. It was fixed into place by mortaring it with epoxy and sanding dust and tapped down into position with a plastic mallet, left 1/4" proud until dry, chiseled close to the wood surface, then bastard filed closer, mill filed very close and then draw filed with 120grit wet/dry wrapped around a file and finish sanded to 220grit. the hole was then drilled through from the opposite side where the original hole was still fine on the other side of the stock.
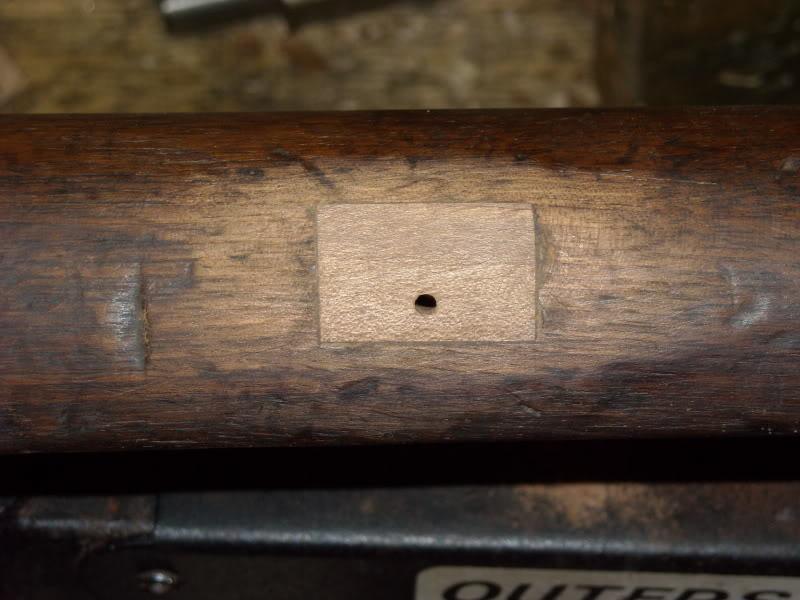
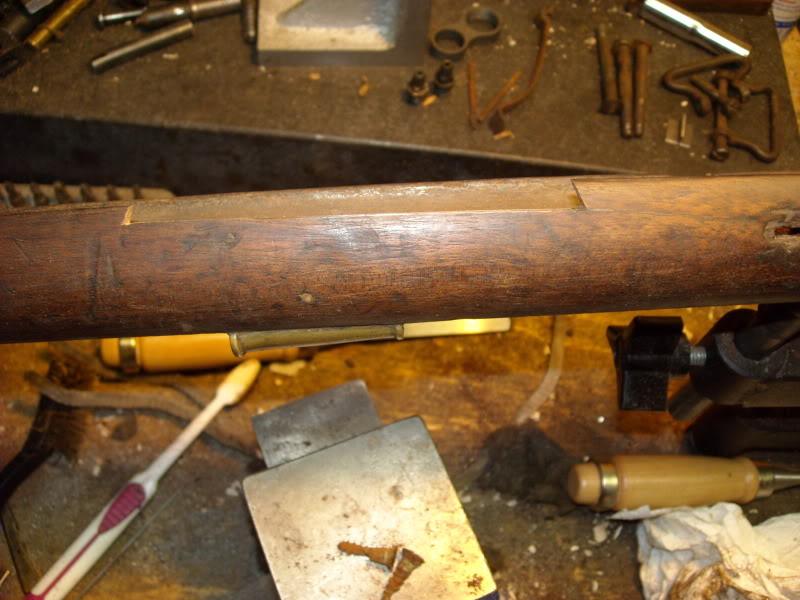
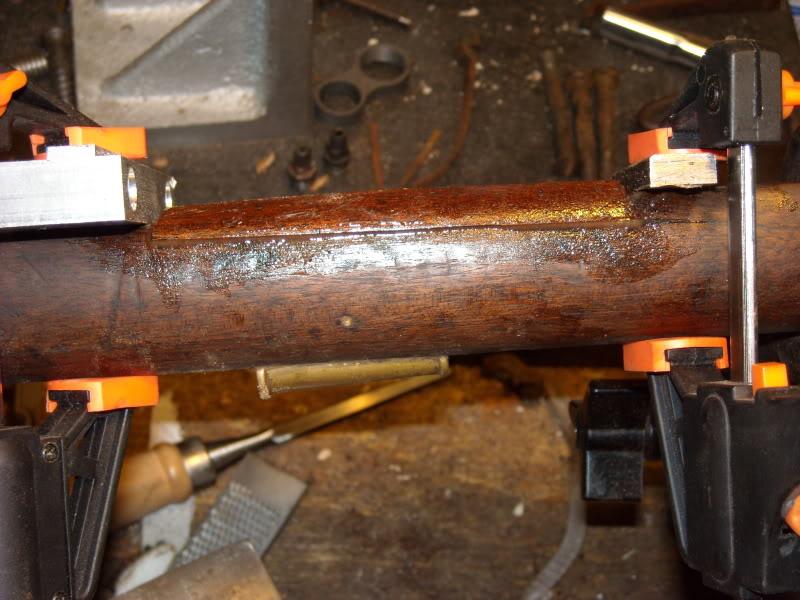
And after one coat of kramers antique improver, no stains or dyes applied at this point:
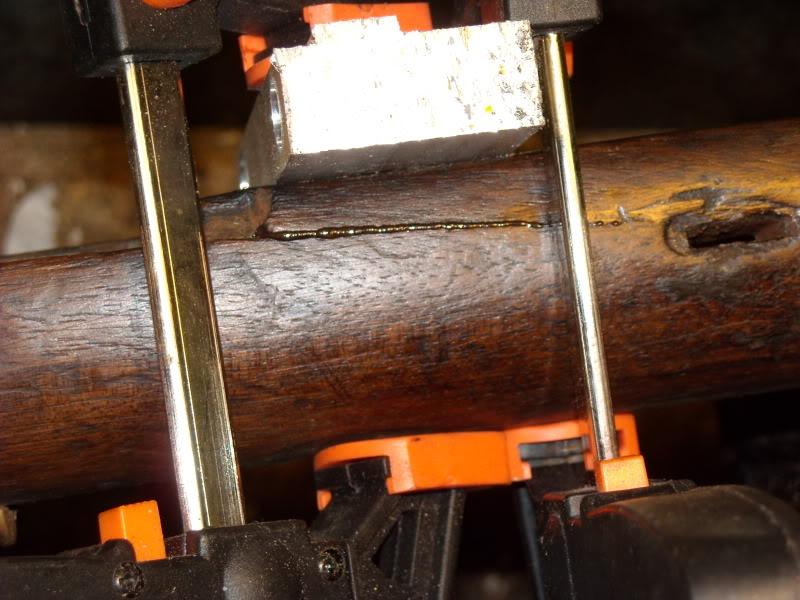
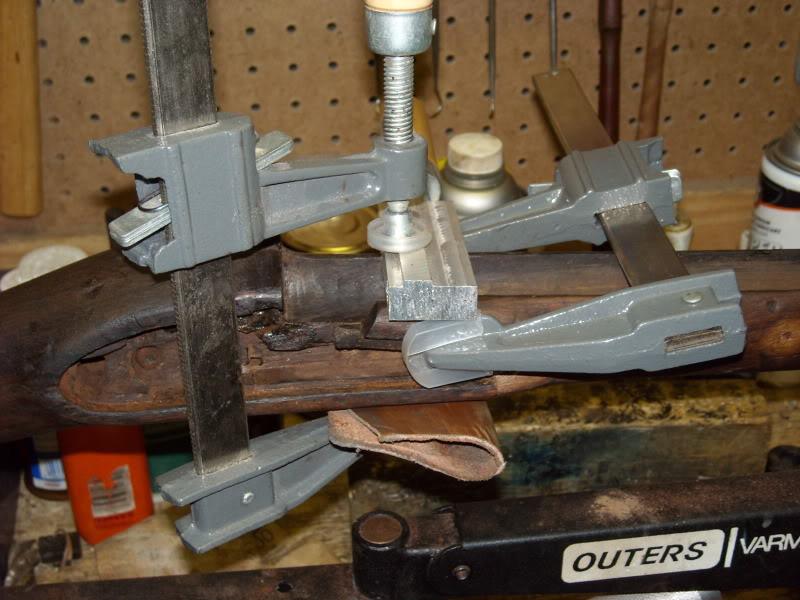
Next I had to fit those age splits in the stock between the barrel channel and lock inlet. This was done again with 2-part epoxy and sanding dust and some clamps. Let set for 8 hours prior to undoing the clamps, then use a round chisel to scrape off excess epoxy in the barrel channel and a small flat chisel to clean excess out of the lock inletting. Barrel inlet was also lightly sanded over the joints with 120 grit wrapped around a dowel.
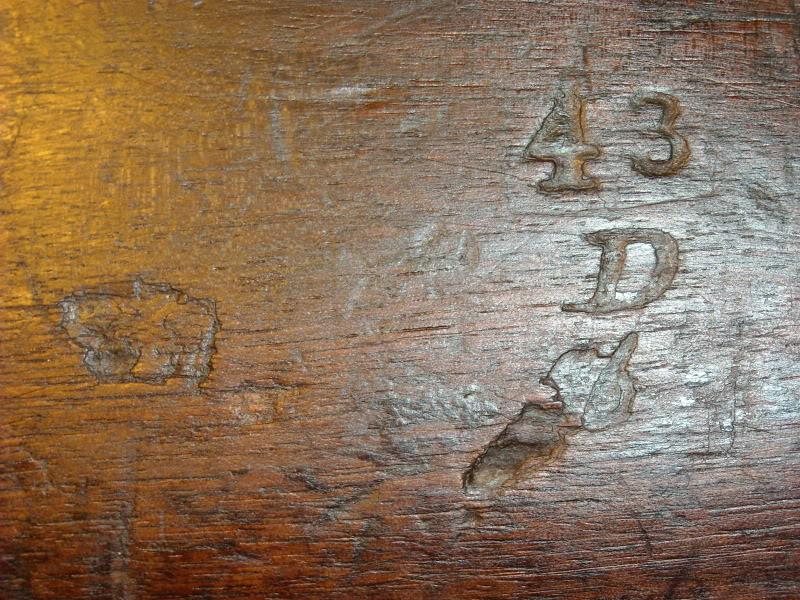
When cleaning the toe of the stock I think I discovered the stock maker's mark, "LACY WP", though hard to see in the photo.
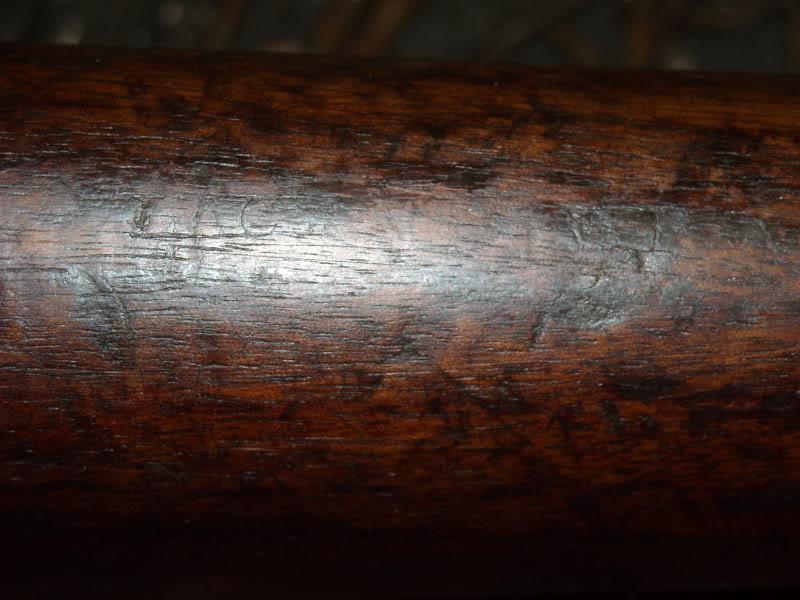
While the epoxy was setting I refurbed the lock. It was pretty rusty. I soaked in liquid wrench, disassembled it, scraped all rusted surfaces with a sharp sheet of brass, then rubbed it lightly with 0000 steel wool soaked in machine oil, wiped it clean, coated it in ballistol to season it, re-assembled and photographed. It cleaned up rather well except for some rust pits on either tip of the lockplate, but oh well - it's older than dirt. It still operates beautifully though and it's amazing how much better made it is than the typicall lock of Nepalese manufacture like, say, on one of their 1853 muskets.

Now as I cleaned the stock (Kramers antique clarifier and restorer are GREAT products) - I found three small worm holes. One was shown previously where I had partially patched it. I finished that by packing the shallow with sanding dust and dribbling cyano-acrylate into it. Once dry, I chisel it flush and lightly buff with 400 grit to smooth it. Nearly invisible now.
Before:
After:
Same procedure for the two small ones on the side of the buttstock. Here's an example:
Curing:
Dressed:
Once the stock finish is rubbed and brought up, they will be invisible for all intents and purposes. Cosmetic fixes are fine here as there was very little damage. If the structural integrity is gone due to volume of worm holes, you'll need a more drastic approach.
The hole in the trigger guard inlet got larger under the trigger guard. To fix it, as it was near a screw hole and needed some strength, I whittled a walnut dowel and cyano-acrylated it into the hole, then packed the crevasses around it with sanding dust and soaked it in cyano-acrylate as well. Once cured, it's chiselled flush and will be at least as strong as the wood around it.
packing with sanding dust:

Soaked in cyano acrylate and curing:
sorry, no "after pic" as my camera battery just died! lol.
By the way, use WALNUT to make your sanding dust or the colors will never blend 
Союз нерушимый республик свободных Сплотила навеки Великая Русь. Да здравствует созданный волей народов Единый, могучий Советский Союз!
-
Thank You to Claven2 For This Useful Post:
-
-
Thank You to Claven2 For This Useful Post:
-
-
Thank You to Claven2 For This Useful Post:
-
-
The Following 3 Members Say Thank You to Claven2 For This Useful Post:
-
Just out of interest, any idea of how many hours you put into it? I know we don't count them but any idea?
-


 PM
PM


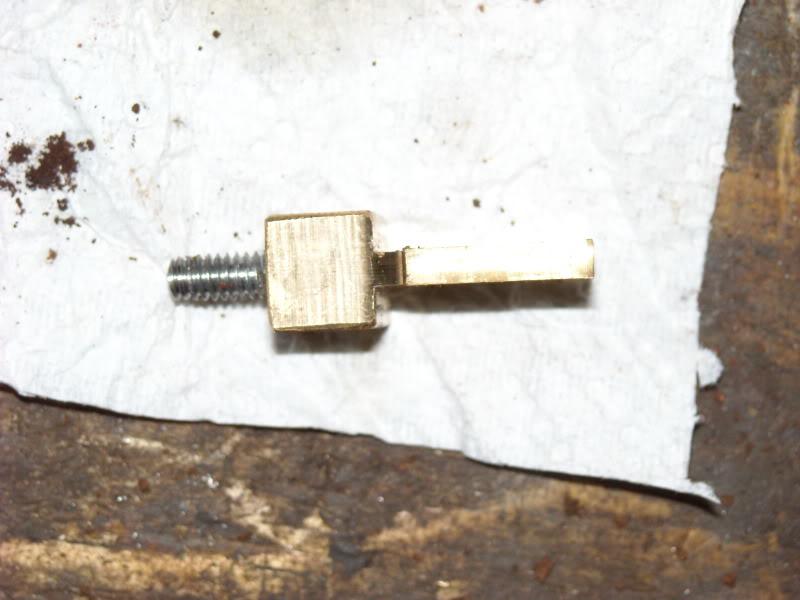

 I also had to make two new screws. I started with some swivel screws off a WW1 era Mauser which were the same length and diameter as the originals and re-contoured the dome heads to seamless integrate to the trigger guard - lots of trial and error as I didn't want to file them in-place and damage the trigger guard patina. When fitted, I browned them to match the metal on the rest of the gun.