-
FREE MEMBER
NO Posting or PM's Allowed

I´ve always wondered how well the steering would work (the Bren carrier seems to be a much better design for the same purpose).
-
04-16-2014 05:06 AM
# ADS
Friends and Sponsors

-

Originally Posted by
villiers

I´ve always wondered how well the steering would work (the Bren carrier seems to be a much better design for the same purpose).
On these vehicles, if you steer more than 5 degrees, the fork assembly actuates one of the track brakes and the tracks do the steering. It works rather well.
Союз нерушимый республик свободных Сплотила навеки Великая Русь. Да здравствует созданный волей народов Единый, могучий Советский Союз!
-
-
-
Advisory Panel


Originally Posted by
Claven2
the fork assembly actuates one of the track brakes
I thought it might be something like that.
-
-
FREE MEMBER
NO Posting or PM's Allowed
I appreciate the thread too. But one question. I notice the front 'motor cycle' part is missing. Was this motor cycle part that's missing similar to anything or other motorcycle part produced after the war?
When they ceased production of these things in 48(?) was anything used on any other vehicle produced by them afterwards so that some spare parts might be easy/easier to obtain?
Great project
Hello Mr Laidler. Yes the front fork and wheel have been sourced. Thank god for the internet and the small pool of venders and companies that cater to these vehicles. I can honestly say that parts have come from just about every EU country to make this restration possible.
---------- Post added at 08:46 AM ---------- Previous post was at 08:40 AM ----------
Originally Posted by
gtodan
Did you have any drawings to work with?
The 1943 kettenkrad parts book is my bible with all its exploded drawings, that and asking a couple thousand questions and connecting with fellow kett owners. One time I needed a measurement and did not want to blow half a day running intot eh Canadian war Museum to get what I needed. I shot a Email over to a fellow in the UK , Andrew went to his kett and sent the message/info back to me in Canada within ten minutes, cross Atlantic cooperation at its finest.
---------- Post added at 08:51 AM ---------- Previous post was at 08:46 AM ----------
Originally Posted by
Claven2
Question for the original poster - was the late-war Kett slightly different in the body panels than early Ketts?
This is a dwg from a
German manual, most of the ketts I see look like this where there is a continuous ledge running from the too of the front fender back to below the rear handrails. (yes, I know the dwg shows hollow handrails vs. the later panelled versions)
https://www.milsurps.com/images/impo...tenkrad3-1.jpg
On your restored body though, the ledge is not there. Is that a purposeful or necessary result or expedient of your restoration, or is it a late-war time-saving mod to that style of body on 1944 ketts? Just curious

Hi Claven, as the war dragged on the Germans made a number of additions and deletions to the kettenkrad. Being a late war mine does not have those fender extesions and all they are really good for is trapping mud and causing rust issues. Late war ketts also have no lights other then a Notek at front and rear, closed in passenger side panels, no shift pattern data plate amoung many other things different.
---------- Post added at 08:56 AM ---------- Previous post was at 08:51 AM ----------
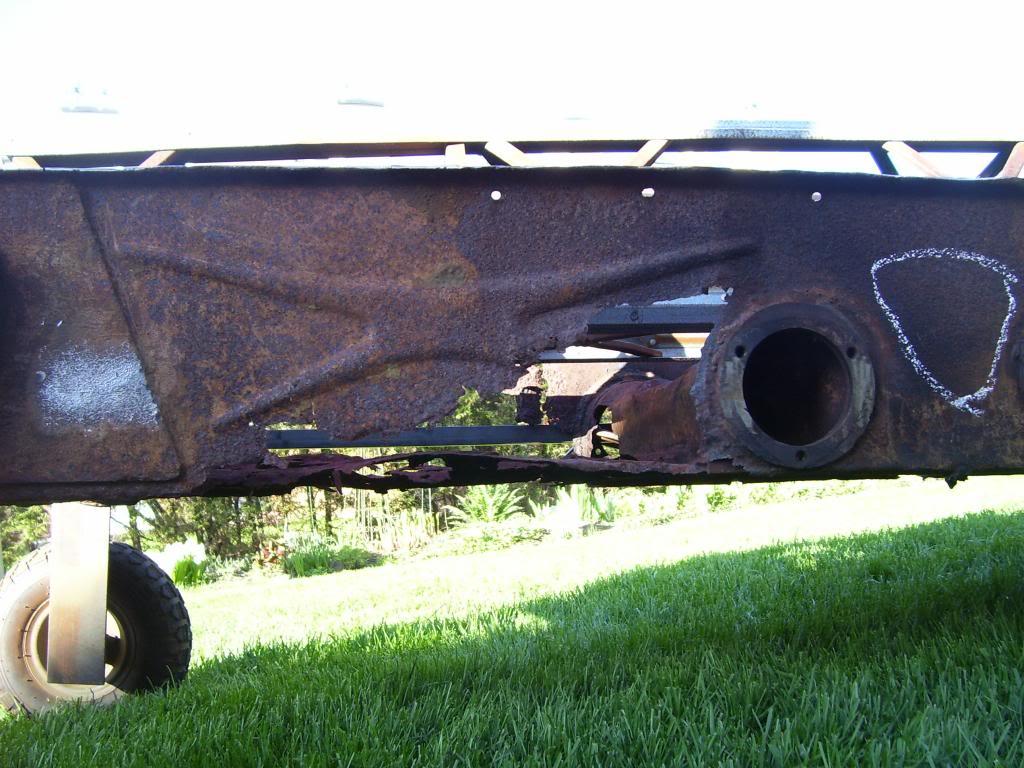
Rehabilatating the Lower Front Portion
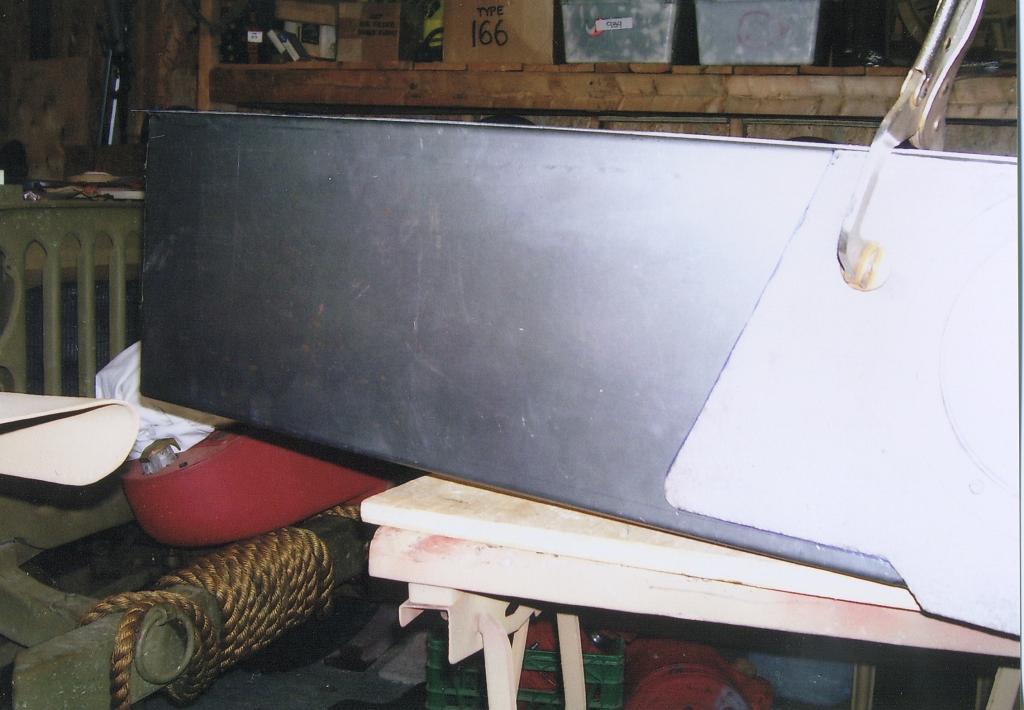
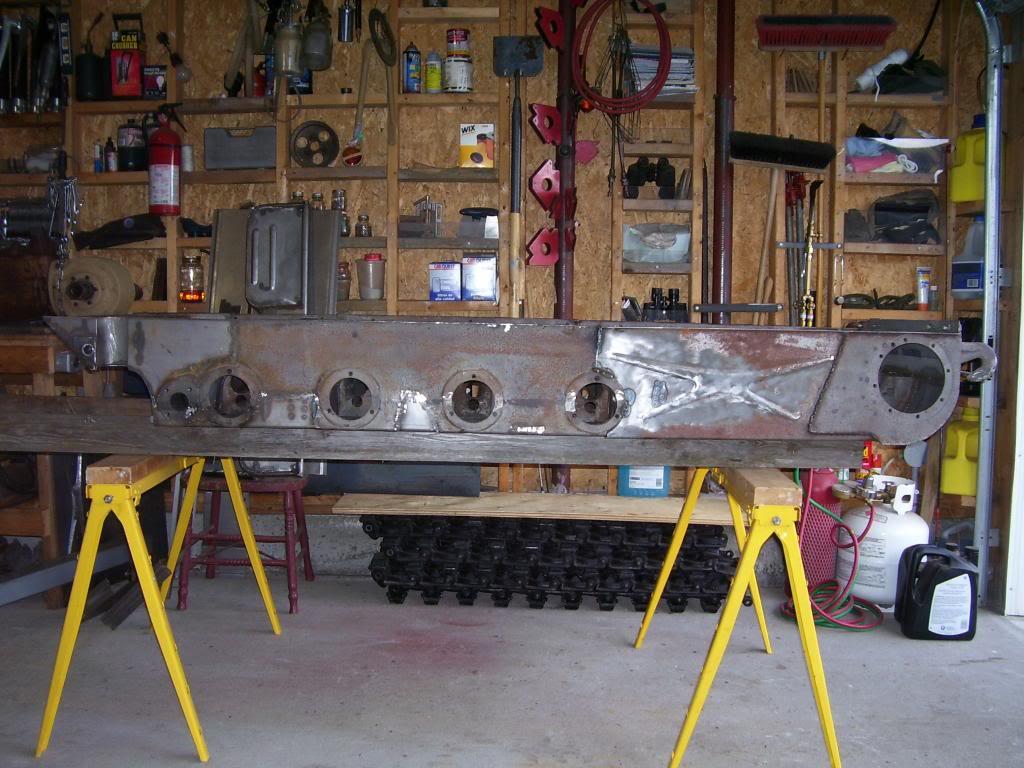
With the Kettenkrads body now cut down to the three portions (lower front and rear and section with steering knuckle) I determined to be saveable and important to the rebuild I start investing time into working at bringing them back. The first of the three sections I will highlight is the front lower as it has a large X shape pressed into the 16 Gauge sheet metal. In this picture you see the large X and how it was rotted, the panel with the X ran, when it was pressed at the NSU factory, the whole length of the kett from front to back and would incorporate the openings for the torsion bars, track adjusters, drive sprockets and was J shaped along the bottom where it is gas welded to the floor panels.

While alot of the X area looks sound the sandblasting reduced most to lace.
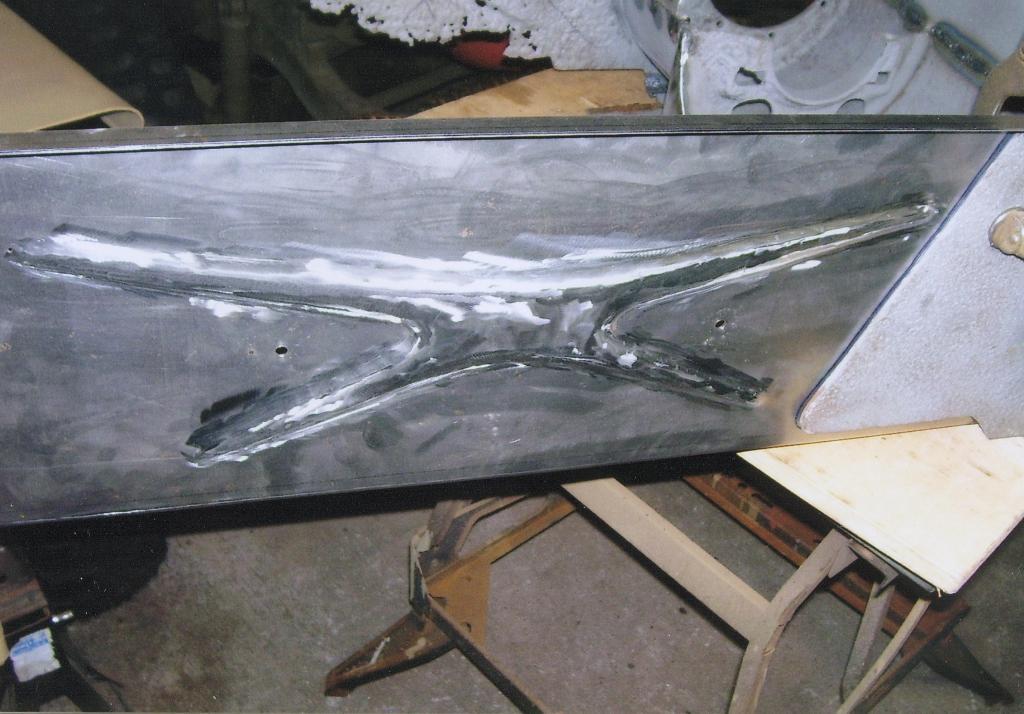
To repair these panels I took a large 3/8in thick plate and using a angle head grinder (Bubbas favourite tool) and a Dremel hand carved a female X to replicate the X in a new panel. On one side I just replaced a rotted X panel with new and on the other saved the top of the X and mated a new lower portion. 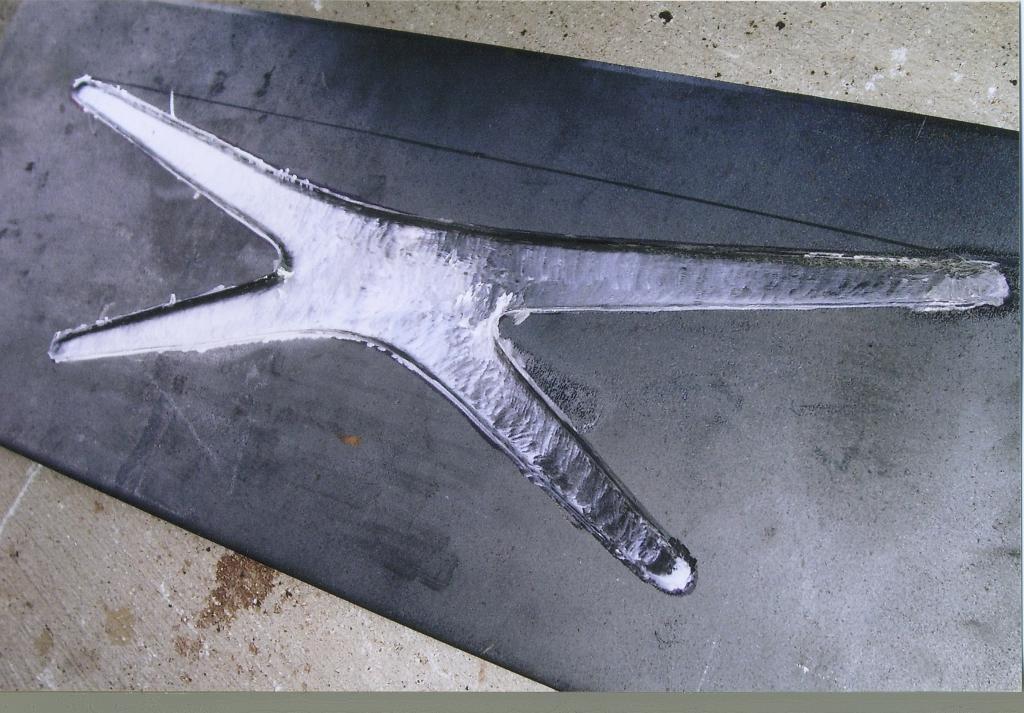
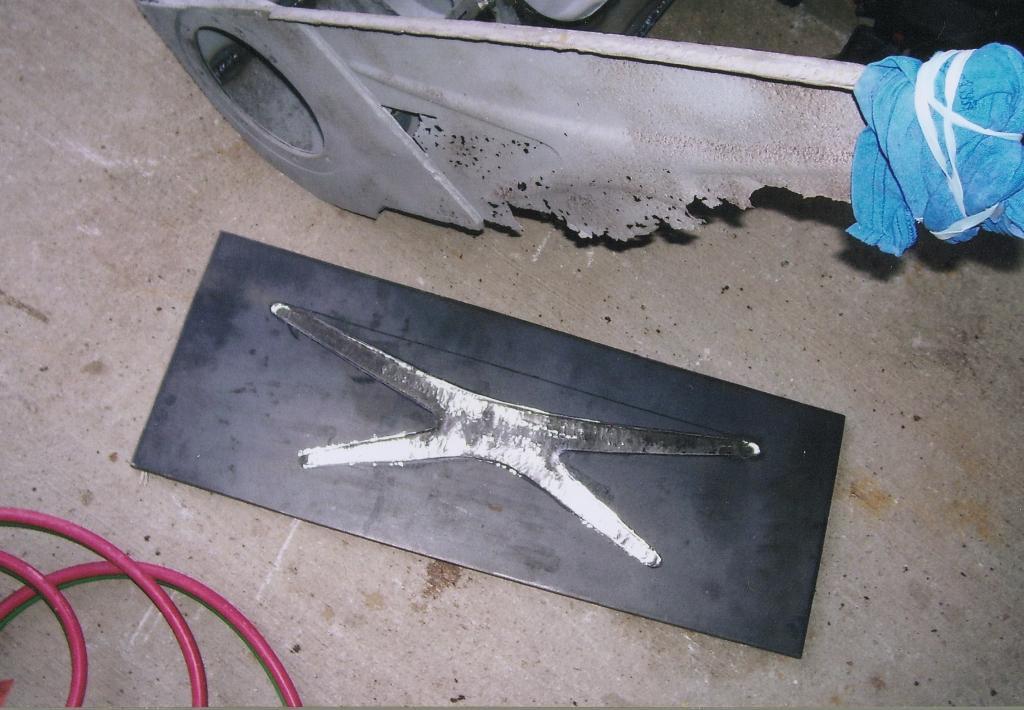
Hand dinging in the X to the new panels.
Before
After
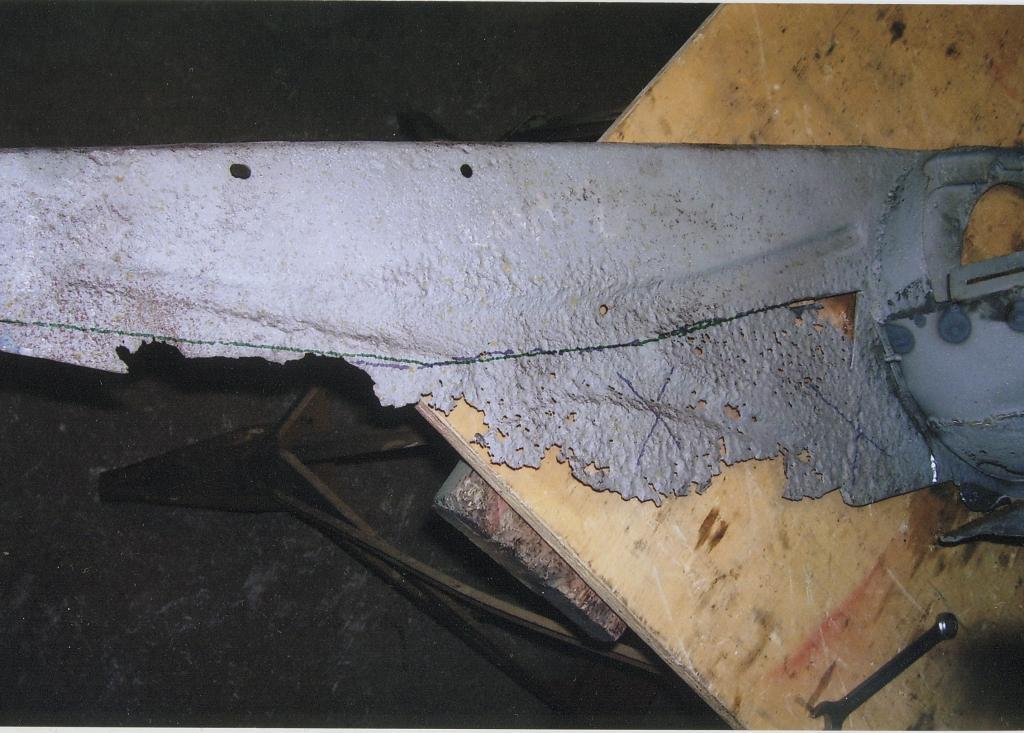
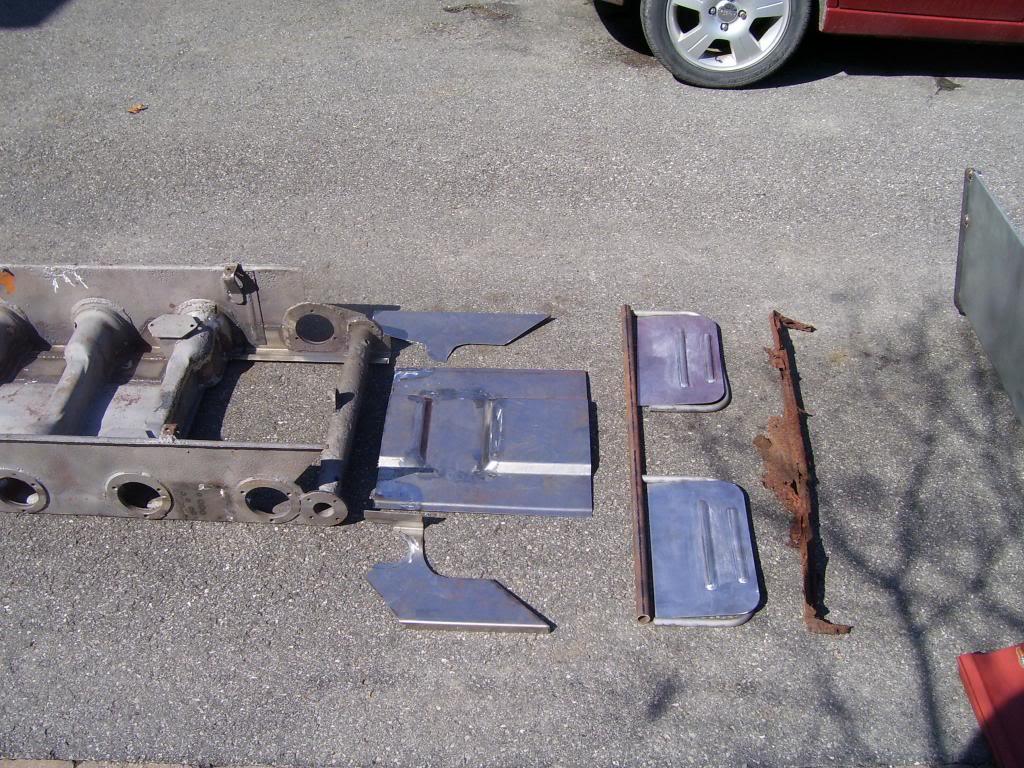
Saving everything possible, after the sandblaster did its thing turning sheet metal into lace, the cutting continues to be replaced with new steel.
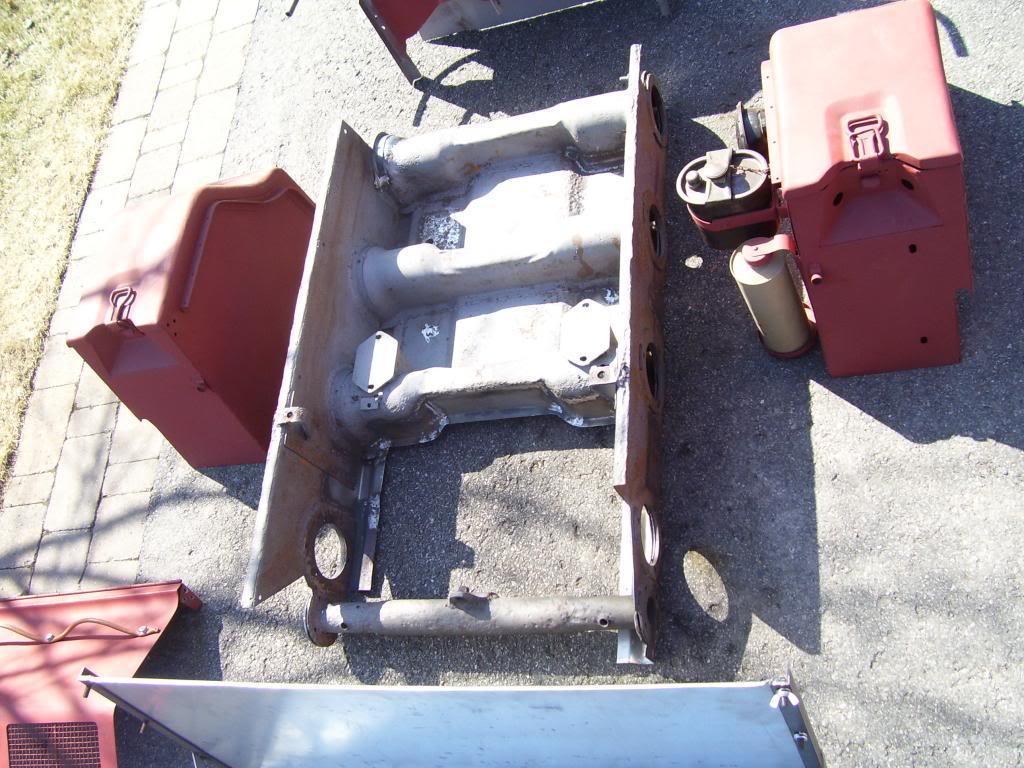
The three major sections (lower front/rear and steering knuckle) the lower front shows the all new X panel and the restored (new bottom area) X on the opposite side.
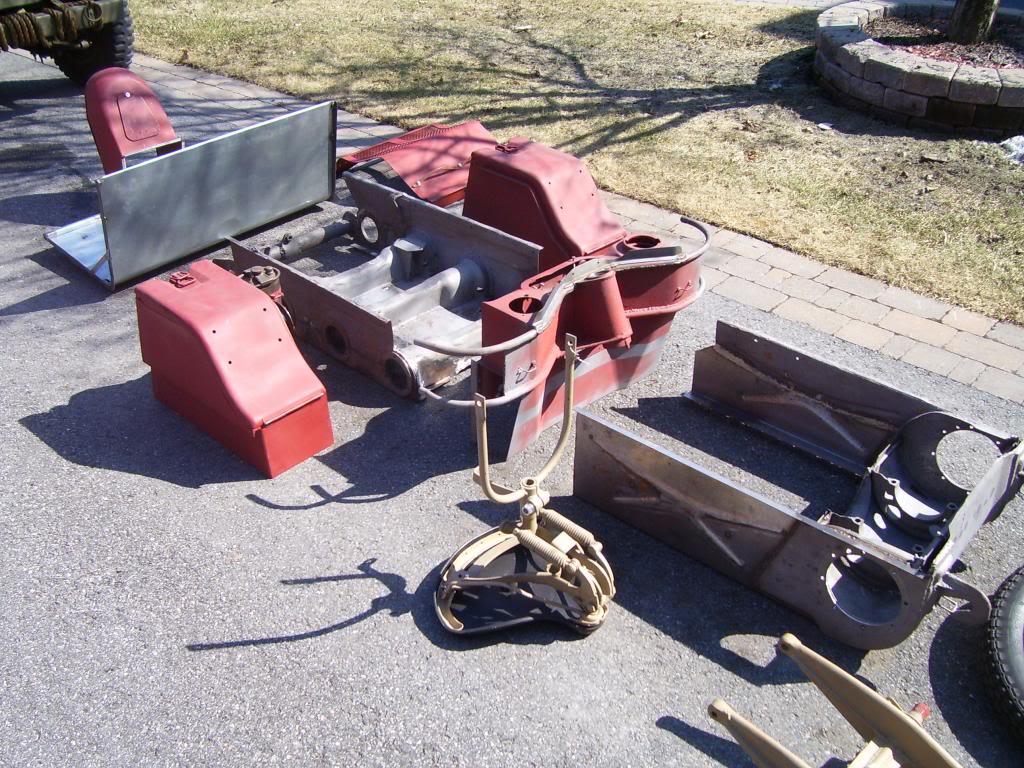
Next up, the lower rear section gets rebuilt.
---------- Post added at 08:58 AM ---------- Previous post was at 08:56 AM ----------
Rehabilatating the lower rear section
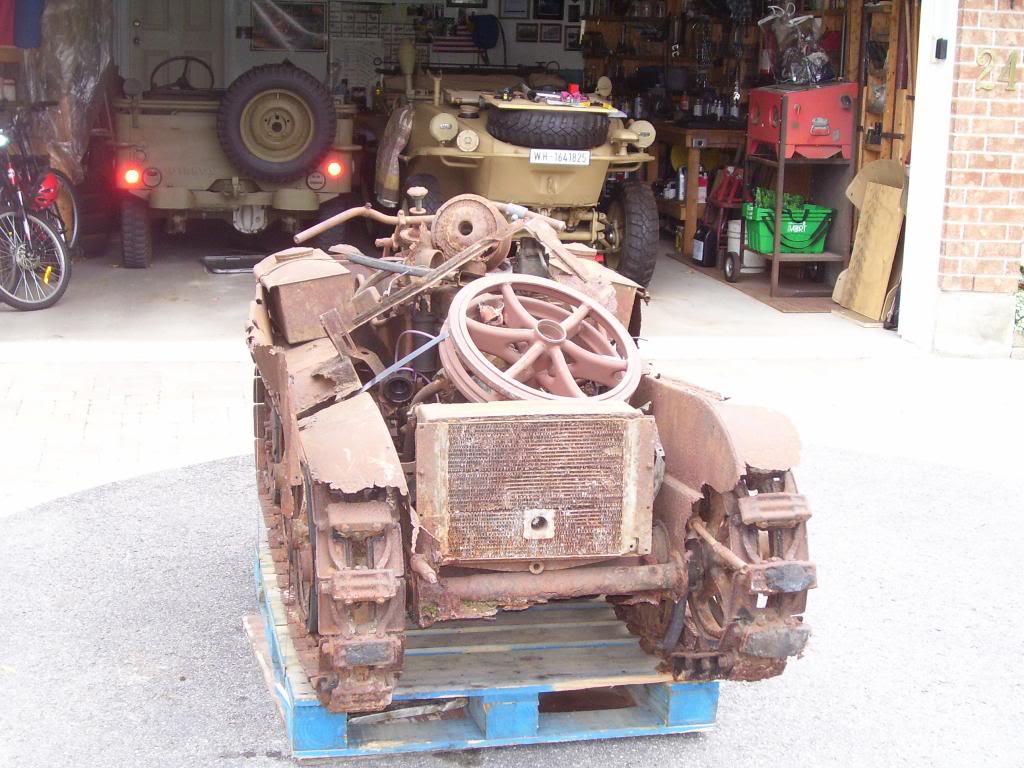
So much ground to cover I had better pick up the posting pace otherwise this could drag on forever. The issues with the lower rear half where 1. the floor, with its unique square pressed portions needed heavy repair 2. the four inverted U shaped torsion bar houses all needed faberication and repair and 3. about 20 inches of the rear lower had simply rusted away to nothingness. This picture, while previously posted shows the rear end at Day One.
Another previously posted pic showing the floor sections that need repair. Note the series of three holes punched in the body to drain the hull, Euro Bubba strikes again. 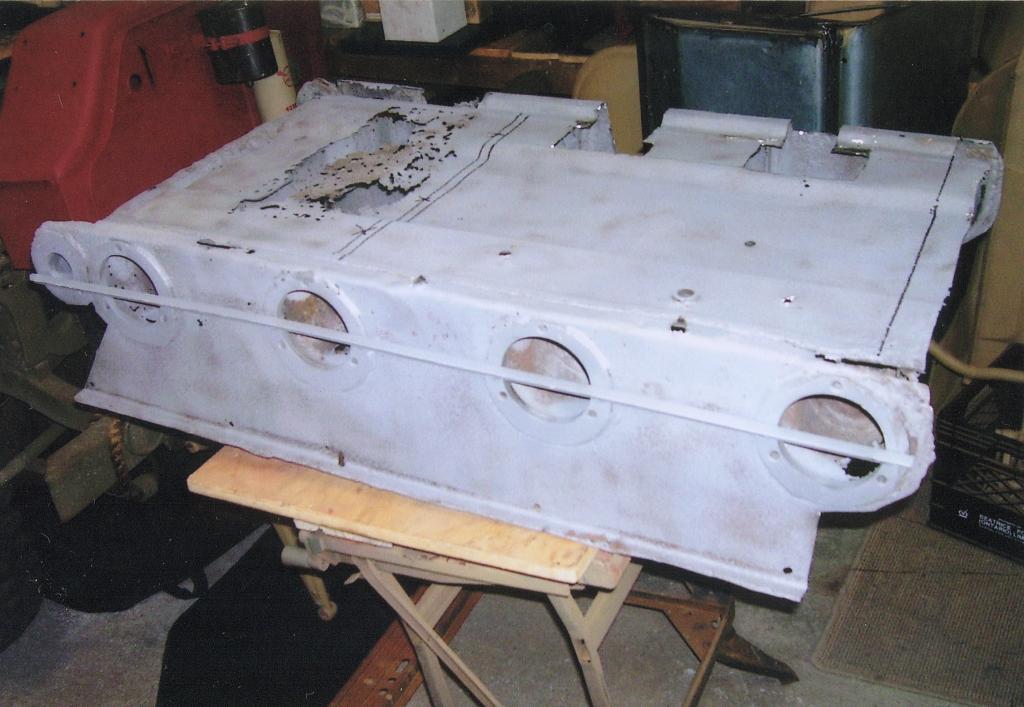
After sandblasting and final chopping out of rusted areas I now see what all floor wise has to be replaced, plus sections of the sides to extend rearward past the track adjusters. The rear most, and insanely difficult to repair torsion bar house is out at this stage, the first three torsion bar houses where repaired without removing, that back one was just to far gone to do that installed.
Lower rear floor and side sections fabericated. I had to resort to hotgluing chunks of rust together to get the radius of the side sections where the Kett muffler mounts off the residue to make new panels.
Repairing #4 torsion bar house.

To repair #4 it took 22 individual pieces fitted and welded into repair, then it had to mocked up with the carriers and torsion bars installed so the vehicle geometry was correct. I spent more time on and effort on that rear house then the other three.
Cut and welding what felt like forever, one one part (good old #4).
Repairing houses without removing, section of mocked in floor to give correct profile.
New made rear floor installed and next is replacing #4 house.
Ready to weld in #4 house rear metal werk largely done after about a couple thousand test fits I get the new to fit nicely with the old and weld together.
#4 back in, finally.
Done.
-
FREE MEMBER
NO Posting or PM's Allowed
Never knew that! Otherwise, as a biker, I wouldn´t have thought that the forks could bring the weight around.
PS
Shortly after German re-unification, I was told that the Kettenrad had been used on GDR airfields quite extensively. Presumably they either had spare parts or made them.
-
FREE MEMBER
NO Posting or PM's Allowed
Originally Posted by
villiers
Never knew that! Otherwise, as a biker, I wouldn´t have thought that the forks could bring the weight around.
PS
Shortly after German re-unification, I was told that the Kettenrad had been used on GDR airfields quite extensively. Presumably they either had spare parts or made them.
No doubt there where a couple put to work in East Germany postwar as Ex-Wehrmacht vehicles but I highly doubt there where very many.
---------- Post added at 06:54 AM ---------- Previous post was at 06:49 AM ----------
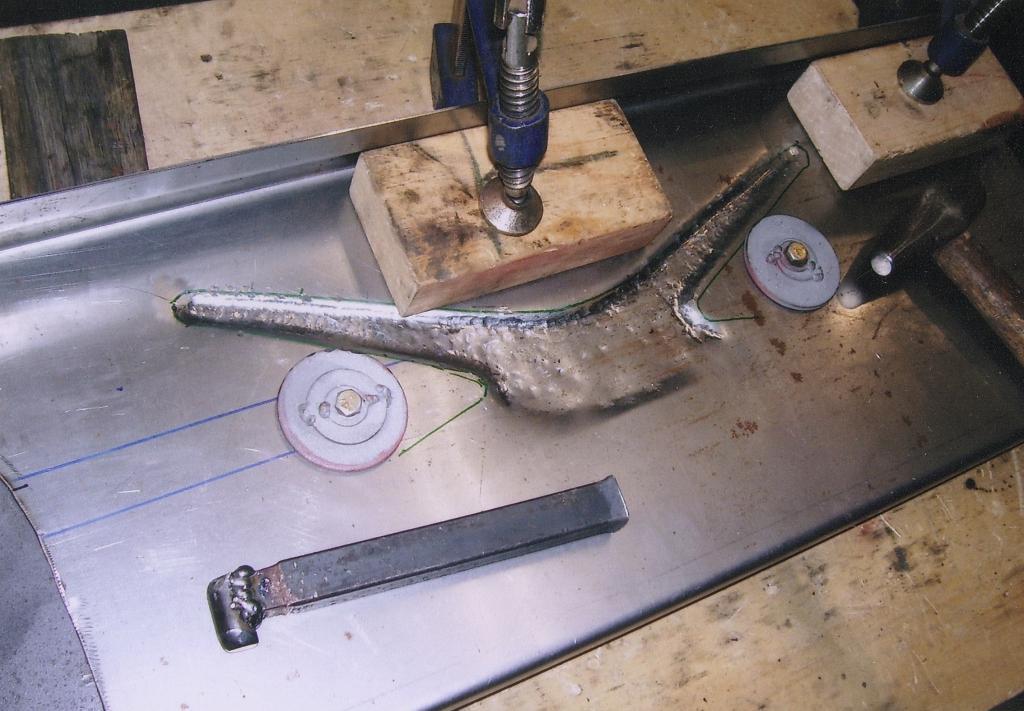
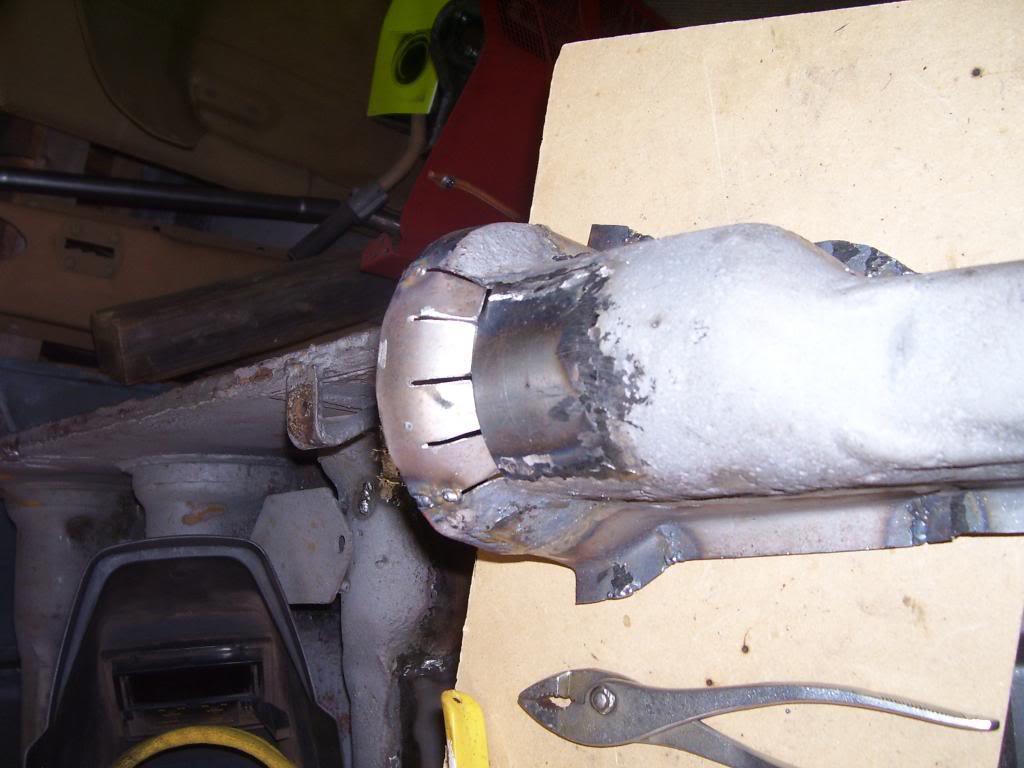
The Rear Foot Rest
When the kett came to me it had a jumble of "crap" tossed inside the body. In with it was the remains of the rear foot rest and more importantly the heavy formed section of the foot rest for the trailer towing hook. Using the residue of rusted footrest I pulled whatever details I could off them (not much was forthcoming) and using measurements off the CWM kett and looking at a lot of pictures had new sheet metal sections made by Pagen industries in Stitsville, Pagen did most of of my metal braking and put up with all my fussyness to detail.
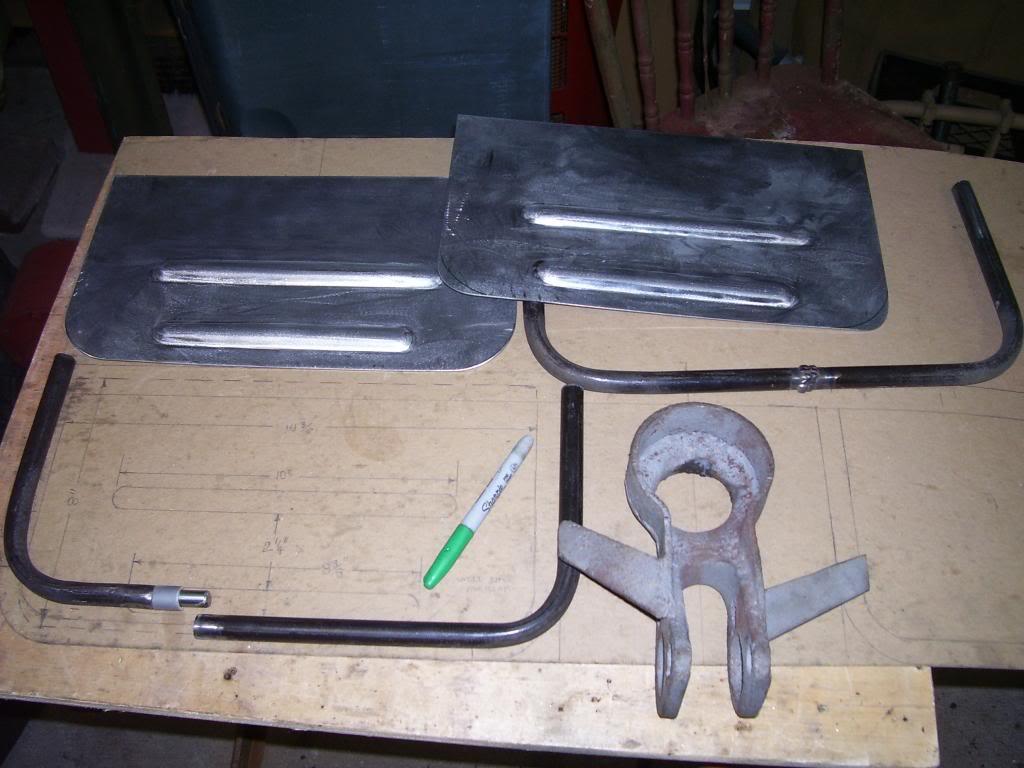
Starting to put things back together. No doubt trained welders will find fault with my welding, its perfectly in line with the crappy work done with slave labour during wartime conditions. I have saved a few choice examples of original werk done. Every kett owner I talk to says the same thing about welds, holes blasted in sheet metal, splatter everywhere, etc. Note my "high tech" restoration facility (two car garage with three jammed into it)
Trying to keep things straight.
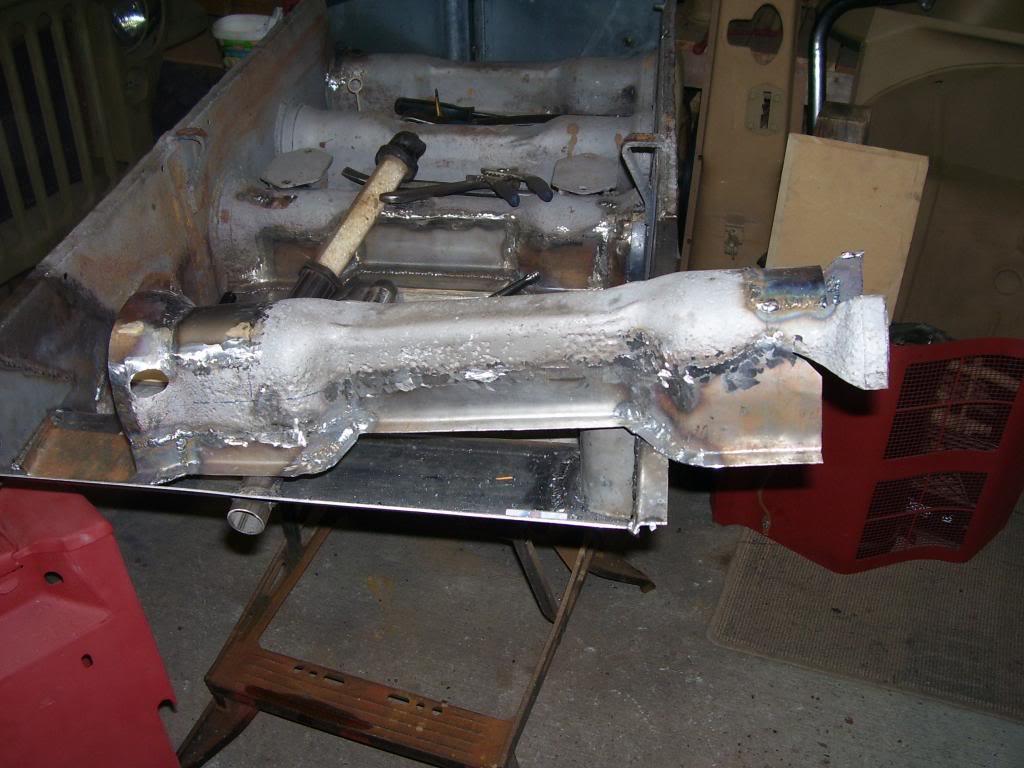
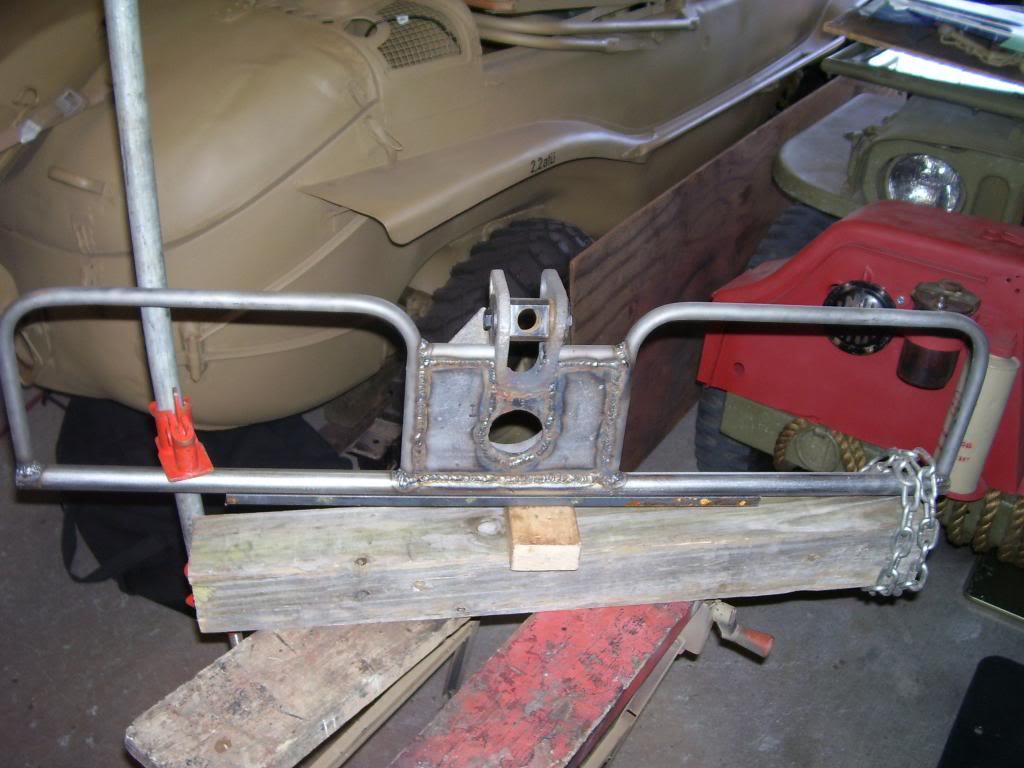
Sheet metal installed, test fit of kett tow hook, old center piece installed on all new metal.
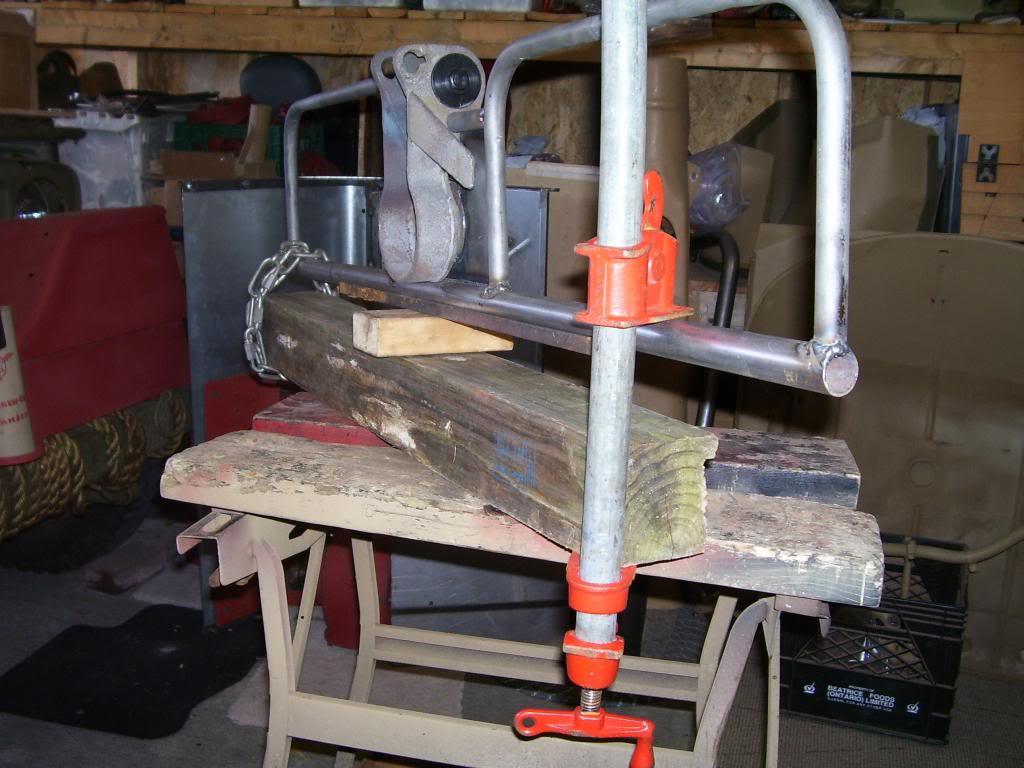
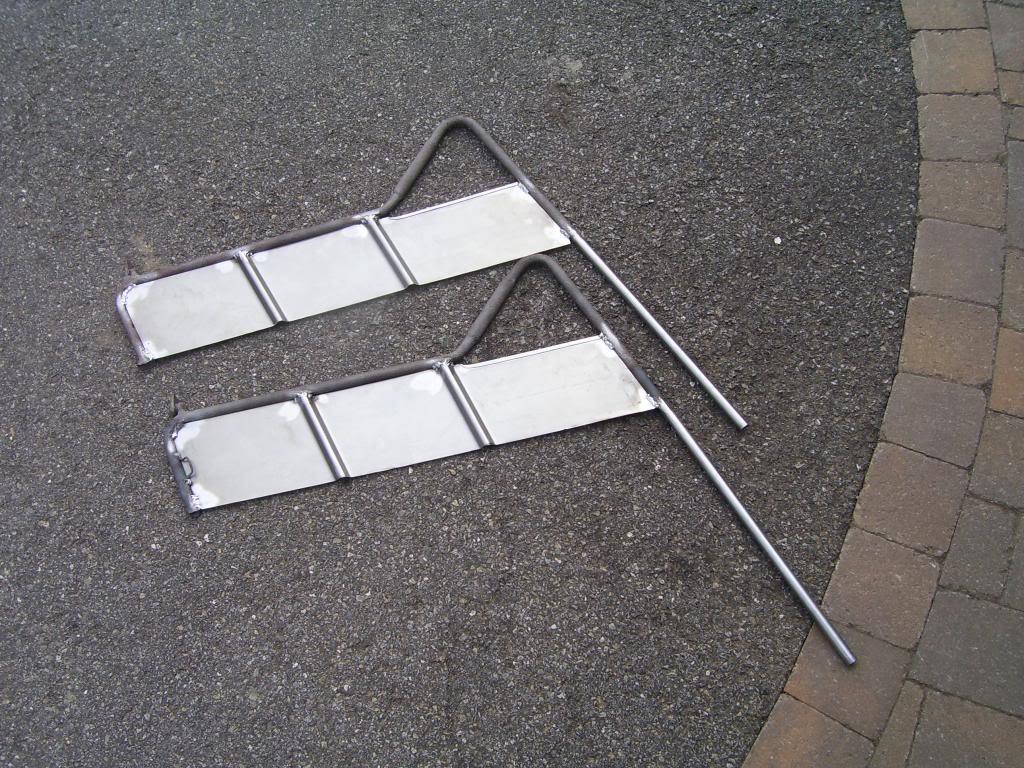
While I am at it here are the rear hand hold frames and sheet metal. I believe in saving as much "Kettenkrad DNA" as possible so I cut out the rusted sheet metal, tweeked out a bunch of bends and twists, and using new steel formed with the correct profile by Pagen I saved the pipe like frames and grafted in new sheet metal.
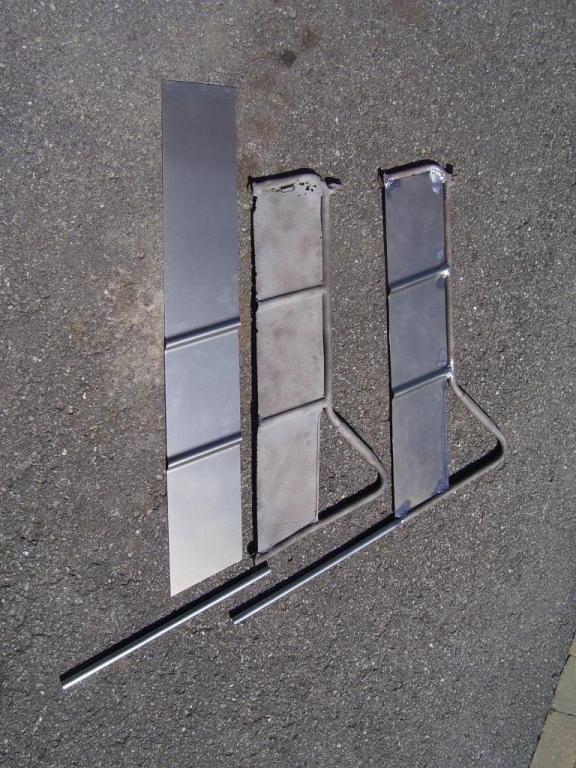
New pipe welded on the bottoms, gotta save as much as possible.
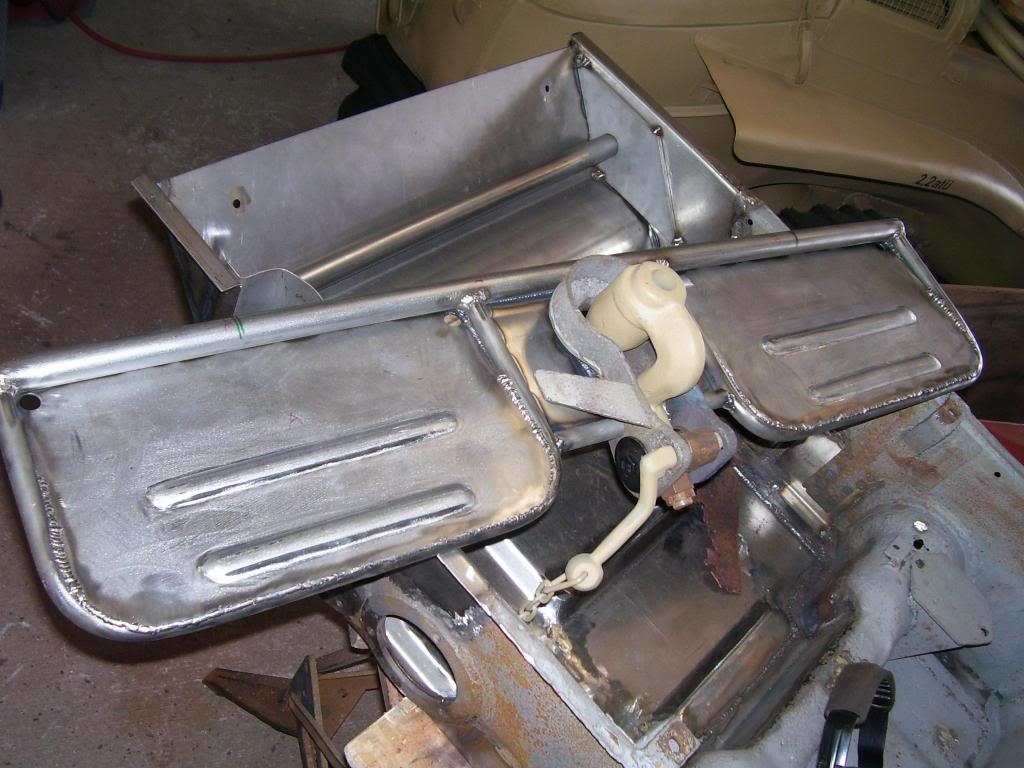
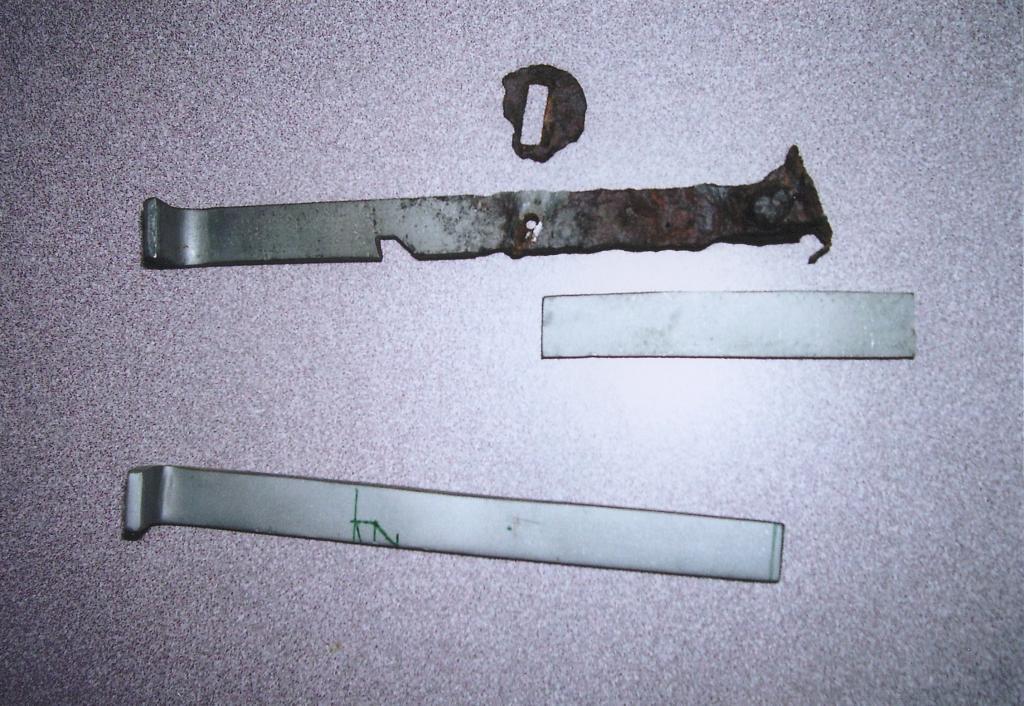
The restoration also called on making lots of small things that had rotted away over the decades. Here are the handles for the body drains being made, one totally new, and the other I cut off the top "savable" section and welded on new bottom to refurb.
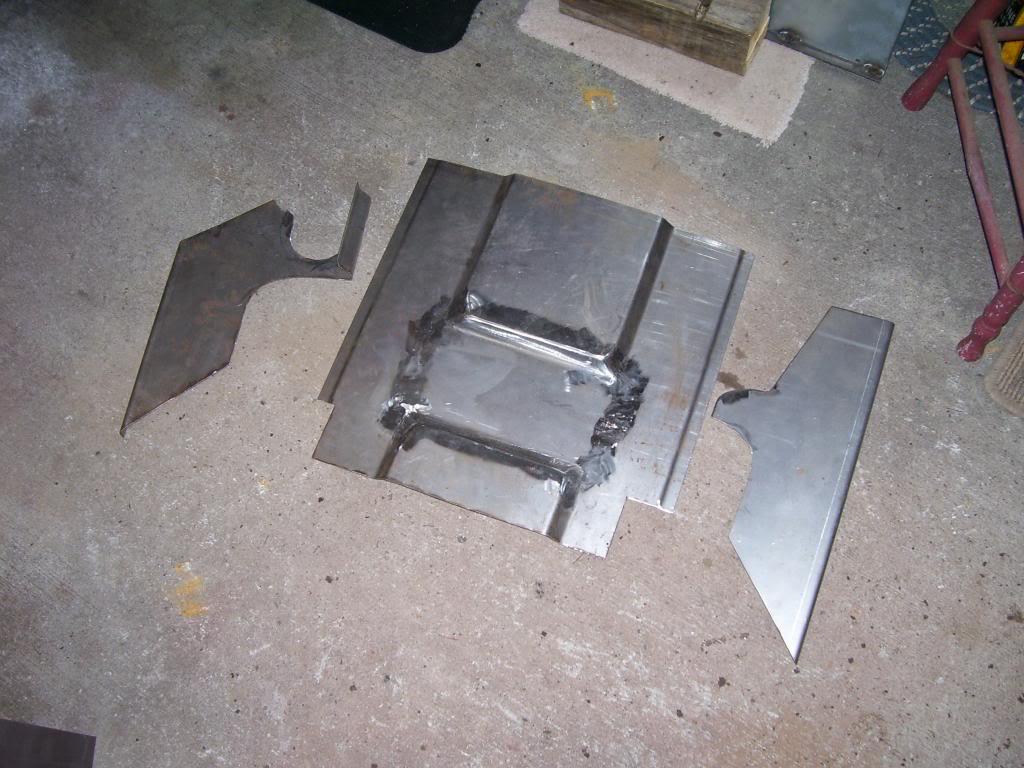
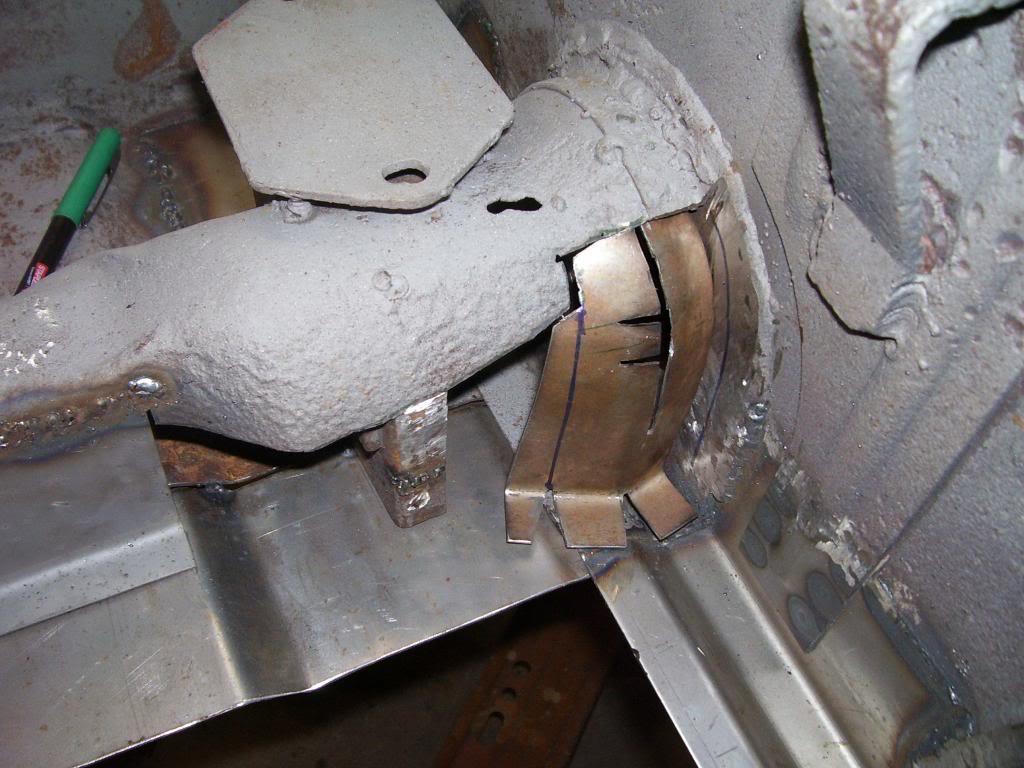
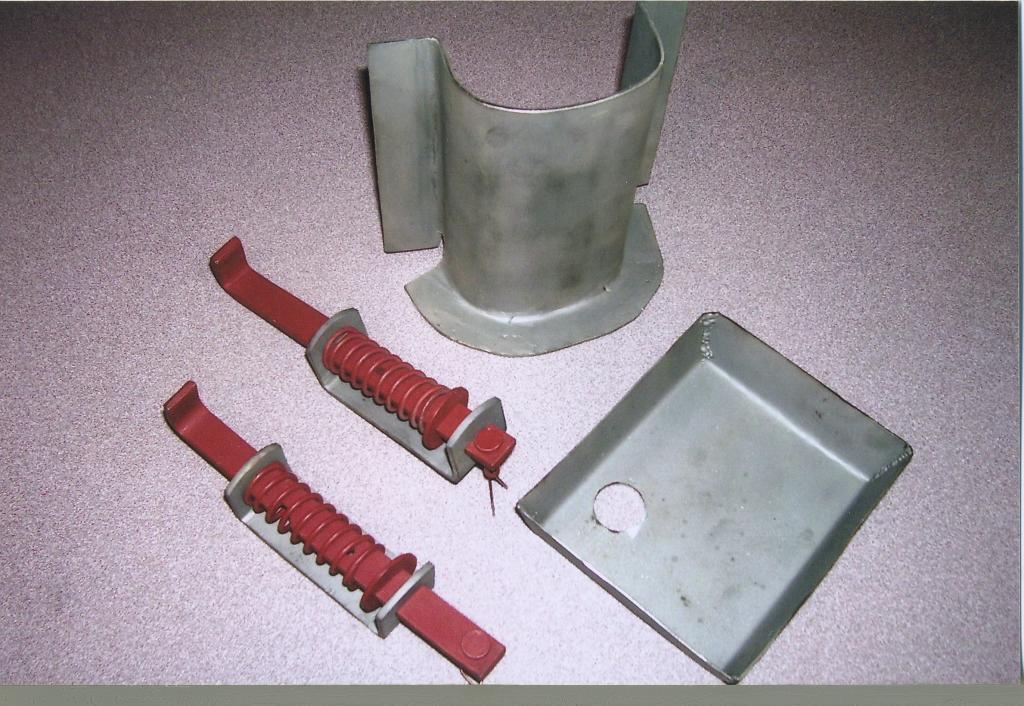
More small details, the D shaped part where the exhaust passes out of the inner body to the muffler, the little tray like thing for when engine oils is drained (I even copied the pattern of original spot welds when I reinstalled the new tray) and the finished latches/handles for the body drains.
---------- Post added at 06:56 AM ---------- Previous post was at 06:54 AM ----------
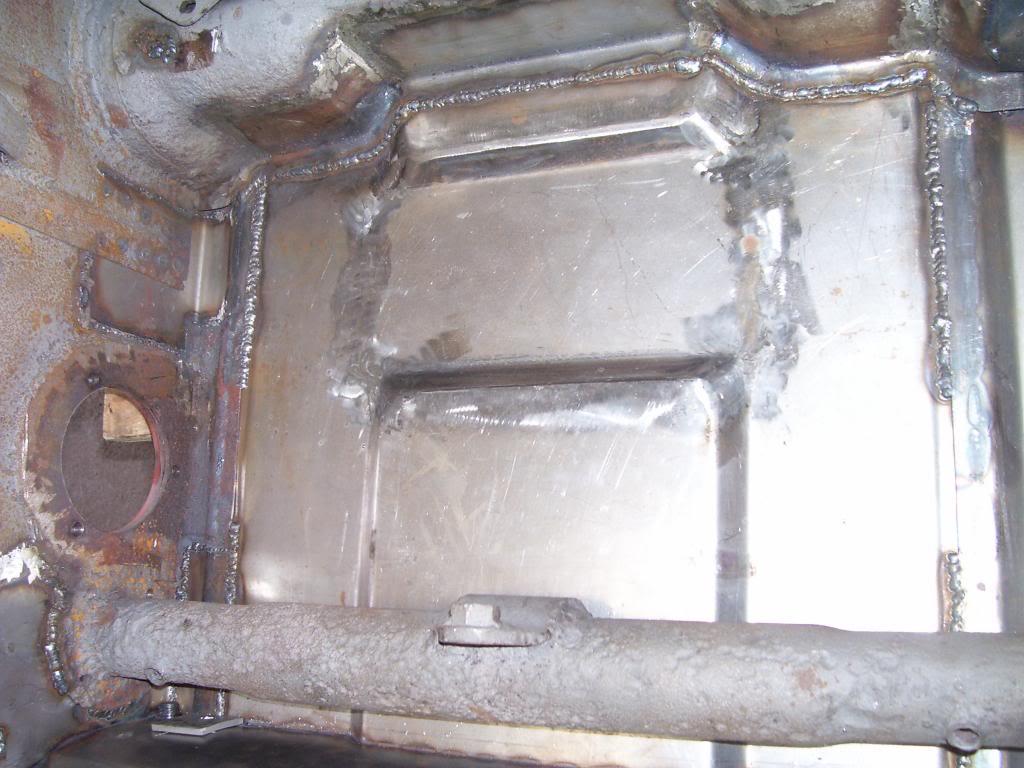
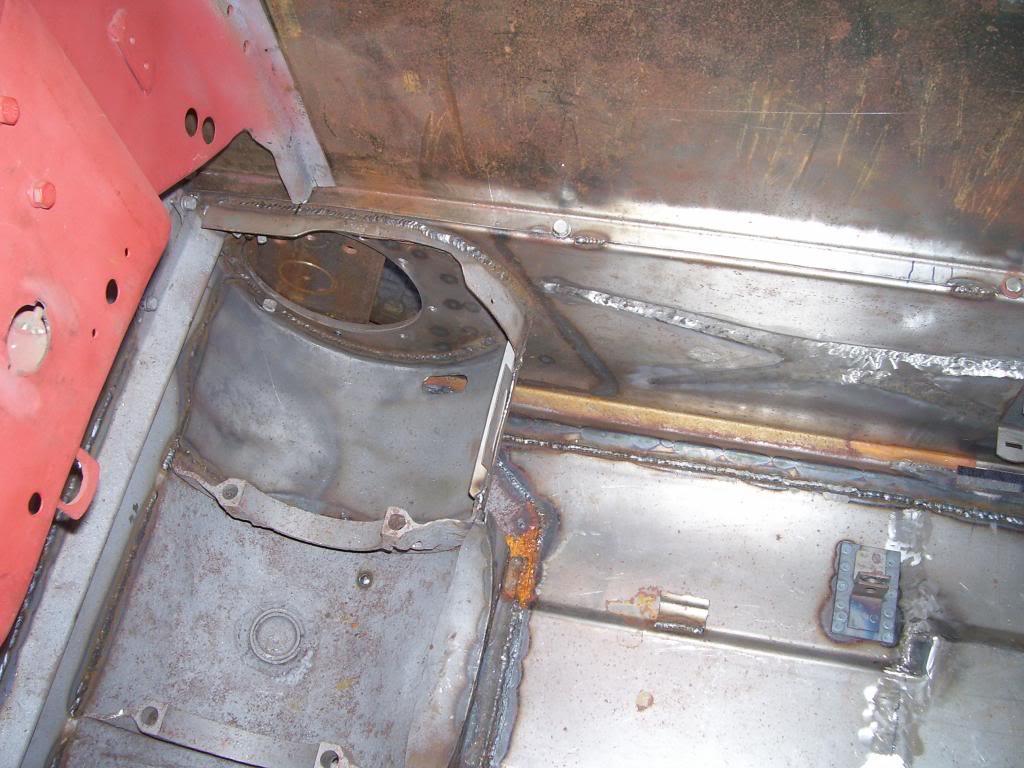
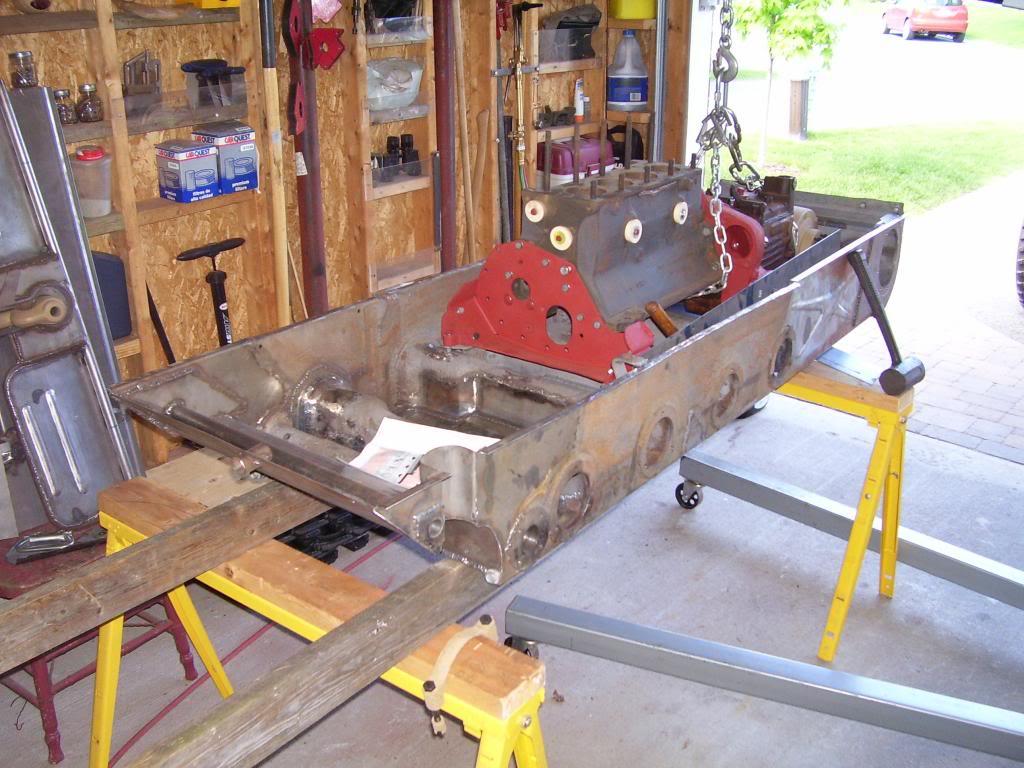
Mating the lower front and rear portions together
Two Victoria Days ago I had the front and rear portions completed and ready to be joined together again. The first pic shows the inside of the front portion new made floor and all the various fitting for seat mounts, drains and the inside laminated skin, plus the fitting for the steering brakes and final drive covers.
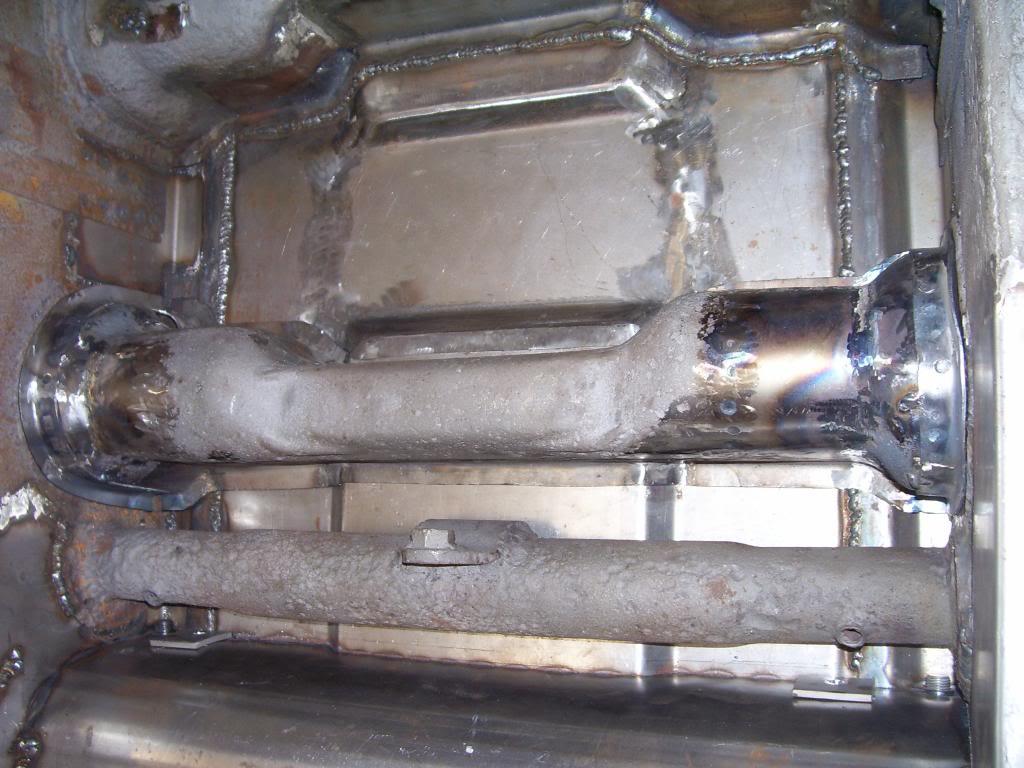
To totally ensure I get the fit, lengths and geometry of the vehicle right I bolted the drive train back together and used that as the jig to get it right, the first time. On the rear body portion is the diamond shaped engine mounts and on the front portion are cresent shaped differential mounts as long as everything fits in I have about 1/2in adjustment I could work with.
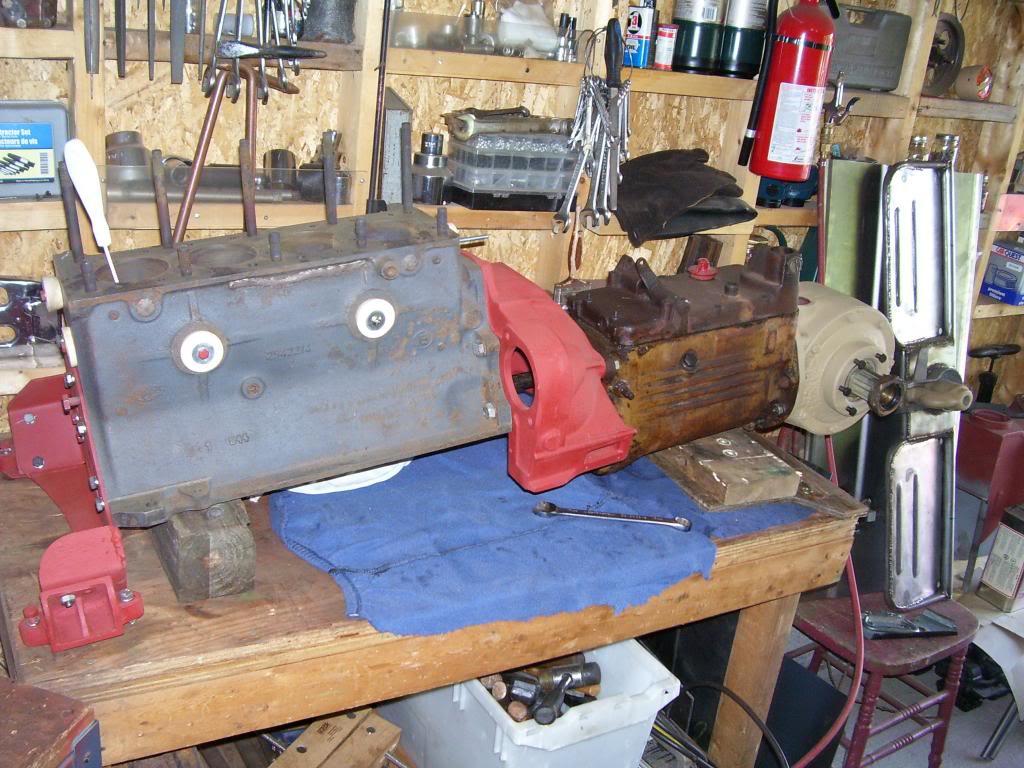
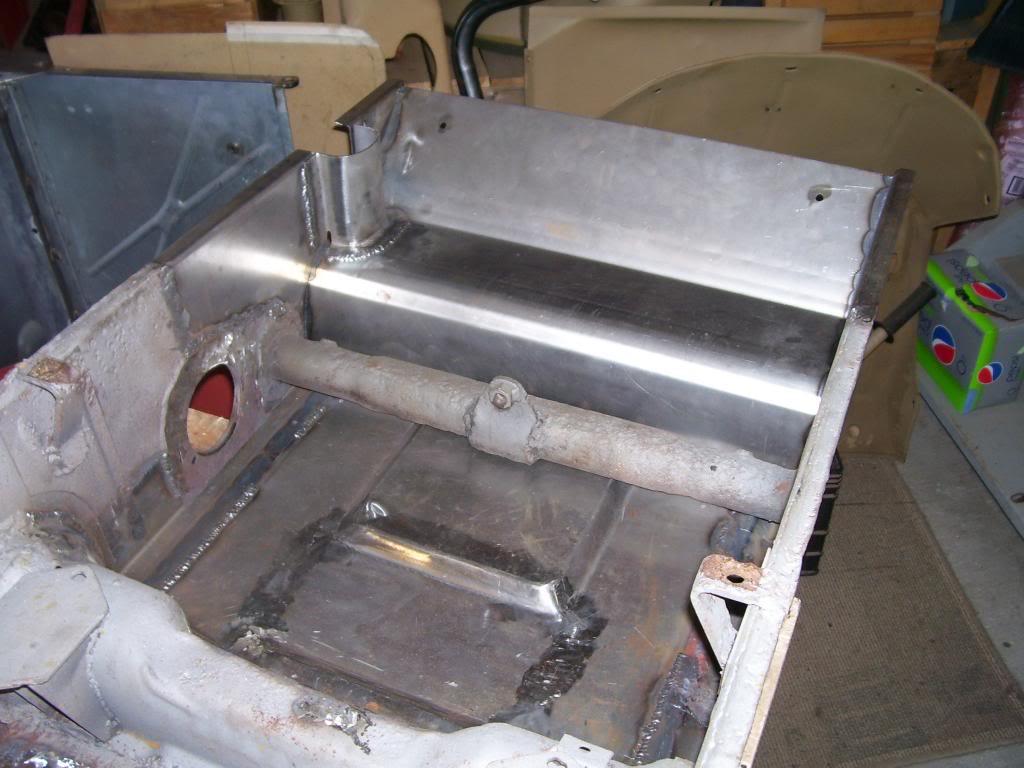
The first of about 50 test fits, a whole day was spent test fitting trim off replacing and removing drivetrain, etc. Note on the side of the engine block you can just see the cast date of 1 D44
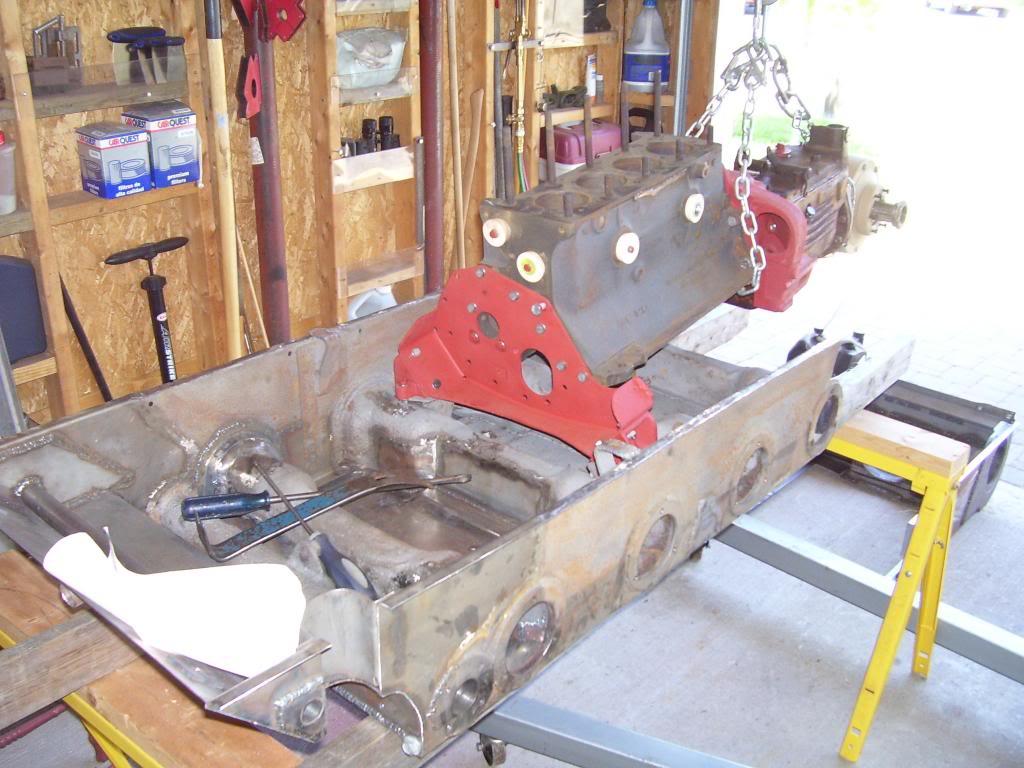
Test fits galore.
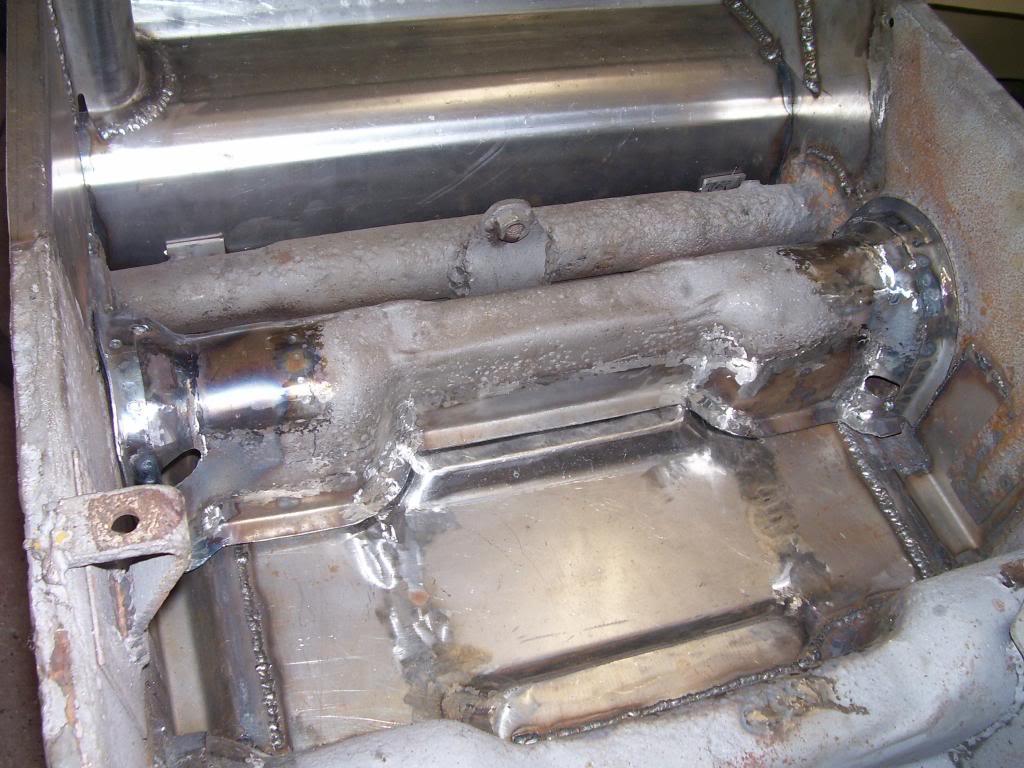
Starting to come together around lunch time.

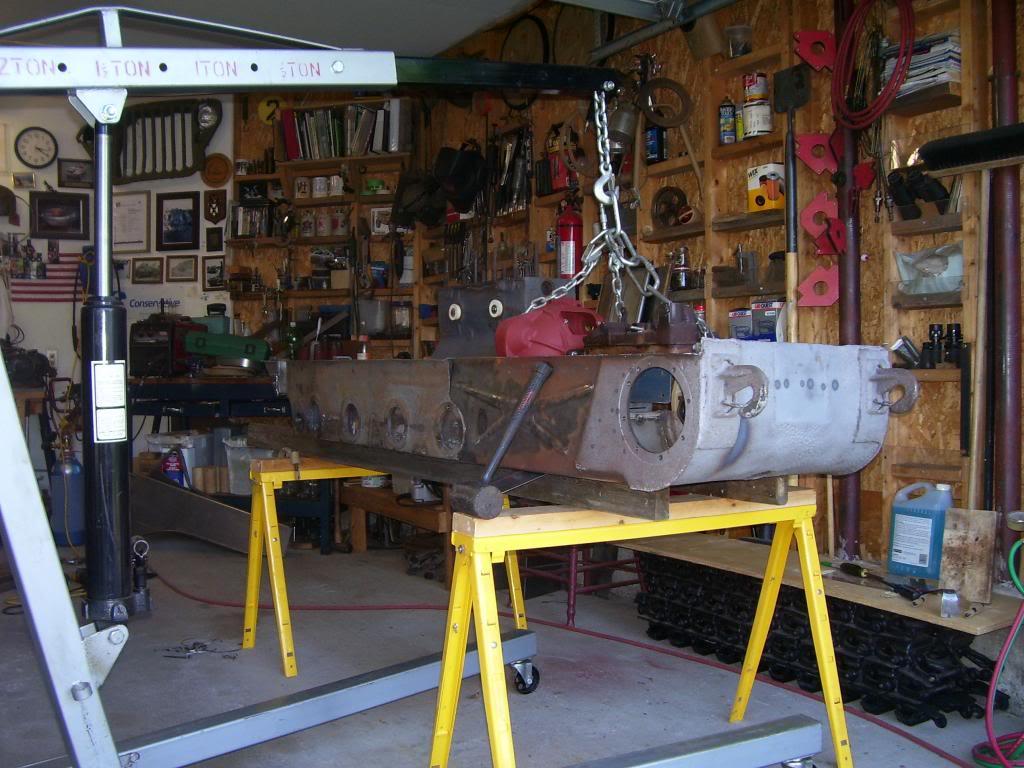
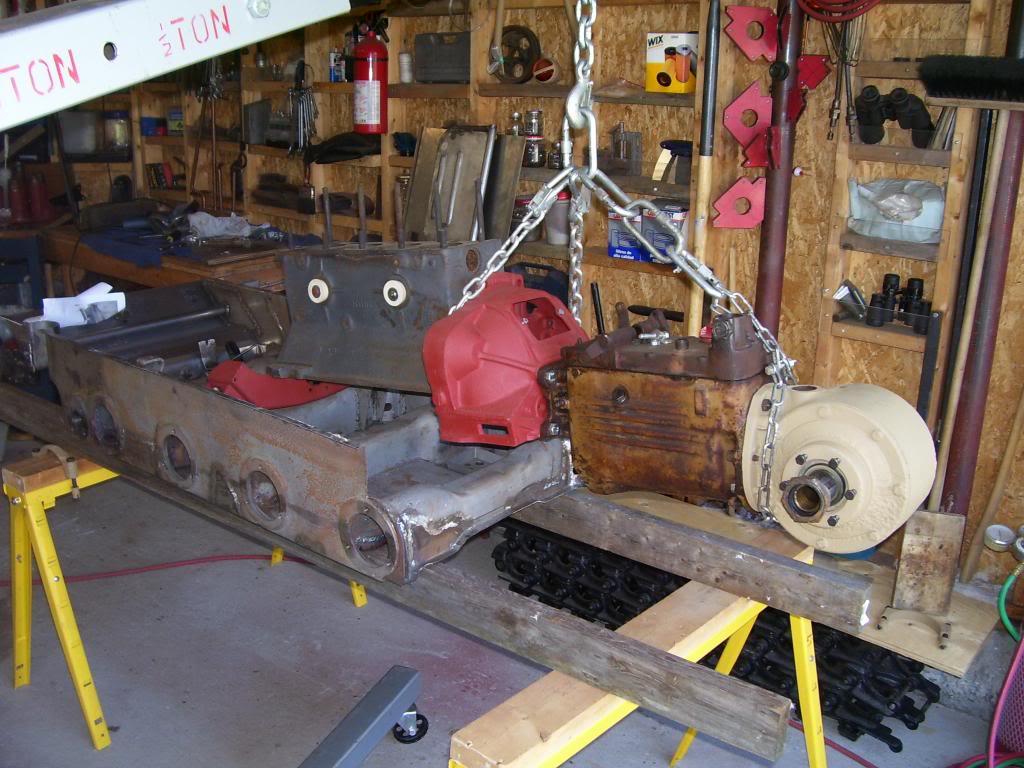
DONE ! tons of finish welds to do but front and rear are now one unit again.
And now the real work will start in earnest. Next up will be the reconstruct of the upper half of the body (and what felt like a couple thousand other things to attend to). Note the stack of restored kettenkrad track layed out in groups of ten, which is about all one can carry with getting a hernia.
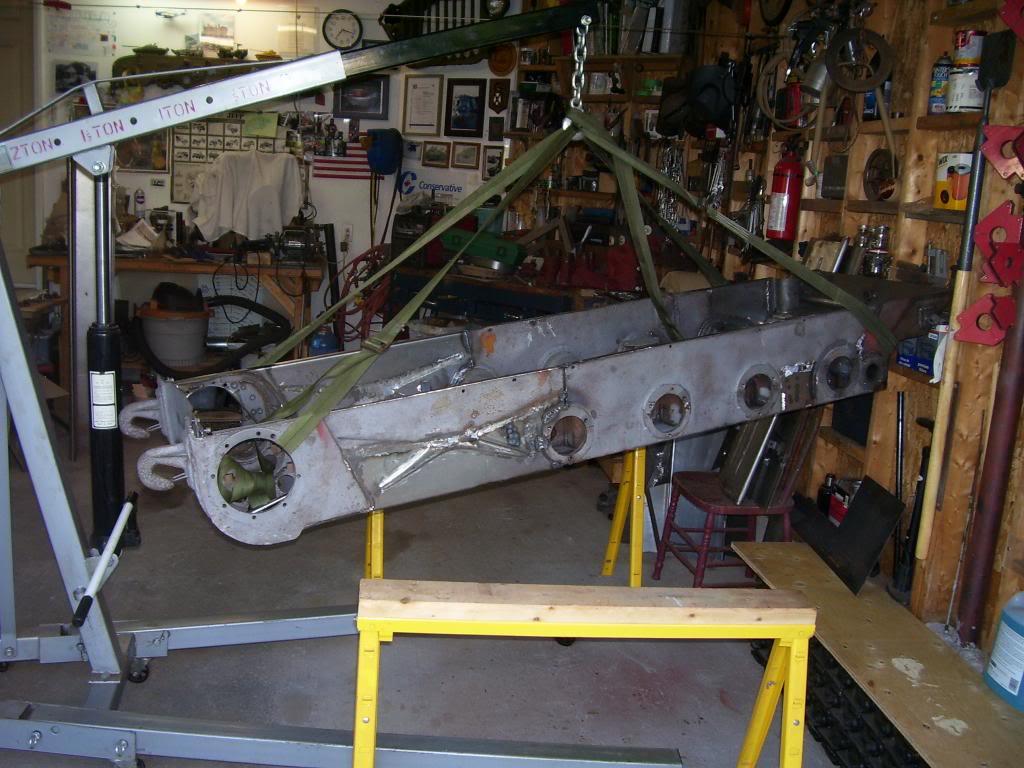
That day was what I consider a big day in the restoration because it means my ideas on putting ol rusty back together where working out. More nasty suprises where in store but at this point I was feeling pretty good about things.
-
FREE MEMBER
NO Posting or PM's Allowed
Just imagine having to pay for all that work to be done!
-
Legacy Member
Great pics and narrative. Thanks for sharing...
-
-
Legacy Member

Resurrection is the only word that comes to mind. Very nice work. Thanks for the post!
-
-
Senior Moderator
(Milsurp Forums)


Bill Hollinger
"We're surrounded, that simplifies our problem!"
-


 Register To Reply


