+ Reply to Thread
Page 1 of 2 1 2 LastLast
Results 1 to 10 of 12

Thread: 1911 LSA

Click here to increase the font size Click here to reduce the font size
  1. #1
    Legacy Member P246's Avatar
    Join Date
    Aug 2016
    Last On
    11-02-2022 @ 12:11 AM
    Location
    Osawatomie,Ks
    Posts
    122
    Local Date
    04-29-2024
    Local Time
    09:59 AM

    1911 LSA

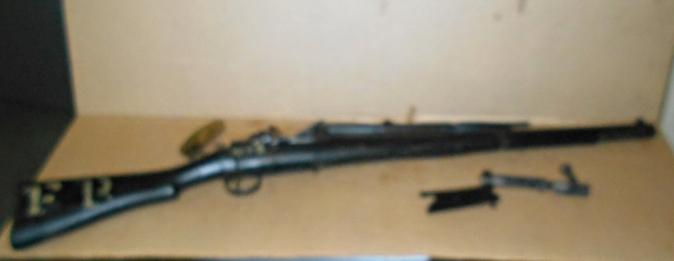
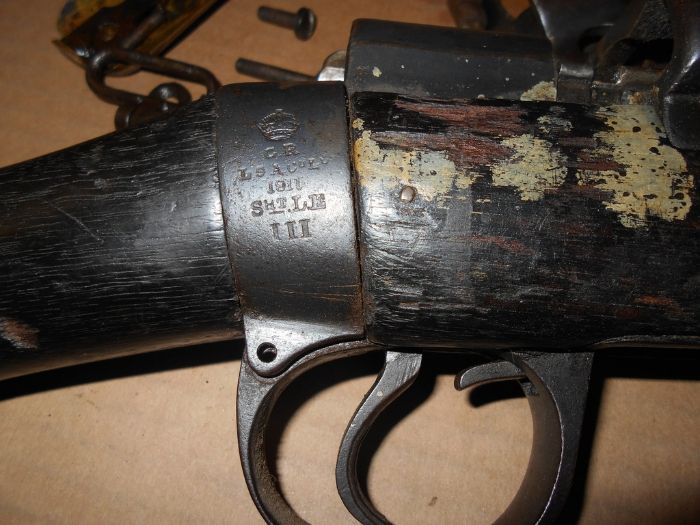
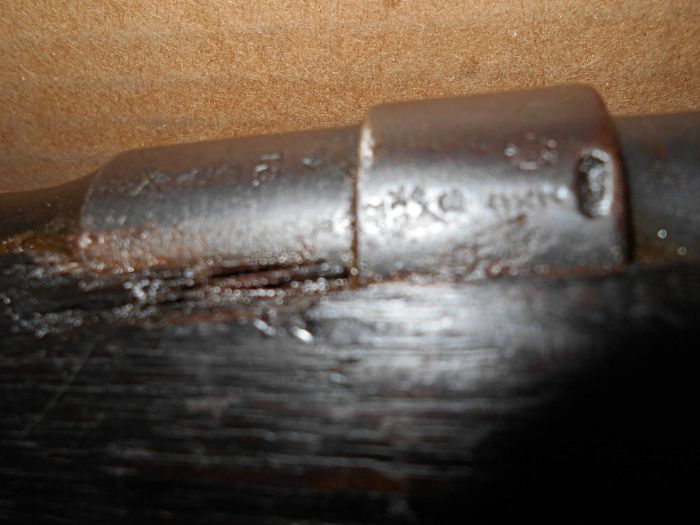
    I bought out a Lee Enfield collection this weekend. 4 rifles and a bunch of parts and pieces. One 1962 Ishapore, two 1918 Brits (One had a broad arrow on the unit disc. When I flipped it had a 1920 date and the Royal Hamphire Regiment {2nd} mark and rack number), and one 1911 LSA.

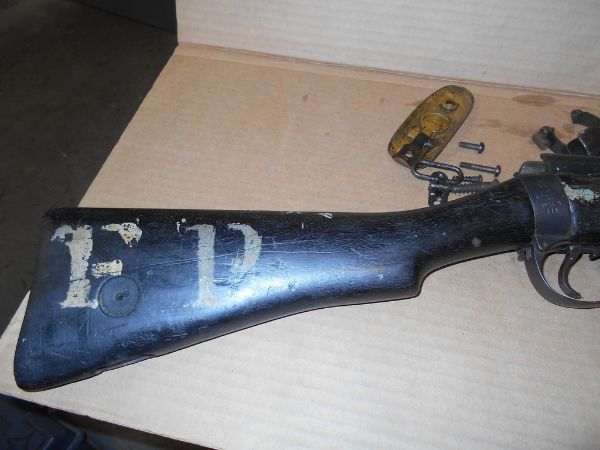
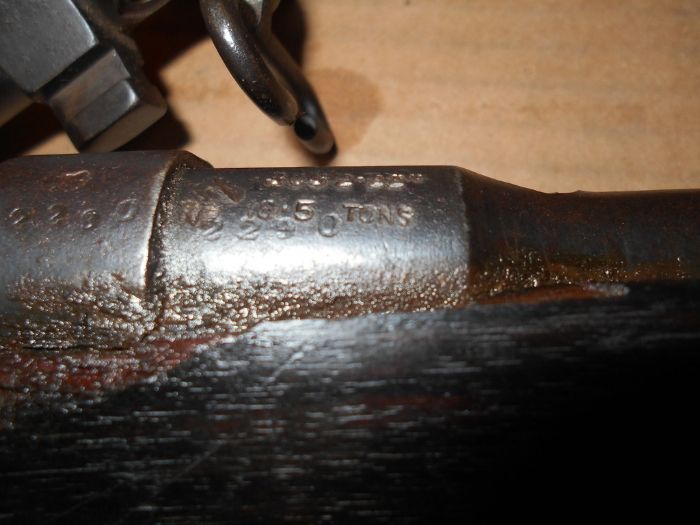
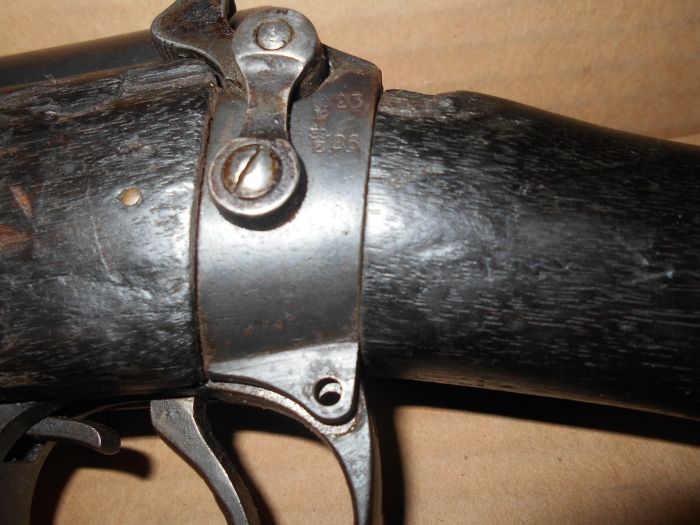
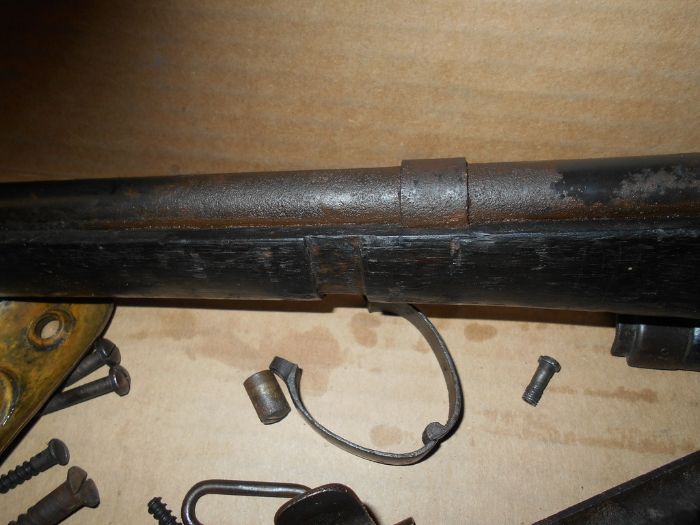
    The LSA has FR painted on the stock and was re-barreled in 1921. Sold out of service stamps on it. This one is a beater and never coming back to a shooter. Wood is pretty beat up. Bolt over clocks, out of headspace, Lots of mud, sand left in the wood around the barrel which rusted the barrel pretty bad. The bore is very pitted.

    However, being a 1911 LSA I figure its worth trying to freeze the rust and relegate it to wall hanger status. So far however the Main (King) screw is rusted stuck and tight. I was able to get everything else out by soaking in Kroil for two days. The main screw after two days of Kroil and plenty of hammer raps on a screw driver is still not following orders. I Kroiled it again. I am thinking about taking a soldering iron and sticking the hot tip on the action where the screw enters. I don't know if that will get it warm enough to help. Any other ideas on getting the screw to move.

    The plan is to disassemble it, give all the metal parts that are rusted an electrolysis bath then cold blue it (Just want to stop the rust). Put a spare snipped firing pin in the bolt and reassemble then wall hanger. I want to leave wood as is with patina and missing small chips. All the numbers match (Barrel numbered when replaced in 1921) except the bolt is so rusted at the handle I can not tell on that. I might be able to after electrolysis.

    Thanks in advance.
    Information
    Warning: This is a relatively older thread
    This discussion is older than 360 days. Some information contained in it may no longer be current.

  2. # ADS
    Friends and Sponsors
    Join Date
    October 2006
    Location
    Milsurps.Com
    Posts
    All Threads
    A Collector's View - The SMLE Short Magazine Lee Enfield 1903-1989. It is 300 8.5x11 inch pages with 1,000+ photo’s, most in color, and each book is serial-numbered.  Covering the SMLE from 1903 to the end of production in India in 1989 it looks at how each model differs and manufacturer differences from a collecting point of view along with the major accessories that could be attached to the rifle. For the record this is not a moneymaker, I hope just to break even, eventually, at $80/book plus shipping.  In the USA shipping is $5.00 for media mail.  I will accept PayPal, Zelle, MO and good old checks (and cash if you want to stop by for a tour!).  CLICK BANNER to send me a PM for International pricing and shipping. Manufacturer of various vintage rifle scopes for the 1903 such as our M73G4 (reproduction of the Weaver 330C) and Malcolm 8X Gen II (Unertl reproduction). Several of our scopes are used in the CMP Vintage Sniper competition on top of 1903 rifles. Brian Dick ... BDL Ltd. - Specializing in British and Commonwealth weapons Specializing in premium ammunition and reloading components. Your source for the finest in High Power Competition Gear. Here at T-bones Shipwrighting we specialise in vintage service rifle: re-barrelling, bedding, repairs, modifications and accurizing. We also provide importation services for firearms, parts and weapons, for both private or commercial businesses.
     

  3. #2
    Legacy Member P246's Avatar
    Join Date
    Aug 2016
    Last On
    11-02-2022 @ 12:11 AM
    Location
    Osawatomie,Ks
    Posts
    122
    Local Date
    04-29-2024
    Local Time
    09:59 AM
    Thread Starter
    few pics first one suckhttp://i1013.photobucket.com/albums/af257/p246/1c3a491f-d39c-4c19-a18f-4b4866ed23c3.jpgs sorry

    ---------- Post added at 02:15 AM ---------- Previous post was at 02:14 AM ----------

    http://i1013.photobucket.com/albums/...4866ed23c3.jpg

    ---------- Post added at 02:15 AM ---------- Previous post was at 02:15 AM ----------


    ---------- Post added at 02:18 AM ---------- Previous post was at 02:15 AM ----------

    http://i1013.photobucket.com/albums/...b788cba94e.jpg

    ---------- Post added at 02:23 AM ---------- Previous post was at 02:18 AM ----------

    http://i1013.photobucket.com/albums/...eaedab0a49.jpg

    ---------- Post added at 02:23 AM ---------- Previous post was at 02:23 AM ----------


    ---------- Post added at 02:27 AM ---------- Previous post was at 02:23 AM ----------


    ---------- Post added at 02:32 AM ---------- Previous post was at 02:27 AM ----------


    ---------- Post added at 02:39 AM ---------- Previous post was at 02:32 AM ----------


    ---------- Post added at 02:42 AM ---------- Previous post was at 02:39 AM ----------


    ---------- Post added at 02:45 AM ---------- Previous post was at 02:42 AM ----------


  4. Avoid Ads - Become a Contributing Member - Click HERE
  5. #3
    FREE MEMBER
    NO Posting or PM's Allowed
    BushyFromOz's Avatar
    Join Date
    Jan 2011
    Last On
    07-22-2019 @ 11:10 PM
    Location
    Mexico, Australia
    Posts
    347
    Local Date
    04-30-2024
    Local Time
    12:59 AM
    Wow..was it stored in a sewer pipe??? !!!???!!!

  6. #4
    Legacy Member P246's Avatar
    Join Date
    Aug 2016
    Last On
    11-02-2022 @ 12:11 AM
    Location
    Osawatomie,Ks
    Posts
    122
    Local Date
    04-29-2024
    Local Time
    09:59 AM
    Thread Starter
    Bushy from Oz I'm guessing damp basement. At first I thought the crud under the hand guards (cleaned before pics) was old cosmo, but its full of fine sand.

    ---------- Post added at 03:29 AM ---------- Previous post was at 03:28 AM ----------

    Forgot to take a picture of the top of the Knox. Has the back to back R stamp there.

  7. #5
    FREE MEMBER
    NO Posting or PM's Allowed
    BushyFromOz's Avatar
    Join Date
    Jan 2011
    Last On
    07-22-2019 @ 11:10 PM
    Location
    Mexico, Australia
    Posts
    347
    Local Date
    04-30-2024
    Local Time
    12:59 AM
    Quote Originally Posted by P246 View Post
    Bushy from Oz I'm guessing damp basement. At first I thought the crud under the hand guards (cleaned before pics) was old cosmo, but its full of fine sand.
    That sucks. A good LSA is on my bucket list of things to own

  8. #6
    Legacy Member Mit's Avatar
    Join Date
    Sep 2015
    Last On
    09-19-2020 @ 05:34 PM
    Location
    Australia
    Posts
    14
    Local Date
    04-29-2024
    Local Time
    09:59 AM
    I had a main screw that just wouldn't budge and I was ready to give up and drill it out.

    After a night sleep I decided to get an impact driver (the hammer actuated variety) and see if it would work. I found that the bits were parallel sided and one fit perfectly. I tapped it with the hammer to seat the bit before I did a heavier strike but had to stop mid swing as I realised it had moved from the tap. From there it was easy.

  9. #7
    Legacy Member P246's Avatar
    Join Date
    Aug 2016
    Last On
    11-02-2022 @ 12:11 AM
    Location
    Osawatomie,Ks
    Posts
    122
    Local Date
    04-29-2024
    Local Time
    09:59 AM
    Thread Starter
    Mit I actually have an manual blow impact driver. I think I'll soak it for a couple more days, and if it does not give up I will try that. I will have to make sure I have a bit that fits the screw, but I think it does.

  10. #8
    Legacy Member Ridolpho's Avatar
    Join Date
    Jan 2012
    Last On
    09-27-2022 @ 11:12 PM
    Location
    Province of Alberta, Canada
    Age
    66
    Posts
    1,019
    Local Date
    04-29-2024
    Local Time
    08:59 AM
    P246: There is another approach- try to set up the rifle between the jaws of a large vice such that you can insert a high quality hexagonal shaft screwdriver blade into the front trigger guard screw and close the vice on it. With the vice clamping it all together you can put a wrench on the shaft of the screwdriver blade and put incredible torque on the screw without any possibility of the blade jumping out of the slot in the screw-head. The only difficulty is getting the parts set up on supports in the vice with wood pieces used where required to protect the metal. Using this method I've removed screws that I had thought were impossible. I first stumbled on it while attempting to disassemble Triumph motorcycle clutch hubs- several shallow slotted screws on each, all very, very tight.

    Ridolpho
    Last edited by Ridolpho; 03-02-2017 at 06:14 PM.

  11. #9
    Legacy Member P246's Avatar
    Join Date
    Aug 2016
    Last On
    11-02-2022 @ 12:11 AM
    Location
    Osawatomie,Ks
    Posts
    122
    Local Date
    04-29-2024
    Local Time
    09:59 AM
    Thread Starter
    Thanks Ridolpho. Actually I've tried that in a padded vice, but I haven't put a ton of force on it yet. However after a couple more days of Kroil I'm going to up all that.

  12. Thank You to P246 For This Useful Post:


  13. #10
    Legacy Member Ridolpho's Avatar
    Join Date
    Jan 2012
    Last On
    09-27-2022 @ 11:12 PM
    Location
    Province of Alberta, Canada
    Age
    66
    Posts
    1,019
    Local Date
    04-29-2024
    Local Time
    08:59 AM
    I would suggest trying it with wood pieces (oak or something else that's hard) set up to protect the rifle from the vice. The method works best if the only thing that can move is the screwdriver blade rotating- if the rifle is free to shift into the padding it won't work. Snug the vice up so that the hex screwdriver can just be turned. Also be ready to back the vice off a bit as the screw starts to turn out. My best success with this so-far was the rear trigger guard screw on a very nice 1901 MLE I*. Screw head totally destroyed by previous owner- felt like you couldn't get any purchase with the screwdriver at all and the screw was in tight! Hardest part was getting the rifle set up with the trigger guard between the jaws of the vice. Used brass stock to brace the offside against one jaw of the vice. Half an hour to set it up, 10 seconds to break the screw free.

    Rudolph

+ Reply to Thread
Page 1 of 2 1 2 LastLast

Similar Threads

  1. Colt's Anniversary 1911 the 1911 - 2011!
    By cwo4uscgret in forum 1911/1911A1 Service Pistol
    Replies: 8
    Last Post: 04-01-2015, 10:36 AM
  2. Parts for govt 1911 and ruger SR 1911
    By c east in forum 1911/1911A1 Service Pistol
    Replies: 4
    Last Post: 07-01-2013, 11:52 PM
  3. Help on ID a 1911...
    By former173rd in forum 1911/1911A1 Service Pistol
    Replies: 3
    Last Post: 08-31-2012, 07:17 PM
  4. Wwi 1911
    By Durutti in forum Appraisals, Fakery, Dispute Resolution & Mediation Forum
    Replies: 0
    Last Post: 07-01-2012, 11:00 PM
  5. Need Help on 1911 A1
    By DaveN in forum 1911/1911A1 Service Pistol
    Replies: 18
    Last Post: 01-21-2012, 05:11 PM

Tags for this Thread

Posting Permissions

  • You may not post new threads
  • You may not post replies
  • You may not post attachments
  • You may not edit your posts