


Note: After you click on images to ENLARGE them, you may find they automatically size smaller in your browser's window making them harder to view. The auto sizing is your browser's way of keeping images entirely within the screen size you have set. Move your mouse pointer to the bottom centre of the pic and you will see an options panel appear. There will be a small square box next to the large X, which will have a pointer arrow sticking out of it. If it's illuminated, it means the pic you're viewing can be enlarged, so click on this box and the pic will EXPAND and open to its normal size.
COMPASS, PRISMATIC, Mk3
V6-6605-99-860-0780 (and other variants)
By Peter Laidler
There has been a bit of interest on this forum about these prismatic compasses and the variations that have emerged since they were introduced in……….., well, whenever it was, they seem to have been around since, well, forever! Certainly since my time in the Army, first learning to read a map and compass as a Cadet at school in the early 60’s. They’re of some significance to the Lee Enfield story because the compass was a supplementary issue alongside the equally important binoculars and wristwatch for the snipers. While they’ve all changed slightly, they’re still very similar
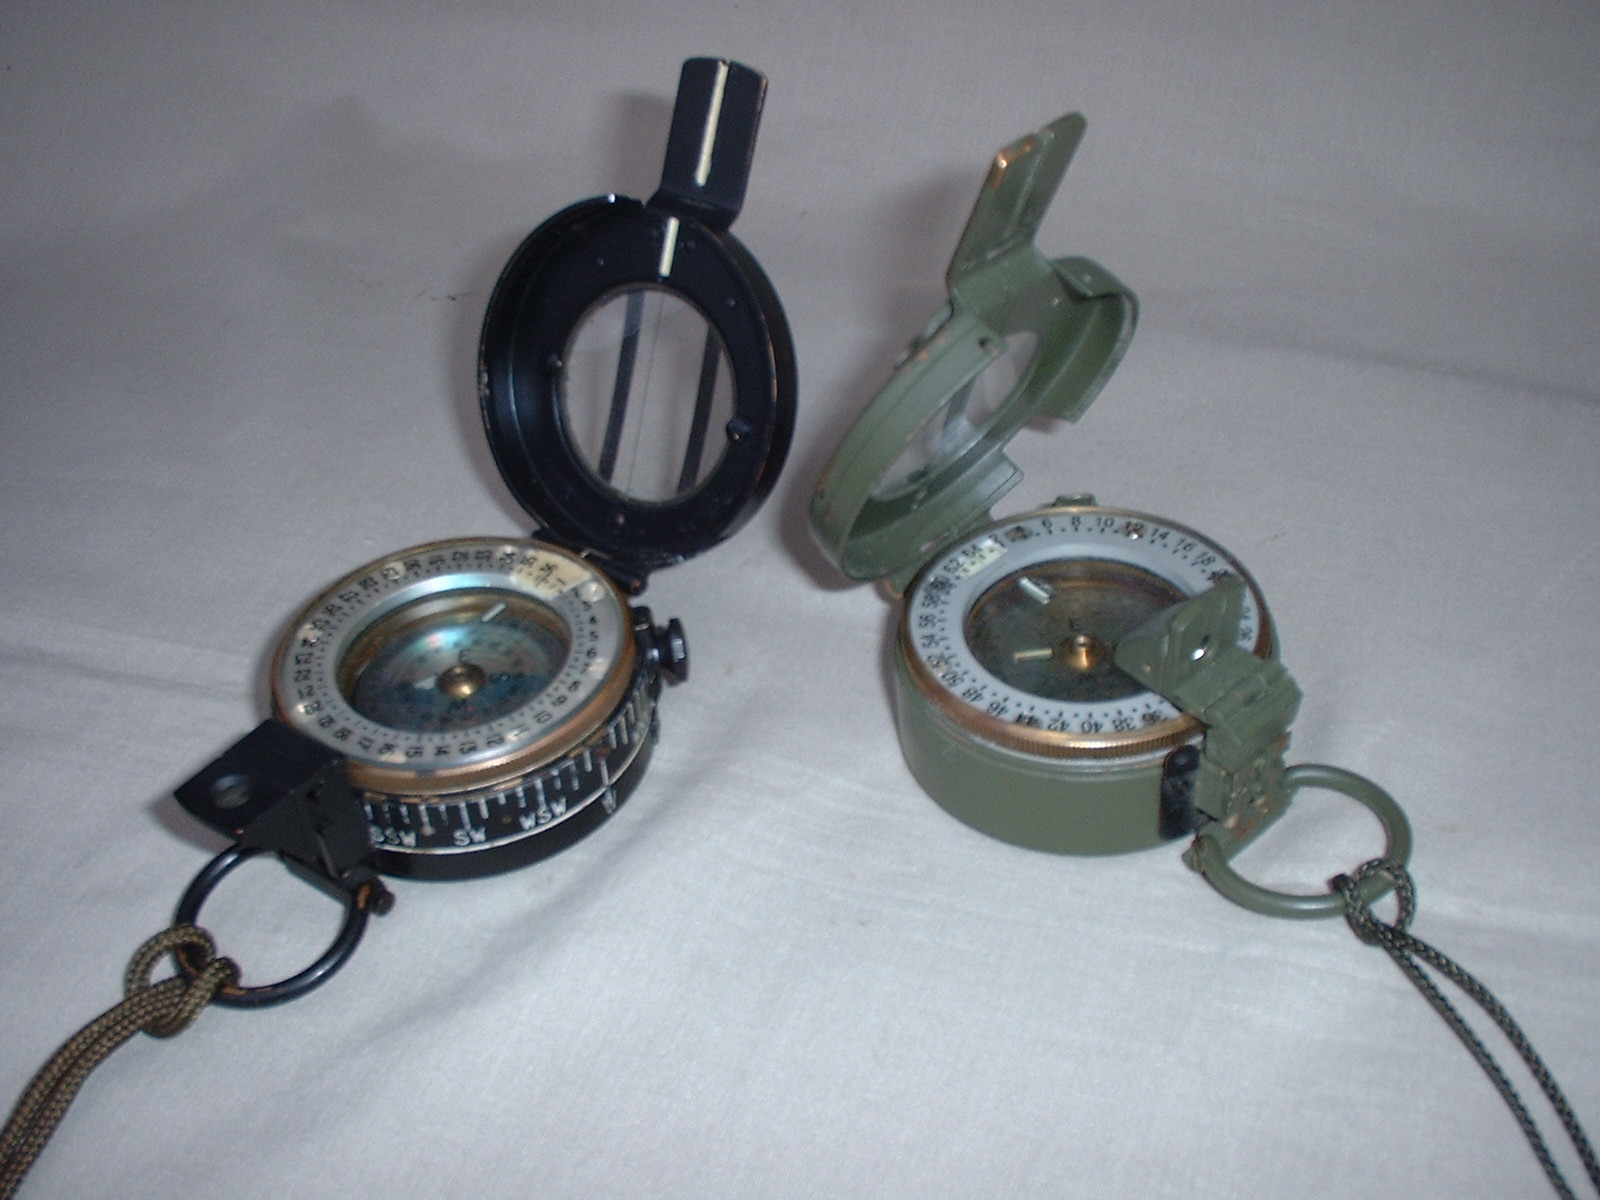
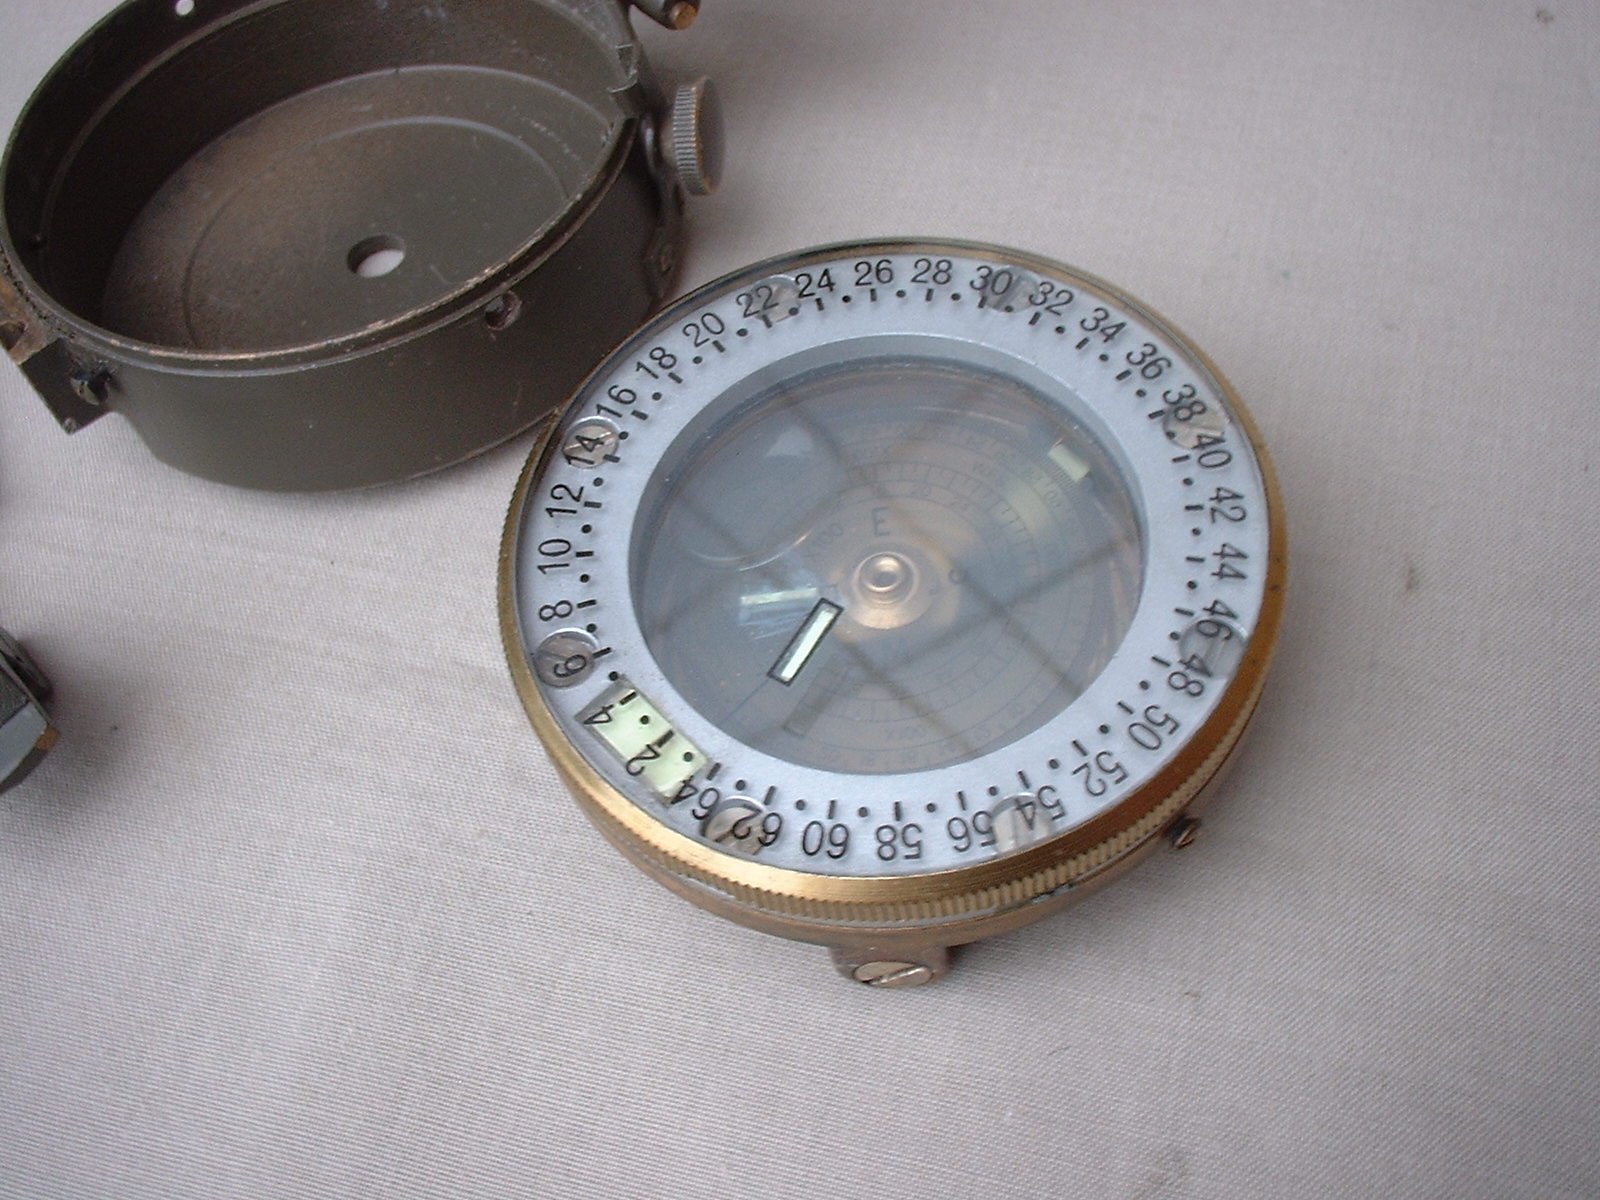
Two compasses, taken straight from the store. The older black degrees Mk3 is immediately identifiable by the sector markings around the side of the case. While the khaki Mils, by STANLEY (know commercially as The Stanley Compass) is simplified. But even though it’s simplified, it still a case of ‘same meat, different gravy…..’ The black metallic part surrounding the thumb loop and prism assembly on the khaki Stanley is the closing catch, supposedly to hold the top down. It doesn’t!
(Click PIC to Enlarge)
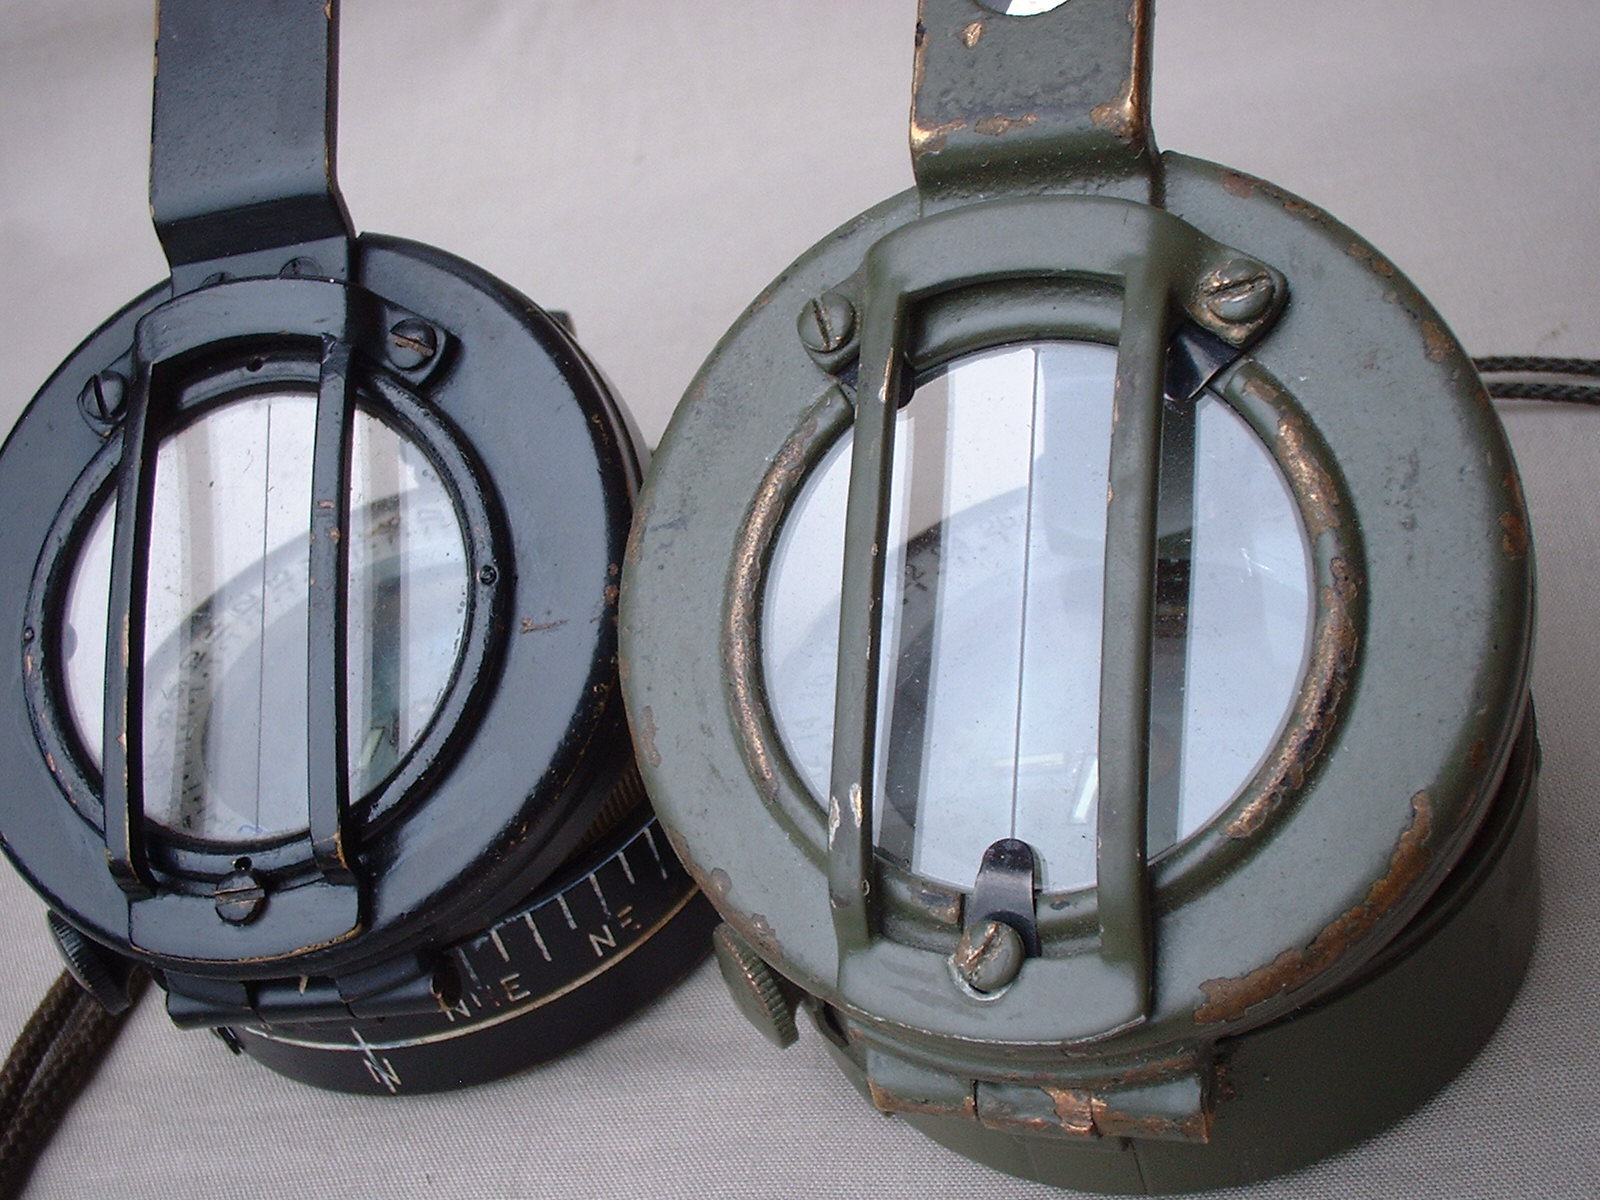
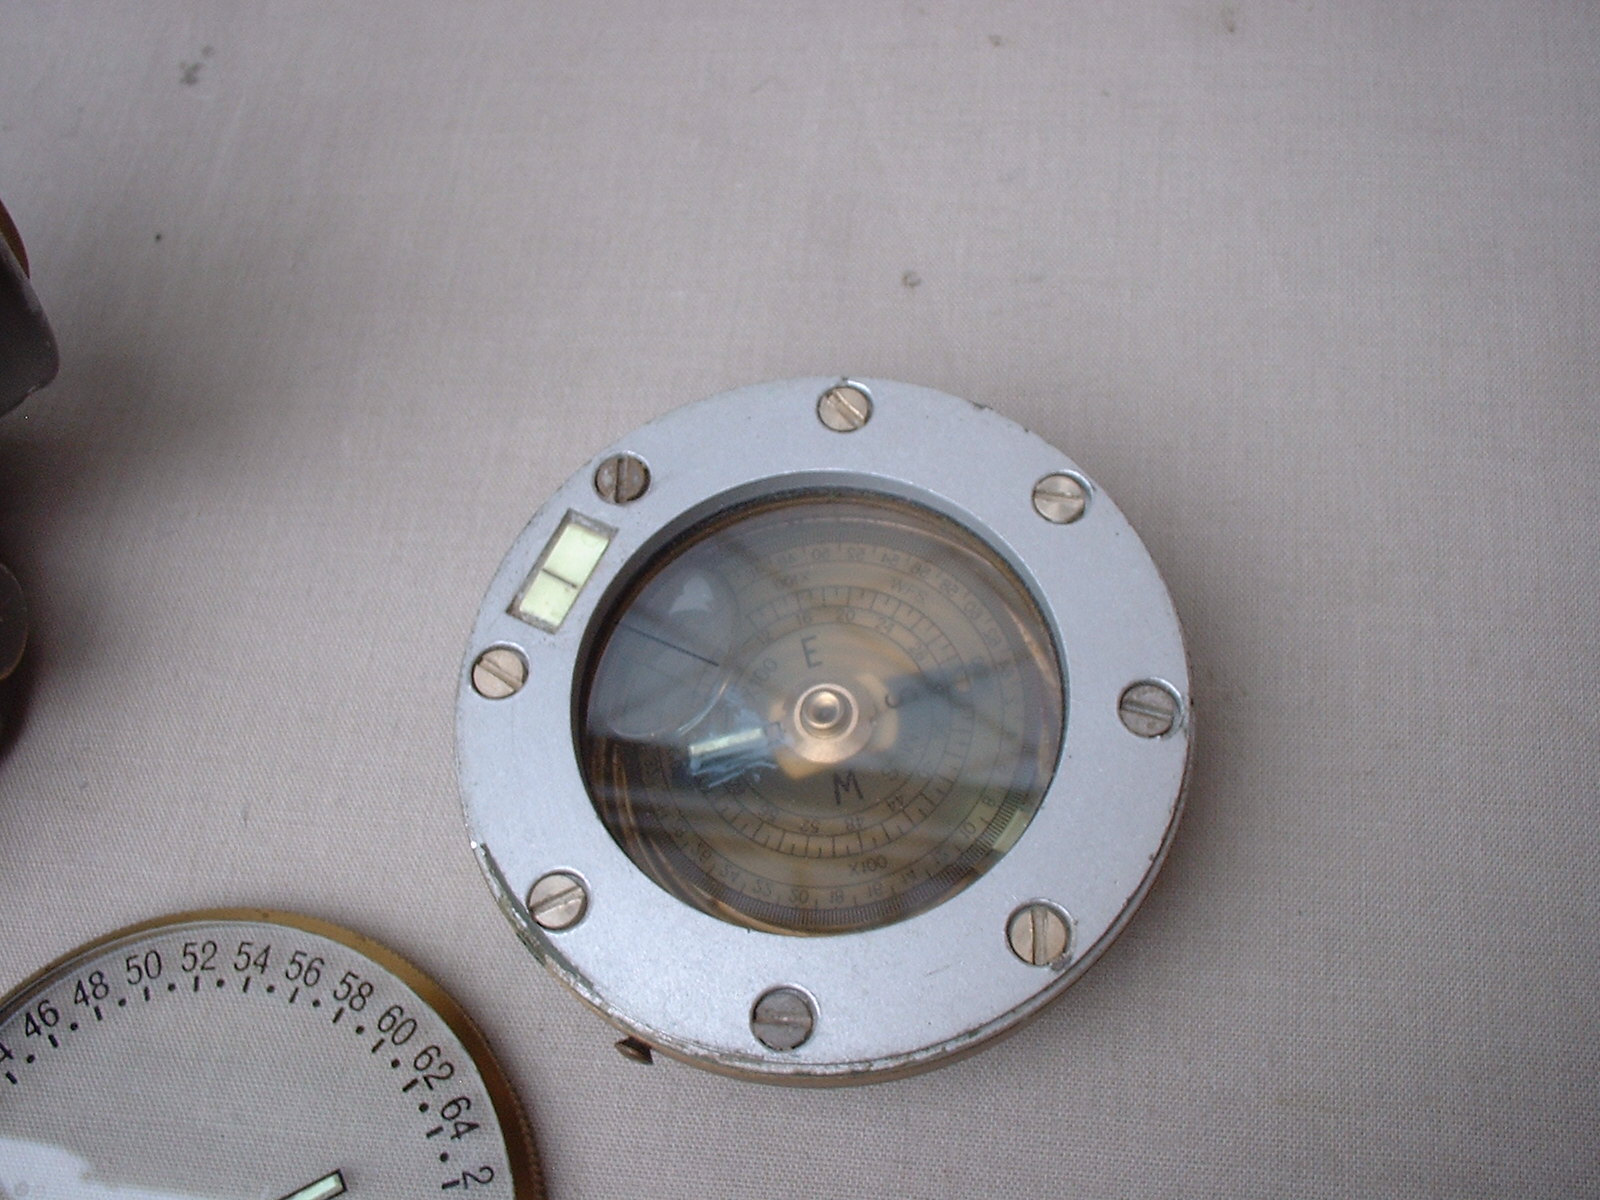
The tops, showing the two or possibly more methods of holding the marching line glass in and the grill on. Note the spring clips on the Stanley but it’s screwed in from underneath on the old one
(Click PIC to Enlarge)
In those days the compasses were all in real, understandable units of degrees and minutes. From the mid 60’s on, things changed and the 60 minutes to the degree and 360 degrees to the complete circle changed to 6400 mils. Oh, it still equates to 360 degrees of course and a square is still 90 degrees or as they say in the best circles, a 4th part of a circle, but……….. anyway, enough of the history lesson.
From that, you’ll find that there are still degree marked compasses around the world, still giving superb, sterling service and there are more current mils marked compasses. Then there are the degree compasses re-calibrated to mils and so on. The fact is that basically, while North still sits atop of the North pole, they’re pretty well all the same except for a) the swinging, magnetic card that is accurately set to magnetic North and immersed in what is for all intents and purposes, a damping fluid - and b) the rotating bezel. Of course progress has played a hand too and here, small TRITIUM vials have replaced the old Radium luminous markings. I don’t want to be a scaremonger here but if you do have an old radium illuminated compass, then I’d advise and ask that you don’t touch the illumninant and/or wear rubber gloves
We’re going to strip a compass, in a slow methodical fashion.
The very FIRST thing were going to do is to remove the PRISM assembly
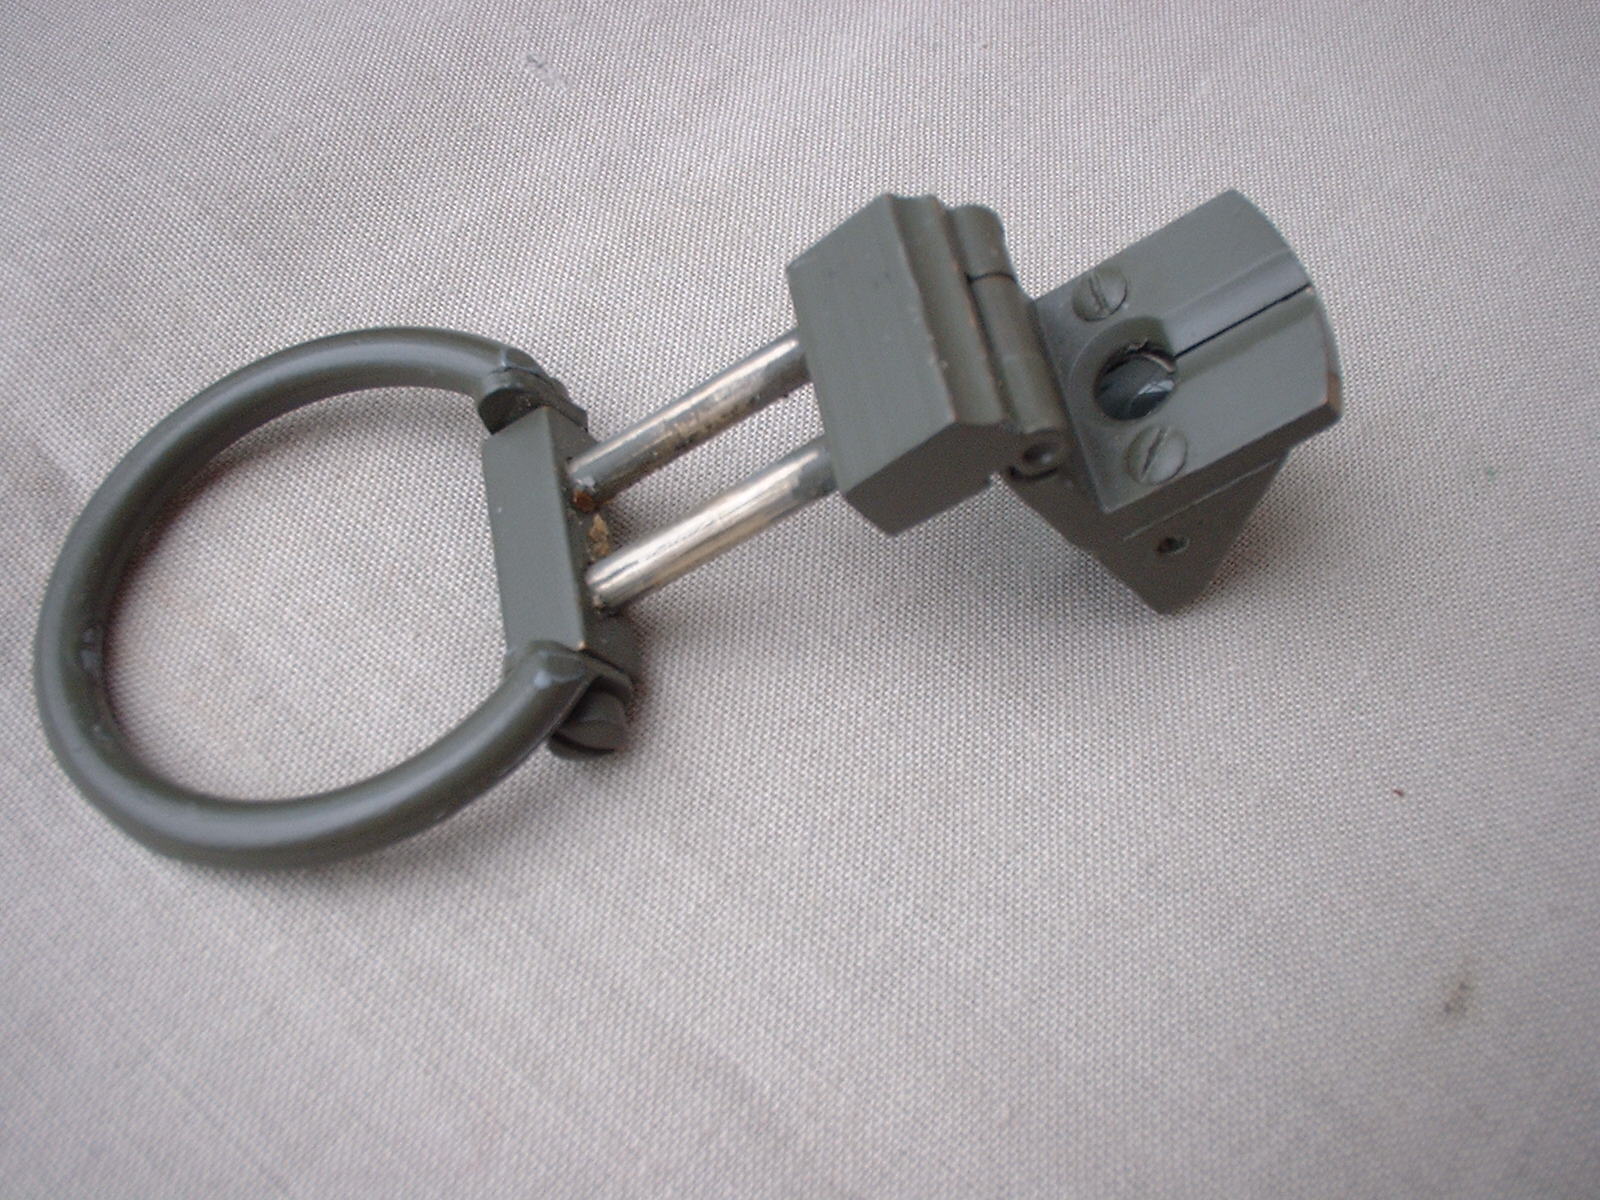
The THUMB LOOP and PRISM assembly
The loop and prism assembly is held onto the compass case by two 10BA screws that hold the prism focusing bars in place that, naturally allow the prism to move up and down in order to focus the card reading. Unless the focusing bars are loose and the spring tension needs adjusting, there’s no need to remove this from the case. Next we’ll look at the prism and these inevitably DO need attention, especially after Army Officers have used them. Don’t ask me how they get old stick boiled sweets and mars bar chocolate squashed into it….., it just happens!
The thumb loop and prism assembly. Notice the two 10BA brass machine head screws used to retain the prism housing, prism and damper to the hinge and slider bars. And JUST to the right of the screw heads, the hole for the 10BA grub screw(s) used to accurately position the prism for parallax
(Click PIC to Enlarge)
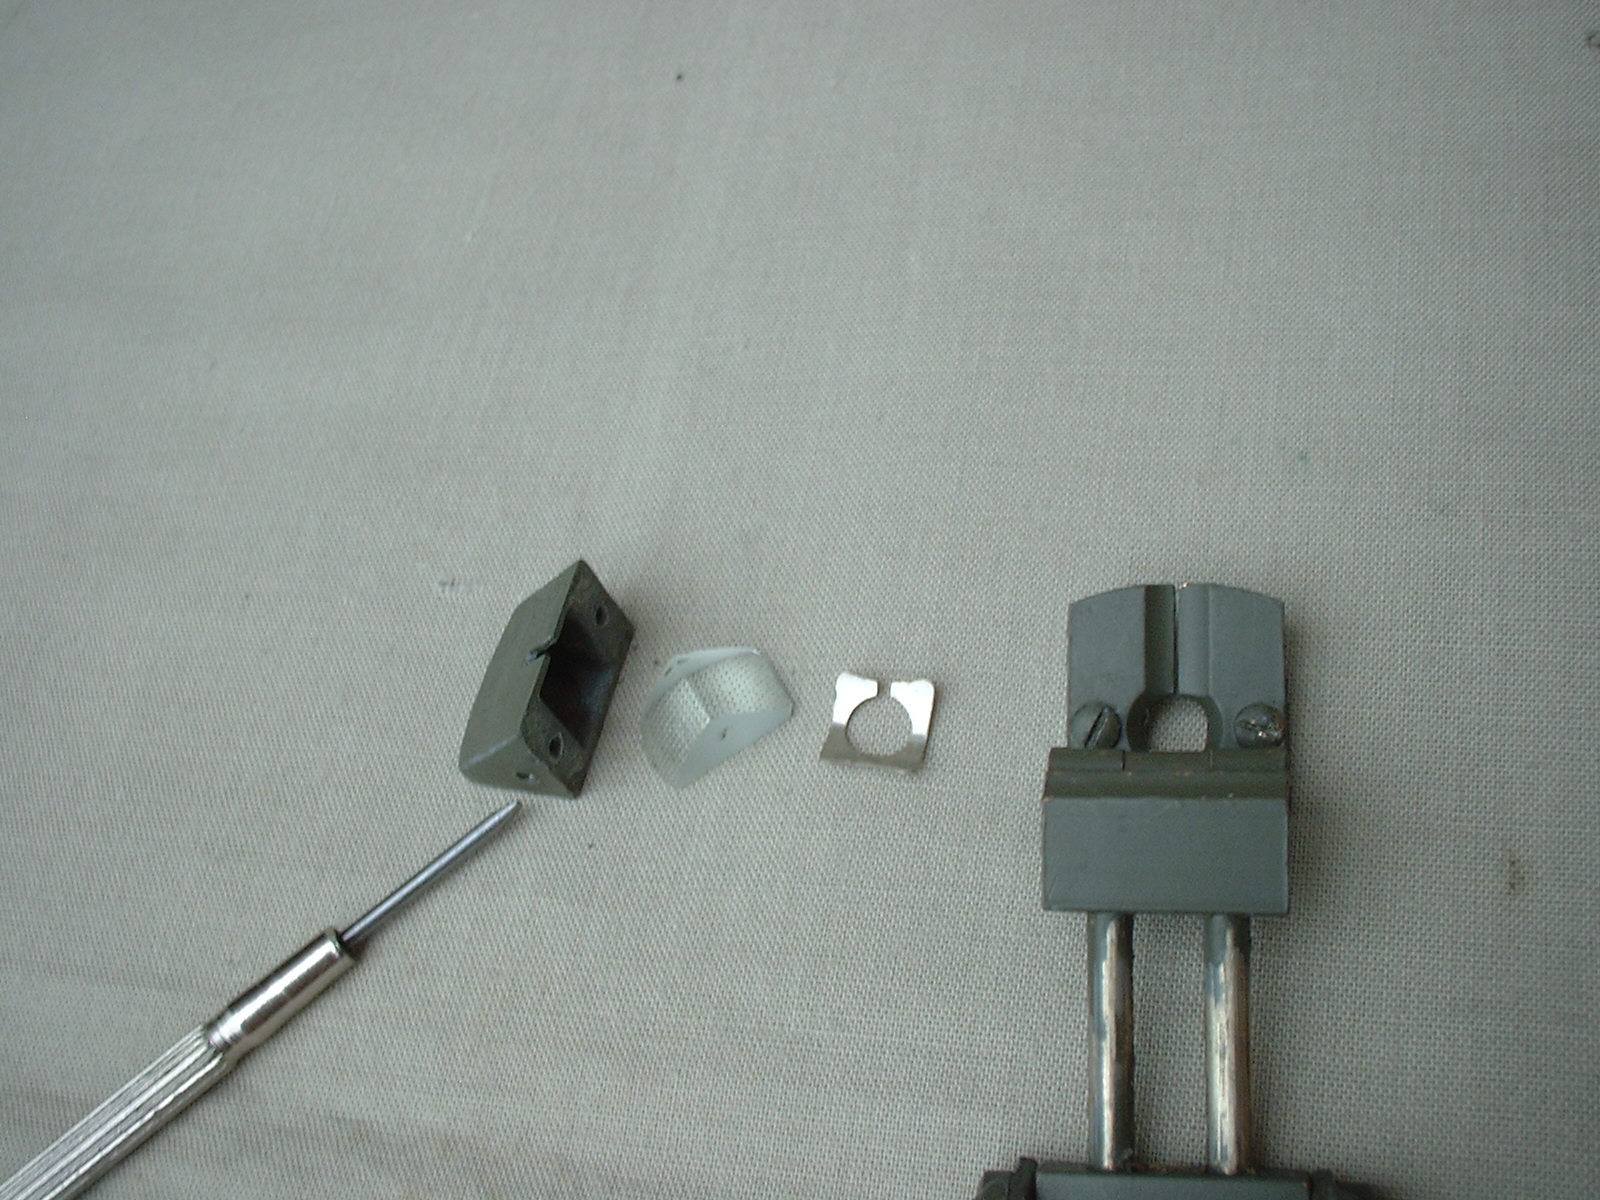
You’ll see the heads of two 10BA brass machine screws at the rear, slotted side of the prism housing. Unscrew these CAREFULLY and remove the front of the housing complete with the prism and a spring loaded positioner. Notice that the positioner is slightly bowed/convex and has a slot. On re-assembly, this slot MUST coincide with the viewing slot in the prism mounting arm and the convex form must follow the convex form of the prism.
There it is. From left, the prism housing, the prism. Note the two convex surfaces that face the viewing/marching line window in the block and reading windows in the housing. The non magnetic bowed positioned showing the opening that must align with the marching viewer in the block. And the block and screws. Now is the chance to clean out any old paint and grot from the window and slots.
(Click PIC to Enlarge)
Note also that in some compasses, the prism is accurately aligned left/right by a 10BA grub screw on either side of the housing. To remove the prism and ensure its accurate re-positioning, only undo one of these screws AND MARK THAT SCREW WITH A PENCIL MARK. You can now clean the prism in clean methylated spirit impregnated tissue. Replacement of the prism is that each of the two convex (outwardly rounded) surfaces must face the viewing window and the reading window – the two windows in short! Now is the time to clear all of that old paint out of the windows and the thin slot that we call the marching line viewer (or viewing slot). But now for the bad or ‘just be careful’ news. Remember when you undid one of the 10BA alignment screws in the side of the prism housing………, well, now is the time to do it up. The screw you undid a half turn will be marked, so using the slightest finger pressure, just nip the screw up onto the side of the prism. Any more than that and it’ll crack. Let me tell you that again………. Screw it down tight and the valuable and unobtainable (outside my circles……, unless you know better) prism WILL crack.
Put the overhauled thumb ring and prism assembly back into a zip top plastic bag because next we’re going to look at the…….
GRILLE and GLASS
Here you’ll see on the cover, three relatively large headed 8BA threaded screws. Unscrew these and lift the guard clear.
On SOME later (Stanley) compasses, these three screws hold the glass in place via three small alloy spring strips. With the screws removed, the glass can be removed with the guard.
On OTHER, earlier compasses, the glass can be removed by unscrewing 2 similarly sized screws from inside the cover. Whichever method is apparent, remove the glass and clean with methylated spirit and a soft duster. Remember that the what we call the marching line must be replaced top to bottom
SLIPPING CURSOR SCALE and COMPASS BOWL
The slipping or rotating cursor scale is held to the actual bowl by either an internally sprung ring or by simple sprung friction. To remove it, loosen the captive clamping nut on the right hand at the NW sector then just gently prise it up and flick it off.
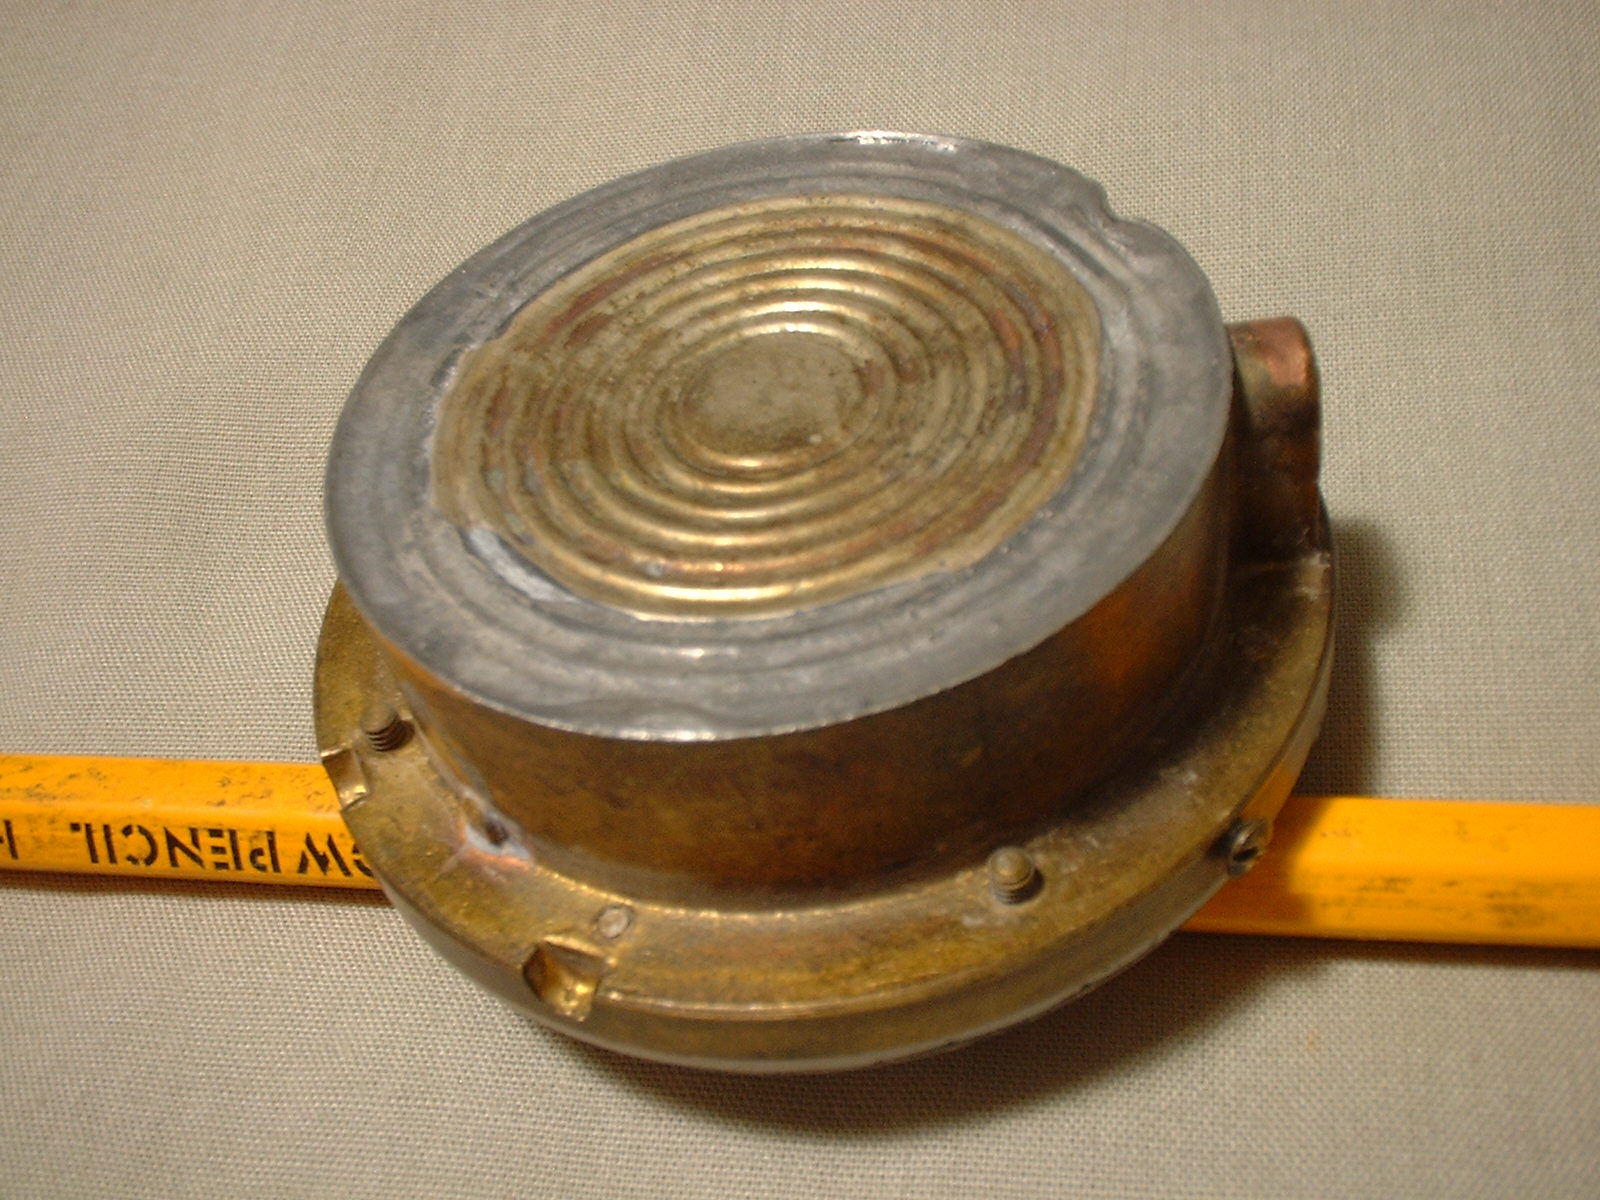
The actual bowl is held into the compass case by means of two 10BA (but some have been repaired and replaced with 8BA brass) machine headed screws. Undo these, turn the compass up side down and the bowl should fall into your hand. It won’t! You’ll need to gently coax it out with your finger tips. When it’s out, take a minute to marvel at it. Notice the bellows underneath that allow this instrument to function with 100% accuracy in all climatic conditions and climates.
The bowl taken from the case. Notice the two brass 10BA screws back in position in the bowl and the ominous bubble in the alcohol damping fluid. That spells bad news because it will affect the accuracy of the compass because the card is never laying flat! The rotating cursor is still fixed here. Just flick it up under the brass lip and it’ll spring off.
(Click PIC to Enlarge)
Next, you’ll have to decide how far you want to go…….. You’ll see around the top of your compass bowl, 8x 6BA brass or nickel countersunk screws. If your compass card (the swinging card inside) is damaged and you have a correctly swung (more later) replacement, then you’ll need to unscrew these 8 screws, release the isopropyl (or isoprophyl if you’re English….) alcohol and remove the glass.
There it is, the heart of the compass with the rotating cursor flicked off. You’ll see the bubble now and the 8x screws. Only remove the window if you have the press, sealant or seal. Otherwise, leave well alone……….
(Click PIC to Enlarge)
On the other hand, if the fluid is just dirty (don’t ask me how, it just get’s like that….) or has aerated (got a bubble in it…) then this is what you are going to do. Unscrew the filling screw in the left side of the bowl, remove it and look out for the fibre seal. Now drain away the isopropyl by GENTLY squeezing the bellows. You can use a needle and syringe or simply immerse the bowl in methylated spirit and FILL the bowl with fresh, clean meths. Swill it around , empty it out and repeat until the interior is visibly clean.
The filling screw. If you can get new fibre washers from your local hardware stockiest, then always replace with new. But if the old is flatted down, then it will probably last another lifetime. I have never heard of anyone trying neoprene but so long as it cannot be attacked by the spirit, it should do as a suitable replacement.

(Click PIC to Enlarge)
In the meantime you can obtain a new fibre washer or make sure that the old one is smooth and undamaged. In real life, where you have a Base Workshop and de aeration tank, we’d be doing something else, but we haven’t and I’m not in the mood to explain how or why we would usually use a de-aeration tank……….. but it’s all to do with that all liquid contains air. And air is something that we don’t need in a liquid prismatic compass. There’s another thing too. In the real world, we’d be filling up our compass with neat isopropyl alcohol because it has some properties that we need. The important one being that its refractive index is such that it won’t distort the image we see when looking through the prism at the damped card. This would be pretty important if we were directing artillery onto a troop concentration while advancing into Belgium or following a dusty almost invisible sand track in the middle of the desert somewhere between the Kuwaiti border and the Iraqi border, waiting for an air drop of supplies and ammunition……….. and the US have turned off the GPS satellite signals. But back to the real world. We’re going to use something not quite as good, but the perfect runner-up. Methylated Spirit. Pure, clean, industrial methylated spirit!
Once the bowl is clean inside and you have confirmed this by draining clean methylated spirits from it, refill it and while the liquid is still spilling from the filler, replace the washer and screw……., just finger tight will do. But as you’re doing so, gently give the diaphragm or bellows at the bottom of the bowl a little squeeze. What will happen now is that because the spirit is now at a very slight depression, any air in the spirit will want to de-gas and as it does so, it’ll form a small bubble. So in a few days, we’ll unscrew the filler screw, release the bubble, top up and repeat the process. You might need to repeat it for several times over a week or so. But each time you do, you are degassing the spirit more and more until it’s pure methylated spirit in the bowl, there won’t be any air in the form of a bubble.
Shown here is the underside of the bowl, the diaphragm. This delicate part acts as a bellows that allows the atmospheric pressure, the heat and cold and the expansion of different materials to be shrugged off by the tough and hardy compass. But beware, while you can gently squeeze the diaphragm as mentioned in the text, please treat it with care...............
(Click PIC to Enlarge)
When you seal the screw for a final time, don’t squeeze the diaphragm but seal it at your own local atmospheric pressure. What is simpler than that eh? Once the bowl is bubble free and sealed, it’s time to seal the screw with a dob of clear varnish
Look chaps, there will be some out there ready to explain that this is an over simplification of the process and this or that or the other is not quite or absolutely correct. That may be so, but at the end of this, you’ll have an overhauled, bubble free compass that will pass muster parade.
You’ll have noticed that I haven’t dealt with the inside of the bowl and that is because in the big wide world, you haven’t got access to the mastic or sealant or the press to squeeze the bowl and glass together that ensures the loading on the seal when the screws are torque down. Unevenly and you’ll crack the glass so open it up at your own risk!
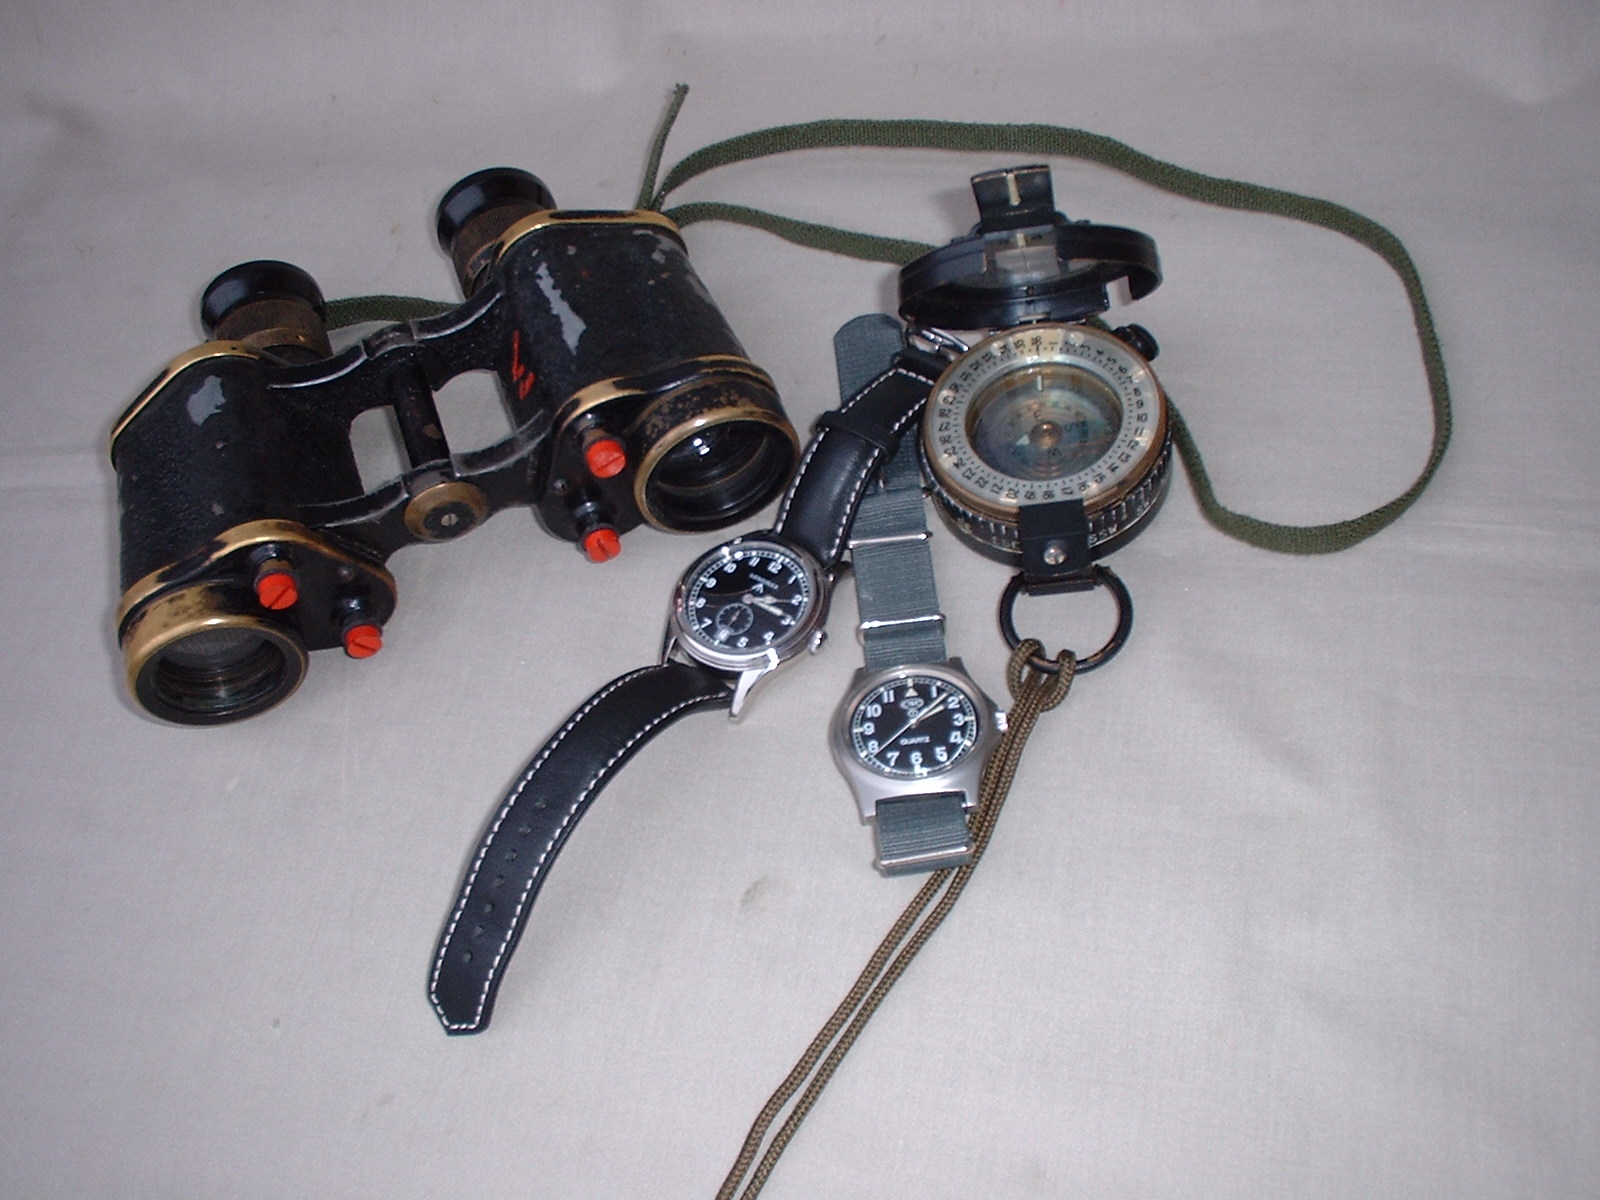
The three bits of what were called SUPPLEMENTARY ISSUES with the sniper CES. The extra smocks and face veils were clothing issue and expense (expendable) items but these were strictly accountable and dubbed ‘V&A’ for valuable and attractive. The Binoculars, prismatic No2 Mk3 are in the twilight of their service now. These old timers, Kershaw 1943’s have been in the authors pouches since the seventies. The red screws are desiccation screws. The compass is a degrees Mk3, straight from the stores, as is the grey strapped CWC wristwatch. Gone are the days of the Omegas, Longines, Eterna and Jaeger le Coutre being issued.
(Click PIC to Enlarge)
The timeless Longines and up to date CWC. Mechanical and electronic but while the mechanics have changed, the basic simplicity is still the same. A good example of keep it simple stupid…………

(Click PIC to Enlarge)
If anyone wants any more pictures to elaborate on something more, just ask and I'll ask Doug (Badger) to add them to the article. But make it snappy, they don't like me taking liberties with their kit!
Last, but not least, thanks to Jennifer for deciphering all of my gibberish and technical ranting and turning it into something readable. Thanks again lovely Jennifer !!
Copyright ©2006 - 2011 by Peter Laidler and MILSURPS.COM
Collector's Comments and Feedback:
1. Capt. Peter Laidler is the senior Armourer in the UK Military, now retired, but based as a Technical Officer at the UK Military Small Arms School. In addition to being a trained and highly experienced military "Armourer", he has authored two excellent books about the No.4(T) sniper rifles and their No.32 scopes. They are titled "An Armourer's Perspective: .303 No.4(T) Sniper Rifle", which he co-authored with Ian Skennerton and his own dedicated work, "Telescope Sighting No.32".
If you're really interested in some in-depth learning about the No.4(T) sniper rifles and the No.32 series of scopes, their history, evolution, repair and adjustments for shooting, I'd highly recommend those two books, which are pictured below. ....... (Feedback by "Badger")
 (Click PIC to Enlarge)
2. The secret to creating and maintaining quality research data in the Milsurps Knowledge Library is you! This is your site and these MKL entries on various old milsurps are yours to add to, or change. The volunteers on the Advisory Panel (click here) can only do so much to vet and validate the information posted here, so please contribute as much as possible to help us present the most accurate and reliable data we can gather on these old milsurps. If you own a particular specimen of any MKL entry, then please send us pics of it, even though they may be duplicate views of pieces you already see here. In that way, we can build up multiple sets of pics for several milsurps of the same model, which will help in identifying markings and authenticity. ALL pics and information received will be treated with the utmost confidentiality and respect of your privacy. Thanks to everyone who has contributed so far, which is helping to make the Milsurps Collectors Forums a prominent site for serious collectors of all genres of old milsurp collectibles. ....... (Feedback by "Badger")
Note: The opinions expressed herein or statements made in this article are solely those of the author, and do not necessarily reflect the views of the Military Surplus Collectors Forums, or the ownership and moderation group of this site. MILSURPS.COM accepts no legal liability or responsibility for any claims made or opinions expressed herein. Also, please note that neither the author nor MILSURPS.COM recommends that any member of these forums, or a reader of this article, try this type of experimentation without the proper knowledge, equipment and training.

 Reply
Reply

 Countries
 Categories
 Recent Article Comments
