


Repairing a K98k "duffle cut"
*** Hotlink to original Gunboards thread (click here) ***
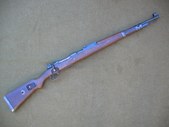
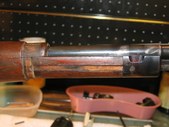
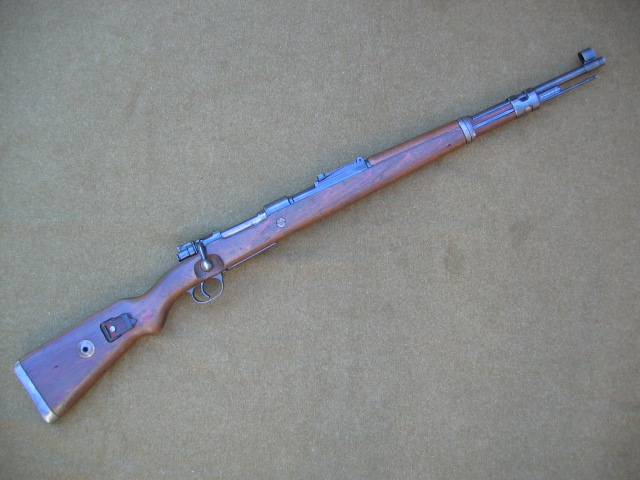
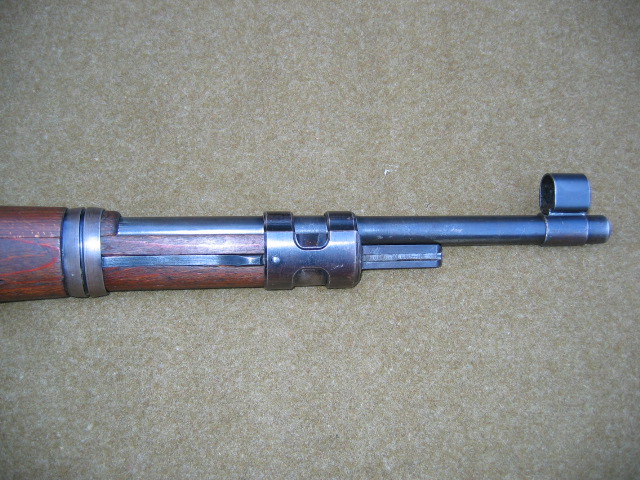
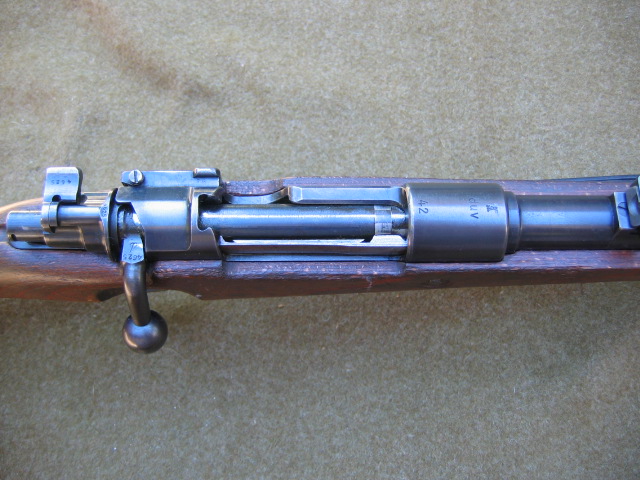
Got a nice matching K98k recently that was "duffle cut", never repaired. Decided to take some pics of the progress to show ya'll my method.
(Click PIC to Enlarge) -- (Click PIC to Enlarge)
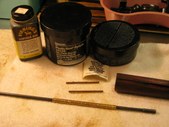
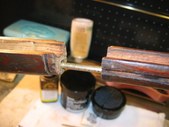
Supplies:
Devcon Plastic Steel (nothing better IMHO)
1/4" brass tubing (found at most hobby/model stores)
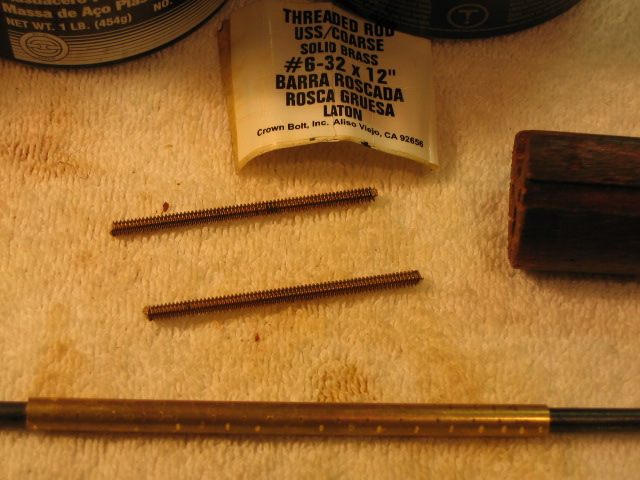
#6-32 threaded brass rod (Home Depot)
Fiebings Leather Die (dark brown)
Chestnut Ridge Dark Brown Military Rifle Stain, Hint of Red (RS Surplus)
Drill, bit 1/8" for threaded brass rods.
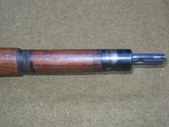
First, remember that the saw cut removes about 1/16" to 1/8" of the wood. Something has to fill that space because if you butt the pieces up next to each other the front band and bandspring wont fit, neither will the rear band. It basically will look assed up or you'll have to grind and cut on things to make it fit. Also, lining things up is IMPORTANT!
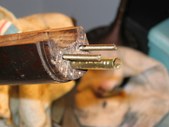
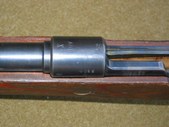
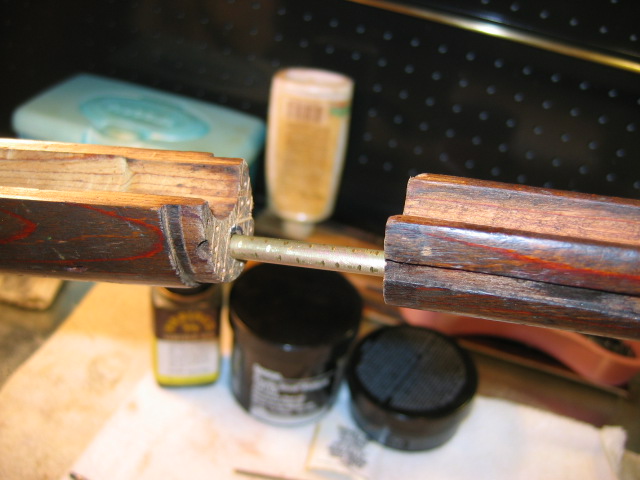
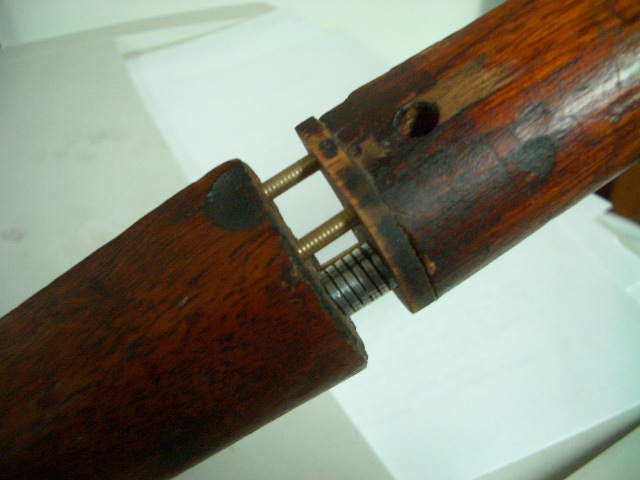
I found that the 1/4" brass tube length fits right tight in the cleaning rod channel without any drilling and a cleaning rod will pass through it. That aligns your front end and rear end and adds a lot of strength. I use ONLY brass as it doesn't rust like steel and is stronger than copper. I use the threaded brass rods because they screw into the wood somewhat and provide more surface for the Devcon. I use a 1/8" bit for the rods, which are 2 1/2" in length, which allows for about a 1/8" gap in the middle and over an inch of rod in each side.

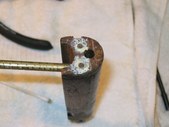
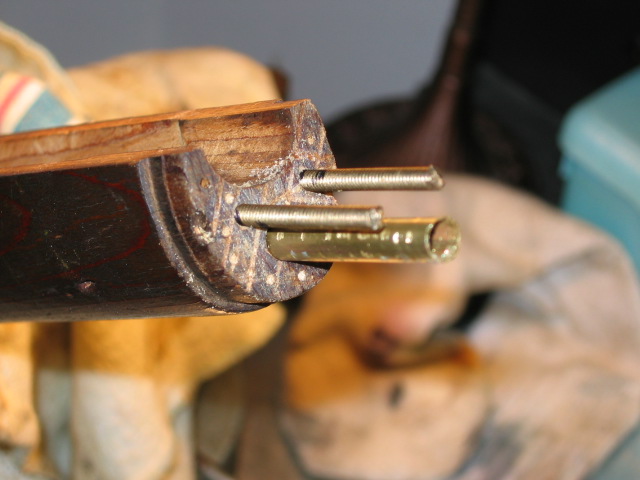
Once the brass tube lines things up, I punch two marks for sinking the pins in the front half. I then vice the front half (I have rubber vice pads), and slooowly drill down an inch for setting the rods. I wipe the front end with white Devcon hardener (or car wax, whatever), then push it down the rod to touch the face of the main stock cut. This leaves an impression showing where the holes are on the front piece. I then punch them and drill them out to an inch to accept the rods.
Note 1: I mark the smaller front piece first as it is thinner and you have less wood to work with than the back. Thus, you want your rods to be in the centers of the thickest sections of the front piece for the most support. MEASURE FOUR TIMES CUT ONCE.
Note 2: The main stock is viced, rubber pads, and I also put the action back in, and reassemble the bands to make sure my marks are right and everything is square.
After making sure everything fits right, I check the fit and depth of the tubing and rods by placing them in the main stock, then pressing the front piece over it. I do a dry run assembly, and put the bands back on, and handguard to make sure all is straight and even. Remember, you must leave a gap so the bands go on properly and the bandspring fits.
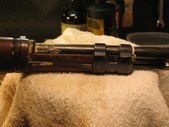
Then, I mix up my Devcon and set the tubing and rods in the main stock. Devcon work time is about 30-40 minutes. Once it sets, it SETS, so make sure everything fits right and you are ready. If you notice, I filed shallow notches in the brass tube to give it "bite" in the cleaning rod channel. I also removed the rod nut so as to not accidentally Devcon the threads. If Devcon gets on your threads and you screw it into that nut, game over, you'll have to cut the rod out. Also note that I punched and roughed up the face of the stock on either side.
OK, so now we wait 16 hours for the Devcon to set. Note that I assembled everything AGAIN to make sure everything lines up.
ALSO, VERY IMPORTANT: CLEAN BOTH STOCK PIECES WITH RUBBING ALCOHOL AND/OR ACETONE TO REMOVE ANY GREASE OR OILS THAT WOULD INTERFERE WITH THE DEVCON BINDING.
Home Depot for the threaded rods. The tubing can be found at any hobby shop where folks fly RC planes, etc. BRING YOUR CLEANING ROD WITH YOU TO THE HOBBY SHOP TO MAKE SURE IT FITS INSIDE THE BRASS TUBING.
We're a little less than halfway there. I'm letting the Devcon set completely. Next step is going to be the fitting, then Devcon of the front piece to the back, and final finishing. When I repair these I like to do so such that they look correct and can be shot, just as they were before. That's why Devcon is my choice for a bedding compound for my M1As and an adhesive. In fact, I used it for a lot of home applications. Great stuff to have around and nothing else comes close that I've found. Here is Devcon info:
Devcon acrylic, acrylic adhesive, adhesive, adhesive and sealants, adhesive applicator (Click Here)
A couple notes while we wait:
1) I kept the fine sawdust from drilling to pack on top of the Devcon. Devcon dries dark grey, but will take some stain off the Fiebings, though I've found a little original wood sawdust in there helps the stain set.
2) You want the Devcon to completely cure, 16 hours at least, before adding any stain.
3) Assemble and check, assemble and check, then assemble and check again before you set anything.
OK, I've let the Devcon set for 24 hrs. at 75 deg.+ to cure on the rods and tubing set in the main stock. I did this because I am forcing the front piece tight and I don't want the pins or tubing pushed back as I do this. The fine fitting consists of assembling everything as it is going to go, again.
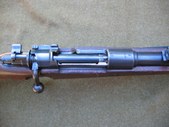
Next, I mix up my next batch of Devcon, lather up the pins and tube, the main stock side and upper piece. I then place the barreled action in, after tapping it down real close and scraping the excess Devcon.
I then assemble everything and tap the front of the bayonet lug with a plastic hammer, forcing the upper half closer to the main stock, all the while watching the bandspring lineup, bands, barrel marks.
NOTE: I PUT A GENEROUS COATING OF CAR WAX ON ANYTHING THAT COULD REMOTELY TOUCH THE DEVCON, AS A RELEASE AGENT. MISS A SPOT AND YOU'VE GOT A DEVCON STUCK TOGETHER MESS.
I also use the sawdust from the drilling for the pin holes to press into the Devcon surface. I then reassemble everything, press it together. I also assemble the trigger guard unit and screws, torquing them exactly the way they were. My purpose is not only to assemble something that looks right, but also a rifle that can be fired as it was before the "duffle cut".
Now, wait another 24 hrs. for Devcon cure. I'll probably even wait 48 hrs. before applying stain. Stain penetrates and I want full cure before applying it. Stay tuned.
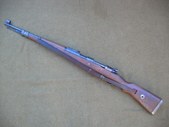
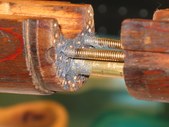
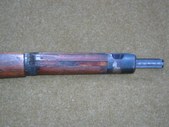
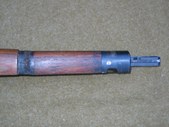
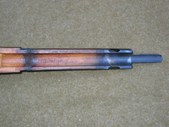
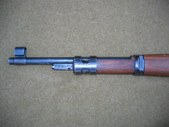
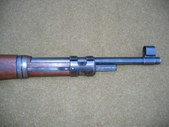
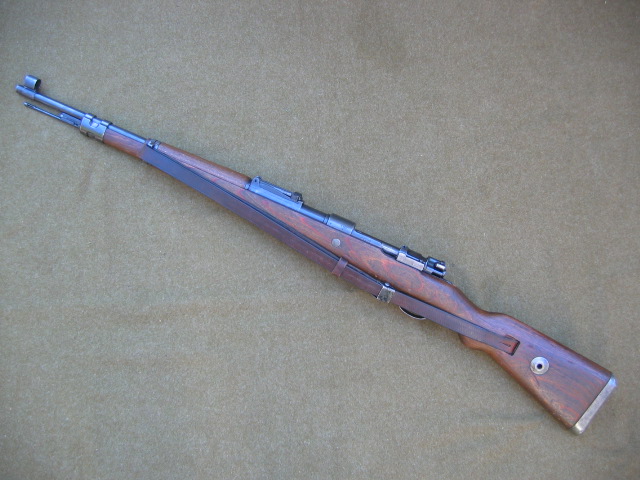
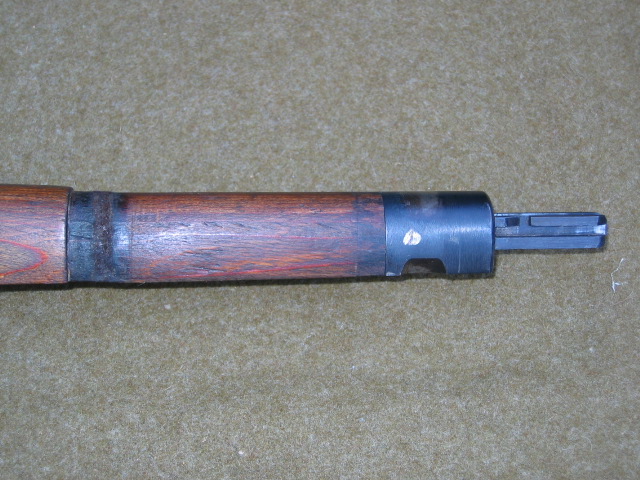
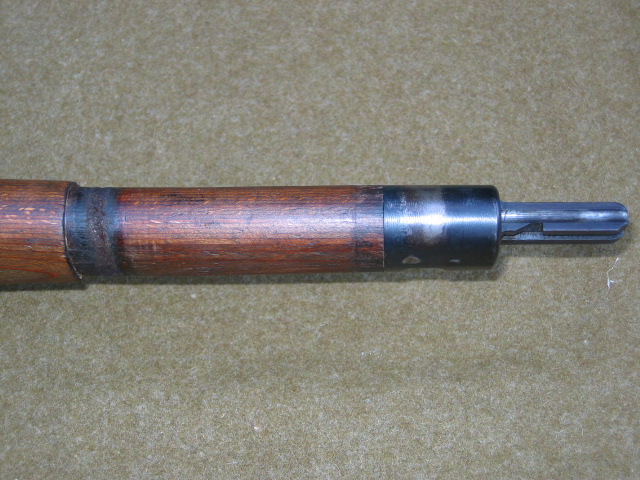
Final pics. You know, I could have sanded and smoothed what you see to make it blend....but I didn't. It's a "duffle cut" rifle and that's the mystique to me. That front piece is there to stay.
*** Hotlink to original Gunboards thread (click here) ***
Got a nice matching K98k recently that was "duffle cut", never repaired. Decided to take some pics of the progress to show ya'll my method.
(Click PIC to Enlarge) -- (Click PIC to Enlarge)
Supplies:
Devcon Plastic Steel (nothing better IMHO)
1/4" brass tubing (found at most hobby/model stores)
#6-32 threaded brass rod (Home Depot)
Fiebings Leather Die (dark brown)
Chestnut Ridge Dark Brown Military Rifle Stain, Hint of Red (RS Surplus)
Drill, bit 1/8" for threaded brass rods.

First, remember that the saw cut removes about 1/16" to 1/8" of the wood. Something has to fill that space because if you butt the pieces up next to each other the front band and bandspring wont fit, neither will the rear band. It basically will look assed up or you'll have to grind and cut on things to make it fit. Also, lining things up is IMPORTANT!
I found that the 1/4" brass tube length fits right tight in the cleaning rod channel without any drilling and a cleaning rod will pass through it. That aligns your front end and rear end and adds a lot of strength. I use ONLY brass as it doesn't rust like steel and is stronger than copper. I use the threaded brass rods because they screw into the wood somewhat and provide more surface for the Devcon. I use a 1/8" bit for the rods, which are 2 1/2" in length, which allows for about a 1/8" gap in the middle and over an inch of rod in each side.
Once the brass tube lines things up, I punch two marks for sinking the pins in the front half. I then vice the front half (I have rubber vice pads), and slooowly drill down an inch for setting the rods. I wipe the front end with white Devcon hardener (or car wax, whatever), then push it down the rod to touch the face of the main stock cut. This leaves an impression showing where the holes are on the front piece. I then punch them and drill them out to an inch to accept the rods.
Note 1: I mark the smaller front piece first as it is thinner and you have less wood to work with than the back. Thus, you want your rods to be in the centers of the thickest sections of the front piece for the most support. MEASURE FOUR TIMES CUT ONCE.
Note 2: The main stock is viced, rubber pads, and I also put the action back in, and reassemble the bands to make sure my marks are right and everything is square.


After making sure everything fits right, I check the fit and depth of the tubing and rods by placing them in the main stock, then pressing the front piece over it. I do a dry run assembly, and put the bands back on, and handguard to make sure all is straight and even. Remember, you must leave a gap so the bands go on properly and the bandspring fits.
Then, I mix up my Devcon and set the tubing and rods in the main stock. Devcon work time is about 30-40 minutes. Once it sets, it SETS, so make sure everything fits right and you are ready. If you notice, I filed shallow notches in the brass tube to give it "bite" in the cleaning rod channel. I also removed the rod nut so as to not accidentally Devcon the threads. If Devcon gets on your threads and you screw it into that nut, game over, you'll have to cut the rod out. Also note that I punched and roughed up the face of the stock on either side.
OK, so now we wait 16 hours for the Devcon to set. Note that I assembled everything AGAIN to make sure everything lines up.
ALSO, VERY IMPORTANT: CLEAN BOTH STOCK PIECES WITH RUBBING ALCOHOL AND/OR ACETONE TO REMOVE ANY GREASE OR OILS THAT WOULD INTERFERE WITH THE DEVCON BINDING.

Home Depot for the threaded rods. The tubing can be found at any hobby shop where folks fly RC planes, etc. BRING YOUR CLEANING ROD WITH YOU TO THE HOBBY SHOP TO MAKE SURE IT FITS INSIDE THE BRASS TUBING.
We're a little less than halfway there. I'm letting the Devcon set completely. Next step is going to be the fitting, then Devcon of the front piece to the back, and final finishing. When I repair these I like to do so such that they look correct and can be shot, just as they were before. That's why Devcon is my choice for a bedding compound for my M1As and an adhesive. In fact, I used it for a lot of home applications. Great stuff to have around and nothing else comes close that I've found. Here is Devcon info:
Devcon acrylic, acrylic adhesive, adhesive, adhesive and sealants, adhesive applicator (Click Here)
A couple notes while we wait:
1) I kept the fine sawdust from drilling to pack on top of the Devcon. Devcon dries dark grey, but will take some stain off the Fiebings, though I've found a little original wood sawdust in there helps the stain set.
2) You want the Devcon to completely cure, 16 hours at least, before adding any stain.
3) Assemble and check, assemble and check, then assemble and check again before you set anything.
OK, I've let the Devcon set for 24 hrs. at 75 deg.+ to cure on the rods and tubing set in the main stock. I did this because I am forcing the front piece tight and I don't want the pins or tubing pushed back as I do this. The fine fitting consists of assembling everything as it is going to go, again.
Next, I mix up my next batch of Devcon, lather up the pins and tube, the main stock side and upper piece. I then place the barreled action in, after tapping it down real close and scraping the excess Devcon.
I then assemble everything and tap the front of the bayonet lug with a plastic hammer, forcing the upper half closer to the main stock, all the while watching the bandspring lineup, bands, barrel marks.
NOTE: I PUT A GENEROUS COATING OF CAR WAX ON ANYTHING THAT COULD REMOTELY TOUCH THE DEVCON, AS A RELEASE AGENT. MISS A SPOT AND YOU'VE GOT A DEVCON STUCK TOGETHER MESS.
I also use the sawdust from the drilling for the pin holes to press into the Devcon surface. I then reassemble everything, press it together. I also assemble the trigger guard unit and screws, torquing them exactly the way they were. My purpose is not only to assemble something that looks right, but also a rifle that can be fired as it was before the "duffle cut".
Now, wait another 24 hrs. for Devcon cure. I'll probably even wait 48 hrs. before applying stain. Stain penetrates and I want full cure before applying it. Stay tuned.

Final pics. You know, I could have sanded and smoothed what you see to make it blend....but I didn't. It's a "duffle cut" rifle and that's the mystique to me. That front piece is there to stay.


Collector's Comments and Feedback:
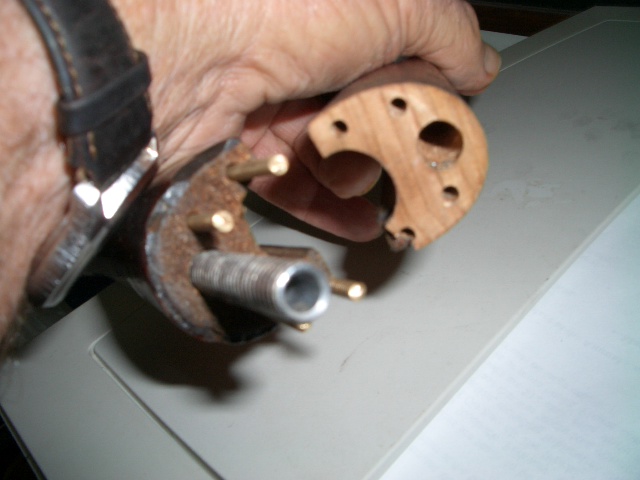
1. This fixing of a Mauser stock is the best repair I have seen, I've learned something. I would like to show you a little jig I made for this same purpose. I have a short piece of barrel for the main stock and another piece for the cut off forearm and reverse the block to drill holes so the pins will match and its easier to align holes. ....... Feedback by "Riceone".

------------------------- (Click PIC to Enlarge) -------------------------
Note: The opinions expressed herein or statements made in the article below are solely those of the author, and do not necessarily reflect the views of the Military Surplus Collectors Forums, or the ownership and moderation group of this site. MILSURPS.COM accepts no legal liability or responsibility for any claims made or opinions expressed herein. Also, please note that MILSURPS.COM recommends that any member of these forums, or a reader of this article, try this type of experimentation without the proper knowledge, equipment and training.
 Countries
 Categories