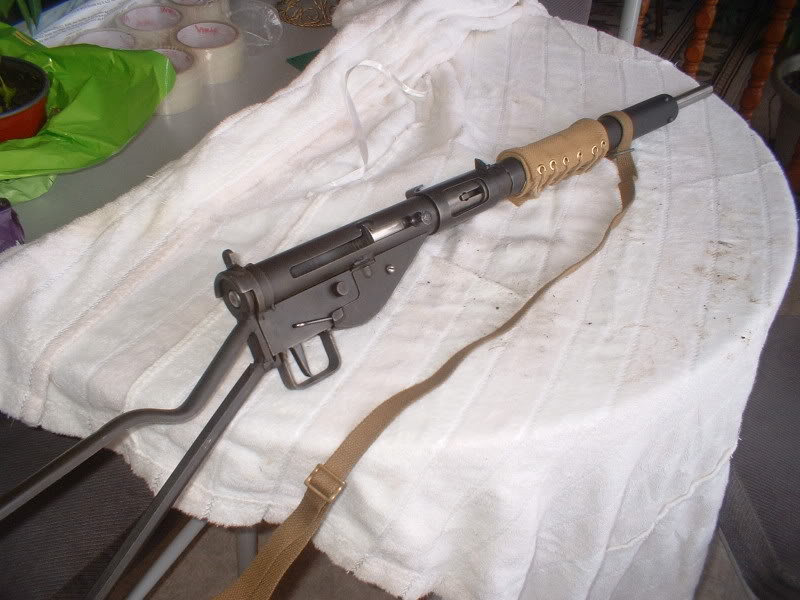
Closed Thread
Page 1 of 22 1 2 3 11 ... LastLast
Results 1 to 10 of 213

Thread: Building the Canadian Semi-Auto STEN

Click here to increase the font size Click here to reduce the font size
  1. #1
    Senior Moderator
    (Founding Partner)


    Site Founder
    Claven2's Avatar
    Join Date
    Oct 2006
    Last On
    08-24-2024 @ 08:11 AM
    Location
    Scandaltown, Ontario
    Posts
    3,242
    Real Name
    Ronald
    Local Date
    10-31-2024
    Local Time
    08:18 PM

    Building the Canadian Semi-Auto STEN

    Here in Canadaicon, a semi-auto version of the STEN has finally been RCMP and CFC approved. To get one, you must build one as there is no commercial source. At this time, the only approved semi-auto STEN here in Canada is the SAS3 conversion suitable for the MkII, MkIII and MKV sten.

    The FRT Number for the home-made Semi-Auto STEN SAS3 in MkII trim is 126844-1

    This thread is intended as a pictorial aid to help those considering a build. It will be updated as progress is made. Additions may be made by any and all builders
    Information
    Warning: This is a relatively older thread
    This discussion is older than 360 days. Some information contained in it may no longer be current.
    Last edited by Claven2; 01-19-2008 at 07:10 PM.
    Союз нерушимый республик свободных Сплотила навеки Великая Русь. Да здравствует созданный волей народов Единый, могучий Советский Союз!

  2. Thank You to Claven2 For This Useful Post:


  3. # ADS
    Friends and Sponsors
    Join Date
    October 2006
    Location
    Milsurps.Com
    Posts
    All Threads
    A Collector's View - The SMLE Short Magazine Lee Enfield 1903-1989. It is 300 8.5x11 inch pages with 1,000+ photo’s, most in color, and each book is serial-numbered.  Covering the SMLE from 1903 to the end of production in India in 1989 it looks at how each model differs and manufacturer differences from a collecting point of view along with the major accessories that could be attached to the rifle. For the record this is not a moneymaker, I hope just to break even, eventually, at $80/book plus shipping.  In the USA shipping is $5.00 for media mail.  I will accept PayPal, Zelle, MO and good old checks (and cash if you want to stop by for a tour!).  CLICK BANNER to send me a PM for International pricing and shipping. Manufacturer of various vintage rifle scopes for the 1903 such as our M73G4 (reproduction of the Weaver 330C) and Malcolm 8X Gen II (Unertl reproduction). Several of our scopes are used in the CMP Vintage Sniper competition on top of 1903 rifles. Brian Dick ... BDL Ltd. - Specializing in British and Commonwealth weapons Specializing in premium ammunition and reloading components. Your source for the finest in High Power Competition Gear. Here at T-bones Shipwrighting we specialise in vintage service rifle: re-barrelling, bedding, repairs, modifications and accurizing. We also provide importation services for firearms, parts and weapons, for both private or commercial businesses.
     

  4. #2
    Senior Moderator
    (Founding Partner)


    Site Founder
    Claven2's Avatar
    Join Date
    Oct 2006
    Last On
    08-24-2024 @ 08:11 AM
    Location
    Scandaltown, Ontario
    Posts
    3,242
    Real Name
    Ronald
    Local Date
    10-31-2024
    Local Time
    08:18 PM
    Thread Starter
    The initial build will be of a MkII based on a Canadian Army demilled Longbranch STEN MkII kit. It was torch-cut by the Canadian Army in the 1970's. The barrel was gouged at both ends with an acetylene torch, the stock base plate was partially torch-cut and in some cases the triggers were cut in half.

    This build is actually a pictorial composite of two builds of similar kits being built side-by-side at the same time, one restricted with original length barrel, and one non-restricted with an 18.5" barrel. One kit has an intact trigger, the other will need repair (cut in half). Both stocks were repaired before the build began by filling the torch cut areas using gas welding and they were then filed back into shape.

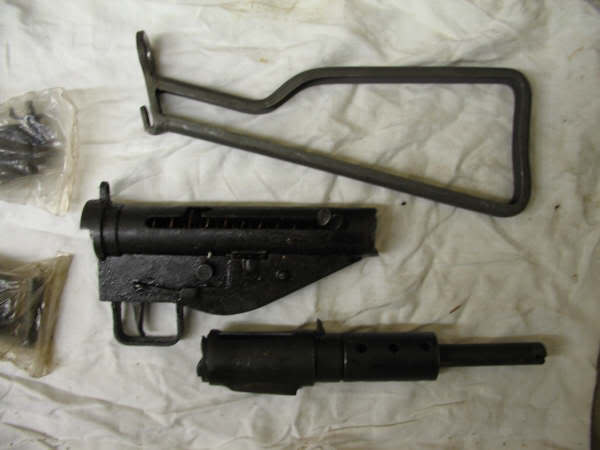
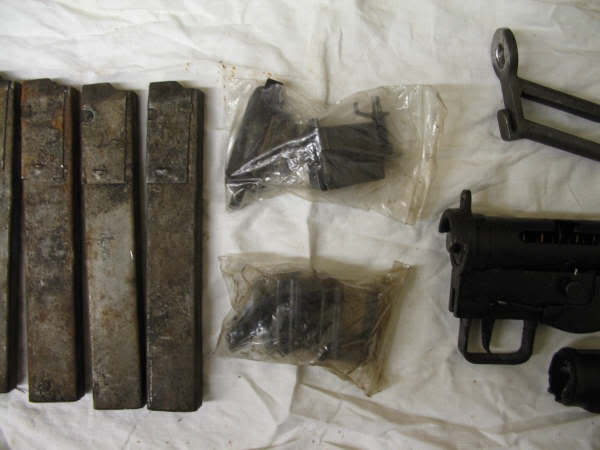
    Kits are available from Milsurps.com Advisory Panelicon member Stencollector. Contact him for info. Here is what the kits look like as received:


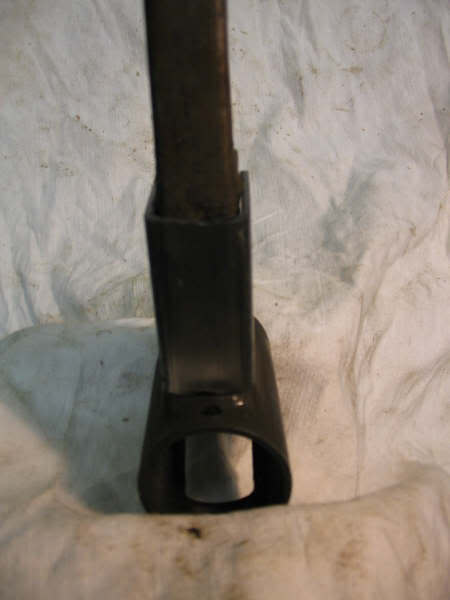
    You will immediately notice that the mag well comes saw cut. This is because the RCMP have ruled that the mag well, bearing the markings and serial number, is the prohibited (automatic) firearm. The kits are shipped with a saw cut mag well so that it can still be used for dimensioning purposes. To get your semi-auto sten registered in Canadaicon, you will need to fabricate a new magazine housing. More on this later.
    Last edited by Claven2; 01-22-2008 at 06:32 PM.
    Союз нерушимый республик свободных Сплотила навеки Великая Русь. Да здравствует созданный волей народов Единый, могучий Советский Союз!

  5. Avoid Ads - Become a Contributing Member - Click HERE
  6. #3
    Senior Moderator
    (Founding Partner)


    Site Founder
    Claven2's Avatar
    Join Date
    Oct 2006
    Last On
    08-24-2024 @ 08:11 AM
    Location
    Scandaltown, Ontario
    Posts
    3,242
    Real Name
    Ronald
    Local Date
    10-31-2024
    Local Time
    08:18 PM
    Thread Starter
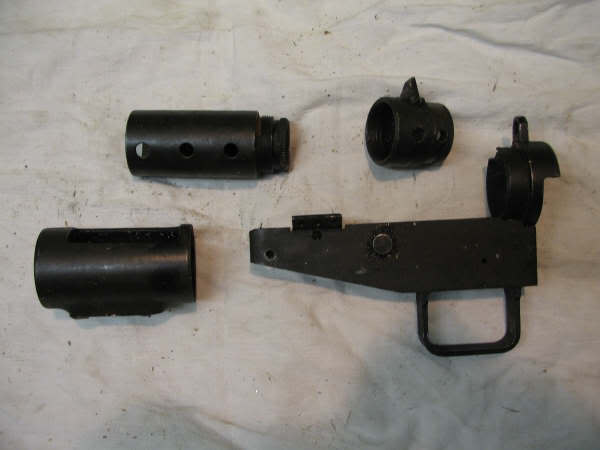
    The first step is to clean up the kit, that is to say, remove all the parts you won't use for the build such as the old tube, the bolt and spring (if you have them), the old barrel, etc. This can be a challenge on some kits. As a rule, if the bits are arc-welded together, you cut away the welds with a grinding disc, and if they are spot-welded, the easiest thing to do is to drill out hte spot-welds and later on, re-use those hols to plug weld the kit together.

    Here is a late production (1944) Longbranch spot-welded kit cleaned up:
    Союз нерушимый республик свободных Сплотила навеки Великая Русь. Да здравствует созданный волей народов Единый, могучий Советский Союз!

  7. #4
    Senior Moderator
    (Founding Partner)


    Site Founder
    Claven2's Avatar
    Join Date
    Oct 2006
    Last On
    08-24-2024 @ 08:11 AM
    Location
    Scandaltown, Ontario
    Posts
    3,242
    Real Name
    Ronald
    Local Date
    10-31-2024
    Local Time
    08:18 PM
    Thread Starter
    So maybe you want to avoid the hassle of getting a STEN barrel exported from the USAicon. Sounds reasonable. There are two ways to fabricate a STEN barrel. Both will require a section of 9mm barrel blank. The first is to lathe out the contour of the barrel, the second is to lathe out a cylinder of the proper diameter and then pin on a barrel base collar. Original barrels were made BOTH ways. Use whichever way works for you! In this case, we had a blank with enough diameter to make a one-piece barrel. You will need a lathe to do this.


    In this photo we see a raw chunk of barrel blank, a lathed out barrel, the front barrel busing portion of the receiver (salvaged from the kit) and the barrel nut.

    Mocked up:

    Note the barrel is NOT chambered. This will be done when the bolt is head-spaced.

    Now, to finish off the exterior of the barrel, we bead blast it to facilitate parkerizing later on.
    Last edited by Claven2; 01-19-2008 at 07:22 PM.
    Союз нерушимый республик свободных Сплотила навеки Великая Русь. Да здравствует созданный волей народов Единый, могучий Советский Союз!

  8. #5
    Senior Moderator
    (Founding Partner)


    Site Founder
    Claven2's Avatar
    Join Date
    Oct 2006
    Last On
    08-24-2024 @ 08:11 AM
    Location
    Scandaltown, Ontario
    Posts
    3,242
    Real Name
    Ronald
    Local Date
    10-31-2024
    Local Time
    08:18 PM
    Thread Starter
    Now we begin fabrication of the magazine well.
    It is best to measure the thickness of the steel used on your de-milled mag well. Get a grade of sheet steel that matches so that you dimensions will be the same when you build your box because you will be making all your measurements from the gun you are copying.

    This part can be done very simply or very complexly. We chose to fabricate from three pieces so as to get precise bends.
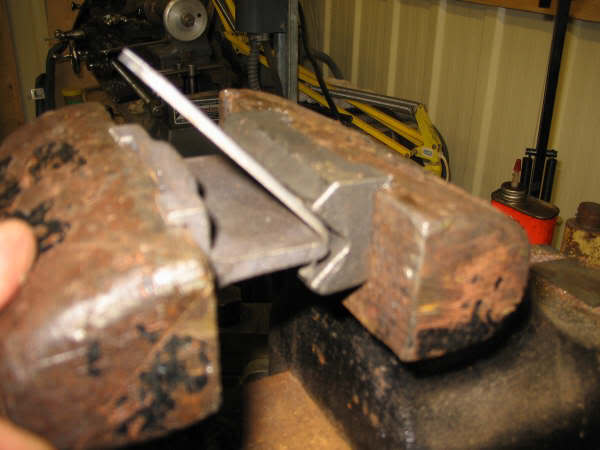
    Step 1. make your first two bends. For those interested, this sheet-metal bending rig was bought at Lee Valley in Ottawa (they do mail order). The vise is up to you though!
    Step 2. fit the two pieces together, use your original mag well for dimensioning. It is important to note, make your mag well longer than you need so that you can trim to size after you weld it to the receiver sleeve section.
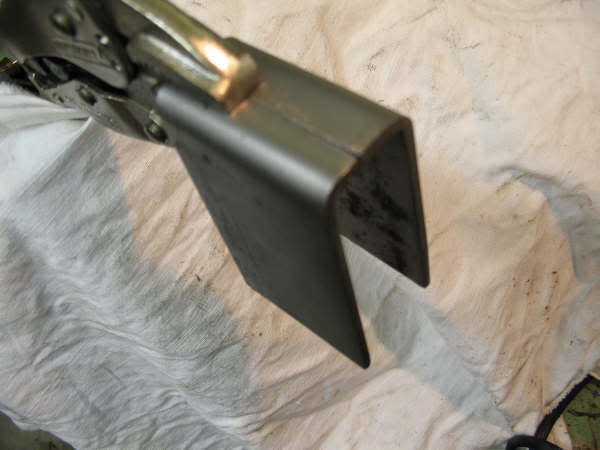
    Make sure a magazine goes in BEFORE you weld!!
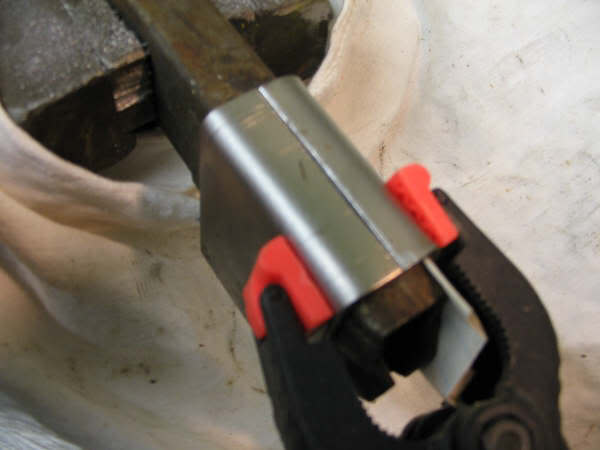
    Just tack weld at first, then completely weld up the seam. A belt sander and file work great for cleaning the outside, the inside must be completely hand-filed. Once done, cut a section of steel to form the back of the box.
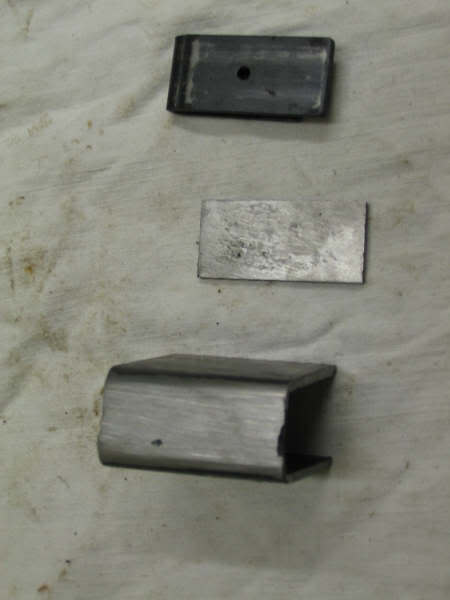
    Here are the parts up against a receiver tube collar like the one we will be welding to later:
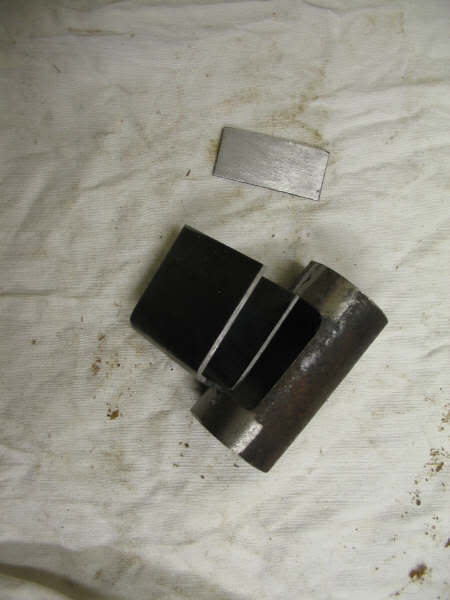
    Once you measure and measure and measure and tril fit and measure again, weld on the back plate:
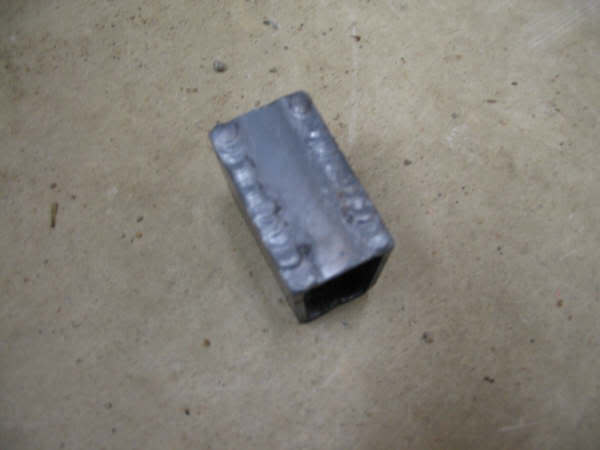
    Does it fit? Use your demilled collar to mock it up and check:
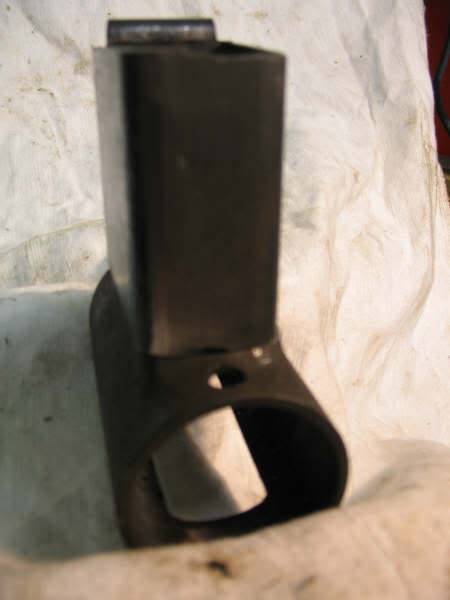

    Now dress the welds:
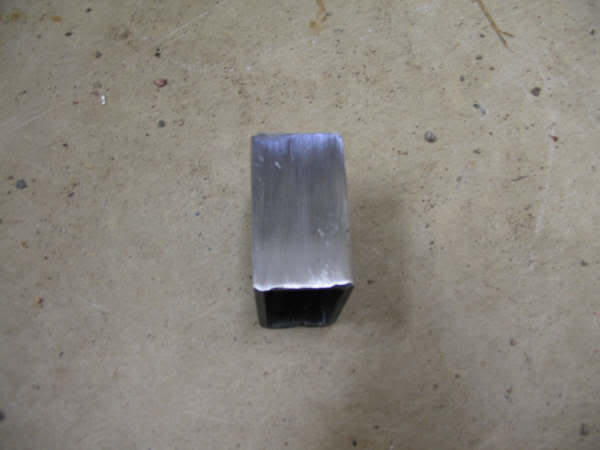
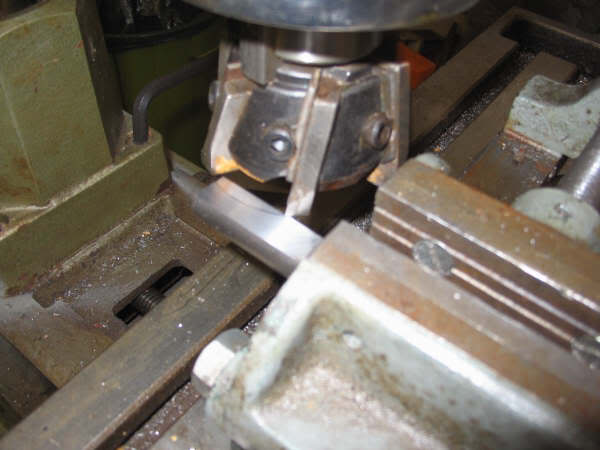
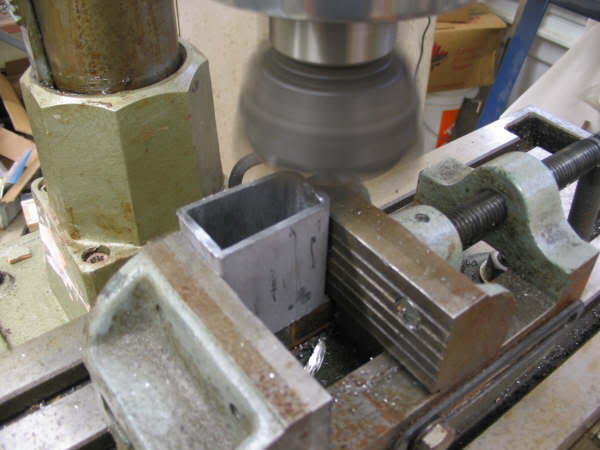
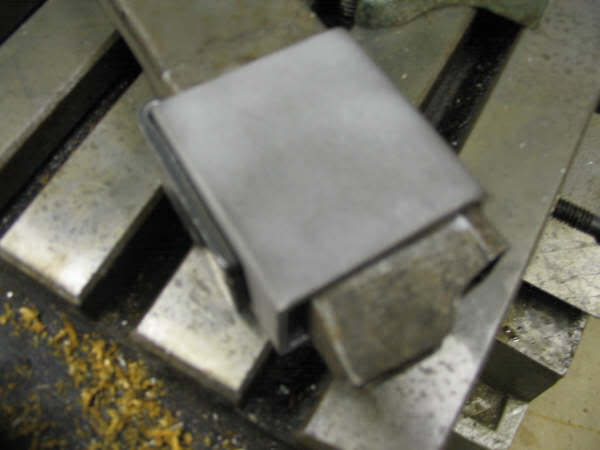
    The ends of the mag box will need to be squared off. If you have a mill, use it. It works great. If not, carefullt scribe lines to ensure a square mark around the circumference of the mag box and carefully grind it level.
    In the mill:
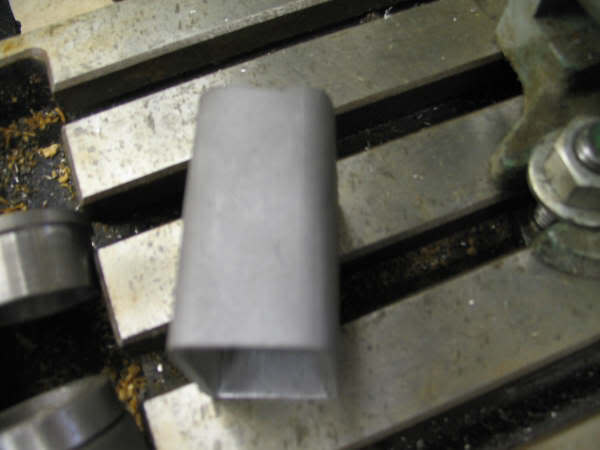
    Done!
    It should fit a mag at this point:
    Last edited by Claven2; 01-20-2008 at 10:22 AM.
    Союз нерушимый республик свободных Сплотила навеки Великая Русь. Да здравствует созданный волей народов Единый, могучий Советский Союз!

  9. #6
    Senior Moderator
    (Founding Partner)


    Site Founder
    Claven2's Avatar
    Join Date
    Oct 2006
    Last On
    08-24-2024 @ 08:11 AM
    Location
    Scandaltown, Ontario
    Posts
    3,242
    Real Name
    Ronald
    Local Date
    10-31-2024
    Local Time
    08:18 PM
    Thread Starter
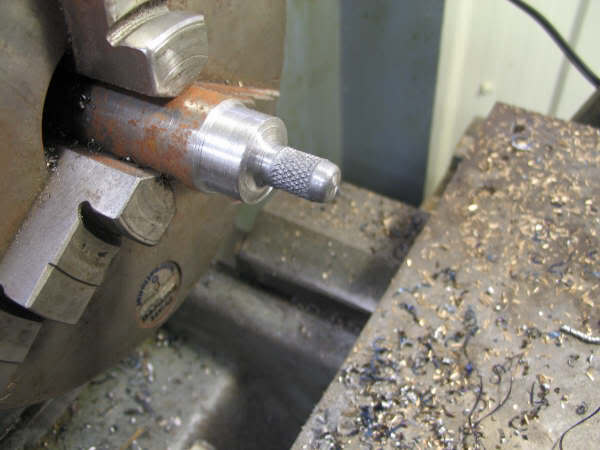
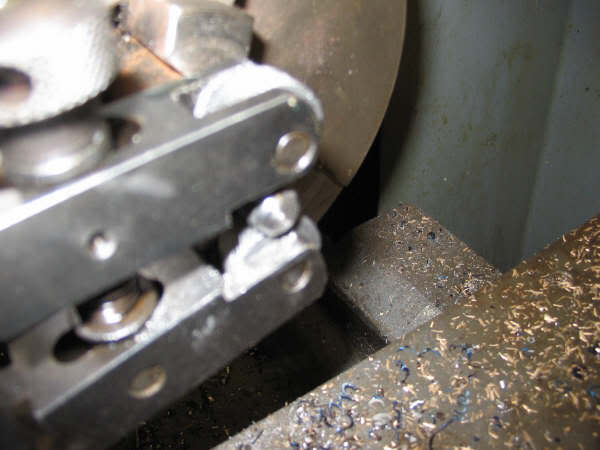
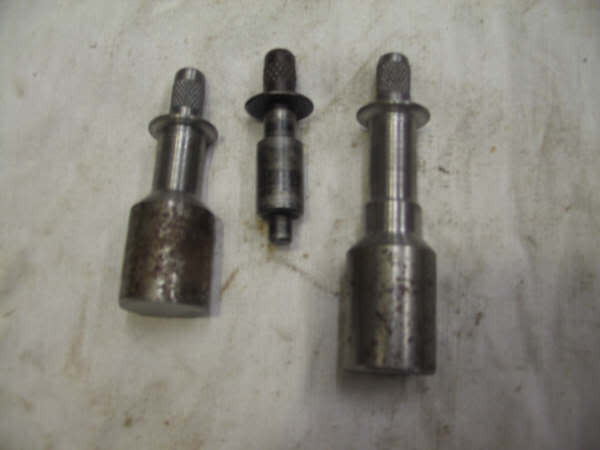
    The SAS3 kit does not use the whole original cocking handle. Due to the striker-fired design, it uses a truncated handle. You can just trim an original MkV handle like will come with your kit, but a better solution is to use a repro MkII cocking handle to match the fact there will be no cocking handle safety hole on a SAS3 receiver tube. An added advantage to making a (very hard to find and rare in original form) MkII handle is that you can fit it precisely to your bolt so its does not wobble around on you.

    You make one on a lathe and will need a knurling tool.

    And here's a couple we made up compared to a real mkII handle:
    Союз нерушимый республик свободных Сплотила навеки Великая Русь. Да здравствует созданный волей народов Единый, могучий Советский Союз!

  10. #7
    Senior Moderator
    (Founding Partner)


    Site Founder
    Claven2's Avatar
    Join Date
    Oct 2006
    Last On
    08-24-2024 @ 08:11 AM
    Location
    Scandaltown, Ontario
    Posts
    3,242
    Real Name
    Ronald
    Local Date
    10-31-2024
    Local Time
    08:18 PM
    Thread Starter
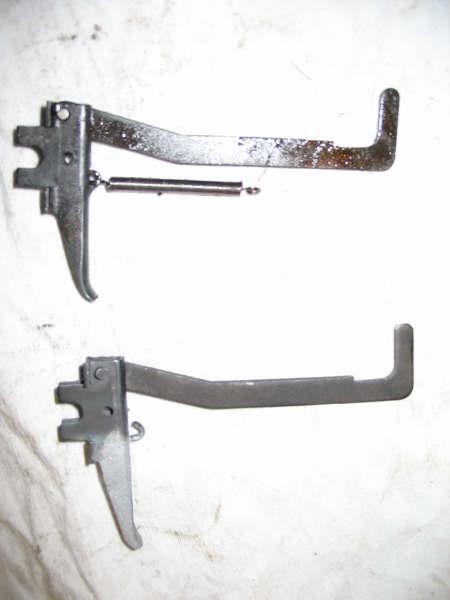
    As Isaid, some kits come with chopped triggers. The top trigger is original, the bottom trigger had the part you pull with your finger cut off. A bottom half was fabricated in sheet steel and mig welded on, then filed flush:
    Союз нерушимый республик свободных Сплотила навеки Великая Русь. Да здравствует созданный волей народов Единый, могучий Советский Союз!

  11. #8
    Senior Moderator
    (Founding Partner)


    Site Founder
    Claven2's Avatar
    Join Date
    Oct 2006
    Last On
    08-24-2024 @ 08:11 AM
    Location
    Scandaltown, Ontario
    Posts
    3,242
    Real Name
    Ronald
    Local Date
    10-31-2024
    Local Time
    08:18 PM
    Thread Starter
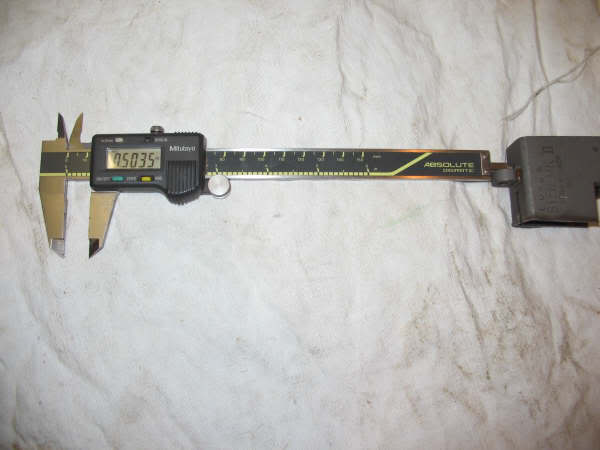
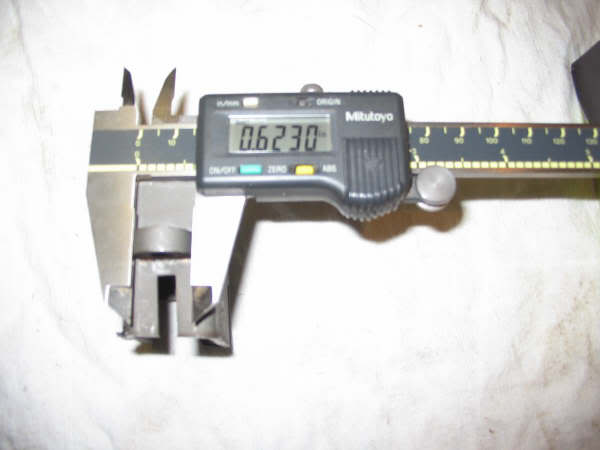
    Now we'll make the mag well locking collar. This holds the locking pin in place to lock the magazine housing into position when firing.

    Let's measure the locking pin collar...


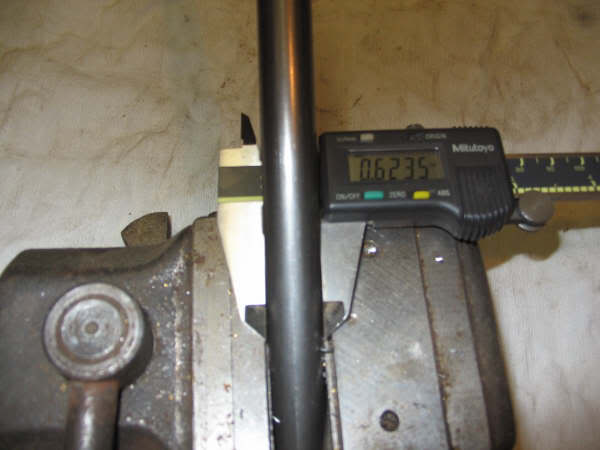
    Great! This bar stock will fit the bill!

    Back to the Mill that Klunk hates, because we're "Fancy"

    Looking good...

    More measuring...

    And sectioned off with the saw...

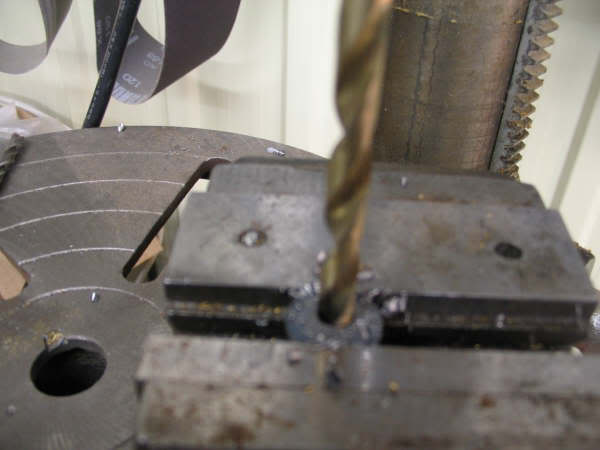
    Drilling out the hole...

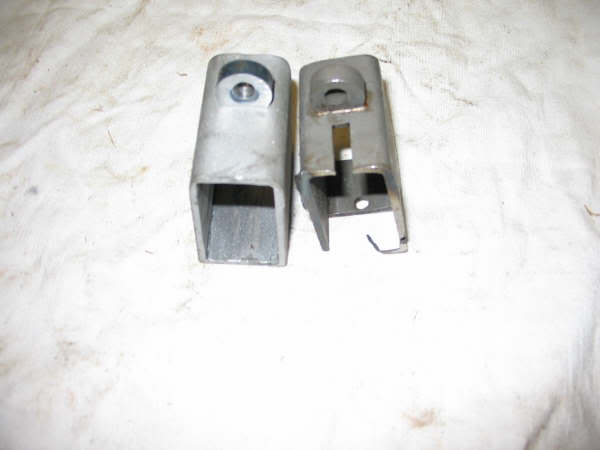
    Brazed on, an original on a demilled Longbranch mag housing is on the right.
    Союз нерушимый республик свободных Сплотила навеки Великая Русь. Да здравствует созданный волей народов Единый, могучий Советский Союз!

  12. #9
    Senior Moderator
    (Founding Partner)


    Site Founder
    Claven2's Avatar
    Join Date
    Oct 2006
    Last On
    08-24-2024 @ 08:11 AM
    Location
    Scandaltown, Ontario
    Posts
    3,242
    Real Name
    Ronald
    Local Date
    10-31-2024
    Local Time
    08:18 PM
    Thread Starter
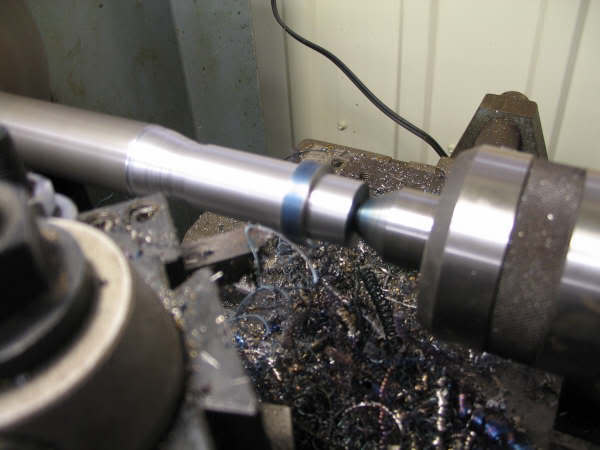
    Now we'll look at building a 18.5" non-restricted barrel with dummy suppressor for the non-restricted Sten we're building on the Britishicon Sten MkII kit.

    We start with a spare 9mm barrel blank we had lying about. There is some old corrosion on the outside of the blank, but the bore is perfect, and once the tube is bead blasted, parkerized and covered by the dummy suppressor, the cosmetic blemished won't be a factor.

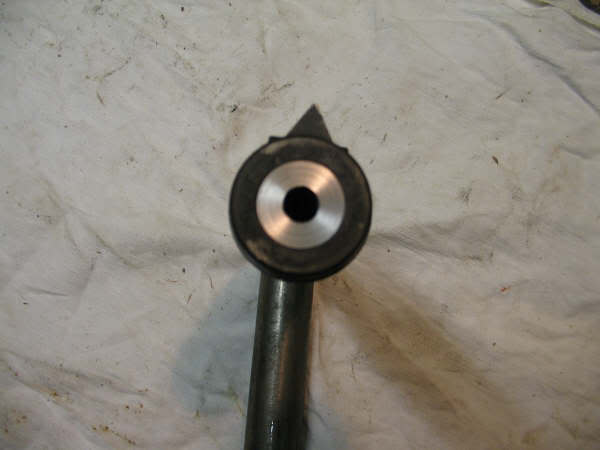
    Here we have the barrel retained by a barrel nut that will form the base of the suppressor. The suppressor will thread onto the Sten receiver in place of the ventilated MkII barrel nut/handguard. The serrations on the base of the barrel nut will be done later with a cold chisel.
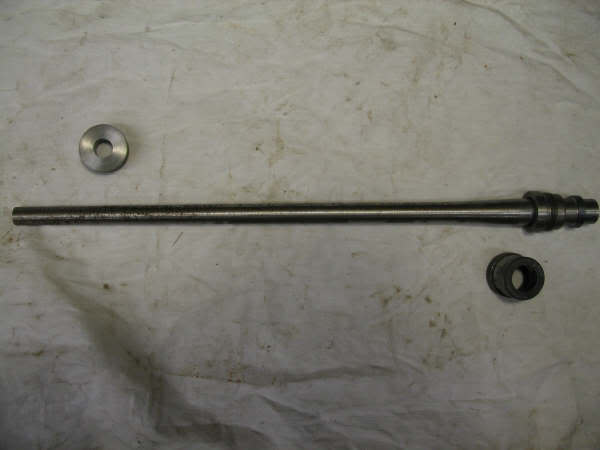
    For scale, note the muzzle bushing at the top:
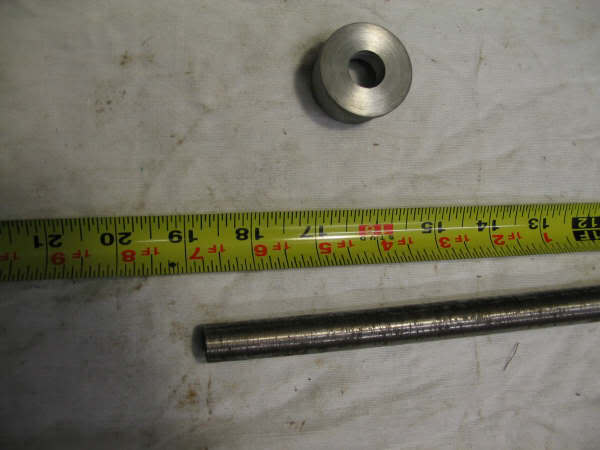
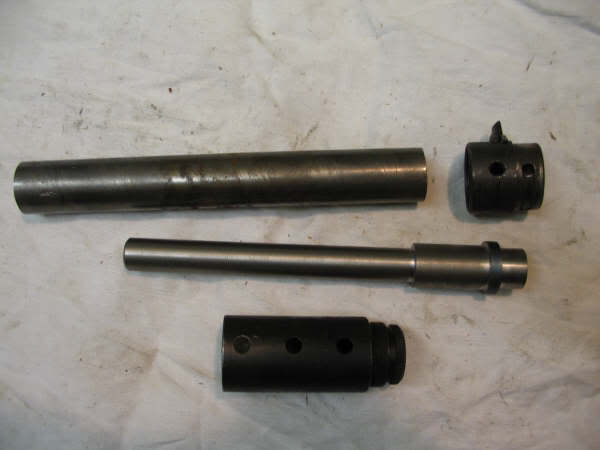
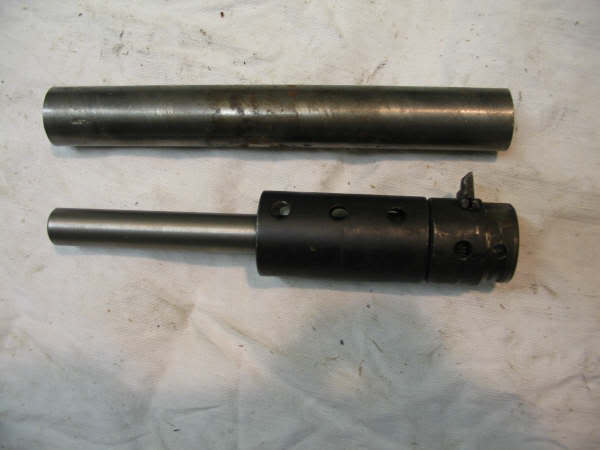
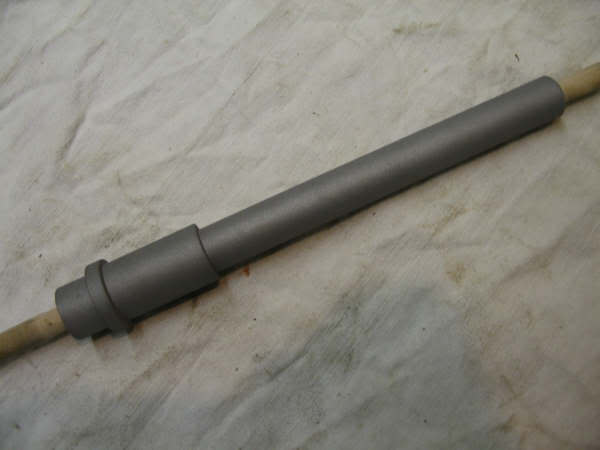
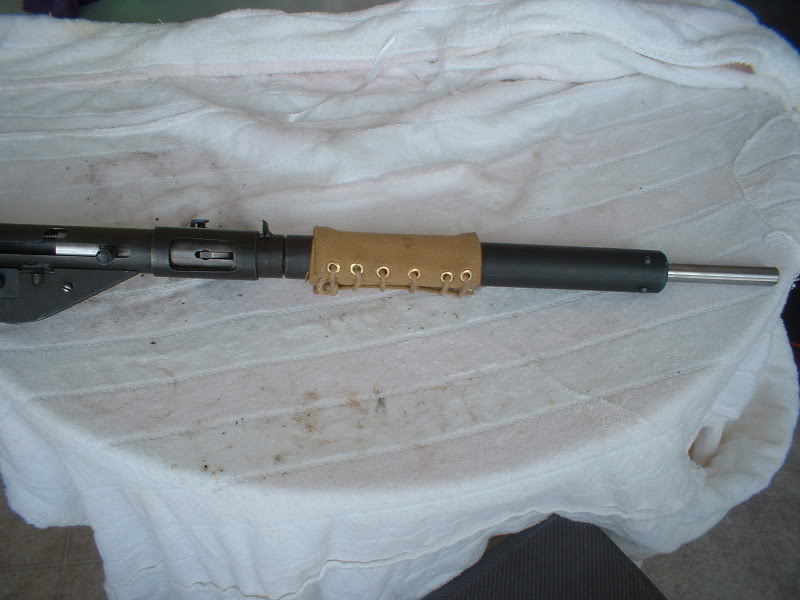
    And here we have the assembly minus the dummy suppressor tube. This suppressor is being built to copy the longer SOE Version of the MkIIS, not the standard tube which is much shorter.
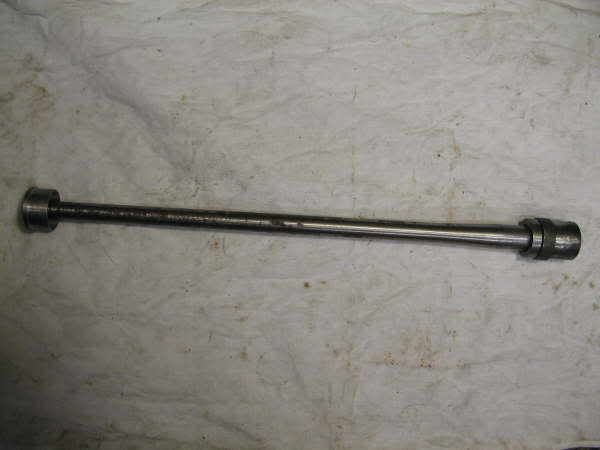
    The barrel is threaded into the sleeve that provides the shoulder for the barrel nut, as the original barrel outer diameter was too small to create a shoulder in the lathe. We used 3/4-16 threads, external ones cut with a lathe, internals with a tap. The threads on the collar are lathe cut.

    The barrel has been torqued into the sleeve quite tight so we may not install a transverse retaining pin - there would be no way to access a pin without a hole in the barrel casing (dummy suppressor), and its not needed to secure the threaded joint.

    To remove the barrel nut from a standard Sten barrel, you would use a punch through one of the rearmost holes.

    The body of the suppressor is just made with appropriate diameter steel tubing.
    Last edited by Claven2; 01-22-2008 at 06:20 AM.
    Союз нерушимый республик свободных Сплотила навеки Великая Русь. Да здравствует созданный волей народов Единый, могучий Советский Союз!

  13. #10
    Advisory Panel stencollector's Avatar
    Join Date
    Oct 2006
    Last On
    10-13-2024 @ 10:56 AM
    Location
    Shilo MB
    Posts
    795
    Local Date
    10-31-2024
    Local Time
    07:18 PM
    I usually heat up the old barrel nut to separate the threaded part from the short tube. I then recycle this onto the dummy silencer. On my version of the silencer, I went to about 14" length, and had the barrel stick out about another 4". I left the remaining barrel unfinished so it wouldn't stand out. Also, it reduced the weight at the nose a bit. I think you are going to find this gun to be a bit nose heavy.

    Last edited by stencollector; 01-21-2008 at 08:42 PM.

  14. The Following 2 Members Say Thank You to stencollector For This Useful Post:


Closed Thread
Page 1 of 22 1 2 3 11 ... LastLast

Similar Threads

  1. Building a match #4
    By sdh1911 in forum The Lee Enfield Knowledge Library Collectors Forum
    Replies: 6
    Last Post: 12-14-2008, 02:32 PM
  2. Dewat sten
    By mitchell in forum Other LMG/HMG and SMG Forum
    Replies: 30
    Last Post: 05-07-2008, 01:11 PM
  3. "Semi auto milsurps for sale" CGN Private Ad
    By Sigismund in forum Appraisals, Fakery, Dispute Resolution & Mediation Forum
    Replies: 6
    Last Post: 09-09-2007, 10:20 AM
  4. Inglis Canadian Hi Power S. Auto Pistol (Joe Salter)
    By Badger in forum Commercial Auction and Sale "Gossip"
    Replies: 0
    Last Post: 06-27-2007, 07:52 PM
  5. Johnson semi-auto
    By bill1 in forum Milsurps General Discussion Forum
    Replies: 13
    Last Post: 04-24-2007, 05:33 PM

Tags for this Thread

Posting Permissions

  • You may not post new threads
  • You may not post replies
  • You may not post attachments
  • You may not edit your posts