-
FREE MEMBER
NO Posting or PM's Allowed

-
11-30-2010 01:51 AM
# ADS
Friends and Sponsors

-
Advisory Panel


Repairing cracks -some comments
Good morning Joel!
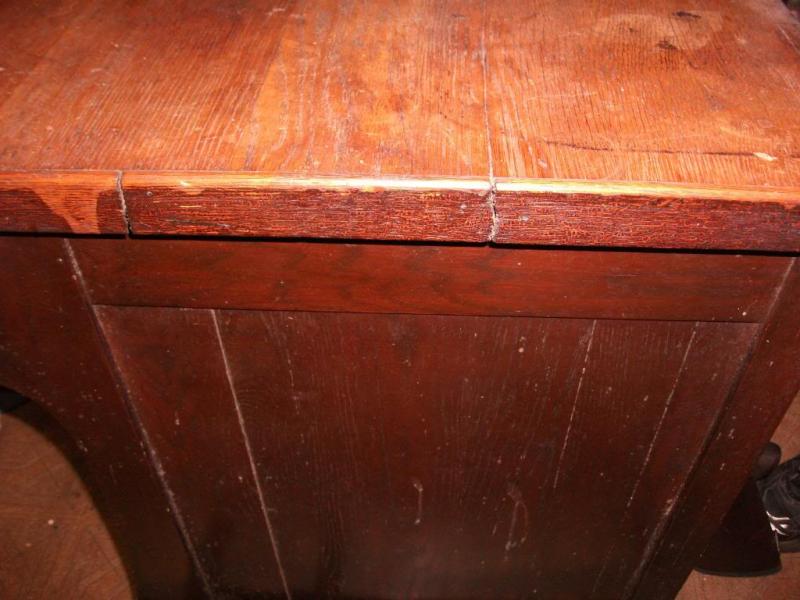
Claven2 has described elsewhere the classic method used by antique restorers - a mix of shellac and wood dust from the matching type of wood. This can only fill - it does not have any worthwhile strength in tension. I don't think it would be suitable for long cracks in a piece that is subject to flexing, and the RB fore-end is pretty whippy. He has also described the alternative we have with modern materials - to make the mix with epoxy resins, and this is then a repair that has considerable strength, provided that it binds to the wood.
The trouble with the cracks we see here is that they are very fine - and full of crumbs. At least, it was on the dining table I refinished recently - crumbs, old candle wax etc. etc. I had to scrape out the cracks as best I could, using a hooked tool, before even attempting a repair. I have no idea what the technical term is, but it looks rather like a very fine C-spanner (the tools used for tightening the pedal hubs on bicycles) with a wooden handle - in effect, a super-fine lock chisel.
Speaking as an old experienced packrat, you can probably find a scrap of steel or brass plate that you can file or grind into a suitable shape. Something even better, if you can find it, is a dental pick, as used by dentists to remove chalky deposits from your teeth.
Claven2 will give you the full story for the epoxy method, but I would like to note that I am on the track of something that is possibly better for thin cracks - melamine formaldehyde (melamine resin).
If that rings a bell, it is because it is indeed the substance that was used in the Great Chinese Milk Scandal, but it has a serious use in archaeology - for conserving ancient and especially waterlogged wood, such as wooden ships. I talked with one of the staff in the Mary Rose exhibition at Portsmouth about this - it turned out he was a muzzle-loading shooter, and we had a great conversation.
It is a watery (in fact, water soluble) resin that can be squirted into woodworm holes to stabilize the wood and stop the surface breaking out. And, of course, it will run into the finest crack. That would make it a good choice for crack repair, from the mechanical point of view.
On the other hand, it might penetrate too well, and cause problems at the surface. A cabinet maker and restorer who has professional experience with this material is going to provide me with a sample quantity and some advice on how to use it.
For now, I leave you with Claven2 to deal with the cracks in the tried and tested manner.
(Claven2 - have you any experience with melamine resin?)
"Hey Patrick,
How about we proceed with finishing the buttstock"
- Only after the cracks have been dealt with!

Last edited by Patrick Chadwick; 11-30-2010 at 04:28 AM.
-
-
-
Advisory Panel

Originally Posted by
killforfood

I’m not trying to make things look perfect but as good as possible without the obvious look of restoration.
- Correct, we agree there.
Originally Posted by
killforfood
I re-stripped the butt-stock but there appears to be little improvement on the stubborn stains. I think I can live with it. It’s all a part of where it’s been..
- Agreed. Take the butt in your arms, as if shooting. You will, I think, realize that the grime underneath the wrist is heavily ingrained from years of handling with dirty, greasy hands. It got like that from being used, not Bubba-ed.
Originally Posted by
killforfood
More than anything, this rifle has become a learning tool and I've enjoyed learning the proper repair techniques.
- And you now have the confidence, know-how and materials to do another. (He! He! He! - got you hooked) 
-
-
Re: Melamine Resin - I think this is what is used in products like StopRot, but no, I've not used it myself.
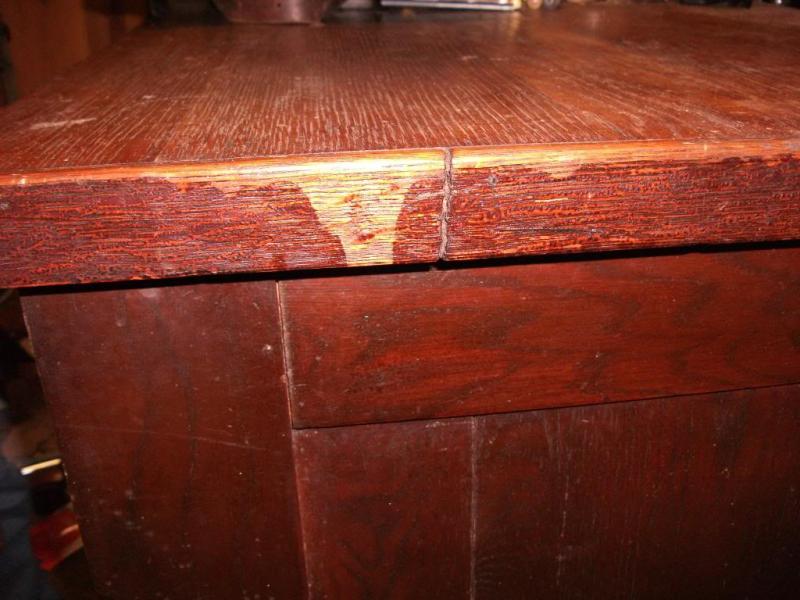
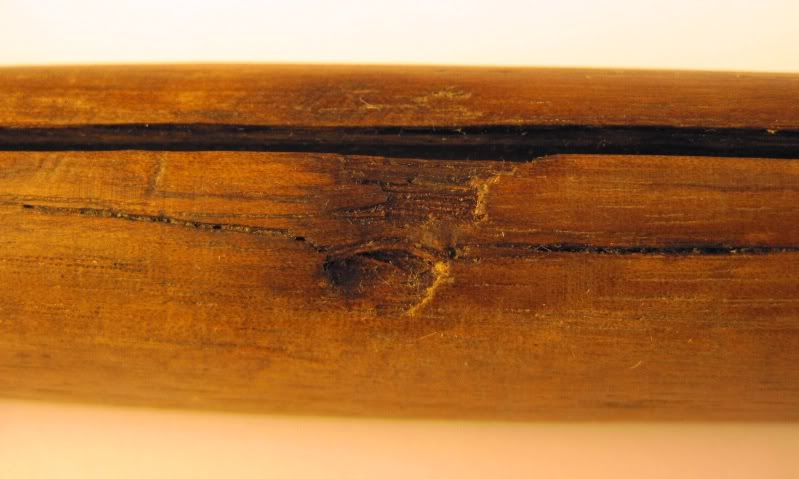
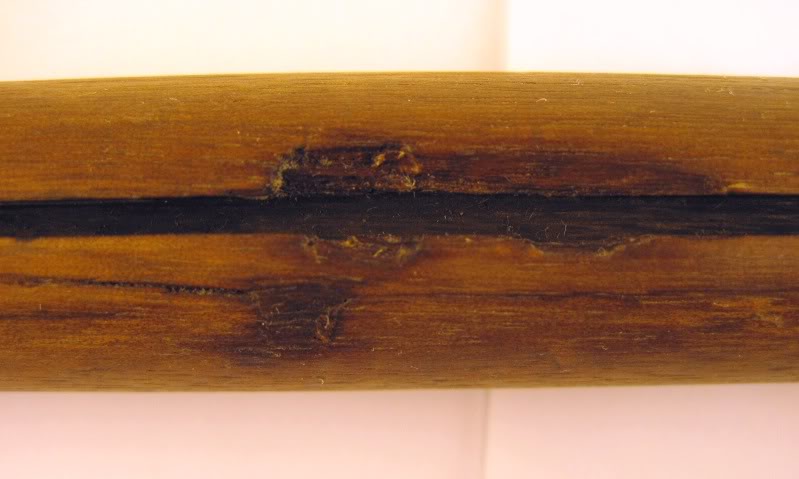
Looking at the above damage, firstly, if it were my rifle, I would not try to repair or diguise the impacted area at all, I would merely seek to stabilize the cracks. I also would not recommend the shellac repair as was rightly pointed out, it will likely dlex and crumble with use.
I think you really have two option here. But lets step back a moment and consider cleaning. The gel stripper you have been using is also available in a liquid form that is viscous enough to enter that crack - essentially it is watery acetone. I would get an old fine bristle toothbrush and scrub those cracks with watery acetone to try to get out as much dirt and crud as you can.
Now onto repair options. If you can spread the cracks enough (about 1mm in the middle), you can use the epoxy/sanding dust mixture. You will need to locate a piece of scrap walnut and use a belt sander to turn it into fine sanding dust. You buy a 2-part epoxy from the hardware store - ensur eyou get clear and that it is wood compatible. The package will confirm if it is or not. You won't be able to squirt it in, get a piece of flexible plastic and use it to trowel the epoxy into the crack while it's still wet and malleable. Don't overdo it as you don;t want it to squeeze out into the cleaning rod channel. Leave the eopxy proud until after it cures and then at about the 8 hour mark, shave it as close to the wood as you can with a razor blade or sharp exacto knife. At the 24 hour mark, file it as flush as you can without beating up the wood with a fine mill file and then finally sand flush with 400 grit wet/dry.
If you can't spread the crack by that much, I would go another way. Get some 5 minute setting cyano-acrylate glue. It's made by companies like Loctite and Krazyglue, etc. This stuff is VERY runny and will stick to even dirty or oily surfaces. squirt the glue over the crack and then gently flex the crack open and closed a few times to help it wick in. Let it set. It will not have filled the crack up to the surface, but it will be glued solid. Now take some sanding dust and with your fingers work it into any part of the crack that isn;t proud to the surface of the stock. Once done, dribble more CA glue over the sawdust and let it set. After 4 hours or so, use the razorblade to shave close to flush and then use 400grit wet/dry wrapped around a file or wodden sanding block to blend it to the surface of the stock.
As I said, this will structurally fix the fine cracks, but it will NOT repair the impact damage. IF you want to do that we are now into chiselled patching, but honestly, given the overall condition and age fo the rifle, I would leave it as acceptable. There is not enough material loss on that non-critical surface to attempt a patch repair in my opinion.
I strongly suggest you read through my Brunswick Rifle thread in the black powder sub-forum before you do anything else.
Cheers.
Союз нерушимый республик свободных Сплотила навеки Великая Русь. Да здравствует созданный волей народов Единый, могучий Советский Союз!
-
Thank You to Claven2 For This Useful Post:
-
Advisory Panel
Excellent advice. With that Joel, you should be able to deal with the cracks. When you have done the repairs, go over it again with the wood burnishing method, and then I for one would like to see a "dry run" assembly to give us long-distance helpers a morale boost. Tip: wipe it over with a rag moistened in natural turpentine just before taking the pics, to bring up the color and figuring of the wood!
Urgent P.S. Read the next posting before assembling for a "dry run" (lightly BLO stock before allowing oily metal in contact etc - please read it all first)-
Last edited by Patrick Chadwick; 11-30-2010 at 03:43 PM.
Reason: Urgent P.S.
-
-
Advisory Panel
Tips for Tonight
Two tips for tonight Joel:
1) I asked you several instalments ago to get some methylated spirits, and forgot about it. Now I remember why: you can try it on that handling grime underneath the wrist. Just dab a few drops on a rag and rub the area for a minutes or two. It will either work pretty quickly or not at all. This muck removal business is sometimes a bit of trial and error, as one doesn't know precisely what the muck is. The meths will dull the surface, but a wipe with the turpentine rag will instantly put the (temporary) shine back again.
2) You must get the rust out of the barrel channel as far as possible. One reason not to use aqueous substances is that they carry molecule-sized rust particles even deeper into the wood than they were before. So, just this once, you ARE allowed to use the 000 wire wool or even 400 grit sandpaper in the barrel channel (but do not let the wire wool or sandpaper come up over the top and round off the edges!!!), as no-one is going to look at the surface afterwards. Freedom from rust is the first priority here. You have seen on the rifle as it was dismantled, that the barrel channel is the worst place for rifles rotting and rusting away without the corrosion being noticed.
When you have done that, and repaired the cracks as far as makes sense as per Claven2, lightly wipe over the stock with the natural turpentine rag. Instantly wipe over again with a BLO-moistened rag, (NOT by pouring oil over the wood),. You should be more generous with the BLO in the barrel channel and other internal surfaces, but they must ALL be BLO'ed to stop oil from the metal parts getting into the wood. Wipe the metal parts thorughly, assemble and post the pics of the assembled rifle, and we will then see about the next stage.
That will involve 3 elements:
1) The proper oiling of the stock with linseed oil, and using the wood burnishing technique to make the "turpentine wash" shine permanent. Apart from the pleasing appearance, the BLO is vital to protect the wood, and must be applied before you assemble the rifle for shooting - which means that it will be exposed to oil, grease and BP residues. A real deep shine takes consdierably longer.
2) Deciding whether or not to go for a real shooter - I would say yes, but that means a commitment to spend some money on brass and bullets - and learning about black-powder reloading. No problem as long as you ignore some of the BS that gets passed around the clubs and listen to Grandpa Patrick, who has already made all the mistakes so that you don't have to.
Seriously, I could write a book on How Not to Do It. I apologize for the arrogant tone of this statement, but if you do as I recommend, you will be very close to an ideal load on the first try.
3) If yes to 2) the barrel must be recrowned. It will shoot as it is , but probably badly, and you would be disappointed.
4) Have a long, hard think about the final metal finish - leave as is and just lightly oil it - bright finish - or "blued" (blackened really). If you go for that, you will need the right materials. I will only go into that if you say "yes", as that is going to be another section which I shall have to compose very carefully. And as in the rest of this operation, the aim is to produce a surface that does not look crassly new.
What? you still haven't fixed the cracks yet! 
Sorry, I 'm holding you up!
G'night
Patrick
Last edited by Patrick Chadwick; 11-30-2010 at 03:49 PM.
-
-
-
Thank You to jmoore For This Useful Post:
-
I would further amplify that for removal of tough rust crusties in the barrel channel, get an old 7mm or .30 cal piece of rifle brass and squeeze the case mouth into a flat scraping tool. sharpen that with a file and use it to chisel out the rust crusts - works really well with minimal impact to the wood and you can do final cleanup with extra-fine steel wool.
Союз нерушимый республик свободных Сплотила навеки Великая Русь. Да здравствует созданный волей народов Единый, могучий Советский Союз!
-
Thank You to Claven2 For This Useful Post:
-
FREE MEMBER
NO Posting or PM's Allowed
Sorry, no pics tonight.
I'm one of the fortunate ones with a job, and a little bit too much overtime lately.
When the equipment breaks down, I get no rest (day or night) till repairs are complete.
Here's my biggest baby.
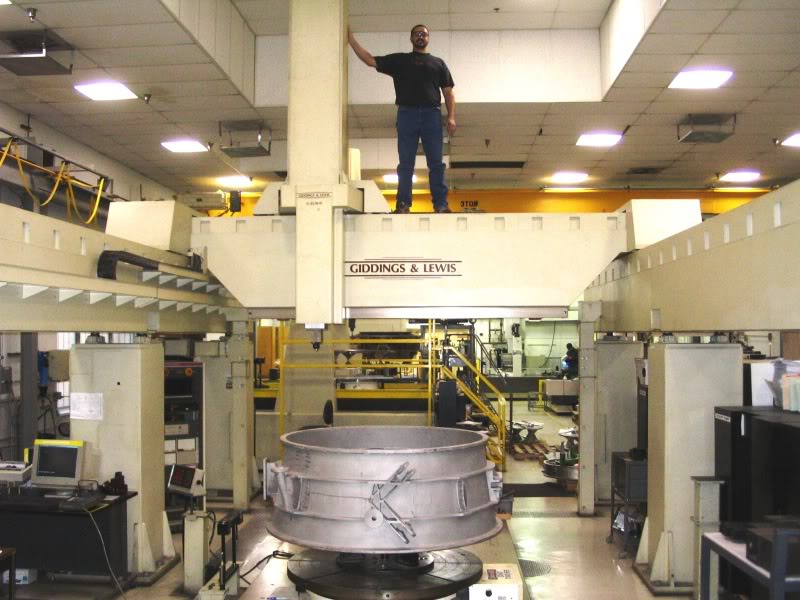
Patrick, you may recognize the “Giddings and Lewis” name as being previously from your old neck of the woods when it was originally called “Sheffield”. Another world player from your old stomping grounds is Renishaw. We use a huge amount of their precision measuring products.
I spent a small amount of time tonight cleaning up the barrel channel (per instructions of course) except that I deviated slightly from your instructions Claven2 in that I found an un-flattened cartridge mouth worked good at scraping the crud out of the channel.
I do like making little tools by hand but honestly I was a bit tired… ok, feeling lazy.
Speaking of which, I’m tired and will catch you guys tomorrow.
I don’t have any chunks of donor walnut to make sawdust out of but I’ll dig around in the garage and see what I can come up with for a close match.
Good Night
Joel.
-
If you don't have walnut at home, your local gunsmith probably has a bin of cracked stocks he uses for repairs. Asking nicely would probably get you a small piece for nothing 
Союз нерушимый республик свободных Сплотила навеки Великая Русь. Да здравствует созданный волей народов Единый, могучий Советский Союз!
-
Thank You to Claven2 For This Useful Post:


 Register To Reply