-
Legacy Member

It looks great, bluing is not necessary it looks like a well used and well preserved gun - as it should. 
-
-
12-02-2010 09:25 AM
# ADS
Friends and Sponsors

-
From the photos so far, gew8805's comments apply quite well!
-
-
-
Advisory Panel


Refurbishing an Argentine RB - Part 7
Good evening Joel, and thanks for the pics.
Thanks also to all commentators for their opinions and advice. I concur 100 %. That rifle is now looking so good that a rebluing would be out of place.
After all, our aim, stated at the beginning, is to refurbish (NOT restore) the rifle to the condition it would have had if it had been probably cared for over the years, not to make it look like new
But I would be curious to see whether the meths actually removed any grime around the wrist. As mentioned, this business is a bit of trial and error. Whatever the result, you are now almost there - as far as looks are concerned.
Returning to the "taking stock" list of actions to be undertaken, and eliminating those that have been dealt with satisfactorily, we are now left with:
5) "The is rust is pretty bad, especially on the end of the barrel."
RUST FIXED but barrel needs recrowning if you want a shooter.
6) "Also the cleaning rod and sling are missing."
Not yet dealt with. I can't help you with that from here.
We will now undertake:
Finishing the stock with BLO
I did say that the re-assembly of the rifle that you just carried out was going to be a dry run - and very good it looks too!
To make a clean job of finishing the stock and to avoid marking the metal parts with the burnishers/scrapers you have (presumably) now made, you will have to disassemble the rifle once more. But as you have seen, the RB is an easy system to dismantle and reassemble.
The original reason for applying BLO to stocks of military rifles was not to make them look pretty, but to preserve them from the influence of damp. Stocks were processed by being immersed in tanks of linseed oil, maybe warmed for faster and better penetration of the wood, for as long as was considered necessary - days, weeks, who knows? Then the were dried again, for as long as it took.
Very, very slowly, over years, decades and centuries, the BLO dries out and hardens, and reaction with the air turns it into something like linoleum. This means that there is still a considerable amount of deep sealing in the wood, even though the surface may have degenerated a bit and that deep sealing is uneven.
Treatment of such wood with aqueous substances, of which caustic soda is about the worst, destroys that remaining sealing right through the wood and introduces moisture into corners which have been dry for over a century, which is why I consider such treatment to be barbaric Bubbaring.
We have avoided that, but still have to restore the BLO sealing of the wood for all surfaces, not just those which are visible - the BLO is protection, not decoration!
You have already lightly BLO'ed the woodwork for the dry-run pics.
When you dismantle the rifle, just use the burnishers on the wood. it will start to get smoother, and you will probably see a slight moistness appearing on the line where the burnisher is pressing as you move along the wood (always along the grain and "downhill" - remember the bird pressing its feathers).
This tells you that the BLO has not yet dried out. Continue the burnishing until you have gone over the entire surface, round all curves. I recommended at the start that you make several burnishers from the diskette covers. I hope you did so, but you have not yet confirmed it. If you have several of them, you can pre-curve some for the sharper curves, where finger-flexing is not sufficient.
Eventually you will become bored with this. No trouble. Just wipe over the rifle with a piece of linen, and you will begin to see the start of a sheen on the surface of the wood, rather than a shine. It will never look like the top of the table on which it was resting for your pics in the last post, and should not do so.
Put it away and wait a couple of days. Try again. If the moist line does not appear this time, then you can ad a tiny bit more BLO. But do not put it straight onto the wood. Rather use a cloth folded into a polishing pad. Moisten the pad with natural turpentine, then pour a couple of drops onto the pad and rub them lightly all over a large area. The aim is NOT to soak the wood with BLO in any one spot, as that spot will then take an eternity to dry. When you have lightly oiled the wood, leave fore a few days and burnish again. Repeat until you cannot stand it any more or are satisfied with the result.
Basically what you have done on the wood is that which would have been done in high-quality furniture manufacture in previous centuries. Except that the furniture maker would not have applied endless thin coats of BLO, but would, after the grain pattern - the figuring - of the wood had been fired up enough by the linseed oil, go over to the spirits/shellac mix used for shellac polishing.
We are relying entirely on the BLO for the finish on the rifle, so it is necessary to apply several thin coats instead, and that takes a lot of time. Impatience will lead to a sticky finish that will not dry satisfactorily. I am fortunate in having a small bottle of BLO that is more than 20 years old. It runs like thin honey, and if a drop falls on the wood, it makes a sticky patch that has to be washed off with turpentine. Your BLO will hardly be of such a vintage, and you will have to develop your own "feel" for how much the pad needs to be moistened with turpentine, and how much oil to apply in one go. As a guide, when you wipe on the oil, there should be a shine of turpentine which disappears after a short time. The turpentine helps to carry the BLO deep into the pores of the wood, and as the surface builds up over weeks (yes, I did write weeks) you use less turpentine, as you do not want to wash off the dried oil that is already there.
If you want a fine surface with that deep sheen that otherwise only appears after decades, you have to have the patience to do it this way. In case of doubt, take another look at The Mahdi. Your stock should look like that.
If you want a wall hanger, then at some stage, when you are satisfied with the wood surface, you will simply re-assemble the rifle and....
...hang it on the wall?
I hope not! 
I hope you want to shoot with it.
If you say yes, I will continue this series to describe how to deal with the muzzle, and how to reload for BPCR rifles in general, and your RB in particular.
End of Part 7
Last edited by Patrick Chadwick; 12-02-2010 at 12:04 PM.
-
Thank You to Patrick Chadwick For This Useful Post:
-
FREE MEMBER
NO Posting or PM's Allowed

I need to get caught up on some of the progress we’ve made.
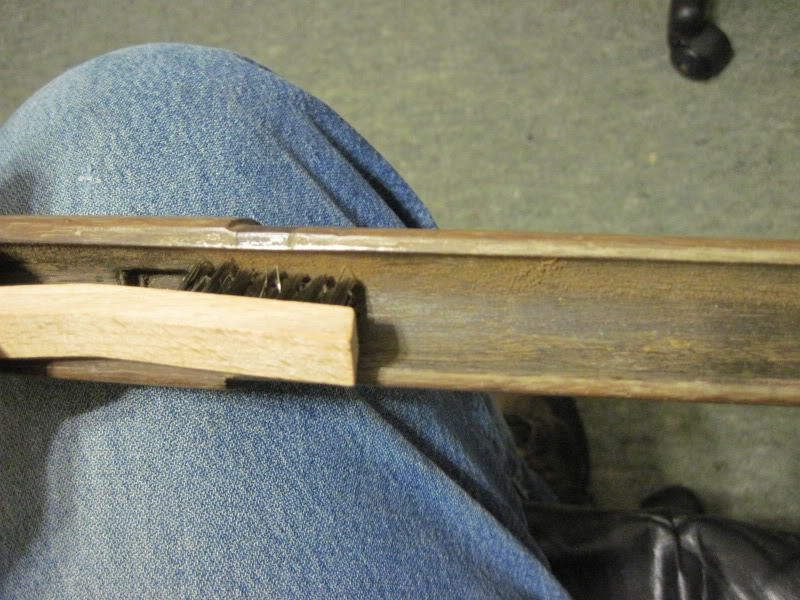
The Barrel channel needed some final cleanup. Claven2 provided instructions for making a scraper using cartridge brass but I was just too tired to make one the other night and used the open mouth of a brass cartridge. It worked ok but I can see where a selection of cartridge chisels will come in handy on future projects. OOPS! Did I just infer I may have other projects in my future?

Some of the grunge was really imbedded and I had to resort to using a stiff stainless brush. I figure you guys will give me a pass on that since is not of cosmetic concern.
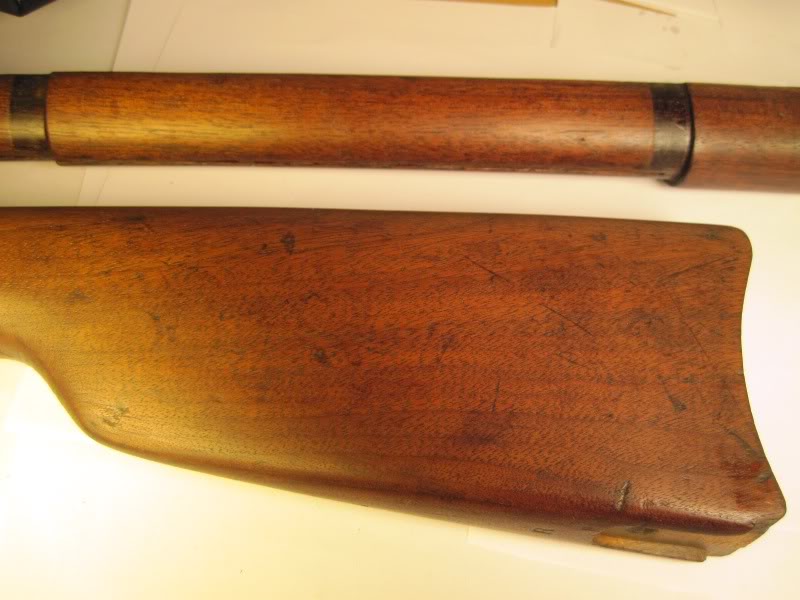
The things you find with a little cleaning. What’s this… Another acceptance stamp?
For pre turn of the century, I am impressed with how sharp and precise the inletting is.
There’s actually some wood underneath all that gunk.
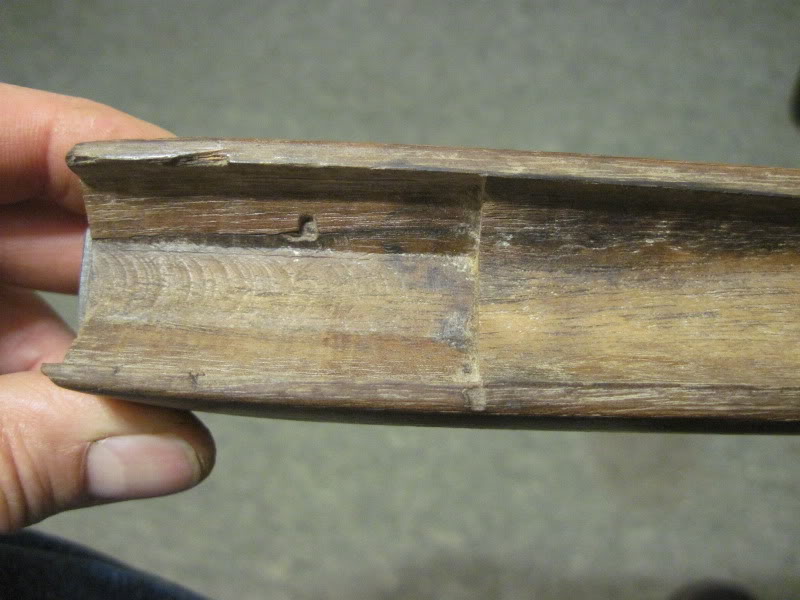
OK next we do some crack repair.
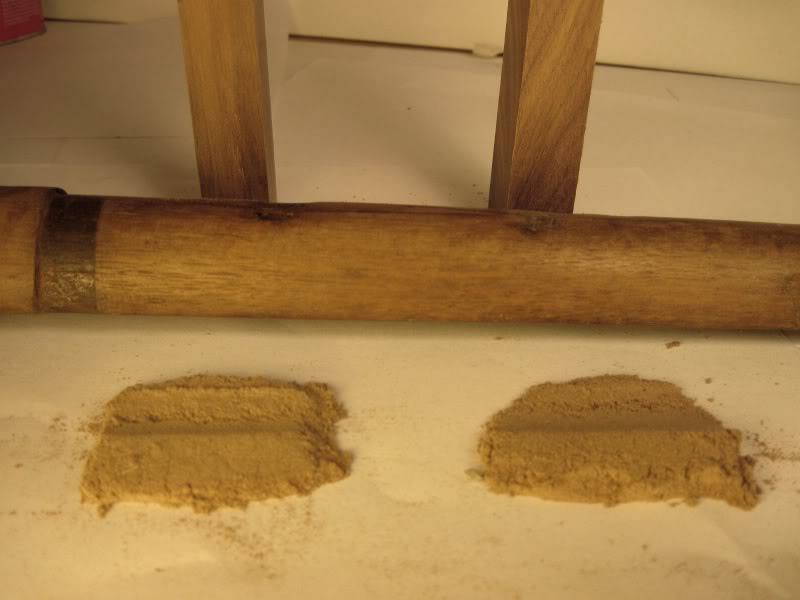
My good friend, the cabinet maker fixed me up with a couple pieces of walnut to sand into dust. The belt sanders dust collector bag worked great for collecting dust samples.
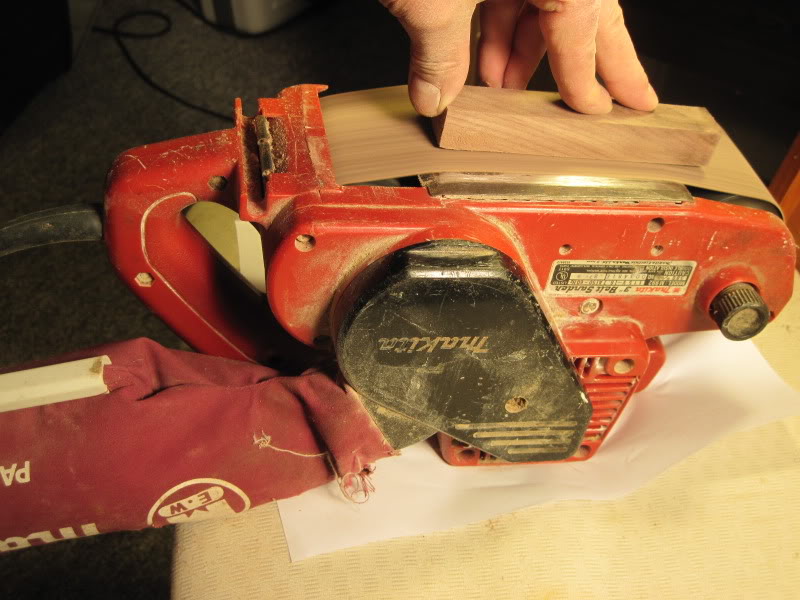
It looks like a good match but hind sight being 20/20 I will try to match the dust color to the final finish color. When I put some oil to the wood, it changed dramatically but the patched area did not change.
The 5 minute epoxy is a little bit on the fast side for my comfort but it’s what I had on hand. Fortunately my basement was on the cool side and it ended up not being a rush job.

I was able to pry open the bigger crack and give it a good cleaning
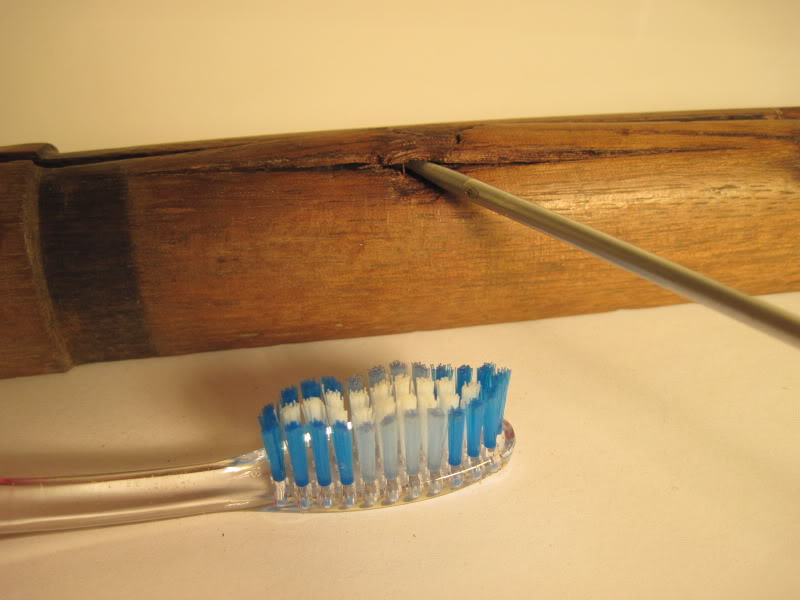
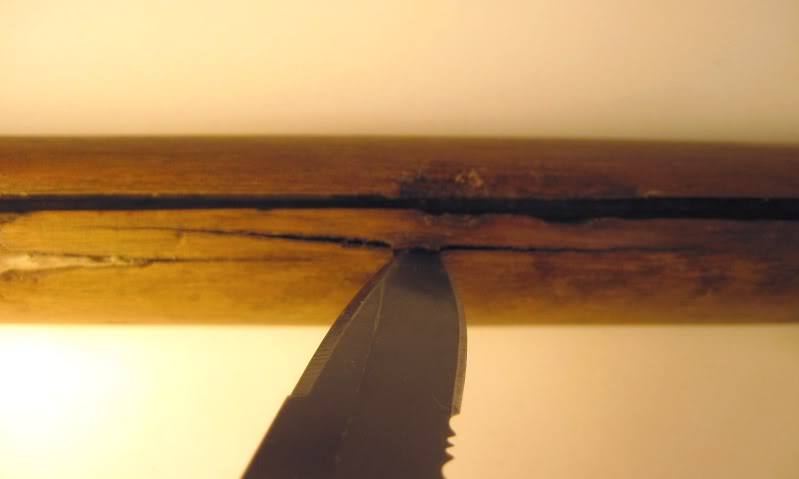
The small crack was quite a bit more stubborn but I got brave and managed to wedge it open with a small knife blade.
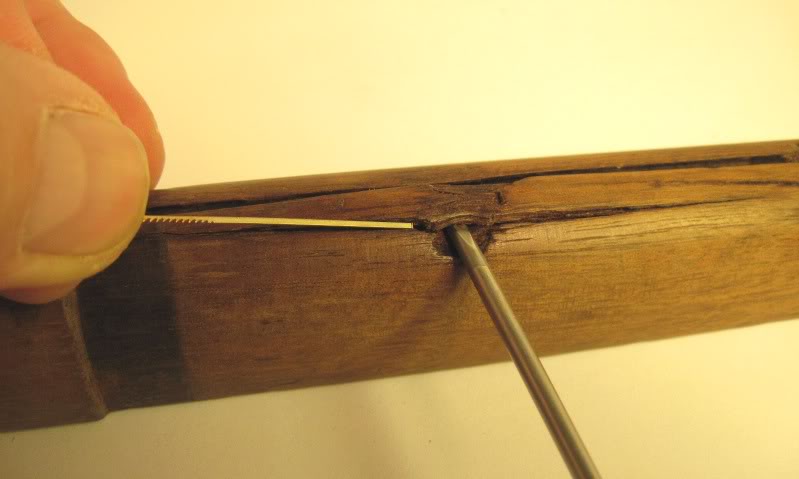
With 5 minute epoxy time is of the essence. There would be no time to sort out procedures after the two parts were mixed. With that in mind I went through a dry run of spreading the epoxy. I scrounged around and came up with a very fine jewelers blade that would fit in the small crack and do a good job of spreading the epoxy.
I wasn’t sure how much dust to add so I used the “that looks about right” method.
That looks about right.
As suggested, I left the filler proud of the wood.
Not bad for my first crack repair. I will need some advice to match the patch color with the final wood color. As mentioned before, with the application of oil the wood changed color but the patch did not.
Patrick,
I’m positive you said something about putting a touch of BLO on the stock to protect it from the oil on the metal parts. OK DON’ SHOOT ME but I probably put on a little more protection than you had in mind. Doesn’t that look pretty though? Sorry, couldn’t help myself.
Now, on to some assembly...
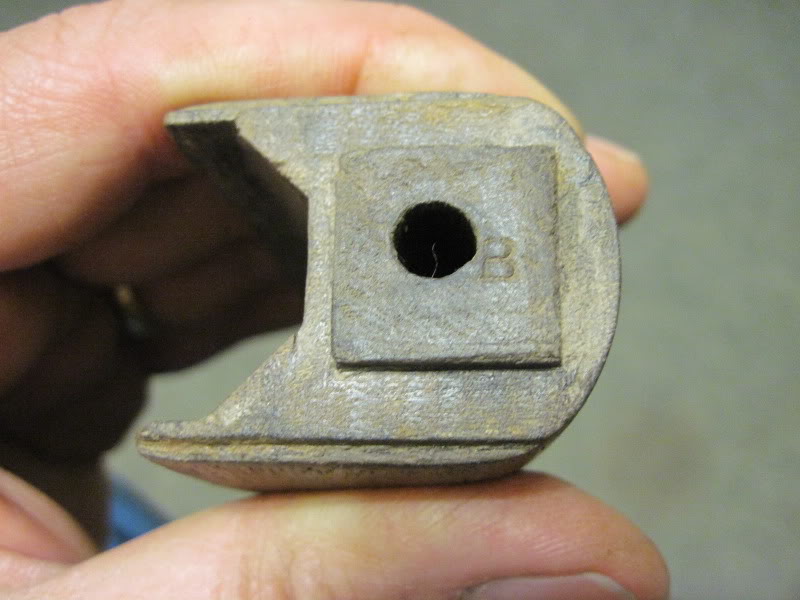
The action went together without a hitch except for a problem with the ramrod stop.
I installed it upside down and this causes interference with the front guard plate screw.
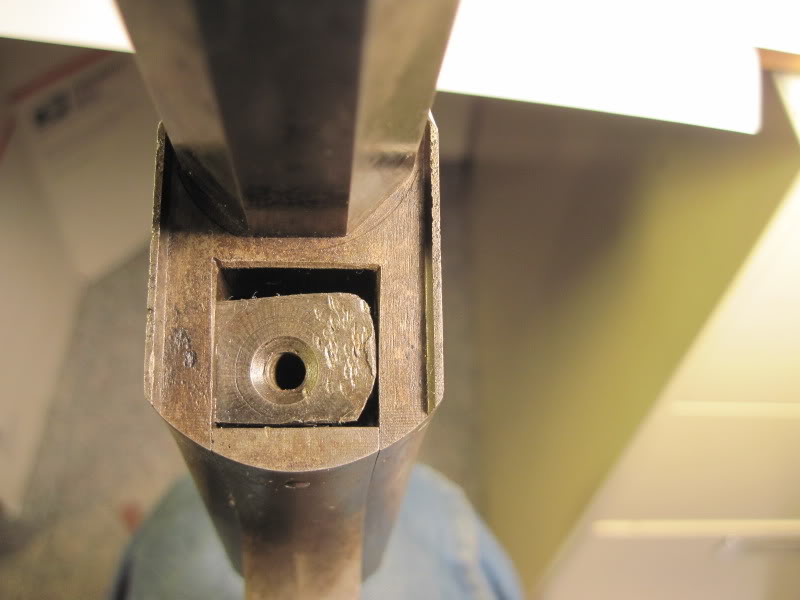
The guard screw will go through but only by pushing the ramrod stop out of alignment.
Now I know why my stop is so dinged up. Apparently somebody made a failed attempt at forcing it back into the alignment slots.
Here you can see the interference caused by simply inserting the stop upside down.
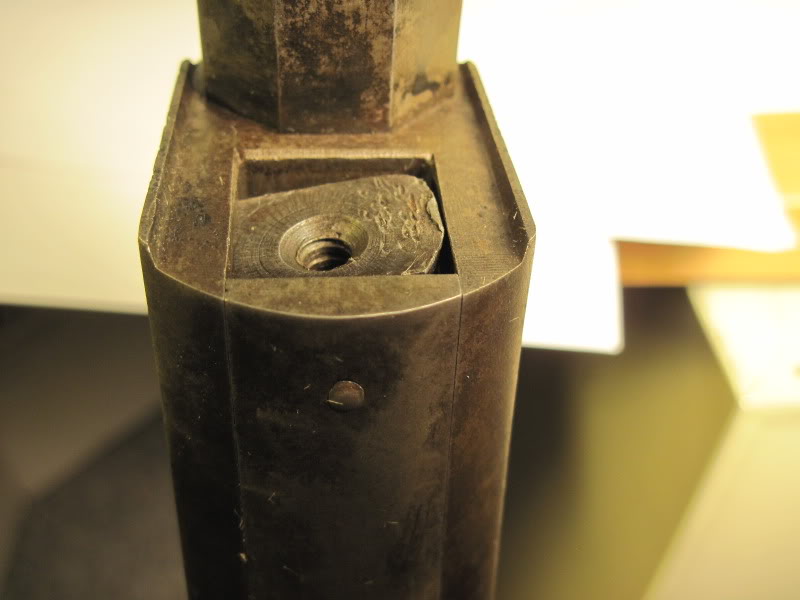
I caused some minor thread damage by trying to tap the screw through. I dressed the nicks with a small file and all is well.
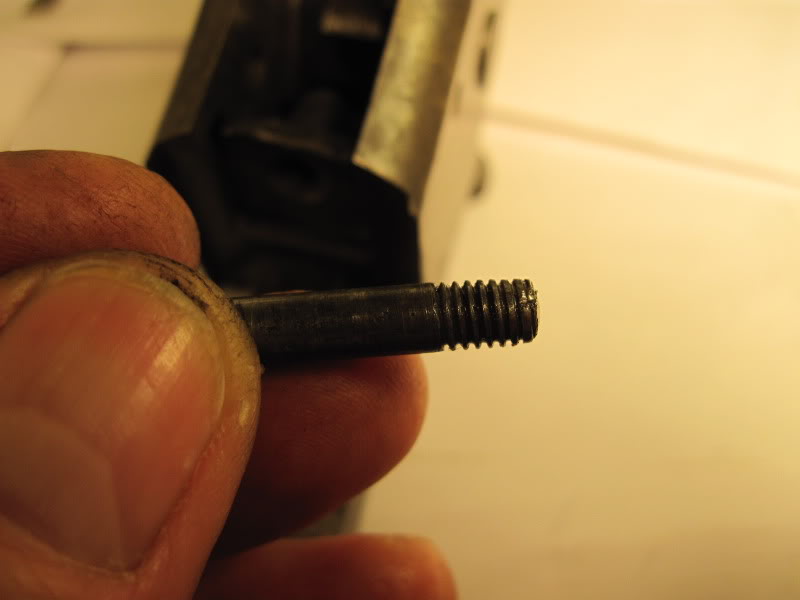
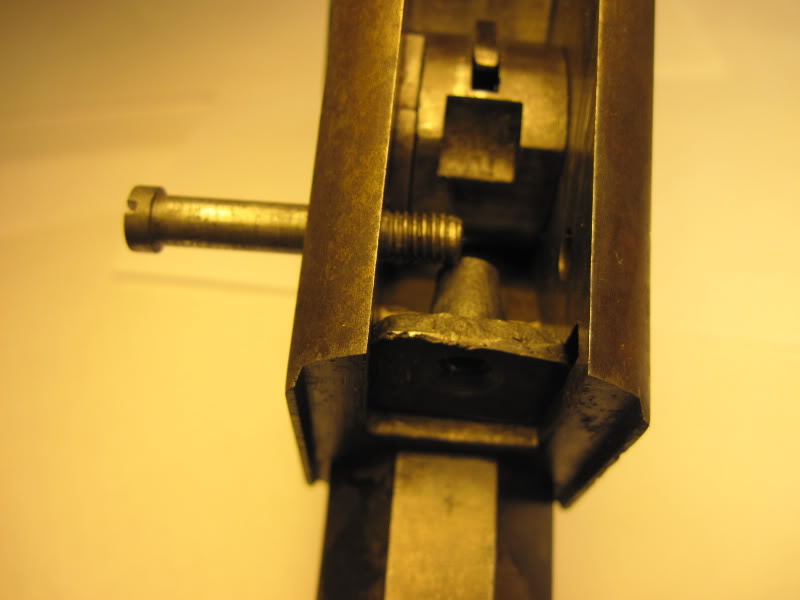
This is the proper attitude. Notice the threads are closer to the barrel and will now allow the guard screw to pass over with adequate clearance. Hopefully my admitting to these small mistakes will help others avoid my pitfalls.
Sorry, I just had to post this one again. Seeing that sight all free of rust and standing up proud just looks pretty to me.
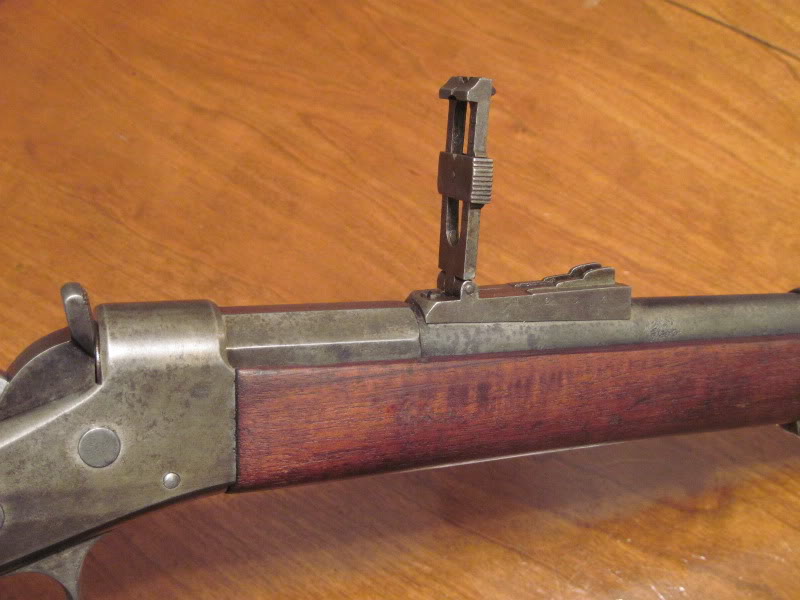
We sure have come a long way and I want to thank all of you guys for your helpful input and especially for Patrick’s detailed instructions. Speaking of which, I’m ready and waiting for the next installment...
Patiently of course,
Joel.
Wow Patrick, you’re fast. Before I can even post this, you already have the next set of instructions up.
Last edited by killforfood; 12-02-2010 at 12:22 PM.
-
Can you show a pic of the repair after oiling? Depending how it looks I might have a cure for that too 
Союз нерушимый республик свободных Сплотила навеки Великая Русь. Да здравствует созданный волей народов Единый, могучий Советский Союз!
-
-
One item of interest is in centuries gone by, troops did not have abrasives available to them and instead used to "bone" their stocks and "burnish" their barrels before being reviewed by an officer. Burnishing in this context was the use of brick dust or hearth ash mixed with spit rubbed into the metalwork with the tip of the cleaning rod. This effectively was like using abrasive polish on the metal to strike it bright and smooth. This is why old muskets rarely have sharply detailed proof stamps left on the barrels
The boning, on the other hand was done usually with an animal bone, often a rib bone. It was drawn along the wood, with the grain, to smooth it out and compress the wood fibres into a more tightly grained surface. This coupled with linseed or flaxseed oil is what gave us those wonderfully smooth finishes on old pre-1900 gun stocks.
Last edited by Claven2; 12-02-2010 at 02:35 PM.
Союз нерушимый республик свободных Сплотила навеки Великая Русь. Да здравствует созданный волей народов Единый, могучий Советский Союз!
-
The Following 3 Members Say Thank You to Claven2 For This Useful Post:
-
Advisory Panel

Originally Posted by
Claven2

The boning, on the other hand was done usually with an animal bone, often a rib bone. It was drawn along the wood, with the grain, to smooth it out and compress the wood fibres into a more tightly grained surface. This coupled with linseed or flaxseed oil is what gave us those wonderfully smooth finishes on old pre-1900 gun stocks.
Of course, these days you just can't get the rib bones...
Seriously, the diskette cover burnishers have the advantage that they can be curved to fit the wood and will not leave "flats" or grooves on the wood, as anything too rigid will tend to do.
Now I know where the expression "to bone up on..." comes from!
Joel: you've got a century of "boning up" to do on that wood!
Last edited by Patrick Chadwick; 12-02-2010 at 02:59 PM.
-
-
Advisory Panel
Joel, don't forget you have to oil ALL the wood surfaces. Including that end grain on the fore-end with the stamp. Take a look at old logs, and you will see that they usually split first at the ends. Not because the wood is weaker, but because it dries out faster at the ends, shrinks more, and splits because the wood further from the ends is a bit "fatter", because of the higher moisture content.
And if you were a bit generous with the BLO on the first run, because of the understandable eagerness to finally see some nice color in the wood - well that just means more "boning up" (Claven2, thanks a lot for that) until the wood has taken up all the oil - i.e. you no longer see oil coming to the surface along the pressure line of the burnisher. As long as you see that - no more oil.
While you are thus usefully occupied, you can ponder the answer to my question - Do you want a shooter? (Please say yes!)
Last edited by Patrick Chadwick; 12-02-2010 at 03:31 PM.
-
-
FREE MEMBER
NO Posting or PM's Allowed
Originally Posted by
Patrick Chadwick
Thanks also to all commentators for their opinions and advice. I concur 100 %. That rifle is now looking so good that a rebluing would be out of place.
Agreed… As I said from the start I will only proceed with what you guys deem as correct and proper for this rifle.
Originally Posted by
Patrick Chadwick
But I would be curious to see whether the meths actually removed any grime around the wrist.
The stains remain but are mellowed enough that I’m not bothered by them.
Time for a side note;
Back in my younger days I paid to have a large Mule Deer head mounted. I was really proud of that buck. There are a couple flaws in the mount though. He was shot in some very rugged country up in the Eagle Cap Wilderness. I had to get him down to a flatter area to proceed with gutting and in the process he fell off of a large drop off. Unfortunately a tip of an antler was broken off. Also in the process of caping out that big Roman nosed buck, I accidently sliced through the hide around one of his cheekbones. Both of these flaws are very apparent on the mount but I wouldn’t change it for all the world. Every time I see that spot on his cheek where the knife slipped through I’m reminded of how proud I was to have caped him out all by myself. When I see that busted off tine, I recall how dangerously steep that mountain was and how he began sliding down out of control when I tried to move him. It was a wild ride to the shelf but I managed to hang on even despite those antlers whipping around, trying to impale me. Yah I think the stains are ok. They’ll remind me of all our efforts to get this far .
.
Originally Posted by
Patrick Chadwick
I recommended at the start that you make several burnishers from the diskette covers. I hope you did so, but you have not yet confirmed it. If you have several of them, you can pre-curve some for the sharper curves, where finger-flexing is not sufficient.
I just de-commissioned four more diskettes and will make a nice assortment of burnishers. I’ve found that these diskette covers vary in thickness and stiffness. It will be interesting to see how this expands their usability. I'm also going to hammer out some cartridge chisels like Claven2 suggested.
Originally Posted by
Patrick Chadwick
To make a clean job of finishing the stock and to avoid marking the metal parts with the burnishers/scrapers you have (presumably) now made, you will have to disassemble the rifle once more. But as you have seen, the RB is an easy system to dismantle and reassemble.
Yah , I think I’ve already covered about the only dumb mistakes that could be made .
.
Originally Posted by
Patrick Chadwick
Eventually you will become bored with this. No trouble. Just wipe over the rifle with a piece of linen, and you will begin to see the start of a sheen on the surface of the wood, rather than a shine. It will never look like the top of the table on which it was resting for your pics in the last post, and should not do so.
I’m fine with that. I’ve never been a fan of the “Weatherby look” .
.
Originally Posted by
Patrick Chadwick
If you want a wall hanger, then at some stage, when you are satisfied with the wood surface, you will simply re-assemble the rifle and....
...hang it on the wall?
I hope not!
I hope you want to shoot with it.
Patrick, I would be derelict in my duties to stop now. Of course I want to shoot it!
We can cover this aspect some more in the future but I have been reading everything on the web that I can find about it. Apparently these rifles typically have very long throats and some folks have even resorted to making they’re own longer than standard brass from .43 or .44 basic. They reported much improved accuracy for their efforts. Another common issue is rim thickness affecting proper head spacing. Some of the brass that is made from .348 Winchester can be problematic because the rim is too thin. I will worry about all of this later when you are ready to give advice.
Pass the BLO
Joel.
-
Advisory Panel
Originally Posted by
killforfood
Apparently these rifles typically have very long throats and some folks have even resorted to making they’re own longer than standard brass from .43 or .44 basic.
Although it is common for old military rifles to show the "deep throat" syndrome, the throat on your RB is good. On the early Argentine Mausers the throat was very long. That is a completely different situation, and I have described the problem and its solution more than once on other forums. You have no problem in this regard
Originally Posted by
killforfood
They reported much improved accuracy for their efforts.
Correct. Once more, I plead with you to ignore any well-meaning advice from people who have no experience with BPCRs at national competition level. It is NOT the same as reloading for smokeless powder but using a different kind of powder.
We will go into this in detail when the time comes.
Originally Posted by
killforfood
Another common issue is rim thickness affecting proper head spacing. Some of the brass that is made from .348 Winchester can be problematic because the rim is too thin.
So don't mess around with reforming brass. Just "bite the bullet" and get a pack of 20 properly made cartridges for 43 Spanish. Yes, they will be relatively expensive. But they will last and last and last... Because once they have been fired in your rifle for the first time, they will only be given just enough neck sizing to hold the bullet.
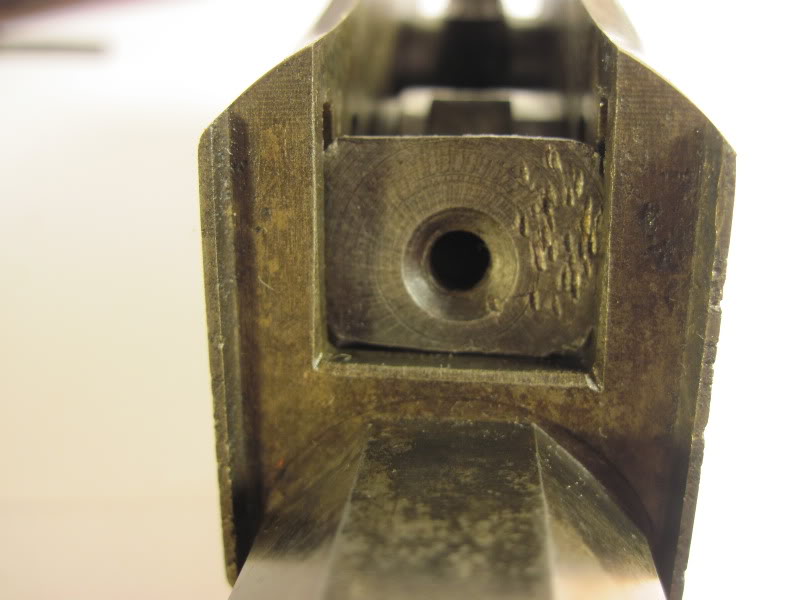
Although I am reasonably sure that your RB is chambered for 43 Spanish, someone might spook you with stories of the 43 Reformado. If you look on P. 117 of the one book you must get - George Layman's "Remington Rolling Block Military Rifles of the World" - you will see the two cartridges side-by-side.
The 43 Spanish has the "classic" BPCR shape as found in the Mauser 1871 cases - thick rim, gentle shoulder, about 2/3 of the way up from the base. The 43 Reformado is a kind of neckless wonder achieved by reaming out the 43 Spanish chambers almost to the mouth and making a cartridge to fit. And so if anyone needs it, they simply take a 43 Spanish and fire-form it in the Reformado chamber.
I believe I can see the shoulder in the photo you posted of the chamber, so I reckon it is 43 Spanish, but you must check that for yourself. With shoulder = Spanish, without = Reformado.
I see I am sliding into the reloading thing - I really must stop. We need to fix the muzzle first.
G'night
-


 PM
PM


