-
Legacy Member

New (to me) Kar98k
Hello all- Well it has finally happened again and I have stumbled upon something new to take my money. I have found on consignment at a semi-local gun shop an all matching vet bring-back Kar98k . Duffle cut, decent (but not great as of yet) bore, and with standard dings and dents. It's a 42 code, dated 1940, Mauser factory if I remember right. Lam stock, nice proofs all over, no cleaning rod, missing band spring, and a somewhat bent-up forward band. Since this one is somewhat of a project, I will be posting pics soon with the restoration, minimal though it will be. I have all of the missing parts on hand in my spares bin so it will just be a matter of hammering out those dents in the metal band and repairing the duffle-cut. Now I have a few ideas on ways to accomplish this, but I'd like to hear what some of you all think since this is my first duffle repair. I will go ahead and say I got this rifle at a VERY fair price and believe I would have gotten it cheaper if it wasn't on consignment. Very happy no matter what so here we go! I will be posting pictures as we go.
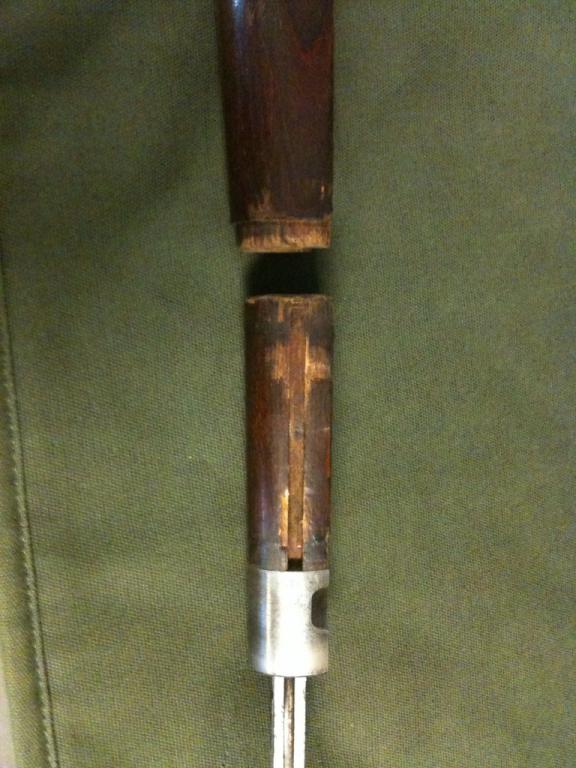
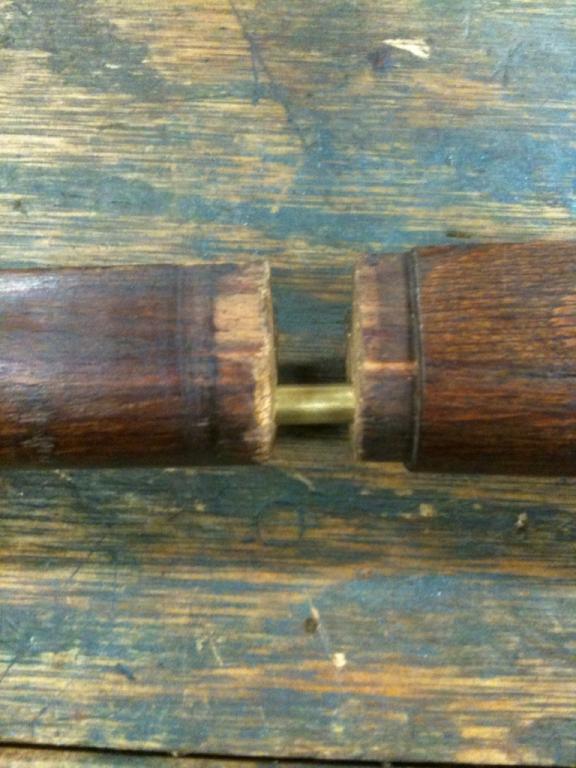
So, thoughts on the duffle repair? It is, by the way, conveniently positioned under the rear band.
Information
 |
Warning: This is a relatively older thread
This discussion is older than 360 days. Some information contained in it may no longer be current. |
|
-
-
11-23-2011 07:03 PM
# ADS
Friends and Sponsors

-
FREE MEMBER
NO Posting or PM's Allowed

You really need the band spring before you try to repair the duffle cut. It will position the front piece at the correct spot. The method I use is to drill the cleaning rod hole out in both the stock and the cut off piece enough to accept a piece of 3/8" wood dowel about 2 inches long. Fiberglass this into place, using the band spring to position it. After this dries I come back and fiberglass the void left under the rear band. Use plenty of release agent on the band so that it will come back off. After everything is cured I drill out the dowel large enough so that it will accept a cleaning rod. The drill is made from a piece of drill bit stock as the correct size drill bit normally cannot be found long enough.
I am sure there are other ways, but this works for me.
-
-
Legacy Member
Hello all! So, I have a temporary bandspring with some pitting that will serve as a spacer until I find a nicer one to take its place. So far, this is what we have done:
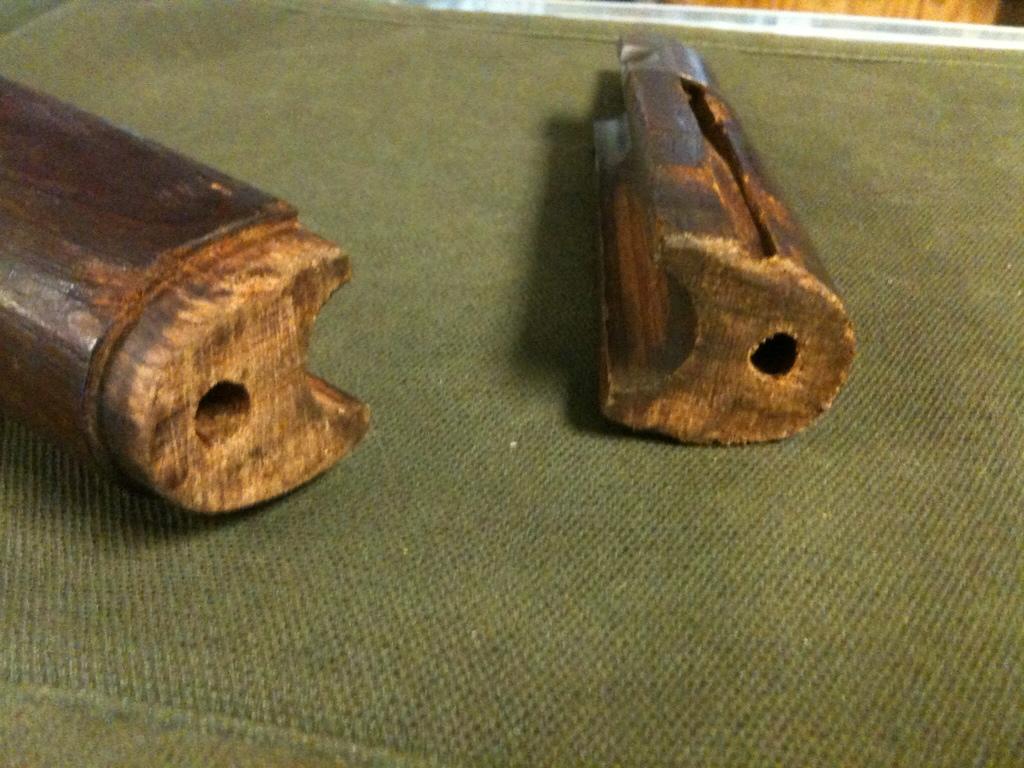
So this is the rifle now; note the sort of coarse and poor fit of the two pieces of wood and the seemingly off-center cleaning rod hole. None the less, when assembled with all parts, the rod seats perfectly and tightens down without problems.
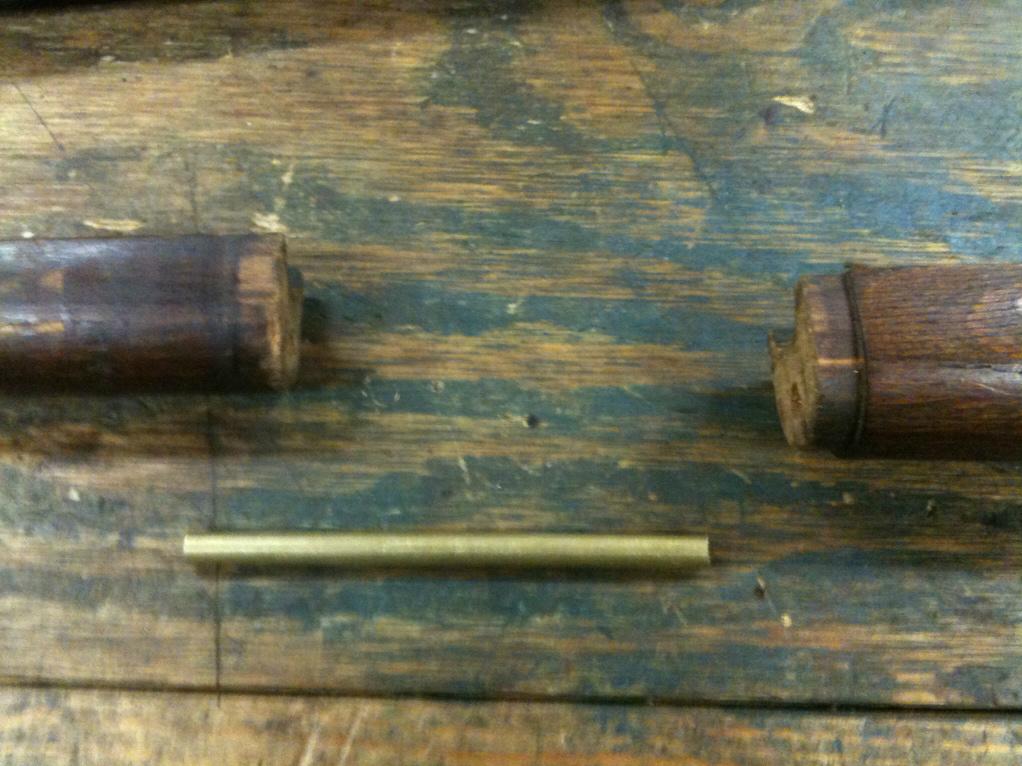
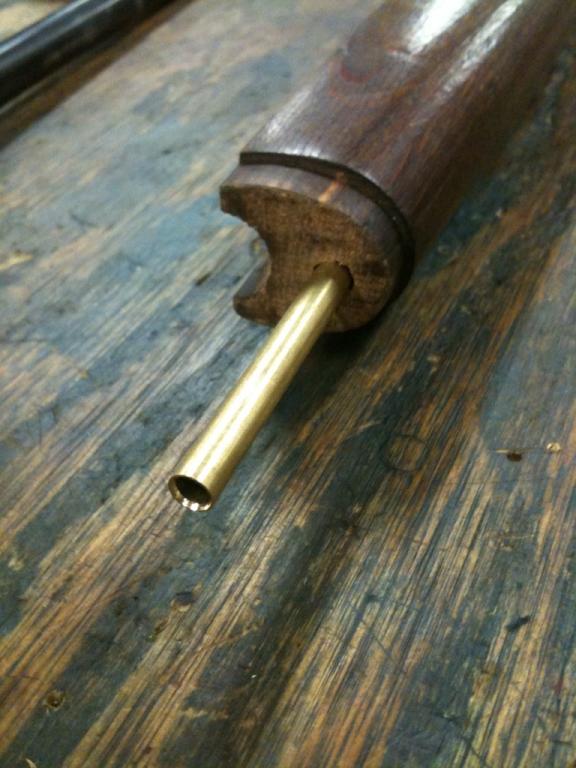
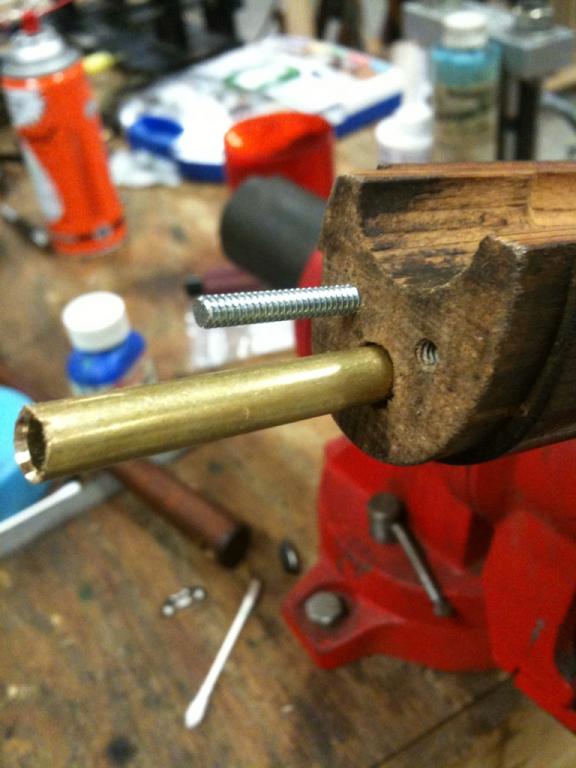
So the first order of business is to place a brass tube that happened to fit PERFECTLY inside the cleaning rod channel while still being able for the rod to pass through it unhampered. For this, we used a luck of the draw perfect fit tube and chamfered the inside of the tube just to be sure to avoid any sort of hang up. This piece is rather thick walled and very strong and will be the core of our strength. It has been epoxyed into place in the buttstock half of the stock and is currently drying.
Next, to prevent the stock from twisting, we are using two pieces of threaded rod and carefully aligning them with the front and rear pieces of wood. One would probably do, but we decided to go for strength thought I doubt I'll be bayoneting anyone anytime soon! These are also to be epoxyed into place in the buttstock half but will be held in mostly by the threads. The end piece will have the holes oversized enough to slip over the threads and the epoxy there will mate the wood and the threads and hopefully keep it all together safe and sound. The dry fit was tight but not too tense and I think with the epoxy it will be strong enough.
The next issue to contend with is the missing wood between the fore-end and end piece of wood from where the saw made the original cut. The gap isn't much but we are debating on whether to fill it with a sort of wood paste, acraglass (fiberglass solution) or simply if the epoxy will fill it up when we mate the two pieces finally. We are leaning to the epoxy as the gap really isn't that big, but we'll decide on Monday. I want thank sht_le who is helping to spearhead this project! Stay posted and find out how it will all together!
-
Thank You to m4a3sherman For This Useful Post:
-
Perhaps this might help ..
MKL article ...
Repairing a K98k duffle cut
Regards,
Doug
-
Thank You to Badger For This Useful Post:
-
Legacy Member
Wow, looks like great minds think alike!
-
-
Legacy Member
Right, so for what it is worth, we finished her up today and the wood repair incredibly strong and fortunately it all came out the correct length. I will be posting pictures later on this week or next- it is finals week next week so I will be writing papers for the next few days! Cheers!
-
Thank You to m4a3sherman For This Useful Post:


 PM
PM


