-
Yu' know what....... there something quite good and telling about seeing how it really was, pitting an' all, beneath a coat of new paint. How many virtually and totally rusted out No32's are out there, optically and mechanically like brand new, with formerly rusted and pitted tubes but are now saved from the scrap yard. They're the ones that have a bit of history attached.
My pal found a stack of about 6 of old wartime blue Police and bronze green kakhi NFS/AFS helmets in an old council building being converted into flats. I arranged for them to be bead blasted and re-phosphated but the pitting was heavy and still remained of course. He had them painted in the correct colours and the sign-writer, an old fashioned one who used paint instead of stickers..... (and hand painted the logos on our Mod Sports car) repainted the white word POLICE and rank markers plus the red NFS (national fire service although one was marked AFS - Army?). And they did look very good. Just me of course
-
Thank You to Peter Laidler For This Useful Post:
-
03-10-2017 08:11 AM
# ADS
Friends and Sponsors

-
Yu' know what....... there something quite good and telling about seeing how it really was, pitting an' all, beneath a coat of new paint
As Peter says, its good to see some vehicles that have obvious suffered in the past and have been restored, but still have a few scars. Several at the War & Peace show you can see were the owner has fought and won over "rust and corrosion" the lamp that started this tread is just an example, its been slow progress, weather in the last week has helped, so managed to managed to get some blasting done, and also to show the finish when using a product called metal brute, pics below, the f*g end come out not too bad and carries the original lens, the lamp holder was beyond repair and the one shown has been part machined from an old pump shaft, the main plate had been filled with braze but struggled to build up some of the edges, so built them using stainless steel (arc welder,thin rods and lots of patience).
The dull looking picture is after its been sand blasted and then left in a product called metal brite, we use this often in the Marine industry, its a basic mild solution of Phosphoric acid with some cleaning additives. it has now been painted in red oxide, (pic of this to follow near completion)
On a bigger scale and As the weather was with us for a time I managed to get the old paint stripped and cleaned up from something else and it then had the electrolysis treatment for around 18 hours, for obvious reasons a certain 5 year old was not too happy but did explain it was for a good reason (I knew I would get flak so purchased the one in the pic for £5.99 rather than use hers)

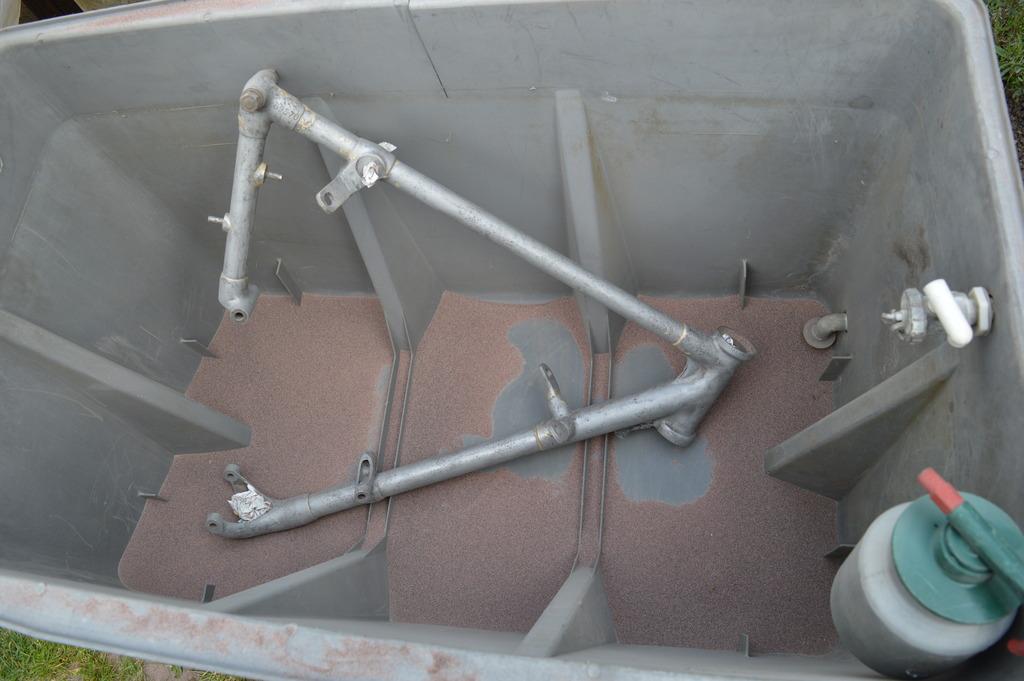
The dark areas on the tube in the blast tank are the conversion of the rust, may sound stupid but these area's (all over the frame) were hardly visible when the frame was just sanded, only after the Electrolysis was it visible and how bad it was, this is were folk trip up and see shiny metal and proceed to paint etc....... I can certainly say this was the mistake made by a previous owner, as the paint was little and could be removed with the finger nail basically "**** poor preparation"
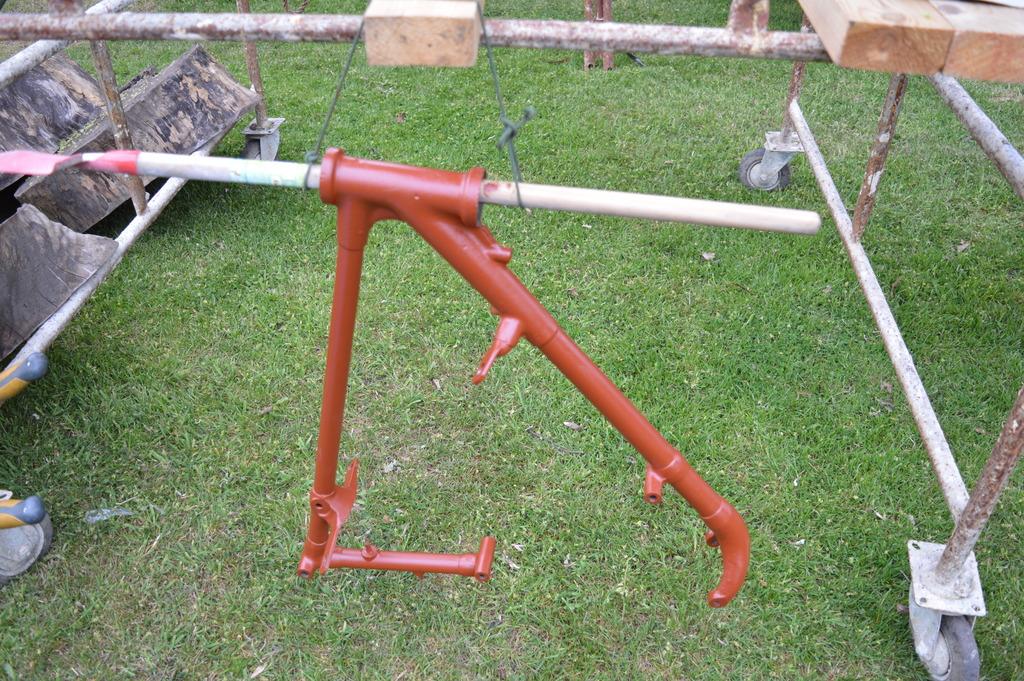
Its nice to get the fist coat of red oxide primer on, (brushed) I've used the paint before on my phone box and the results were excellent, it needs a rub over with wet and dry and then the second coat applied, third coat will be a standard primer then two coats of Synthetic service brown........
Last edited by bigduke6; 05-12-2017 at 06:15 PM.
-
-
-
Advisory Panel


It's looking healthier now...
-
-
Cheers Jim, I can see a glimmer of light at the end of the tunnel now......
-
Thank You to bigduke6 For This Useful Post:
-
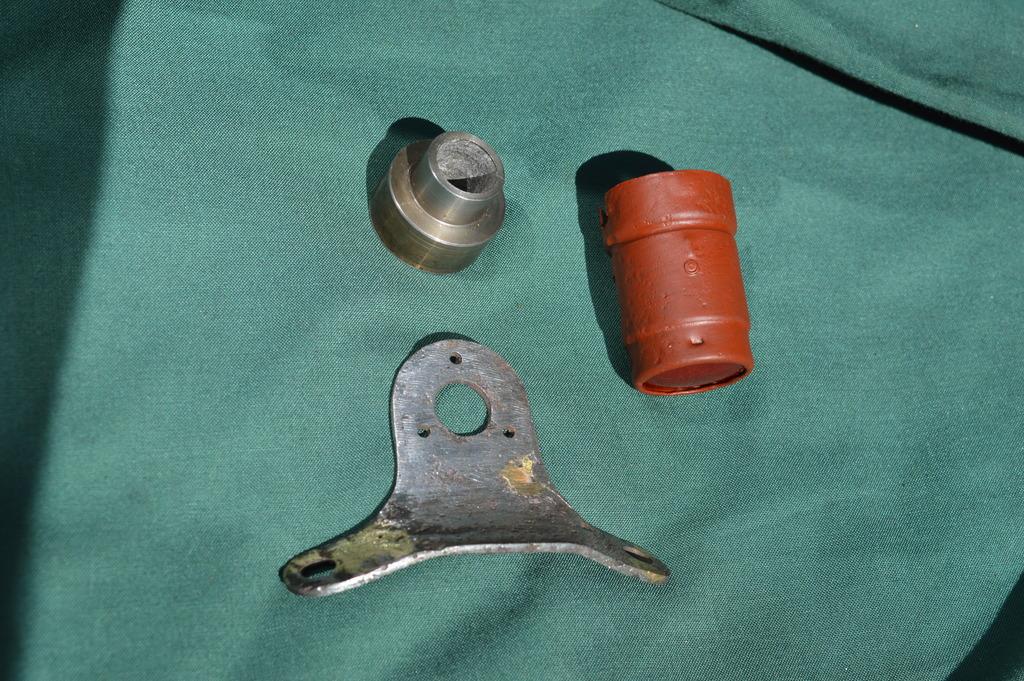
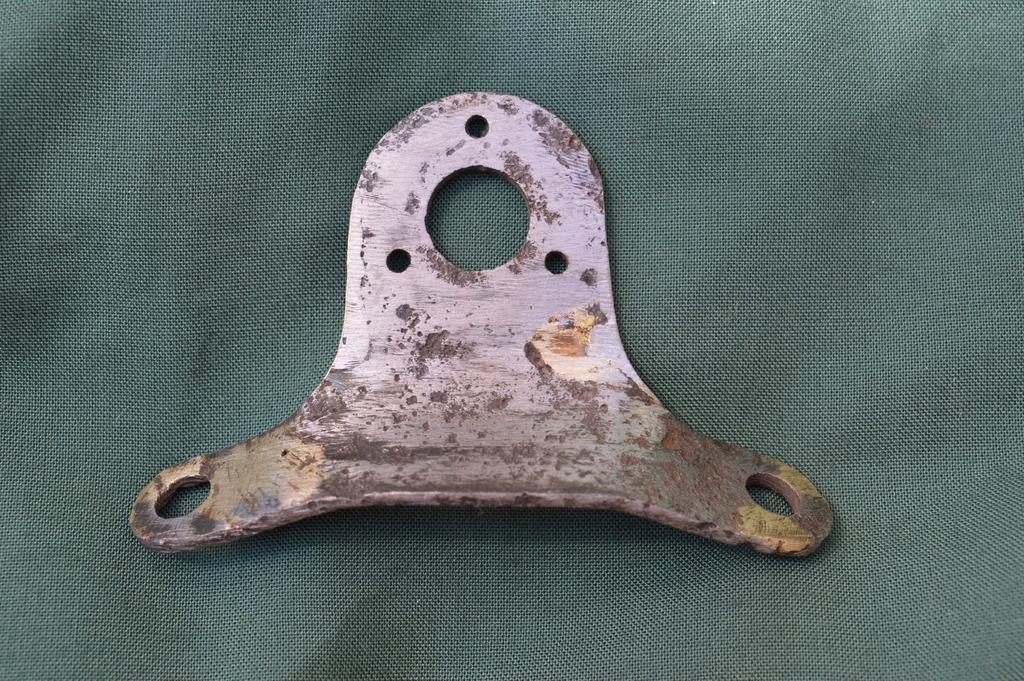
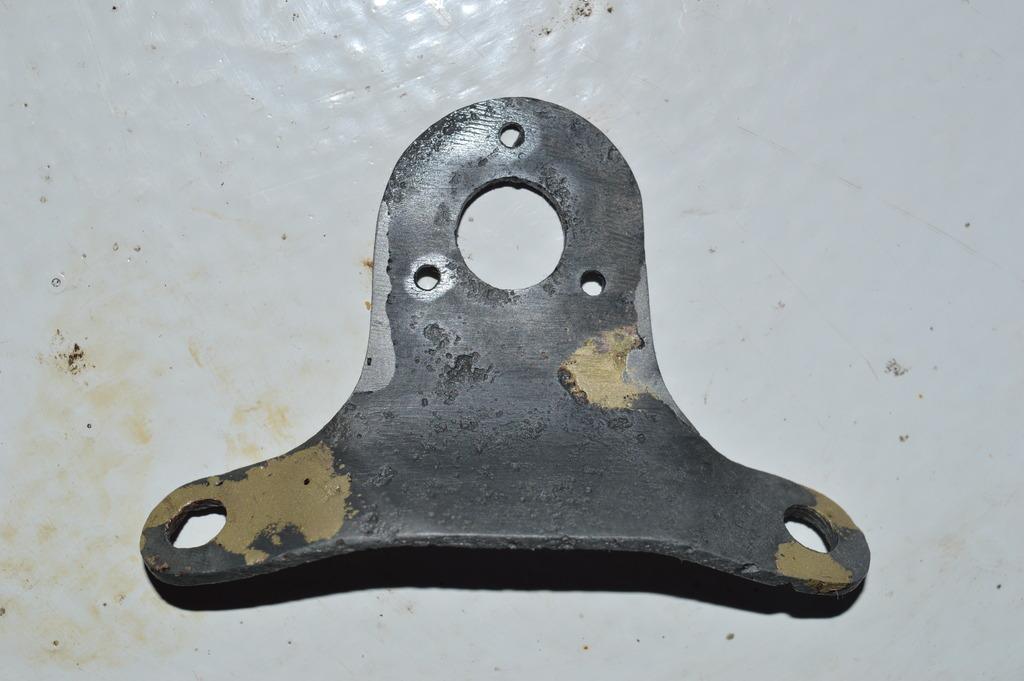
Did you or are you going to make any new parts? The tin-work looks pretty agricultural, such as the light bracket (top photos, thread 22) would be dead simple - so presumably will other similar pieces, I made plenty of new parts such as bracketry etc for my 1969 Mini Cooper S plus stainless odds and sods for my Commando. Mind you, the Cooper S, being a BMC product (Bloody Midlands Crap.....) was pretty agricultural, basic, paint free etc etc anyway. To be honest, I assembled them with a view to later maintainability as opposed to rigid originality and used stainless UNF nuts, bolts washers where I could/possible PLUS modern jointing compounds and grease/oils. Just painted the visible exposed stainless parts over.
Mind you, I made some real howlers too....... such as cleaning out the front subframe tower threads with a BSF tap instead of UNF (26 -28 TPI!!!!). Took days to understand what I'd done wrong but Mr Helicoil came to the rescue with his thread inserts! Anothger good tip I learned when doing my wifes Dolomite Sprint was never, ever, never, under pain of death, have metal to metal contact when fixing stuff to the bodywork. Always have a thin neoprene membrane between then squeeze up. They used to use a lot of fibre washers and gaskets! I mean......... water absorbent fibre.....!
Great to see and don't forget, those photos in an album are worth an extra £2000 on top of the price when you sell it. That's the only way the buyer can see what's not festering under the shining (or matt in your case.....) paintwork
We had a bloke on the forum restoring one of those tracked motorcycle things a couple of years ago. There's a project!!!!! Wonder where he has gone now. Sorry to have gone off at a tangent
Last edited by Peter Laidler; 05-13-2017 at 07:10 AM.
-
-
Peter, some parts I'm making, others I'm restoring , the lamp bracket has had a few coats of primer and looks serviceable now compared to post #1, I've kept all the pics so far..... I'll update the Matchless thread, the Petrol tank is the only thing that I've used filler, small parts etc will have the same process as the frame above but the bonus of phosphate too.... all the engine bits are now ready to go, just need to give the outside of the crankcases a blast (these are 1942 replacements)
The tracked Motorcycle you mention was the Kettenkrad, that was a project and a half and the owner a skilled tin basher........
-
-
FREE MEMBER
NO Posting or PM's Allowed
Lucas Rear Motorcycle lamp, Electrolysis rust removal

Originally Posted by
Flying10uk

Are you able to clarify exactly what soap powder is used in the process, please? Is this what I ask for in the Supermarket?
It’s sodium tricarbonate you can also use sodium bicarbonate (baking soda)
FYI
Also the more amps you use the faster the rust is removed! Oh Don’t worry about the metal your only changing rust. A 200 amp battery charger or even a dc stick welder works good for high amps faster rust conversion
Be careful with fumes ie hydrogen
I do it in garage with ventilation no problem though
Food for thought
I have done it with a engine using a pallet built into box and a tarp!
Last edited by Ajsgreenjeeps; 10-30-2017 at 06:11 AM.
-
Legacy Member
For de-rusting steel and iron items, try molasses, the stuff used for stock feed and interesting cooking. You can get it in bulk from places that sell animal feed and farm requisites.
It is a SLOW process, but involves no mechanical "violence" like grit-blasting.
Caveat: DO NOT use molasses with Zinc or Aluminium parts.
Interesting to read about "Soda" baths.
I use "Washing Soda" (Sodium Carbonate) to clean cartridge brass. It should be available in the "Washing" section of your trusty supermarket. Being slightly caustic, also not recommended for Zn and Al alloys. My "refinement" is the additional use of "industrial" vinegar.
The first "bath" is in a hot and strong brew of the washing soda. This removes any residual grease and oil, and seems to "activate" the oxidized surface. Next "bath" is plain HOT water, to remove most of the soda residue.
Into a container of vinegar; watch for the colour change from "brown" to "brassy yellow".
A "running" hot fresh water rinse, and then into a second, HOT washing soda and finally a HOT rinse.
All that heat is useful because it seems to make things "go faster" and, just as importantly, DRY faster, especially if direct sunlight is not available.
Have a ferret around the websites that specialize in "traditional" household cleaning techniques; it's amazing what you can do with simple stuff, like common vinegar.
-
-
Legacy Member
Just another thought:
Has anyone tried "Metal Spray"?
This is a technique which uses essentially a plasma jet to spray metal onto an existing surface.
Also known also Vacuum Plasma Spraying.
Some more details here.
-
-
Contributing Member

Originally Posted by
Bruce_in_Oz
Just another thought:
Has anyone tried "Metal Spray"?
This is a technique which uses essentially a plasma jet to spray metal onto an existing surface.
Also known also Vacuum Plasma Spraying.
Some more details
here.
Bruce--
I have not used the metal spray that the company uses but I have on several occasion had used micro laser bonding on real small broken parts to a slide and #3 Lee Enfield bolthead. It will bond the pieces together without a lot surrounding heat to take the temper out of the metal.
--fjruple
-


 PM
PM


