-
Legacy Member

Ok.
I'm intrigued now.
I took a closer look at my 1943 7L series Dewat, and I did a bit of disassembly, and discovered that it is quite possibly a good candidate for this kind of conversion.
So.
Is there a bill of materials that I'd need to get a move on assembling?
Have we tracked down anyone who's importing the kits as of yet?
NS
-
-
02-02-2008 11:04 PM
# ADS
Friends and Sponsors

-
Advisory Panel


NS: If your dewat is at all like the ones I am familiar with, then the barrel's chamber has been cut back about 3/8" and then the entire area has been welded in to the trunnion of the receiver. It will take some fancy cutting and filing to remove the barrel from that trunnion. In all likelihood you will need a new extractor as well since the face of your bolt should have been cut or ground away.
And of course, if you take apart that dewat, make sure you destroy that magwell. It would not do to have a loose prohib kicking around. The fate of my first magwell (which was recycled) came up when I was talking to the RCMP lab tech about my SAS-3mk2.
If you manage to get one of the SAS-3 kits in from the US, there is very little you would need to get here in the way of materials. Between a sten parts kit and what is contained in the SAS3 kit, the newly manufactured magwell would be the only thing requiring any materials.
-
-
-
Agreed, though you will need a barrel (or make one) and possibly a new trunion (as mentioned) which I'm sure Stencollector could provide.
Nobody is importing the SAS3 at this time, so you need to either deal with Questar or import one yourself (legally)...
OR,
You could make one using some of the pics in this thread as a guide.
Союз нерушимый республик свободных Сплотила навеки Великая Русь. Да здравствует созданный волей народов Единый, могучий Советский Союз!
-
-
Legacy Member
Ok,
So, what are the dimensions on the receiver tube that I'd need...and specs on the type of metal?
How about the bolt?
Any other bits I'd need to fabricate? I have a (small Sherline) Lathe and Mini-Mill at my disposal...
NS
-
-
1.5" outer diameter tubing is needed. The inner diameter is whatever you want to make it if you build your own bolt  I would suggest a thicker than original tube to help with CFC approval so a full auto bolt cannot be easily fitted. For the tube, regular 102X series low carbon steel should be fine. For the bolt, I'd go with a medium carbon steel of your choosing so it can be hardened easily if you choose to do so.
Союз нерушимый республик свободных Сплотила навеки Великая Русь. Да здравствует созданный волей народов Единый, могучий Советский Союз!
-
-
Advisory Panel
If your main tube is 1.5" OD, the tube for the collar will have to be something that will slide over. Either the main tube, or the collar could be adjusted to fit. I suspect that one or the other is going to have to be altered. You might get lucky and find stock sizes that will telescope smoothly. From reading the US sites, it is necessary for them to use a main tube with an internal diameter that will not accept an issue bolt. Tubing is catalogued by OD, with a range of wall thicknesses. If an original used a 1/16" wall, 3/32" would insure that the bolt will not slide in.
-
-
OK, time to start talking about welding jigs. You SHOULD use a jig when you weld your mag box to your collar.
It is made up from a 1.5 inch diameter piece of steel bar stock with a peg made from threaded rod that threads into place on the bar shaft to accurately position the box against the collar. It uses the plunger guide on the front of the box, and the plunger guide hole at the front of the collar to stop movement when clamped together. The piece of threaded rod and a plate clamp the box to the collar.
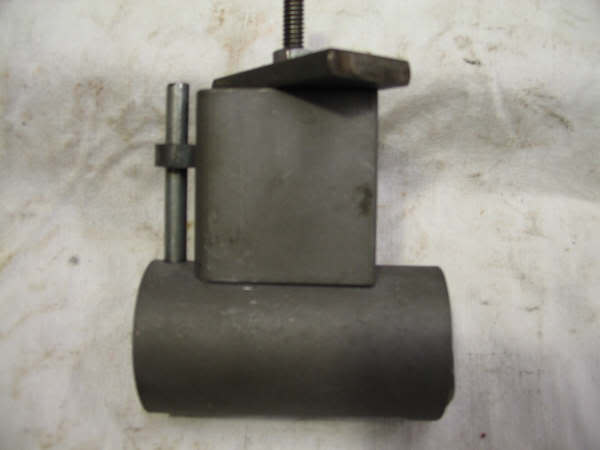

When the time comes to weld the mag housing pieces together, the box will be tacked in place, then removed from the jig for the welds to be completed (you function test it first with dummy rounds to ensure it will feed). Once the box is permanently assembled to the collar, the box will be cut to finished length, the slot for the barrel nut detent cut, and the rear wall of the box cut back for the magazine catch retainer. The slots for the magazine catch will be made, and a hole for the magazine catch retaining screw drilled.
Now if any of you have bought your kits from Stencollector, you will notice that your mags are likely "demilled" by beng struck at around the 5 round mark with an axe. Don't blame stencollector!!! The Canadian Forces did that! LOL
We can fix it... we have the technology... those mags can be made to function like new again, though you WILL haveto limit them to 5 rounds again by other means.
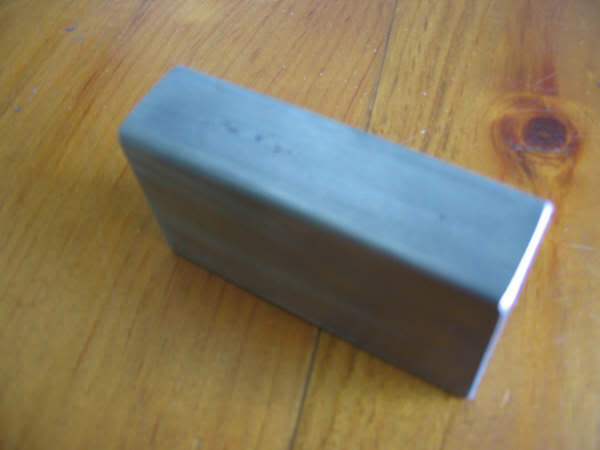
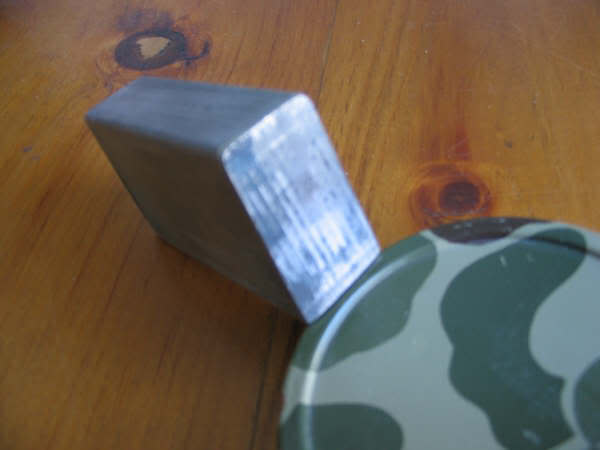
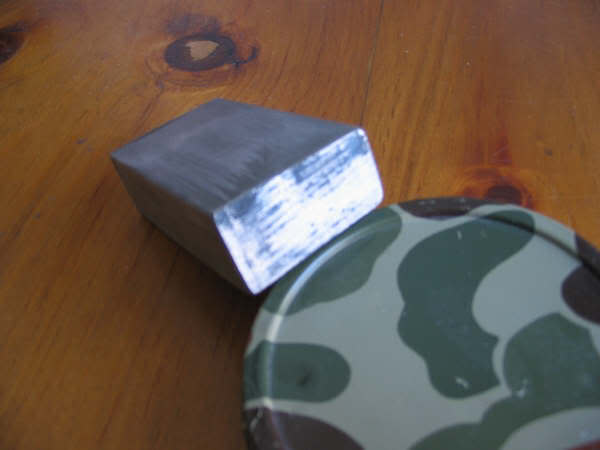
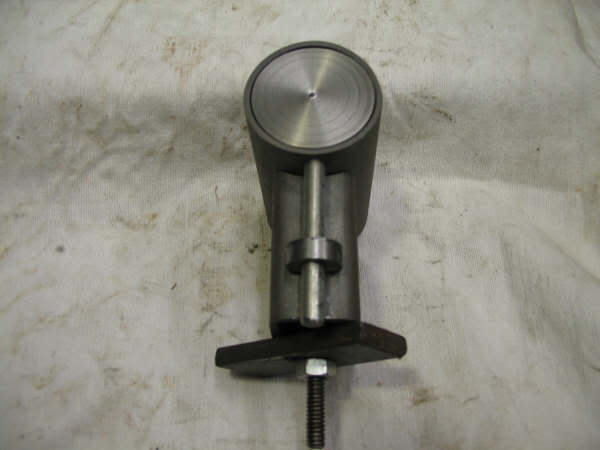
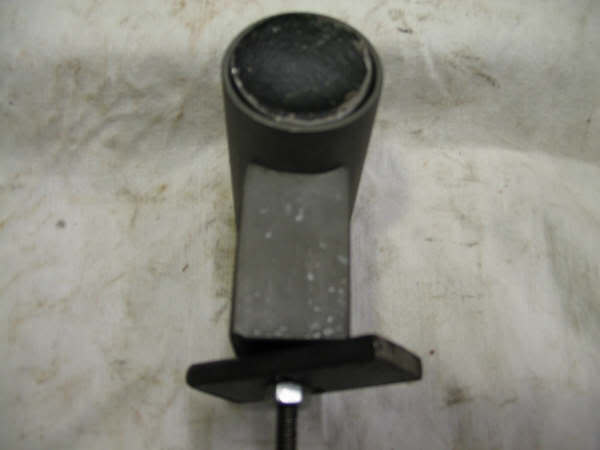
You need to build a swage... it will look something like this:
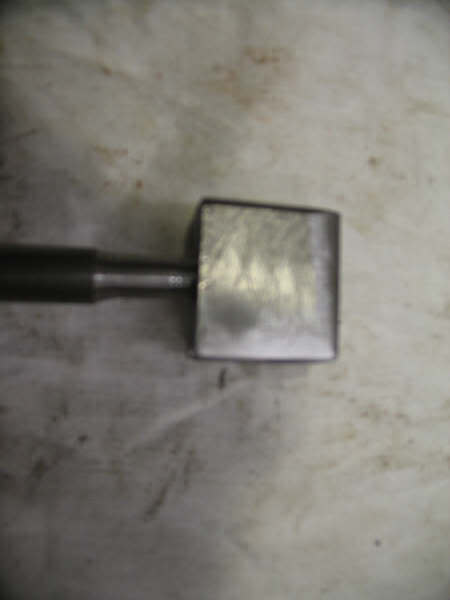
It is sized to fit tightly inside the body, and has a tapered leading end. In use, it is tapped under the dent, while the dent is ironed out by light hammer blows. It works not unlike a shotgun barrel dent raiser.
Maks sure you "concave" the back edge to account for the magazine spine.
This item can be made from cheap low-carbon steel and fashioned with hand files if you don't have a bunch of shop machinery.
Last edited by Claven2; 02-05-2008 at 08:23 AM.
Союз нерушимый республик свободных Сплотила навеки Великая Русь. Да здравствует созданный волей народов Единый, могучий Советский Союз!
-
-
-
-
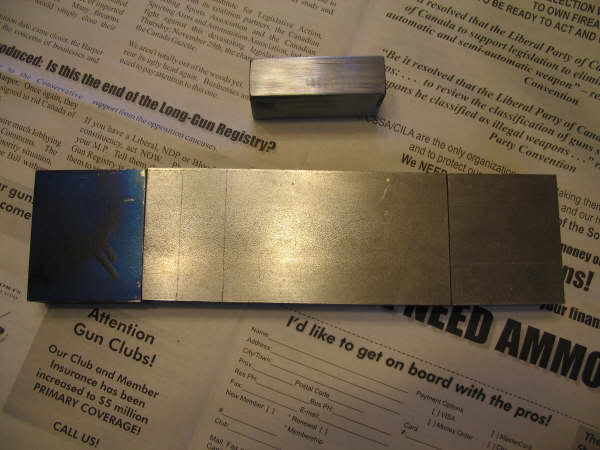
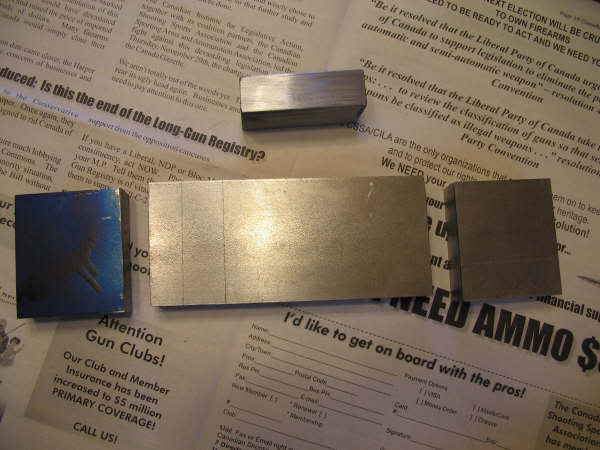
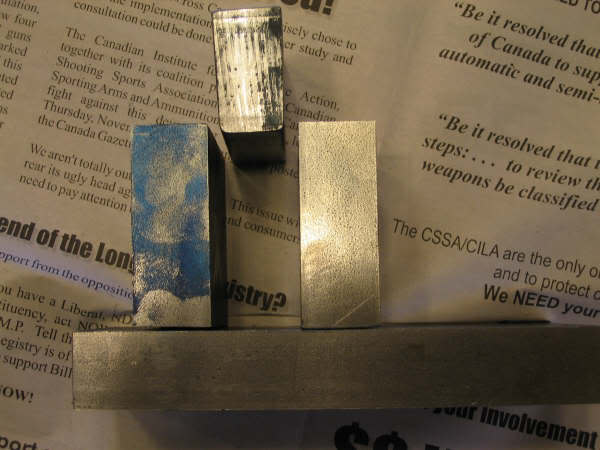
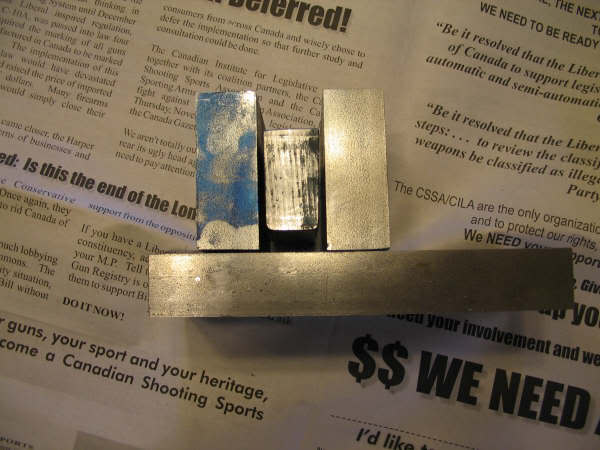
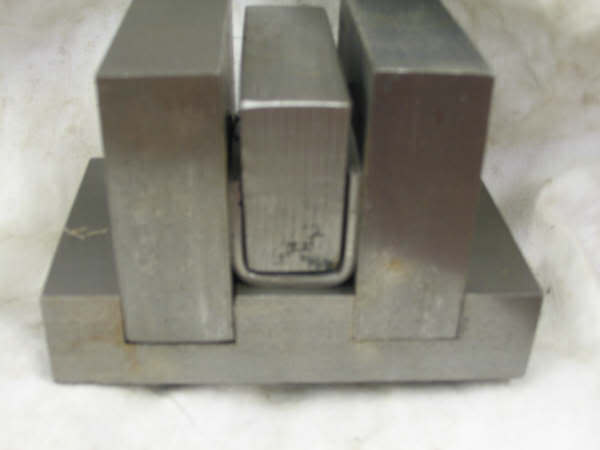
There are various ways of fabricating the box portion of the magazine housing assembly: one piece wrapped around a form, with a single welded seam, as Stencollector showed in his photo series; three pieces hand formed as illustrated elsewhere in the thread, and welded together; die formed and seamed; formed from seamless tubing. Earlier photos showed a shaped plug which could be used for any of these methods. It is dimensionned so that it is a tight fit in a demilled housing. Note that a taper is incorporated, front to back. These photos show the basic pieces for a die to be used in conjunction with the forming plug. A press is used in conjunction with the plug to force a steel strip into the die, and then the ends are folded over and a single seam run up the back. These pieces are cut from a piece of 1"x3" steel. Dados will be milled across the base, and the sides secured in these cuts. Note that each sidepiece will be machined with a taper, to match the forming plug. One of the sidepieces will be machined on both sides, so that either 3/32" or 1/8" steel may be utilized for the housing, simply by reversing the part.
Союз нерушимый республик свободных Сплотила навеки Великая Русь. Да здравствует созданный волей народов Единый, могучий Советский Союз!
-
-
Trial run of forming die using a heavy vise and 1/8" steel. Will need adjustments and some experimentation, but looks as if it has promise.
Союз нерушимый республик свободных Сплотила навеки Великая Русь. Да здравствует созданный волей народов Единый, могучий Советский Союз!
-


 PM
PM