


OK, well the replacement barrel (36" .54cal Green Mountain) arrived on Friday. they told me it was their last .54 GM barrel in stock - something about GM getting a US Army contract to produce machine-gun barrels and their commercial orders being insanely backed-up as a result. Lucky me
Now when you get these, they are surface-ground on the flats to what looks like approximately 80grit. I think they also must have changed to a less expensive supplier of breech plugs. According to their plan set that ships with the kit, the breech plug is supposed to be already contoured and sized. Mine was neither, though I did pull the plug (it was in b@lls-deep tight) and measured the clearance. Distance to rifling is exactly 0.630" and the plug is exactly 0.630" long - so no wonder it's in so tight at top-dead centre. It's completely bottomed-out which is a very good fit. Much better than I expected.
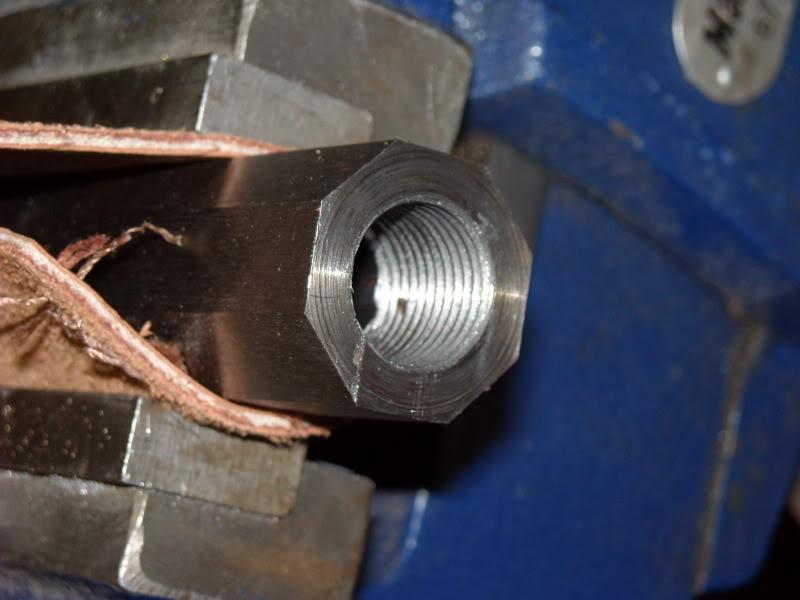
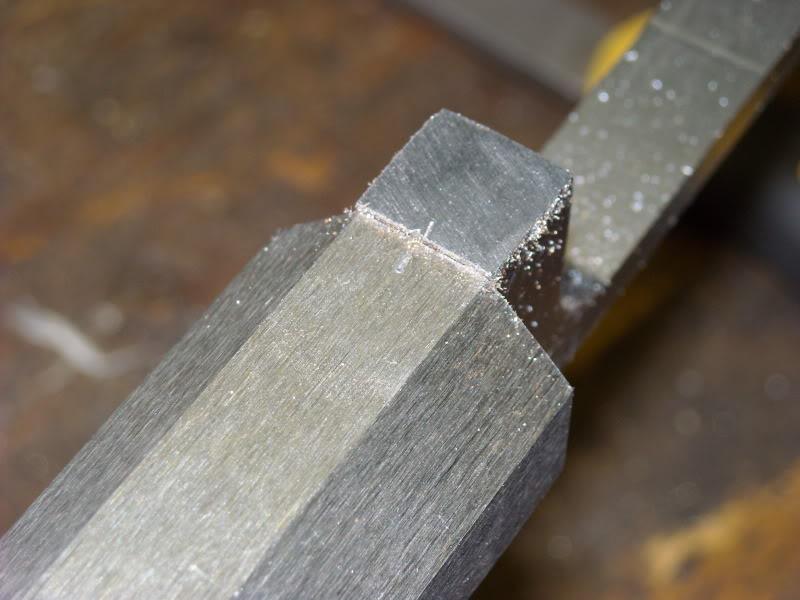
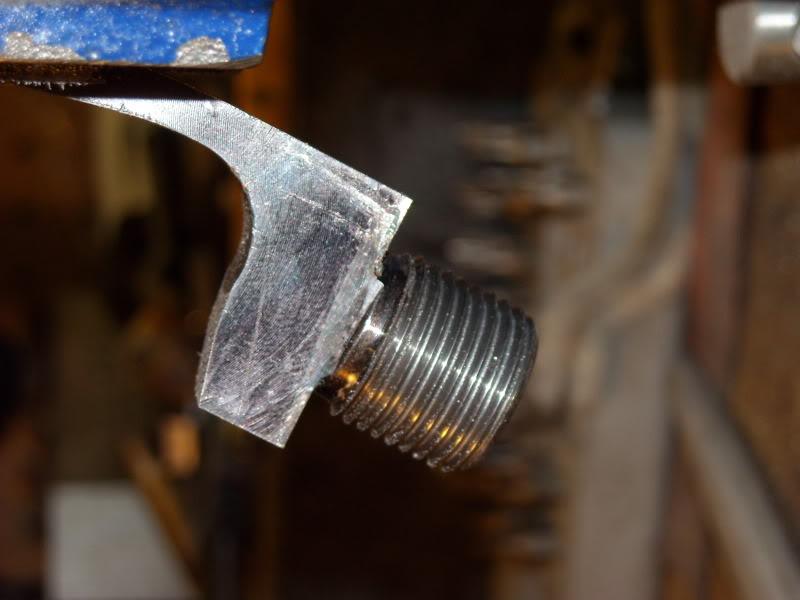
Here's the barrel internal threading. It looks die-cut to me, not machined. Either way though, it IS well done and the thread fit (male to female) is very good.
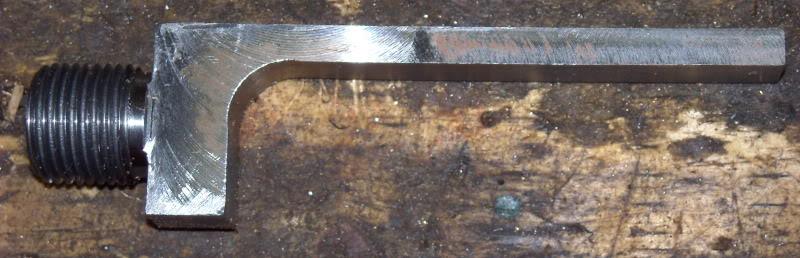
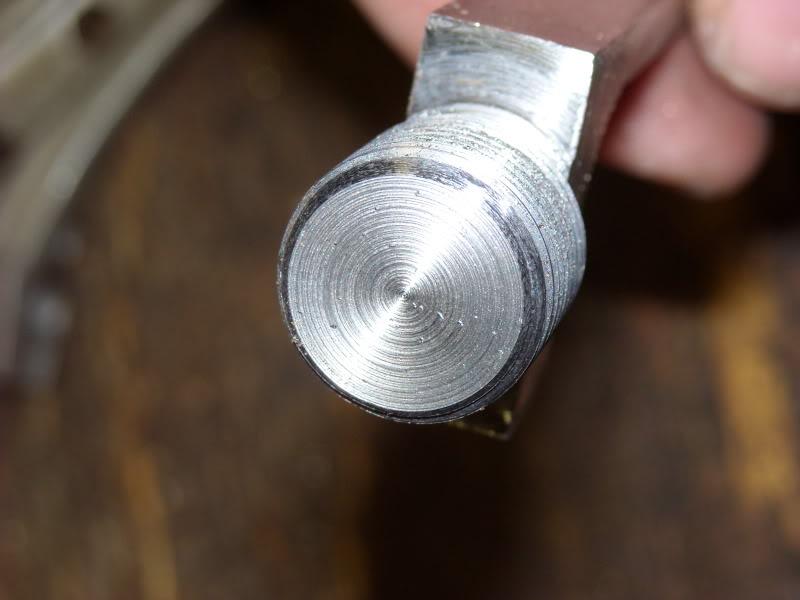
And this is the plug as-received. It is taller than the barrel is and MUCH longer than the plans call for, leading me to believe it's a generic part made for any number of their rifle models. It's machined from what looks like hot-rolled billet. The machining is nice enough executed, though the facing cut (lathe done) could have been a little smoother, but it'll work fine as-is.
Here you see the base is proud and the witness marks they made don't line up well.
I filed the base flush to the flat and re-struck the witness mark, better this time.
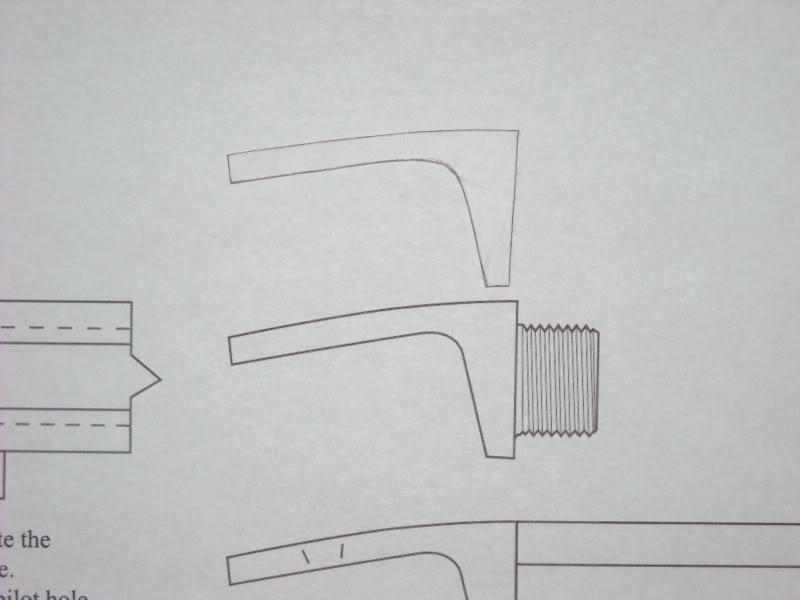
This is what the tang that the instructions say is included was supposed to look like. The top one is a cardboard cutout I made to act as a template for when I use hte oxy-acetylene torch to heat up the tang and bend it to the right profile.
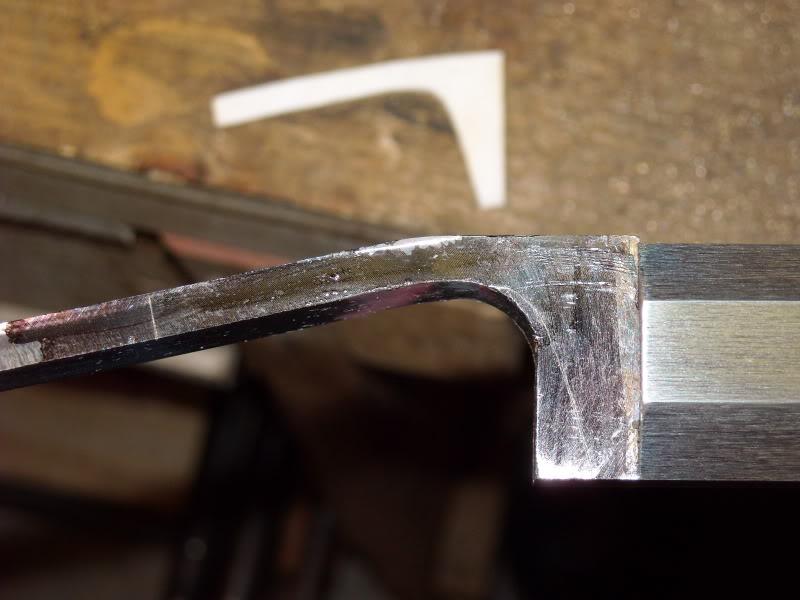
Here the tang is after bending and it's been scribed to match the template.
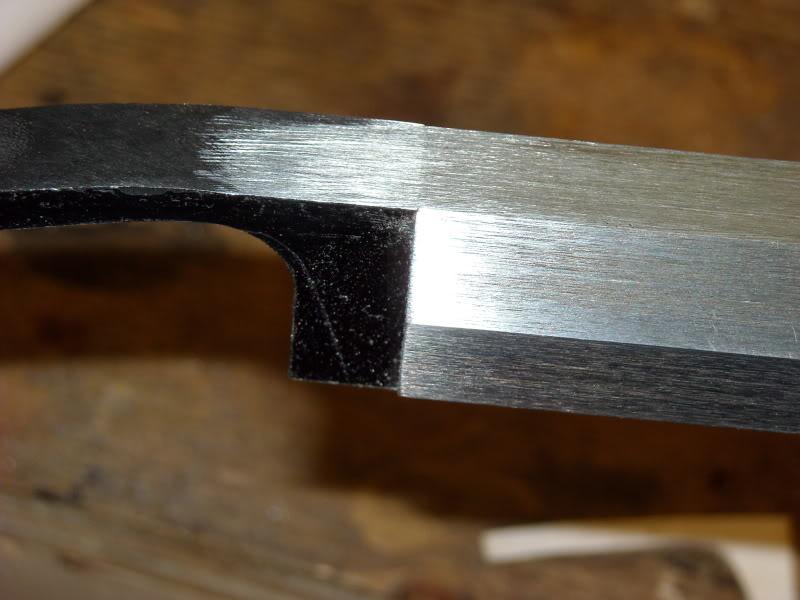
And now the top of the tang is filed flush.
Plug removed and I'm now shaping the tang to match the template scribe-marks with a file.
Cut to length and filed to shape:
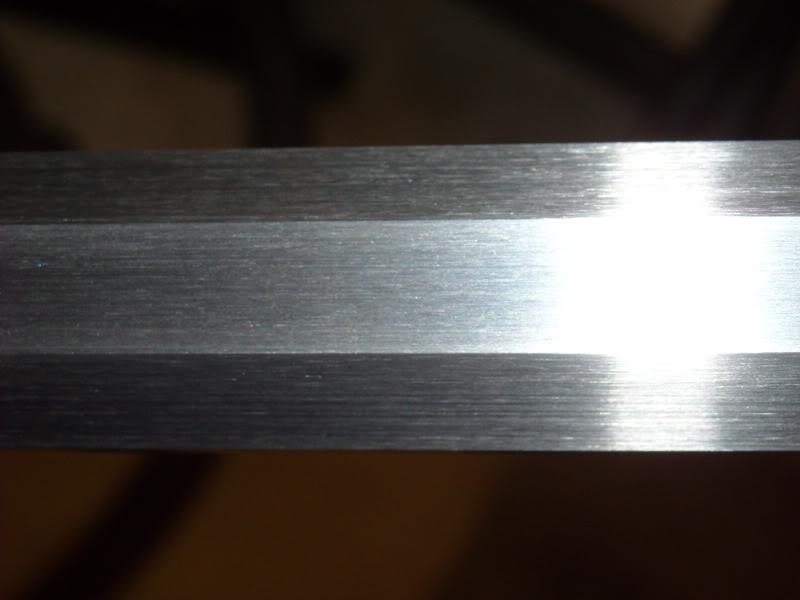
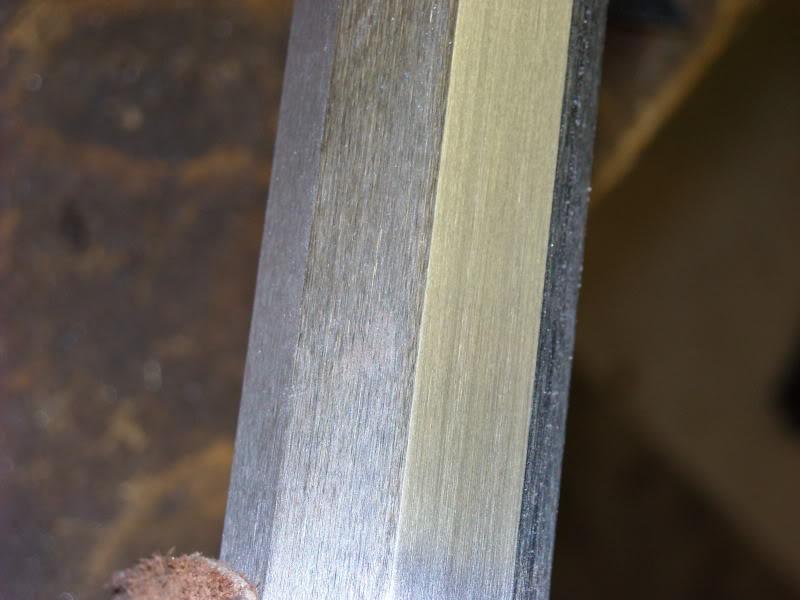
Now to draw-file the 5 exposed flats to 400grit. For reference, the left-flat is as-received (surface ground coarse), the right flat has been draw-filed to 400 grit.
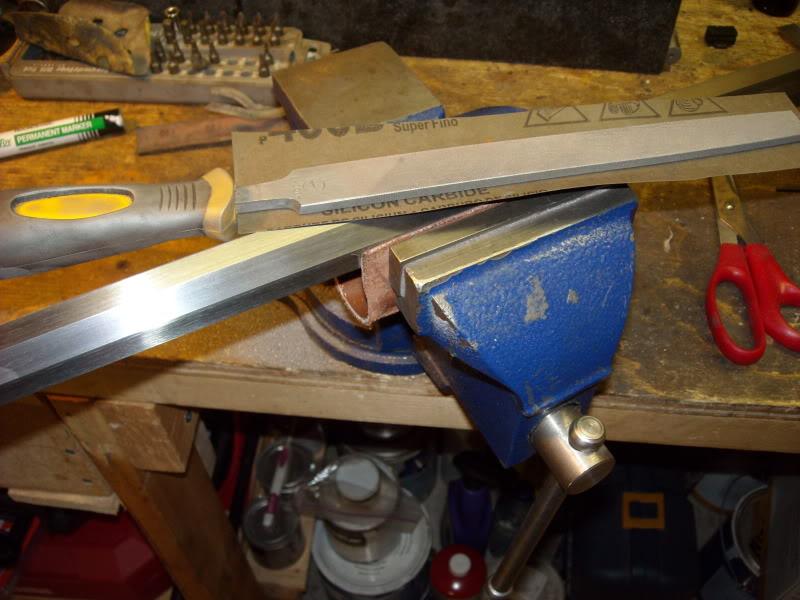
To draw file (for those who don't know) means to draw your file lengthwise down a barrel to make sure you get no ripples in the surface finish like you would get with localized sanding or filing. I find you get the best results with the file about 45 degrees to the axis of the barrel, flat on the barrel flat (you need a steady hand so the file doesn't wobble) and you either push the file down the length of the barrel or pull it towards you. Which you use is personal preference, but I find I get more control by pushing the file away from me. I also find you get much better results if you push the file down the entire length of the barrel with one continuous pass, repeated as many times as needed to get the finish you want.
On a rough-machined barrel you would start with a smooth file and then graduate to varying grits of paper. On these Green Mountain barrels, you already have 80 grit or so. I start with a smooth file to press 120 grit wet-dry paper over the length of the barrel. The file keeps the paper pressed flat to the steel ensuring you don't round off the corners of the flats. After 20 or 30 strokes (with practise you can tell when enough is enough by eye) I switch to 180 grit and repeat. After 180 I go to 400 which is about all you need if you are going to brown the barrel. If you are going to rust-blue it and you want it to have a higher sheen, go to 600 and then deaden the gleam a little with a scotch-brite pad.
And here are the top three flats at 400 grit.
 Information

Warning: This is a relatively older thread
This discussion is older than 360 days. Some information contained in it may no longer be current.
- Knowledge Library

- MKL Entry of the Month
- Australia
- Austro-Hungarian Empire
- Canada
- Czechoslovakia
- Denmark
- Finland
- France/Belgium
- Germany
- Italy
- Japan
- Norway
- Russia
- South America
- Sweden
- Switzerland
- Turkey
- United Kingdom
- United States
- Yugoslavia
- Is my rifle authentic or a fake?
- Jay Currah's Lee Enfield Web Site
- On-line Service Records (Canada)
- Technical Articles/Research
- Forum
- Classifieds
- What's New?
-
Photo Gallery
- Photo Gallery Options
- Photo Gallery Home
- Search Photo Gallery List
-
Photo Gallery Search
- Video Club
- iTrader


 PM
PM