-
If you're worried about it, disassembly is likely not needed on that gun. The holes can be fixed with patching or dowel repairs glued in with epoxy mixed with sanding dust (use clear wood-compatible two-part epoxy and mix with very fine sanding dust). Try to use a similar wood for your dowel - looks like an oak stock to me.
IF the wood is varnished, remove it using a gel-type varnish remover - leave just long enough to remove the varnish - not the coloration of the wood underneath. The new finish you should apply is probably raw linseed oil as that is what was used in the 19th century.
Cheers.
Союз нерушимый республик свободных Сплотила навеки Великая Русь. Да здравствует созданный волей народов Единый, могучий Советский Союз!
-
Thank You to Claven2 For This Useful Post:
-
11-25-2010 06:54 AM
# ADS
Friends and Sponsors

-
Advisory Panel


Let's face the challenge - very cautiously!

Originally Posted by
DaveN

You wanted more.
I hope you have a barf bag.
Well that should quieten the "don't spoil the historic original finish" enthusiasts.
There is none to be preserved.
And the "part of its history" faction can look at those holes and weep.
- - - - - - - - - - - - - - - - -
"Now I know what you're thinking... is his store of wisdom exhausted?
Or has he still got some tricks up his sleeve to turn this dire wreck back into at least something you can hang on the well without being ashamed?
Well, to tell the truth, I don't rightly know myself.
Go on DaveN - make my day!"
- - - - - - - - - - - - - - - - -
Well you saw my pics of the treacle rifle. That sort of thing is manageable.
But have you seen this?
Attachment 17545Attachment 17546Attachment 17547
That was the same type as the treacle rifle (Gew. 88 in carbine form - Kar.88)
In this case, Bubba beat me by sandblasting the entire rifle, beore smothering it with black paint. I keep it "because it might come in handy one day" - that's the pack rat syndrome for you - and as an example of Bubba's Inhumanity to Wood.
Originally Posted by
DaveN
I'm not sure I have the ability to do this. My biggest worry is the pins are very rusty.
You are right to be worried. What this thing really needs is hands-on treatment by Claven2.
So Claven2, if you wish to take over here, that is fine by me.
Otherwise, DaveN, I shall now retire and have a good think how we can tackle this in a low-risk manner where you can stop at any time you feel it is getting to be too much.
IMOH you have nothing much to lose with that wreck.
Patrick
Last edited by Patrick Chadwick; 11-25-2010 at 07:37 AM.
-
Thank You to Patrick Chadwick For This Useful Post:
-
-
Contributing Member


Yes Patrick you now see the truth. The evil that was wrought upon this rifle was nothing short of a lampabottomy. I'm not one to give up, but in the condition it's in it does no one no good at all. Maybe a wall hanger in the dimmest of light. I still believe I have nothing to loose and I know it might even be fun and rewarding a project.
-
-
Legacy Member

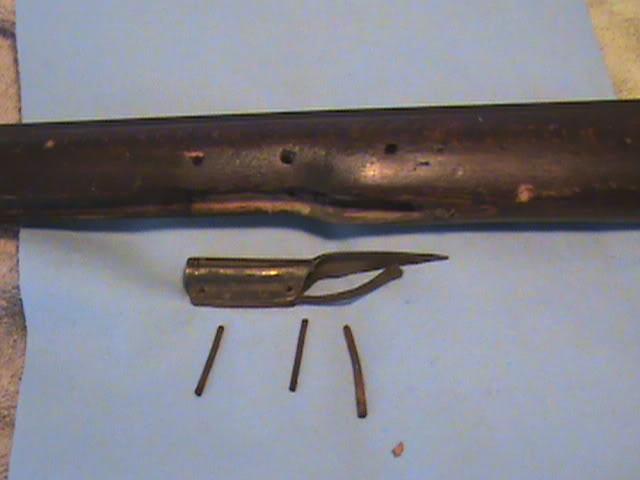
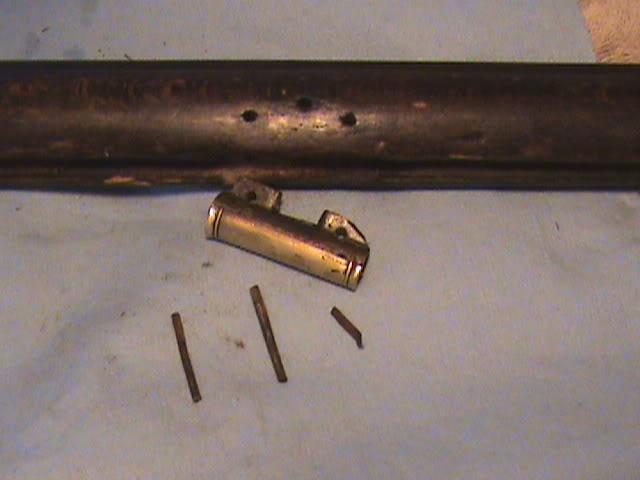
Dave, I'm with Claven. Disassembly is not needed - leave it alone. Just fill the holes with pins made from matching beachwood (same as used in the stock when manufactured) then dress them over carefully and stain and finish to match. And you will need to use an oil based varnish to match the original finish on the gun. Yes, that wood finish IS the original military finish put on the gun when manufactured, not some mess the lamp-maker put on it. If you want, a good quality boiled linseed oil applied VERY thinly over time will match the original varnish- just be sure to allow each THIN coat to dry completely before applying another. Please don't take offense but wthout much more experience that you have exibited so far, I would not attempt to completely disassemble the gun.
Have you made any decision about the rear sight replacement?
Guys, just a note, this gun, while rough, is really not too bad as far as condition goes.
-
Thank You to gew8805 For This Useful Post:
-
I don't think it's hopeless at all, but IF you are not very experienced in woodworking, you should consider seeking the help of someone close by who is. I'm a huge believer in learning, so if it were me, I would NOT drop it at the gunsmith and have him do everything for you as next time you will still not know how to do the requisite repairs. That option is certainly available, but I would opt for finding a local gun enthusiast with a solid reputation for wood repairs.
I'll have to defer to gew8805 on what the original finish for this rifle was, as I honestly don't have any concrete info on Norwegian martial arms of that period. If it's varnish that's appropriate, then by all means, do not strip it off.
Repairing those holes is not as daunting as it sounds. The original wood is either oak or beech. It looks oakish to me, but that might just be due to the varnish. Based on other guns of that period and area though, beech is every bit as likely and looks very similar to quarter-sawn oak. Your first step is to decide how invisible you want the repairs.
Three ways to go on this one, in order of difficulty from least to most:
1) Use round dowel stock straight through the existing holes, drilled out to give crisp edges. Secure in place with epoxy or glue mixed with sanding dust made with a belt sander. End grain won't match seamlessly so the repairs will remain somewhat visible.
2) Use round dowels made on a lathe so that the exposed grain runs parallel to the stock grain. This will be more invisible and the hardest part is lathing out the dowels without snapping them. Secure as per above making sure hte grain direction matches when the dowel is pressed in.
3) Use small rectangular patches with the grain lines as closely matched as possible. This requires the most skill to do right. You need to be good at both chiselling a nice sharp rectangular inlet, and also VERY patient at filing and fitting the patch before you glue it in. You fit it proud and then file or plane it flush after the glue/sawdust sets. This will also be the closest thing to a period stock repair as most 19th century stock repairs were hand-fitted with chisels - presumably because chisels and wooden blocks were more adaptable for field repairs than carrying a large selection of dowel stock about in a wagon train.
Do not attempt No.3 by yourself without either having someone to walk you through it, or practising on scrap wood first to learn by trial and error.
Whatever you do, please keep us updated and we love pictures.
Last edited by Claven2; 11-25-2010 at 11:43 AM.
Союз нерушимый республик свободных Сплотила навеки Великая Русь. Да здравствует созданный волей народов Единый, могучий Советский Союз!
-
-
Contributing Member
-
-
Contributing Member
Also ,the rifle shop is making a rear sight (6-8 weeks) a ramrod and the worm and breach block reamer thingee to go in the patch box. They seemed to be very knowledgable on this rifle. They emailed pictures and info.
-
-
Advisory Panel
Cautious Progress
OK DaveN, I think you have reached decision time.
As you will have noticed, there are varying opinions as to what to do with this rifle.
1) The "don't spoil the original finish/patina etc" school of thought.
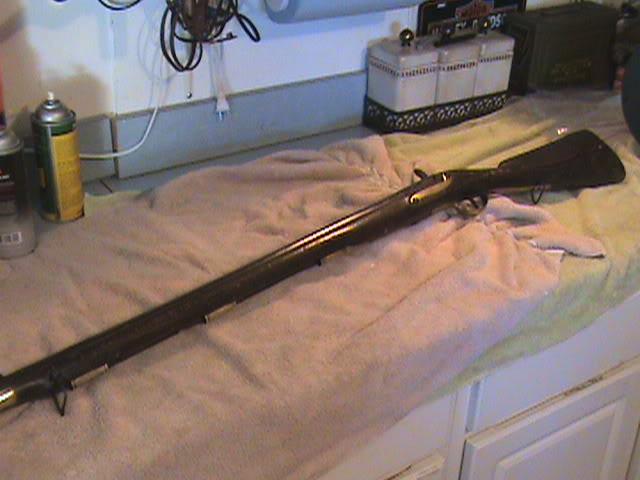
- Which is reasonable if there is an original finish or patina to be preserved. You stated yourself, I do believe, that the brown gunge was all over the rifle, including brassswork, lock etc. And so it certainly looks in the first pictures that you posted.
So, with the greatest respect for the fact that geww8805 undoubtedly knows more about this type of rifle than I do, I must nevertherless repeat my opinion that that all-over muck was never an original finish. That is, I say again, a "treacle rifle". And I have demonstrated that you may find a reasonable surface preserved under the treacle.
2) If you have the skills and experience of Claven 2, you can give it the full treatment. Claven2 has posted a blow-by-blow account of his recovery of the Brunswick rifle. But it was not a beginner's project.
3) My position varies along the line between those two extremes, depending on what I actually find. I want to refurbish (not restore in the antiquarian sense) my rifles to proper working order. I think my previous posting referring to the Ghosts of Sergeants Past makes my position quite clear.
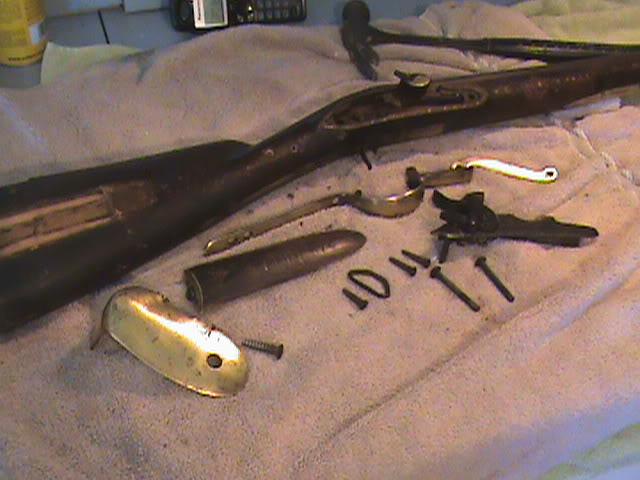
I am very relieved to see that (unlike the Argentine RB) there was no horror story of rust in the barrel channel. You have already cleaned the brass and largely dismantled the rifle. Very brave, after my caution re. screws. And your courage has paid off. You seem to have a good solid barrel - who knows how it looks inside?
As Claven2 has pointed out, you could clean off the woodwork without dismantling the rifle. That is true, but the process is messy enough anyway, and it is easier if you do not have to worry about chemical gunge lurking between, for instance, buttplate and wood, to cause possible trouble over a longer period.
However, as the rifle is just about completely disassembled, you can use the method I am now describing in Part 5 of the RB series. As you might guess ( if you read the shopping list I posted for Joel in advance of Part 5), it involves the gel paint stripper mentioned by Claven2 - and 3.5" diskettes! So take a look at Part 5 in a couple of hours time. In the meantime, please do NOT start to strip the stock! And please do not do the plugging (as described by Claven2) just yet. It will be easier to select the wood and match in the plugs when the stock has been cleaned. We don't even know what kind of wood it is. (My bet is on beech)
And the decision - no, not whether to refurbish it or not- you have in effect already made that decision and committed yourself. No, I mean - are you going to investigate whether it can be turned into a shooter again.
Crazy? Only on my good days
Of course it might be hopeless, but that is what Joel thought at first about the RB. It's starting to look different now.
To answer that question, a first step would be a good picture of the inside of the lock in cleaned condition.
Patrick
Last edited by Patrick Chadwick; 11-25-2010 at 03:24 PM.
-
-
Contributing Member
I have a friend who originally bought the rifle and fixed the trigger and then gave me the rifle. He has been refinishing any thing and every thing for as long as 60 years. From old cars to rifles, knives, binoculars you name it. Through this great site and as much hands on I can get out of him I hope to have a nice rifle when all is done.
I will have the sight in 6-8 wks from the Rifle Shoppe and he was going to show me how to sweat it on. I think the bore is worn beyond shooting as the rifling is very faint(smooth) and the pic I saw on one for sale looked sharp. The sight for my purpose will be for looks.
-
-
Advisory Panel
OK, but have you looked at Part 5 of the Argentine RB series?
-


 PM
PM