+ Reply to Thread
Page 6 of 19 FirstFirst ... 4 5 6 7 8 16 ... LastLast
Results 51 to 60 of 187

Thread: Argentino M1879 Rolling Block. Is it worth restoring?

Click here to increase the font size Click here to reduce the font size
  1. #51
    FREE MEMBER
    NO Posting or PM's Allowed
    killforfood's Avatar
    Join Date
    Dec 2009
    Last On
    05-26-2014 @ 02:00 PM
    Location
    Oregon, USA
    Posts
    56
    Local Date
    05-09-2025
    Local Time
    03:14 AM
    Thread Starter
    The Thanksgiving holiday is winding down so I’m now able to start refinishing the stock.
    The stripper instructions suggested a well ventilated area and a temperature range of 60F-80F.
    The outside temps have been well below freezing so I set up a bench in the basement next to an open window and started a rip-roaring fire in the stove. The nice thing about the stove other then keeping me toasty warm was that I could quickly dispose of chemical soaked rags and keep most of the lovely aroma from drifting upstairs. It must have worked since the Wife only lightly complained, once or twice.


    Here are a couple before pictures of the butt-stock.


    I swiped a natural bristle brush out of the Wife’s craft drawer and proceeded to slather on generous amounts of stripper onto the wood.


    I left the stripper to do its thing and cut some scrapers out of an old plastic jug. Just to be sure, I dunked one of the scrapers into the stripper can and it didn’t melt. On the other hand, my gloves did.


    After the required half hour I donned a more robust pair of Nitrile gloves and began scraping off the bulk of the stripper. The jug material conformed nicely to the stocks curvature.


    A special scraper worked well on the cleaning rod slot.


    Any remaining stripper was washed away using a rag well drenched in alcohol.
    Unfortunately the results were disappointing. No amount of scrubbing would remove the stains. Even a good drenching with acetone was not able to remove them.
    Here are a couple close ups of the stubborn stains.


    The two dark spots appear to be cigarette burns. I didn't expect them to improve but why no improvement on the stained areas? Sure wish I knew what was spilled on the stock. At least then I might know what would dissolve it.


    I’m really not looking forward to using more aggressive methods but it appears I must.
    The thought of bleaching and staining is distasteful to me. I much prefer natural wood tones. I do have some "Goof Off" that might work. It has all of the required nasty chemicals of paint stripper but lacks the gel thickener and may penetrate better. I’ll test it in an inconspicuous spot and see how it works.

    So, Patrick, what do we try next?

    Joel

  2. # ADS
    Friends and Sponsors
    Join Date
    October 2006
    Location
    Milsurps.Com
    Posts
    All Threads
    A Collector's View - The SMLE Short Magazine Lee Enfield 1903-1989. It is 300 8.5x11 inch pages with 1,000+ photo’s, most in color, and each book is serial-numbered.  Covering the SMLE from 1903 to the end of production in India in 1989 it looks at how each model differs and manufacturer differences from a collecting point of view along with the major accessories that could be attached to the rifle. For the record this is not a moneymaker, I hope just to break even, eventually, at $80/book plus shipping.  In the USA shipping is $5.00 for media mail.  I will accept PayPal, Zelle, MO and good old checks (and cash if you want to stop by for a tour!).  CLICK BANNER to send me a PM for International pricing and shipping. Manufacturer of various vintage rifle scopes for the 1903 such as our M73G4 (reproduction of the Weaver 330C) and Malcolm 8X Gen II (Unertl reproduction). Several of our scopes are used in the CMP Vintage Sniper competition on top of 1903 rifles. Brian Dick ... BDL Ltd. - Specializing in British and Commonwealth weapons Specializing in premium ammunition and reloading components. Your source for the finest in High Power Competition Gear. Here at T-bones Shipwrighting we specialise in vintage service rifle: re-barrelling, bedding, repairs, modifications and accurizing. We also provide importation services for firearms, parts and weapons, for both private or commercial businesses.
     

  3. #52
    FREE MEMBER
    NO Posting or PM's Allowed
    killforfood's Avatar
    Join Date
    Dec 2009
    Last On
    05-26-2014 @ 02:00 PM
    Location
    Oregon, USA
    Posts
    56
    Local Date
    05-09-2025
    Local Time
    03:14 AM
    Thread Starter
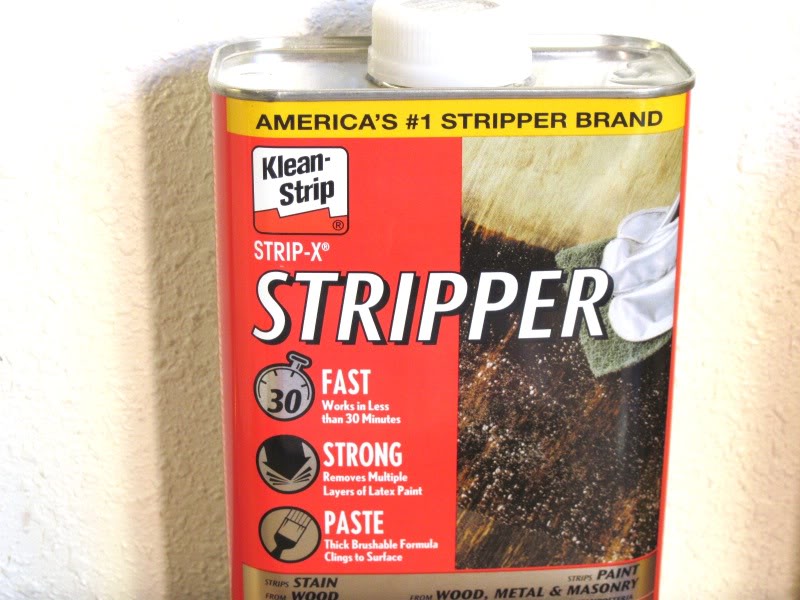
    I did some reading on paint stripper and found that some of the “safer” strippers do not contain methylene chloride. It was described as being very effective compared to “safer” strippers that are less effective without it. Might it save me from bleach and stain?

    Here’s a couple links that shed some light on this chemical and its nasty side effects.

    Dichloromethane - Wikipedia, the free encyclopedia

    http://oehha.ca.gov/air/chronic_rels/pdf/75092.pdf

  4. Avoid Ads - Become a Contributing Member - Click HERE
  5. #53
    Advisory Panel Patrick Chadwick's Avatar
    Join Date
    Sep 2008
    Last On
    06-25-2023 @ 06:36 AM
    Location
    Germany
    Posts
    5,032
    Local Date
    05-09-2025
    Local Time
    12:14 PM
    Now you know why the window should be open!
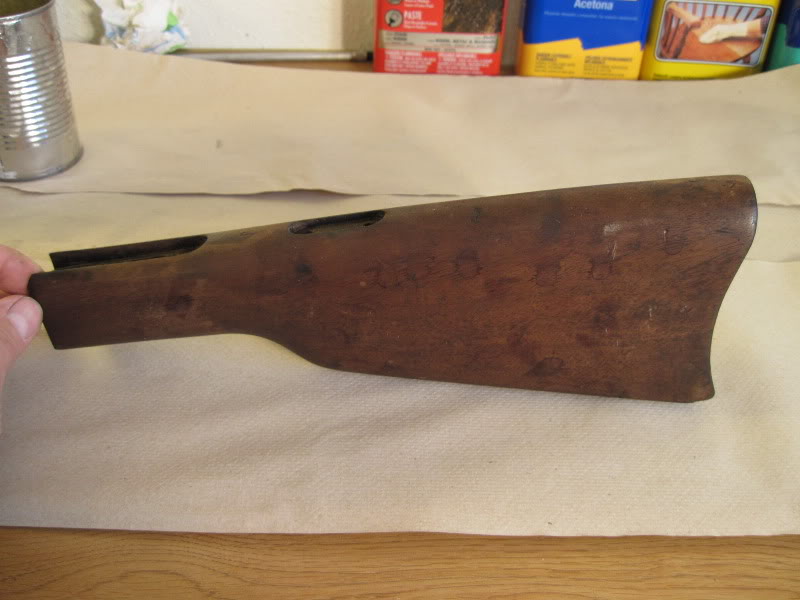
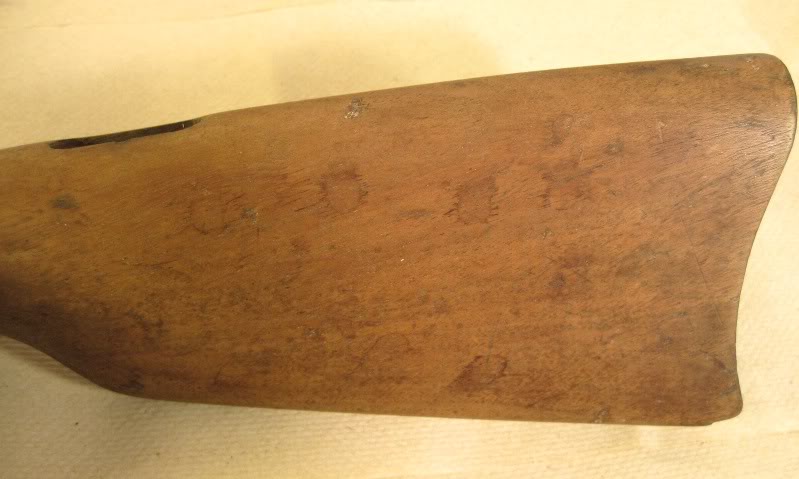
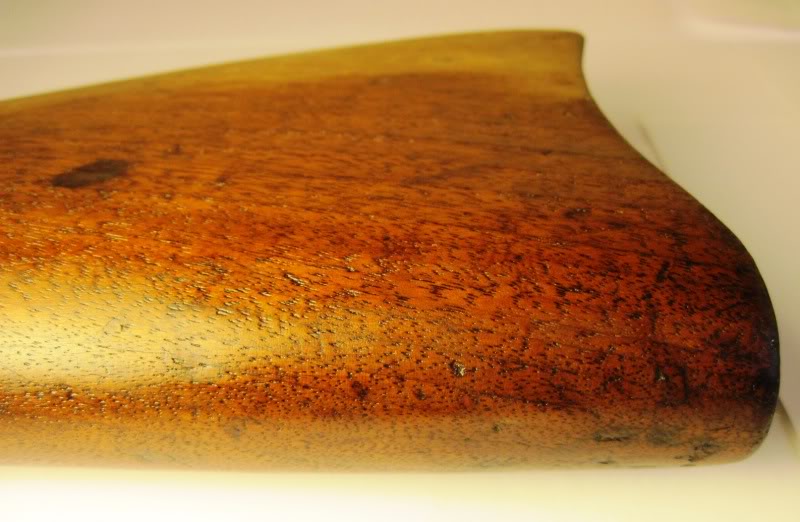
    The wood looks as if it basically has a good surface.
    Quite right: cigarette burns will not disapper. Carbon remains carbon, whatever you tip on it.
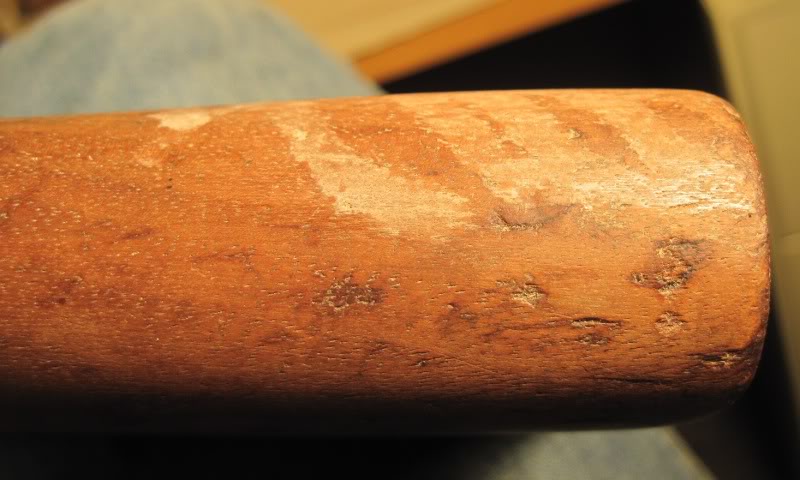
    And the rough depressions in your last picture can not be removed without sanding, which is the last thing I would want to do.
    But they do not look like dings, i.e. mechanical deformation, as that does not produce such roughness.
    Are they perhaps spots where rot was starting to take hold?
    If so, those ragged areas will feel softer to the touch than the surrounding clear areas.
    It may be necessary to give those ragged areas a teensy weensy bit of sanding with a 400 grit paper.
    Just enough to smooth them off.
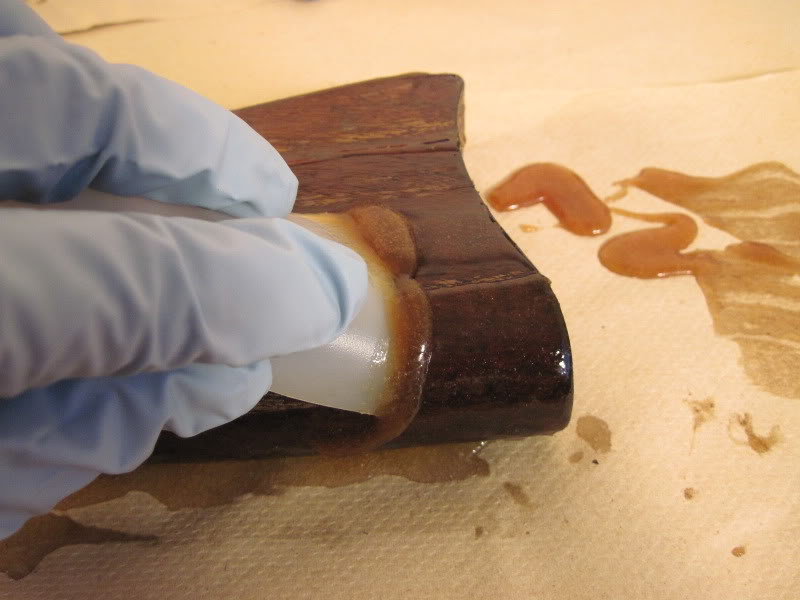
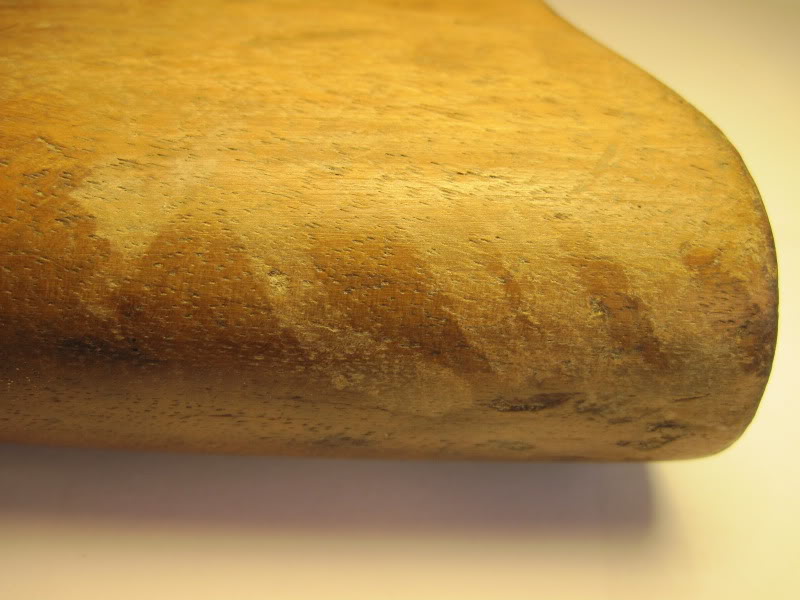
    But try my wood brunishing method first, and you may get a considerable improvement wihout any sanding.
    It is slow, but it hardens up the surface of the wood, and most of that stock should start to look a bit shinier, as I showed on the pics of the ENfield butt.

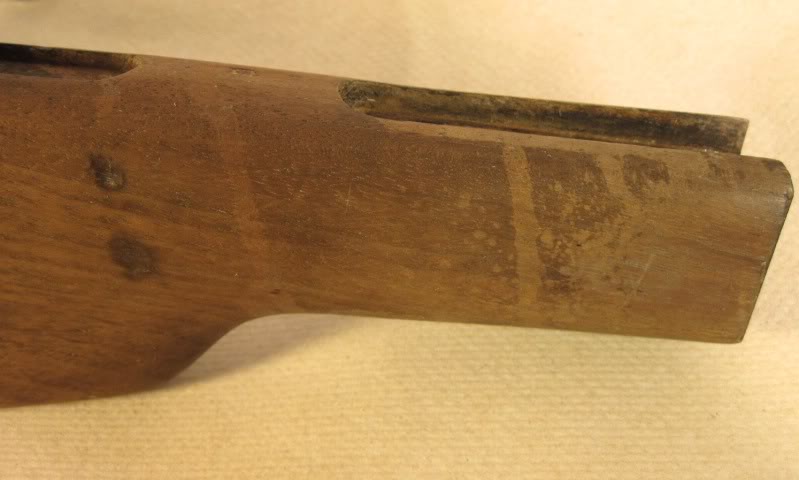
    What bothers me above all is the drip stains. I do not think that they are stains that you can remove. The reverse is true: whatever it was has already partially bleached out the wood where it ran. In which case, you will only be able to subdue them by bleaching out the rest to match. DO NOT DO ANYTHING ABOUT THAT JUST NOW. Continue with the rest of the wood while I send out a call for help....

    At this point, I think we need a second opinion.

    Paging Dr. Claven2 !!! Are you out there? We need your advice!
    Last edited by Patrick Chadwick; 11-28-2010 at 05:01 AM.

  6. #54
    FREE MEMBER
    NO Posting or PM's Allowed
    killforfood's Avatar
    Join Date
    Dec 2009
    Last On
    05-26-2014 @ 02:00 PM
    Location
    Oregon, USA
    Posts
    56
    Local Date
    05-09-2025
    Local Time
    03:14 AM
    Thread Starter
    Patrick,
    I had some time to try the burnishing techniques that you described.
    It actually worked quite well and I was able to sit on the couch and watch a little football while madly burnishing away. No need for the Wife to be upset about any mess either since there is no sanding dust. I paid special attention to the bleached runs on the butt-stock. These areas grabbed the burnishing tool and at first did not want to smooth up. It felt like these fibers were slightly softer than the surrounding areas, probably damaged by what ever was spilled on the stock.


    I stayed with it and eventually the tool slipped over the bleached areas with less drag.
    Just for grins I decided to wipe some Turpentine over the area and see how it might appear with a finish on it.
    To my amazement the wood took on a beautiful hue with no signs of the bleached stains.


    Well that got me good and excited so I rubbed some Turpentine over the stained tang area of the stock with hopes that those stains wouldn’t show either. It doesn’t look terrible but it does show. I would prefer that the stains be gone but am willing to live with a few warts to remind me of where this rifle came from.


    I look forward to any suggestions that Claven2 might add to your helpful advice.

    Thanks, Joel.


    Oh, Yah, the dings that you mentioned are firm with no signs of rot. As you can see in the picture above, the burnishing improved their appearence a good amount.

  7. #55
    Senior Moderator
    (Founding Partner)


    Site Founder
    Claven2's Avatar
    Join Date
    Oct 2006
    Last On
    Yesterday @ 10:43 PM
    Location
    Scandaltown, Ontario
    Posts
    3,284
    Real Name
    Ronald
    Local Date
    05-09-2025
    Local Time
    06:14 AM
    Hi gents,

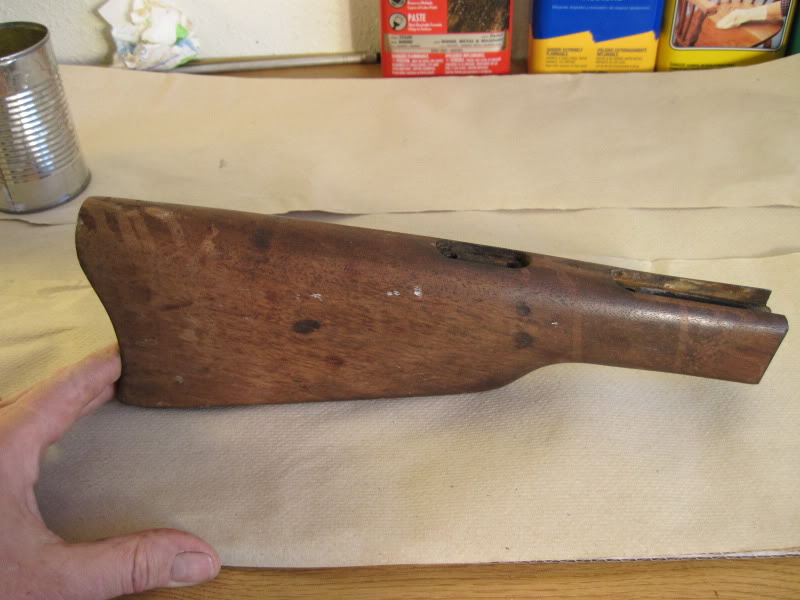
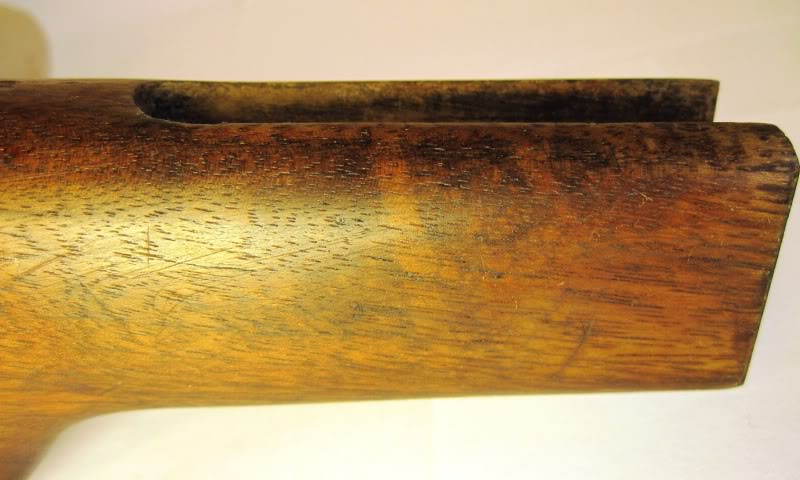
    I think the light areas might be where the concentrated gel stripper was first applied and stayed on a bit longer I would suggest giving it one more stripper coating and then taking another look.

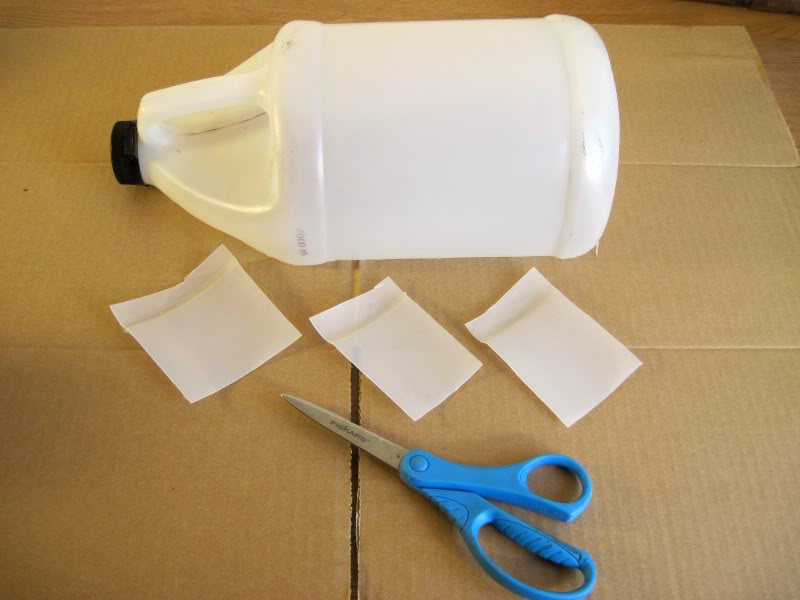
    IF you have to use 400 grit paper, cut it into inch-wide strips 8" or so long and wrap it around a file to guide your sanding. Do not just use hand pressure as this will give it too much waabi (in other words make the surface wobbly). Do NOT sand the entire stock - just sand spot areas where you find more problems than you are willing to live with.

    Personally, if it were my stock, I would re-strip and then finish it - leaving any remaining discoloration as pat of the rifle's history.

    Cheers.
    Союз нерушимый республик свободных Сплотила навеки Великая Русь. Да здравствует созданный волей народов Единый, могучий Советский Союз!

  8. Thank You to Claven2 For This Useful Post:


  9. #56
    Advisory Panel Patrick Chadwick's Avatar
    Join Date
    Sep 2008
    Last On
    06-25-2023 @ 06:36 AM
    Location
    Germany
    Posts
    5,032
    Local Date
    05-09-2025
    Local Time
    12:14 PM

    Argentine RB - Part6

    Joel, I must confess that is turning out even better than I expected.
    OK, let's "take stock" (the pun is unavoidable) of where we are.

    The questions in your very first posting have now almost all been answered
    1) "Is it worth restoring?"
    YES

    2) "I’m thinking maybe offering him $50 but I’m not sure if it’s even worth that."
    IT WAS

    3) "It took some work to open the action and the hammer will not fall hard enough to detonate a primer."
    FIXED

    4) "The buttstock is not badly dented and would probably clean up nice."
    IT DID

    5) "The is rust is pretty bad, especially on the end of the barrel."
    FIXED but barrel needs recrowning if you want a shooter.

    6) "Also the cleaning rod and sling are missing."
    Not yet dealt with. I can't help you with that from here.

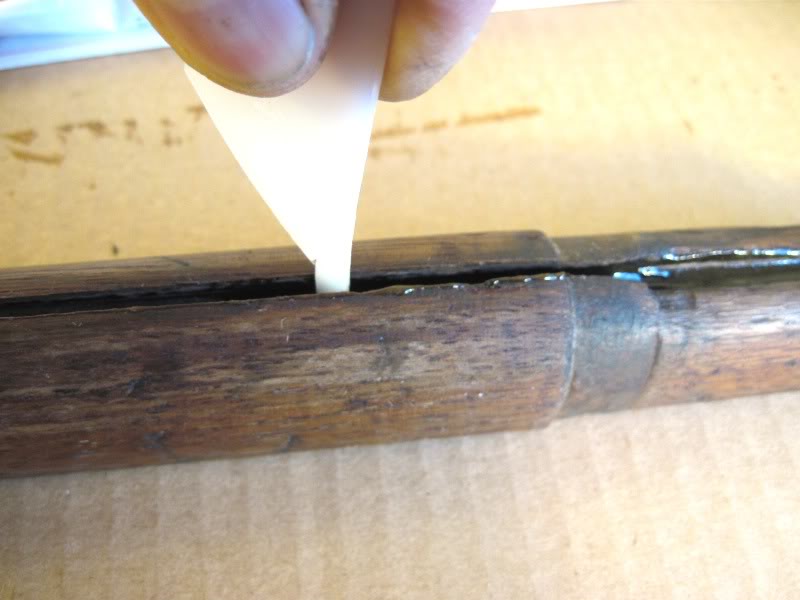
    7) "The stock has a crack that could probably be repaired..."
    YES
    "...but would require some filler where wood is missing."
    Not ordinary DIY wood filler, but I will leave that to Claven2 - he is better at that sort of thing.

    8) "The sight is rusted in place and cannot be adjusted."
    FIXED

    9) "The finely detailed manufacturer patent marks would probably be lost."
    THEY ARE NOT AND WILL NOT BE LOST.

    10) "What do you guys think? Give it a try or run for my life?"
    - And what did I write in reply?
    "....Let me have that thing in my workshop for a long weekend, and I'll turn it into something that would make you regret not having kept it."

    And as you can see, that would have come true.

    It is very pleasing to see that the methods described here actually work. Initially reluctant to touch the rifle, you are now producing something that you can show with pride.

    We have come so far without removing any metal or wood - we have only removed rust and muck - that we are not going to cut any corners now and use destructive chemicals or sandpaper.

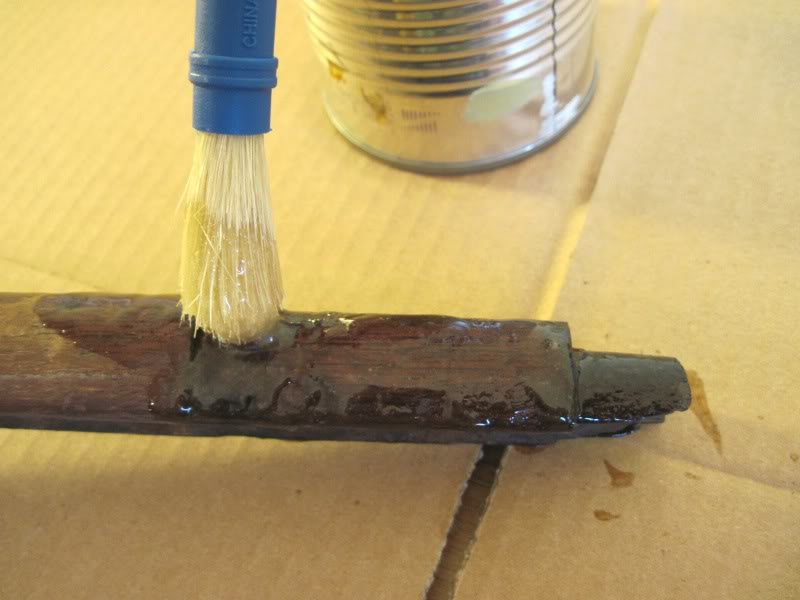
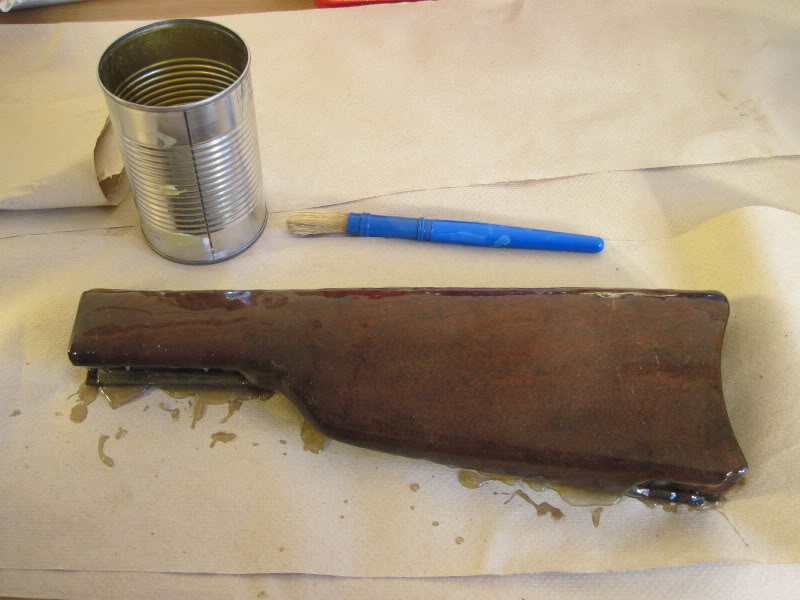
    The gel stripper and burnishing process produces very good results and does no damage to the wood. Another advantage is that since you are not dunking the wood in a tank, you can go back and redo any areas that are not yet satisfactory. We have not yet applied any finish - the wipe over with the terpentine just shows how it will look - permanently - when the BLOicon is applied.

    So do as Claven2 recommends, and redo the area shown in your last pic. The streaks show up more in the darker area, indicating that there is still some grime to come off. Personally, I would try my best not to use sandpaper at all, but if you feel that is unavoidable in patches, then do as Claven2 recommends.

    And then there will then only remain the crack to be fixed. Claven2, could you please provide some advice here?

    When you have done that, please report back with photos.

    Eagerly expecting your feedback!

    Patrick

  10. #57
    Senior Moderator
    (Founding Partner)


    Site Founder
    Claven2's Avatar
    Join Date
    Oct 2006
    Last On
    Yesterday @ 10:43 PM
    Location
    Scandaltown, Ontario
    Posts
    3,284
    Real Name
    Ronald
    Local Date
    05-09-2025
    Local Time
    06:14 AM
    Can you post detailed photos of the crack(s) in question? I'll try to best advise once they are posted.
    Союз нерушимый республик свободных Сплотила навеки Великая Русь. Да здравствует созданный волей народов Единый, могучий Советский Союз!

  11. #58
    FREE MEMBER
    NO Posting or PM's Allowed
    killforfood's Avatar
    Join Date
    Dec 2009
    Last On
    05-26-2014 @ 02:00 PM
    Location
    Oregon, USA
    Posts
    56
    Local Date
    05-09-2025
    Local Time
    03:14 AM
    Thread Starter
    Patrick, Claven2,
    Thanks for all of the support.

    Claven2,
    I will post up detailed pictures of the cracked area tonight after work.

    Patrick,
    I’ll re-apply stripper tonight and see if we can achieve any improvement.
    Regardless of outcome, I will accept the results as a reminder of what this rifle has been through. Let’s not forget that the gentleman who recovered it was required to wear head to toe protective gear just to enter the wet moldy basement where it lived for countless years.

    Good News!
    Re-production cleaning rods are available from…

    Untitled Document"]www.rollingblockparts.com/no1.html"]Untitled Document

    “Cleaning rod for the 1879 Argentineicon rolling block rifle. This rod is a reproduction of the cleaning rod for the three band Modelo Argentino 1879 Rifle. The rod is 34 inches long and has the appropriate course thread a the bottom end to fasten into the cone style cleaning rod stop. This rod is also correct for most other .43 cal #1 three band military rifles. $35.00 - $4.95 S&Ins. “

    Thanks, Joel.

  12. #59
    Advisory Panel Patrick Chadwick's Avatar
    Join Date
    Sep 2008
    Last On
    06-25-2023 @ 06:36 AM
    Location
    Germany
    Posts
    5,032
    Local Date
    05-09-2025
    Local Time
    12:14 PM
    Quote Originally Posted by killforfood View Post
    Good News!
    Re-production cleaning rods are available from…

    Untitled Document"]www.rollingblockparts.com/no1.html"]Untitled Document

    “Cleaning rod for the 1879 Argentineicon rolling block rifle. This rod is a reproduction of the cleaning rod for the three band Modelo Argentino 1879 Rifle. The rod is 34 inches long and has the appropriate course thread a the bottom end to fasten into the cone style cleaning rod stop.
    Very good news. When you get it, check whether the thread will actually go into that plate in the action body, below the end of the barrel. A bit of fettling may be necessary.

    Patrick

  13. #60
    Advisory Panel

    jmoore's Avatar
    Join Date
    Mar 2009
    Last On
    06-09-2023 @ 04:20 AM
    Location
    US of A
    Posts
    7,066
    Local Date
    05-09-2025
    Local Time
    06:14 AM
    Morale building, y'all! Another recent thread didn't turn out near so well, not from a lack of effort on Patrick Chadwick's and Claven2's part, as well as others.

    Killforfood, I must thank you for being suitably cautious and diligent. It's been good reading.

    (Don't know why this is all in bold. Too tired to fix!)


+ Reply to Thread
Page 6 of 19 FirstFirst ... 4 5 6 7 8 16 ... LastLast

Similar Threads

  1. Mauser Modelo Argentino 1909 in .30-06?
    By Seamus in forum Mauser Rifles
    Replies: 11
    Last Post: 09-29-2017, 10:06 PM
  2. Grenzaufsehergerwehr (GAG) M1879
    By Patrick Chadwick in forum Black Powder
    Replies: 9
    Last Post: 12-20-2012, 01:13 PM
  3. Remington Model 4 Rolling Block Rifle
    By Pattern14 in forum The Watering Hole OT (Off Topic) Forum
    Replies: 6
    Last Post: 06-02-2010, 06:37 PM
  4. Swedish Rolling Block Butt Disc
    By K31 in forum Mauser Rifles
    Replies: 4
    Last Post: 04-09-2008, 08:08 PM
  5. LOADING FOR SWEDISH ROLLING BLOCK, 8mm
    By K31 in forum Ammunition and Reloading for Old Milsurps
    Replies: 2
    Last Post: 03-17-2008, 05:37 PM

Tags for this Thread

Posting Permissions

  • You may not post new threads
  • You may not post replies
  • You may not post attachments
  • You may not edit your posts