


Progress for Today: Removed the torch cut receiver tube from the trigger housing. Since I tend to get impatient and my work suffers, I'll stop at this point and use another day to clean up the trigger group. Here's the round up:
I looked through a few web sites where others were building STEN III or V's. I noticed on one of them, the man damaged the upper rim of the Head Casing when he removed the tube from the back. I suspect he did not fully remove the spot welds and when the tube was bent upward to remove from the Rear Head Casing, it took a chunk of metal with it. I wanted to prevent that, so I proceeded slowly.
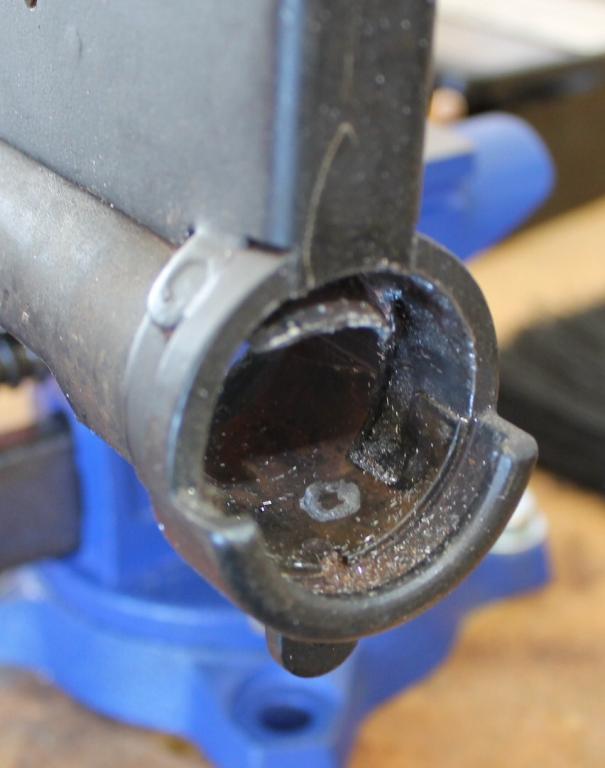
Started by clamping the tube in the vise being careful not to clamp the tabs on the Case, Trigger Mechanism. The spot welds are fairly easy to see, but once the metal glitter flys, they get covered up. I started by marking the welds so I could grid easier.
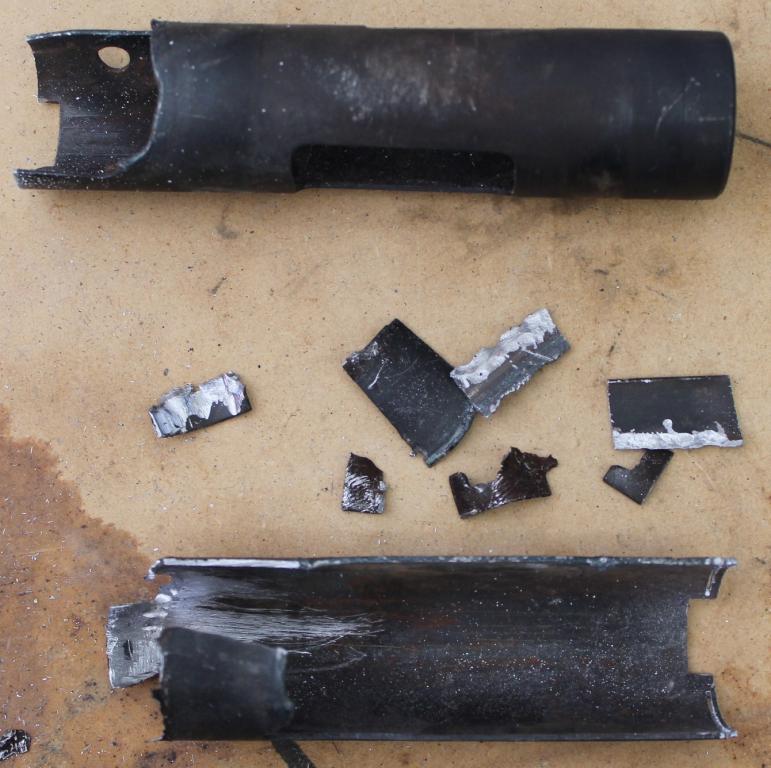
I then began to grind using the TiN metal cutting bits from the Dremmel tool to eat away at the welds. As I made some progress I was able to get a small pry tool between the tube and the Head Casing Ring and pry the tube slowly away. This told me how my progress was going and let me see how deep my grinding was so that I did not cut into the Head Casing. Here you can see the progress as I gind the tube, being careful not to exceed the thickness of the tube and go into the Casing. You can also see the pieces being separated from the casing by light prying and bending.
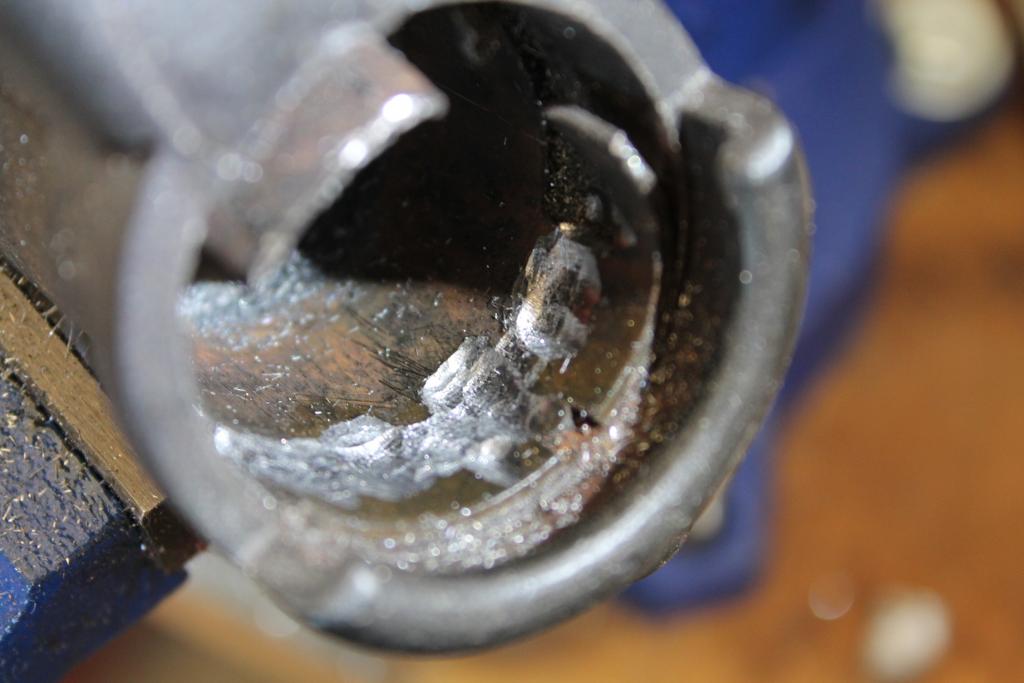
It occurred to me that if I cut the back of the tube, from the weld cut to the back, I could begin to roll up the tube on the inside as I ate away the welds. This allowed me to grind away without goig too deep. In the next photo you can see where I took the hacksaw apart, turned the blade upside down and reconnected it to the hacksaw frame so I could say inside the tube. This worked real nice and I was able to cut through only the tube from the torch cut to the back of the tube.
Here is the progress after the cut was finished and you can see how easy it was to roll the tube inside the Rear Casing. This really helped with the weld removal. Notice how there is no damage to the Casing Head. Success.
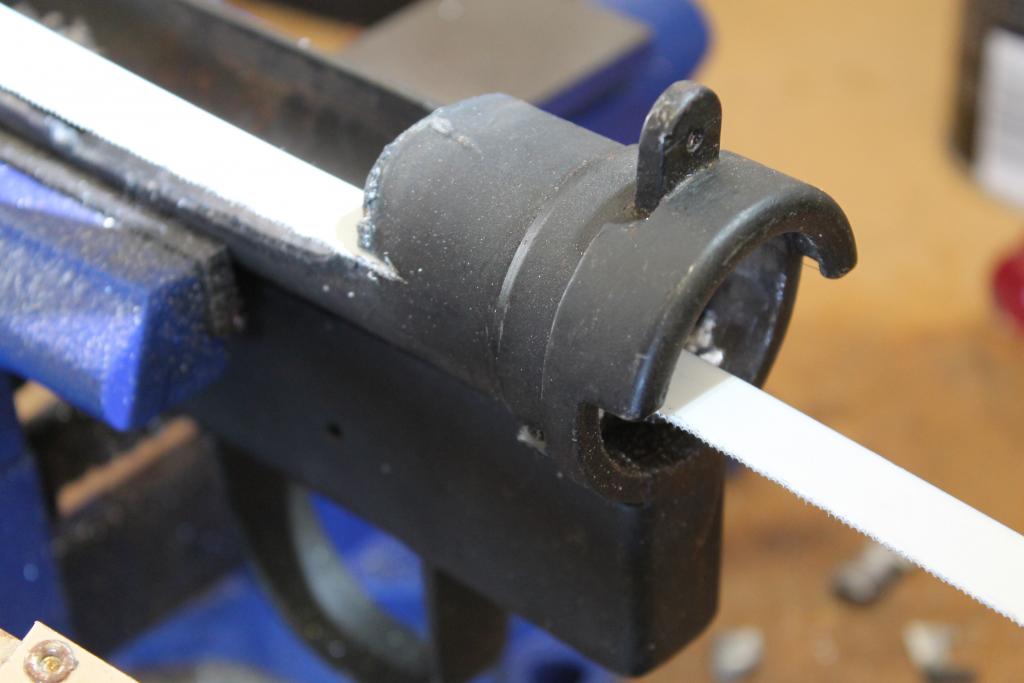
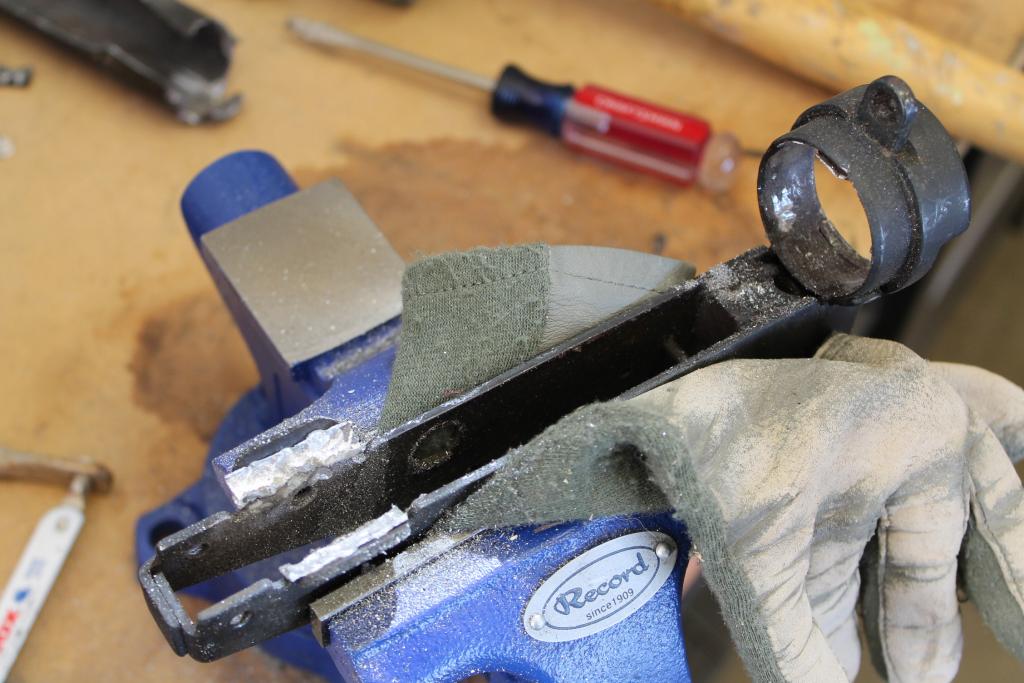
The next step was to clamp the Trigger Case Mechanism using some leather to prevent marring the parts that I want to use. I began grinding with a ball grinder on the Dremmel. I was hoping to use my drill press and Ball Mills to grind away the welds and not damage the two tabs on the housing. As I began to grind the inside of the tube I realized i could cut the tube completely off in front of and behind the two tabs. I failed to photograph this step, but you can see in the next photo where the cuts were made. Just in front and behind the tabs there are small recesses that allow you to cut with a hack saw without touching the housing below. This left a small ring of metal only over the tabs, and as I ground away I was able to bend the tube back and away from the tabs without damaging them.
*****Wait to do this until you get most of the welds removed or you might bend/snap off the tabs.
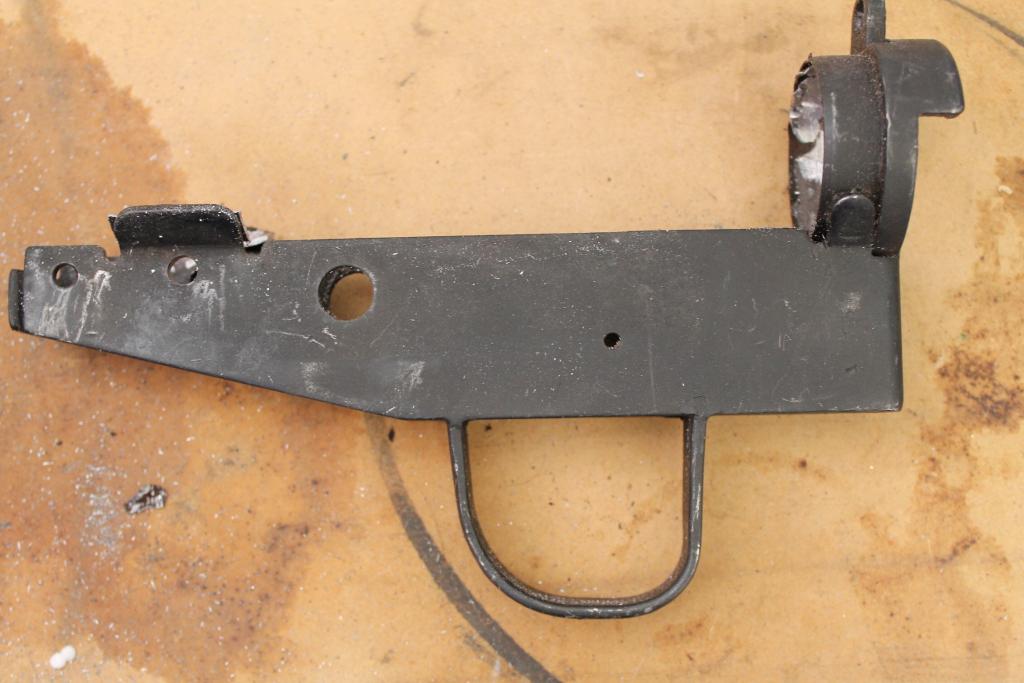
All I have to do now is clean up the inside of the Rear Head Casing and the inside of the two tabs and the trigger mechanism housing will be ready for blasting. This step did two things for me:
1. Saved $200 by not having to buy a newly made mechanism,
2. Saved all of the valuable marks and Broad Arrows on the housing.
Reusable???
More Later
- Knowledge Library

- MKL Entry of the Month
- Australia
- Austro-Hungarian Empire
- Canada
- Czechoslovakia
- Denmark
- Finland
- France/Belgium
- Germany
- Italy
- Japan
- Norway
- Russia
- South America
- Sweden
- Switzerland
- Turkey
- United Kingdom
- United States
- Yugoslavia
- Is my rifle authentic or a fake?
- Jay Currah's Lee Enfield Web Site
- On-line Service Records (Canada)
- Technical Articles/Research
- Forum
- Classifieds
- What's New?
-
Photo Gallery
- Photo Gallery Options
- Photo Gallery Home
- Search Photo Gallery List
-
Photo Gallery Search
- Video Club
- iTrader


 Register To Reply