-
Deceased August 31st, 2020

Chipped out butt repair
With the hobby of antique firearms, I sometimes have a dilema as what to do with a specimen. Two schools of thought here, either a collector or a shooter. As a collector I want to preserve the history of a firearm and not to refinish or change it. As a shooter, I want my firearms to be 100% mechnicaly and function overides originality. So if I am refurbishing something to shoot, I have no hesitation in changing a part or machining, welding etc or touching up finish.
I have a nice example of a 1891 LSA made Mk.I* Lee Metford. It came to me with a hundred years of grime on it. A drill rifle all beat to **** but mechanically showing very little wear, and untouched. Probably made into a DP because it was an obscolete arm, not because it was worn out. It appears to have good potential to be a decent shooter.
Original blue on the metal, original finish on the wood. Bright shiney Metford rifling. The collector in me thinks that I should not mess with this one, just give a a gentle cleaning and halt any signs of decay. The shooter in me wants to get it barking at the moon again. So what to do…..
With my hobby of refurbishing rifles, I work on older military arms. Usualy by the time that they make it into my hands they are showing a lifetime of abuse and neglect. With some of them, a lifetime of military service and then several generations of use in civilian hands. My mission is to remove these signs of neglect but leaving the rifle looking its age. If something is broken, I fix it but leave all else alone. I will clean and refresh the wood, but not very often will I touch the finish on the metal. Honest wear on an antique looks just fine in my eyes.
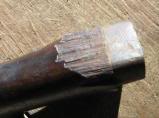
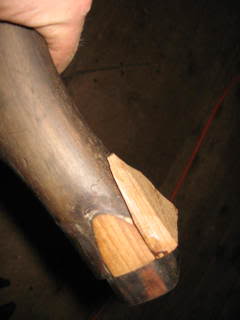
This rifle has been marked DP and came without mag or bolt. Looking at the woodwork it is a well used drill rifle. The butt stock is chipped where it fits into the butt socket, no doubt from years of being pounded on the drill square. With respect to structural integrity, once the butt stock screw was tightened, it was tight and fine to use. But it looks pretty sad. So here is how I addressed the damage.
I have seen this problem quite a bit before with Martini Henry rifles, where it is common for the stock to chip out at the joint between pistol grip and butt socket. The wood shears out under the shock of recoil because the brunt of the force is taken on the shoulders of the stock tennon and not the end as it was origianly designed to do. The end should bottom out in the socket and the shoulders should have a coontair of clearance to the metalwork.
First I removed the stock and cleaned it with a rag soaked in turpentine. This takes a lot of the grime away so I can see as to what I have to work with.
The BLO finish was dark,almost black with age and oxidisation, skin cells, snot, blood or whatever
. I cleaned it with antique furniture paint and varnish remover. This type of stripper is intended specifically for use on wood and will not harm it but will cut the crud like you would not believe.
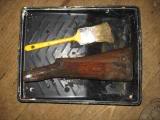
The stripper was washed away under hot water and the wood gently cleaned with a scotch pad.
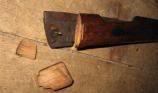
Cartouches became visible like magic. There is the LSA roundel plus another one that says ‘FORT WILLIAM ARSENAL’.
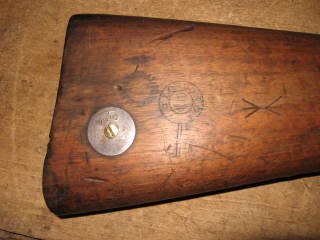
The city of Thunder Bay here in Ontario used to be called Fort William. There is also a Fort William in Calcutta, India
More research required on this one. The wood is blackened so I am thinking India and the use of Rangoon oil which has a darkening effect. I scrutinised the rifle for goverment acceptance marks, British were the only ones that I found.
So wood all cleaned up dirt is gone and yet no patina removed. All of the dings and dents remain. However, I will probably be able to get most of them out with my steamer. More on this later.
Using a flat file, I dressed the area of damage taking care to make the surfaces flat.
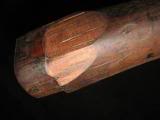
I cut up an old walnut fore arm from a MLE for material.
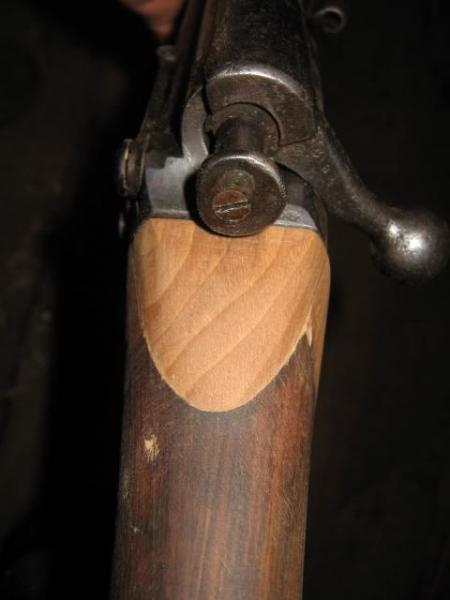
I used cynoacrolate (super glue) to attach the wood patches tightly clamped.
The excess material was removed with a modeling knife close to profile then finished with sand paper wrapped around the file.
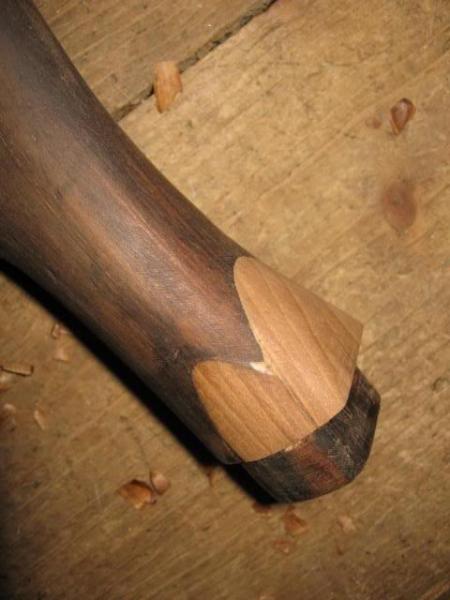
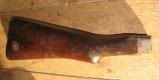
The shoulder on the butt tennon was taken back and the stock fitted back up. So far so good. 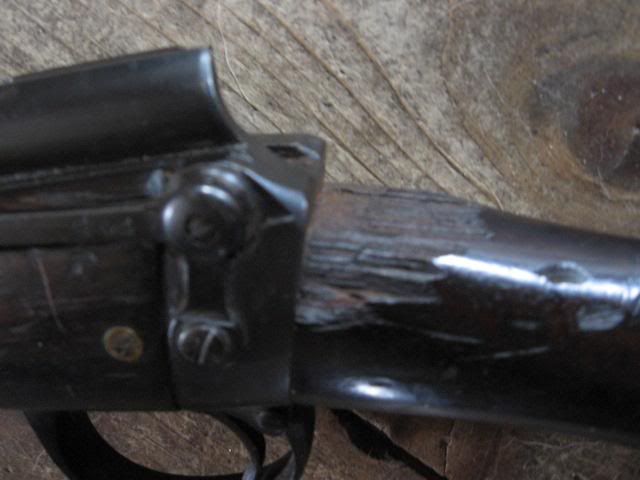
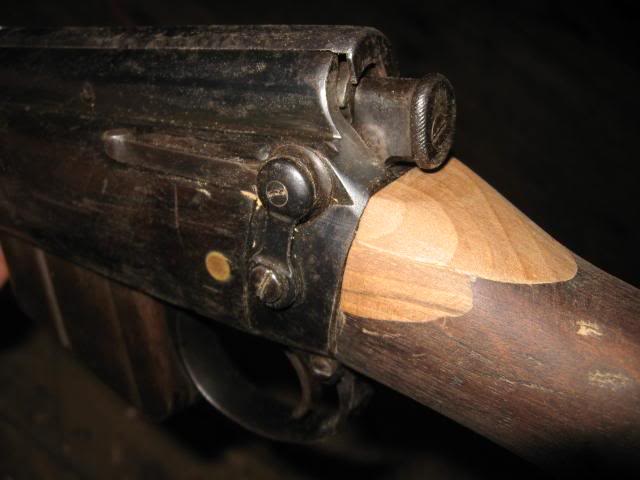
If I was smart, I would have selected wood patches with a better colour match, however, I will stain the patches when I am ready to finish the wood as a set.
The repair won’t be invisible but it is neat and the stock now feels good in the hands. I will show it to you again when I am finished.
Information
 |
Warning: This is a relatively older thread
This discussion is older than 360 days. Some information contained in it may no longer be current. |
|
Last edited by englishman_ca; 03-26-2009 at 01:55 PM.
-
Thank You to englishman_ca For This Useful Post:
-
03-26-2009 01:07 PM
# ADS
Friends and Sponsors

-
Legacy Member

Great technique and execution. Some brown dye will probably get you in the ballpark.
Military repairs were never perfect either. Did you consider using any brass repair screws through the repair?
JR
-
-
Deceased August 31st, 2020

Originally Posted by
Rotor

Great technique and execution. Some brown dye will probably get you in the ballpark.
Military repairs were never perfect either. Did you consider using any brass repair screws through the repair?
JR
Ya, not finished yet, I will mix up and match some alcahol based dye and darken it down a bit. The fore stock from which the patch was taken was quite dark on the surface but fresh wood was quite light in colour.
I don't think that the repair will need anything else for strength as the shoulder is now clear of the reciever and I don't expect the rifle will have its buttplate pounded on the ground for years.
Yes, I tought of inserting some threaded brass rods, but usualy with a big flat patch like this the armourer would have used pegs. I might put in a couple of oak dowels just for show.
-
-
Advisory Panel


Could you tell us what brand of furniture cleaner you used?
I've got a pitch black stock that could really use a brightening up...
-
-
I just used Circa 1850 furniture stripper, this afternoon, on really yucky DP forends for No1Mk3. Works great.
Lou
-
Thank You to louthepou For This Useful Post:
-
Deceased August 31st, 2020
I have tried a variety of methods, yes, including oven cleaner and the dish washer. Sometimes for a wood set that is all but a lost cause, drastic measures have to be taken. However, for general use, 'Circa 1850' brand antique furnature stipper seems to work the best for me. It will remove all the crud and yet will not remove patina, so when dry, the wood still looks old with all its charm and character.
Other strippers work well too, but they tend to strip everything and the cleaned stock looks like bare new wood. My feeling is that these industrial strippers might be too harse and might be harmful to the wood. So I went to a purpose made product. Probably any stripper that is marketed as for use on antique furnature would be one to try.
-
The Following 2 Members Say Thank You to englishman_ca For This Useful Post:


 Register To Reply


