Attachment 52107
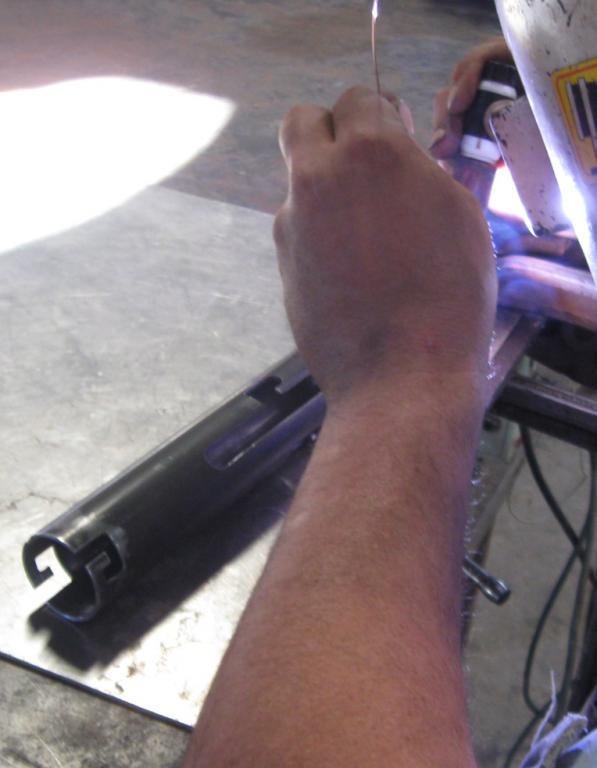
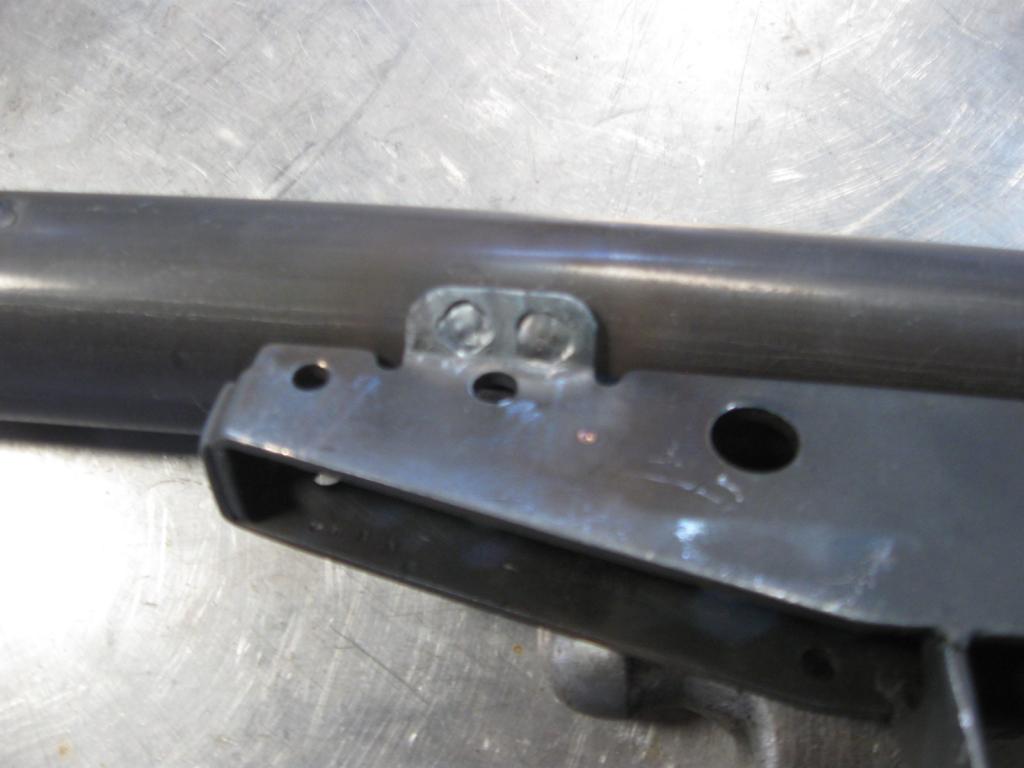
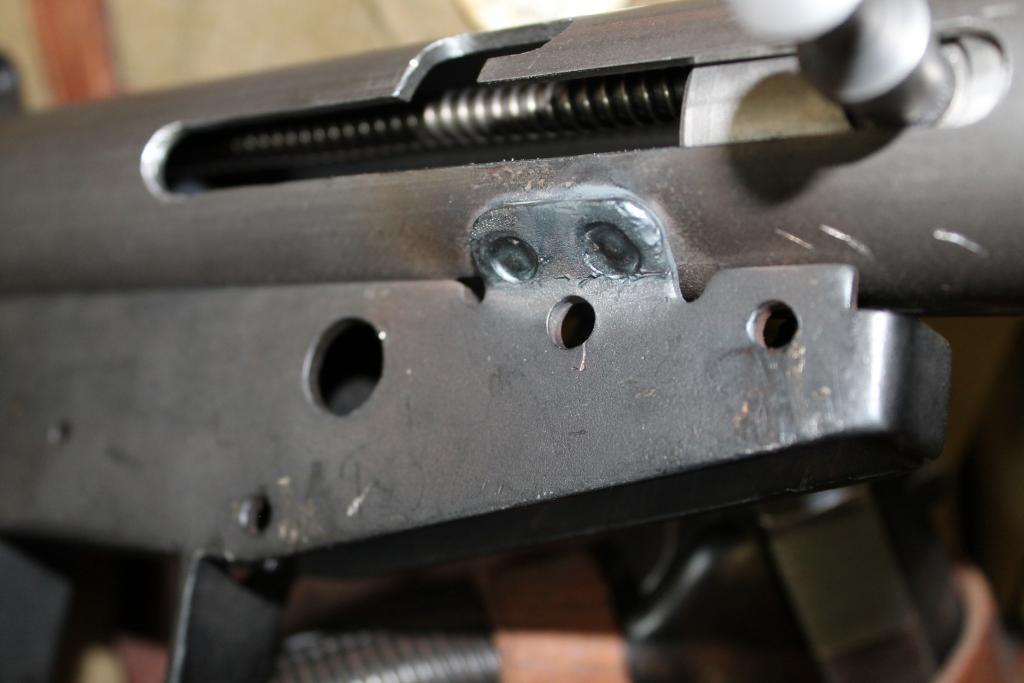
You don't want the ejector to be flush with the outside of the tube. The weld will be stronger if it is sitting down in the slot. Remember the magazine well will be sliding over this. So the weld needs to be in the slot. If you get any above the slot, you will have to grind it off so it's flush with the tube.. or the magazine well will not go on.Information

Warning: This is a relatively older thread
This discussion is older than 360 days. Some information contained in it may no longer be current.
- Knowledge Library

- MKL Entry of the Month
- Australia
- Austro-Hungarian Empire
- Canada
- Czechoslovakia
- Denmark
- Finland
- France/Belgium
- Germany
- Italy
- Japan
- Norway
- Russia
- South America
- Sweden
- Switzerland
- Turkey
- United Kingdom
- United States
- Yugoslavia
- Is my rifle authentic or a fake?
- Jay Currah's Lee Enfield Web Site
- On-line Service Records (Canada)
- Technical Articles/Research
- Forum
- Classifieds
- What's New?
-
Photo Gallery
- Photo Gallery Options
- Photo Gallery Home
- Search Photo Gallery List
-
Photo Gallery Search
- Video Club
- iTrader
 PM
PM