-
Contributing Member


I just got back from checking it out. I did buy it and bring it home but photos are going to have to wait a bit. I have a busy weekend planned with WWII weekend tomorrow and a slew of graduation parties on Sunday.
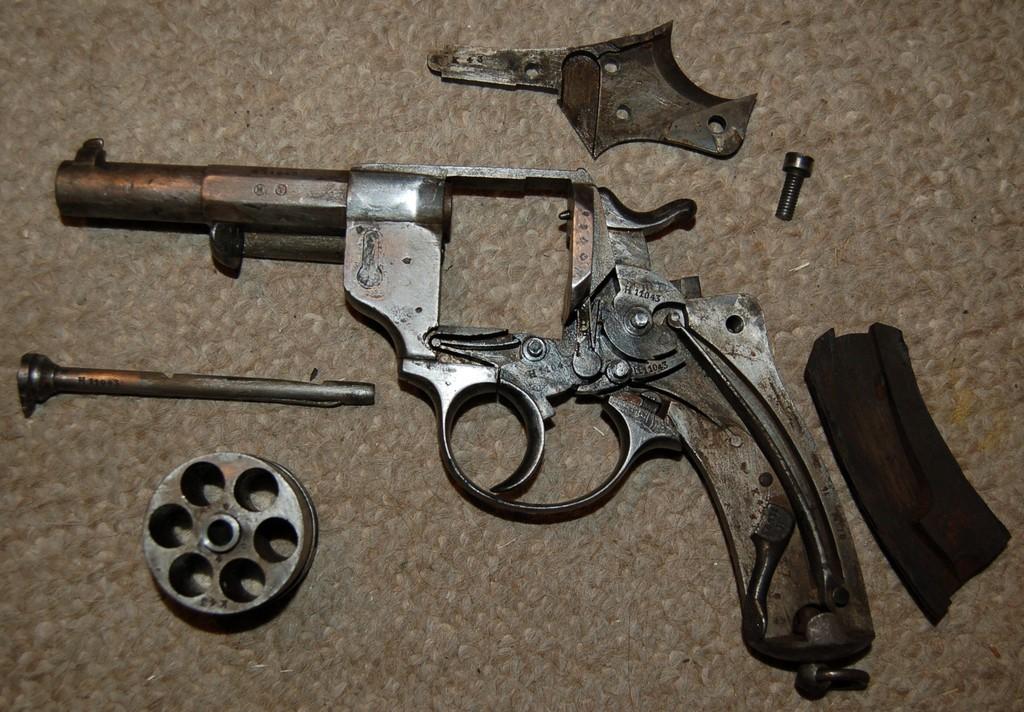
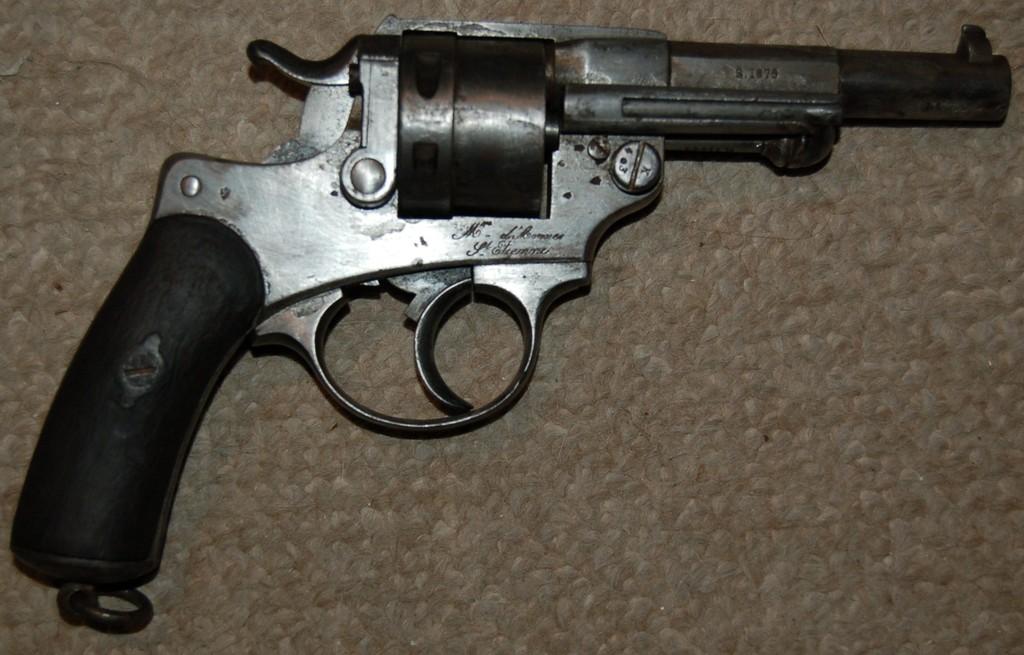
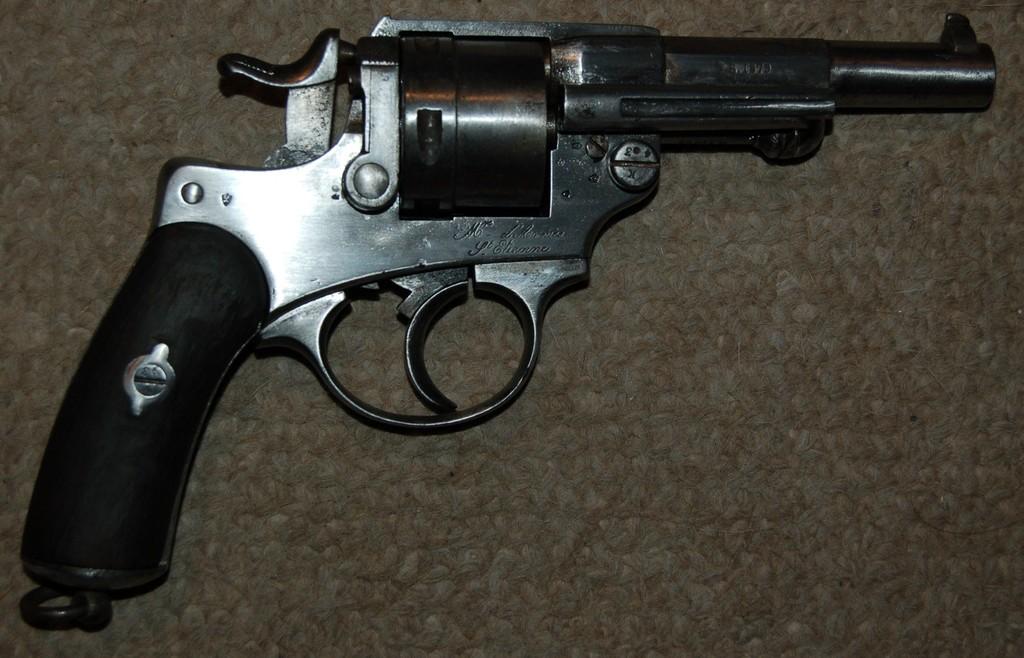
It is not a pretty one. Seems to be rust free on the exterior but there is what appears to be slight erosion in places and the appearances of a wire wheel cleaning. Bore looks good with the exception of one area which I am hoping is fossilized grease.
Cylinder works on single action, double action and locks up pretty tight on cocking. Seems to be a nice solid piece.
Hopefully I can clean it up nicely.
-
-
06-05-2015 08:28 PM
# ADS
Friends and Sponsors

-
Contributing Member
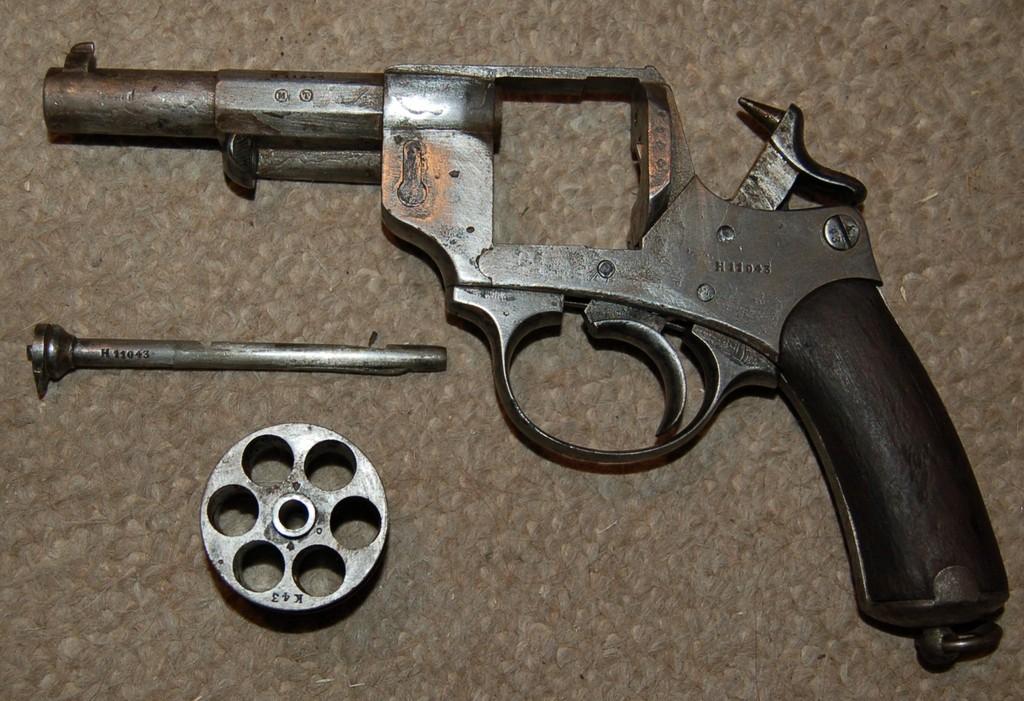
Update, couldn't stand it and had to find out what that was in the bore. It does appear to be fossilized grease. I have it soaking in PB Blaster and I was able to get most of it out and it does not appear to have affected the rifling. It ran about 3/4's of the way down the barrel and was mostly only on one side. Like it may have been lying for a long time and everything moved in that direction and hardened.
Wife is complaining about the smell already, she's only been in the house for 2 minutes. Women.
-
Thank You to Aragorn243 For This Useful Post:
-
-
Contributing Member
-
The Following 5 Members Say Thank You to Aragorn243 For This Useful Post:
-
-
The Following 2 Members Say Thank You to Aragorn243 For This Useful Post:
-
Legacy Member

Huge improvement, had to do what you had to do.
-
The Following 2 Members Say Thank You to WarPig1976 For This Useful Post:
-
Advisory Panel


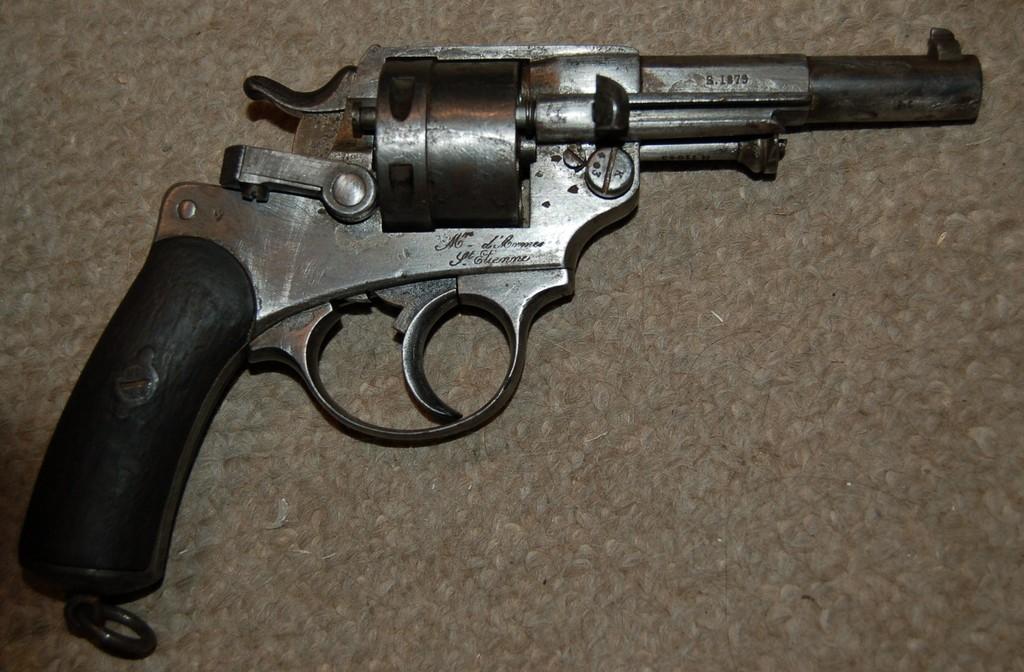
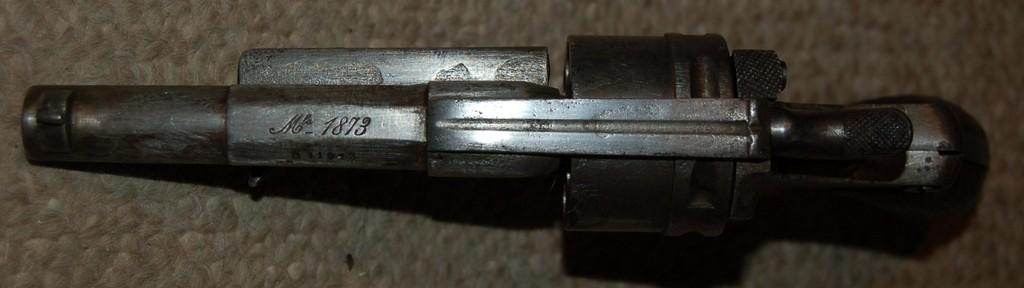
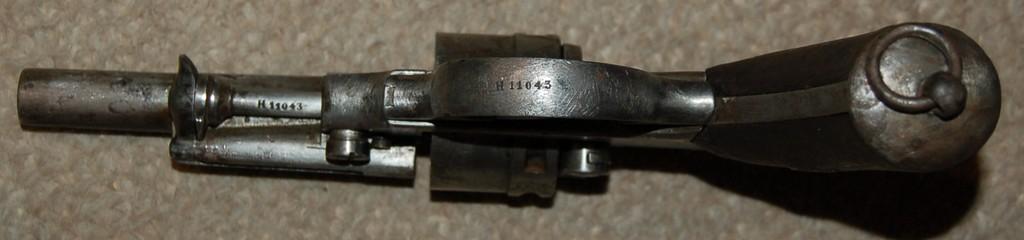
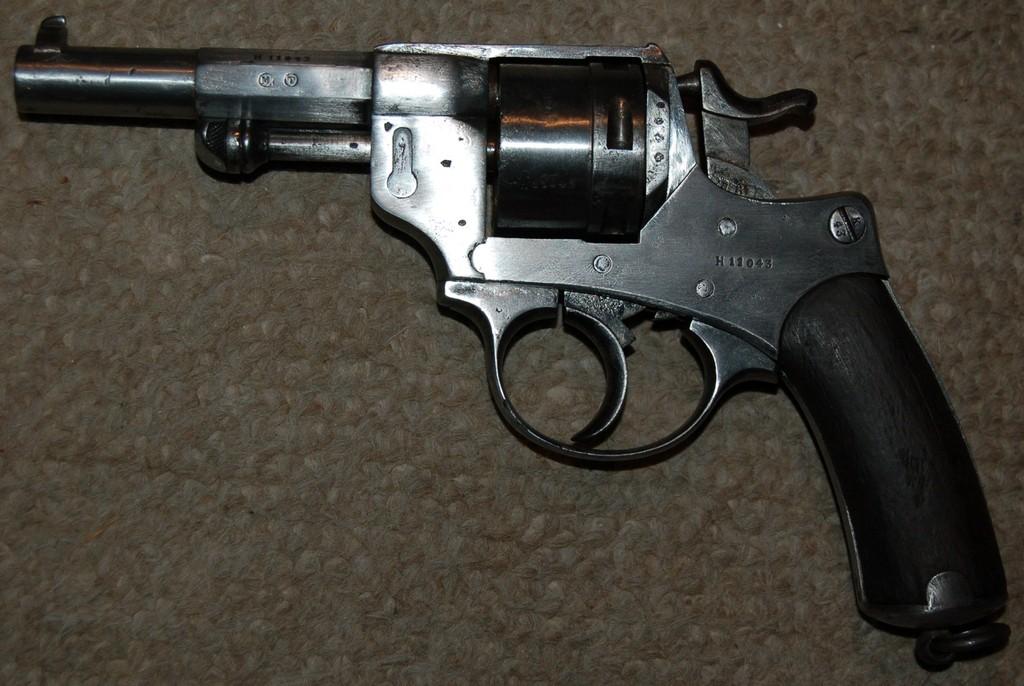
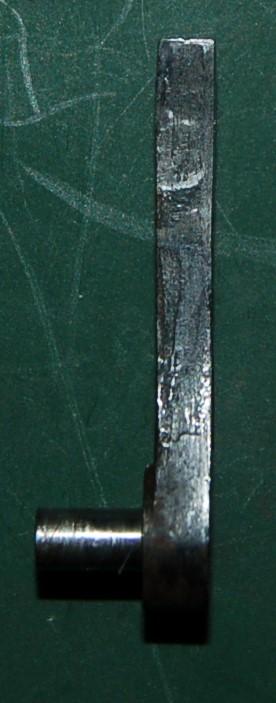
You're doing well! Keep it up. BTW, the Mle 1873 was usually bright finished, so you need have no "originality" worries about polishing off the scratch marks. The markings are all there and very clear, and the internal mechanism is in very good shape, although a close-up of the ratchet would be a good idea - they often require a bit of peening and super-cautious filing to restore good timing. I reckon you made a very good purchase.
Last edited by Patrick Chadwick; 06-08-2015 at 02:12 AM.
-
-
Contributing Member
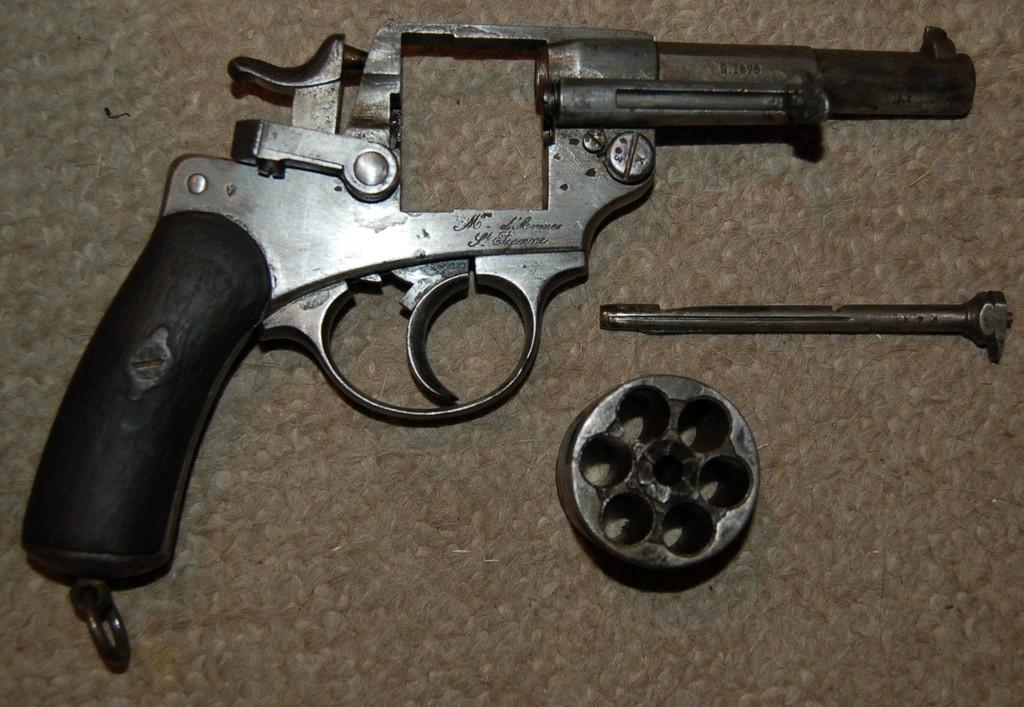
I steered clear of any polishing of any working mechanisms. There doesn't appear to be much wear on the internals including the ratchet. The cylinder moves a about 1/16th of an inch total from side to side (around) and is tight from front to rear. I may work on polishing a bit more but I'm pretty happy with it as it is. It came out a bit better than expected. I'll probably polish up the cylinder rod pin flat, that still looks a bit rough. I don't have a gauge for the cylinder gap but it isn't very big. I can get two but not three sheets of paper through it and there is no erosion on the bridge.
-
-
Advisory Panel
"The cylinder moves a about 1/16th of an inch total from side to side (around) and is tight from front to rear. "
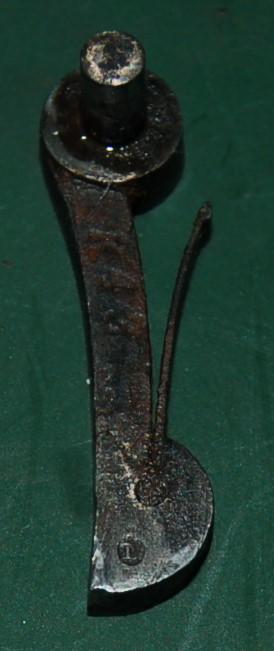
If you mean that the cylinder can be rotated by about a 1/16 on the circumference when the revolver is cocked, then that is what I both feared and expected. It needs to be tighter than that, as if the mouth of the cylinder chamber is badly aligned with the entrance to the forcing cone, then the bullet can strike the edge and that will certainly result in a slice being shaved off the bullet and spat out sideways. Not good for accuracy either.
However, as I wrote in a previous post, to be fair to the revolver you need to test this at the moment the hammer is about to drop. Revolvers of this vintage work by the pawl pushing the ratchet sufficiently to hold the lug or notch (depending on design) on the cylinder against the trigger stop (a.k.a. bolt). If the pawl is worn or bent (both common) then it will not push the ratchet round sufficiently. And since the pawl is itself pushed up by the trigger, the amount of trigger movement also plays a part. And of course wear on the ratchet and the trigger stop... and the lugs/notches... but let's take it step by step.
To test: Cock the revolver, then put a felt wad between the hammer and the back of the frame, so that the hammer cannot bang on the frame if it drops. Now use one hand to squeeze the trigger, and the other hand to very lightly push the cylinder back so that the ratchet is in continuous contact with the pawl. Get as close as you can to the release point, and hold it steady. Now see if you can rotate the cylinder.
If you can, then the pawl is not pushing the ratchet round far enough. If you really want to shoot the revolver and not have lead spitting out, then any rotary play should be more of the order of a 1/64 than a 1/16!
Last chance: squeeze the trigger until the hammer just drops, allowing a bit more "shove" from the pawl. How much play is there now. 1/16 is too much, 1/32 is loose but usable. 1/64 is OK. All just IMHO, of course. What you really need is to make sure that the bullet emerging from the mouth of the chamber flies into the forcing cone without striking the edge, so it all depends a bit on the start of the cone as well.
OK, so if it's not good enough - what is to be done? Watch this space!
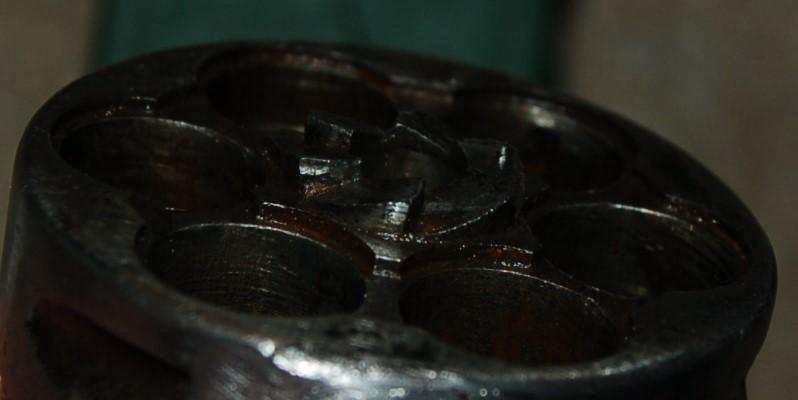
P.S. A close-up of the pawl and the ratchet would be useful. (If you consider a continuation of theis topic to be useful)
Last edited by Patrick Chadwick; 06-08-2015 at 05:26 PM.
-
Thank You to Patrick Chadwick For This Useful Post:
-
Contributing Member
-
-
Contributing Member
Trying to learn about this last evening and am wondering if first I should try polishing the inside of the arm of the "hand" hope I got that right. This would allow it to come in a little further and catch the ratchet where it is not worn. I guess peening the hand top would be next if that doesn't work? Not planning to do anything until instructed.
-


 PM
PM