


With thanks to Advisory Panelmember Peter Laidler
Making Up a Useable No.4 Sniper - Part 4 (by Peter Laidler) (click here)
As Peter says …. "This series will describe a reasonably accurate and passable way of making up a useable No4 sniper from a pile of repro bits. Not a fake or means of ripping anyone off, but just a useable replica.
Peter has added a personal request in regards to this series of articles.Article Extract .....
When we left part 3, we had the front and rear pads fitted to the bodyside with their 4BA machine head or raised countersunks (x3 at the front) and countersunk x2 in the rear pad. Now is the time to scrupulously clean and flux and tin the flat and angled mating surfaces of the pads and the body side and allow a small amount of the flux to run into the 4BA holes too. Because we want the soft solder to penetrate into the threaded holes in order to LOCK the screws too. Just run a smooth file down one side of the 4BA threads because this small flat is going to allow the molten solder to run into the threads and lock the screws. Position the front pad and start the screws. They’ll soon get tight in the holes so this is the time to get the flame of the blow torch to soften the solder on the body and pad. While the solder is fluid and you’re playing the flame over the area, get your colleague to slowly, bit at a time and evenly tighten up the screws……… There, they are now done up very tight locking the pad to the body. If he as professional as you and if he’s got the correct size and serviceable screwdriver, you won’t have any amateurish gouges of the screw heads either. …...
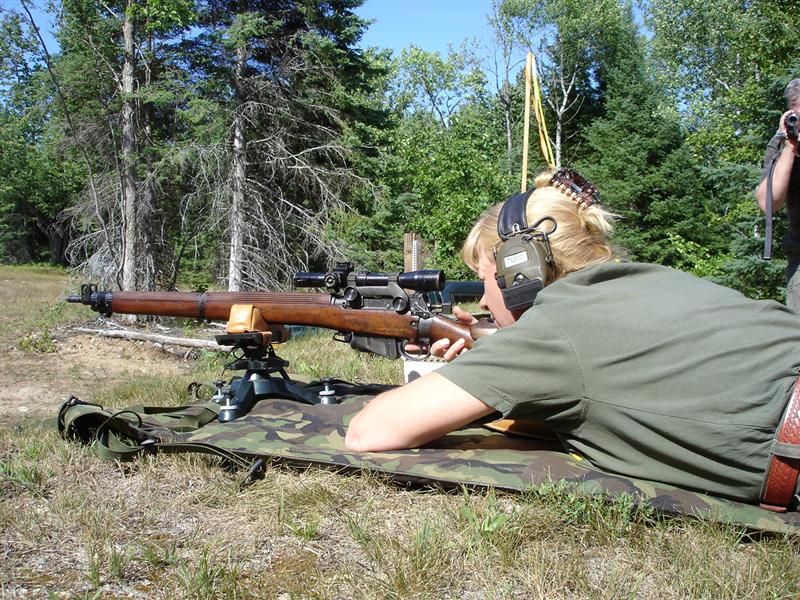
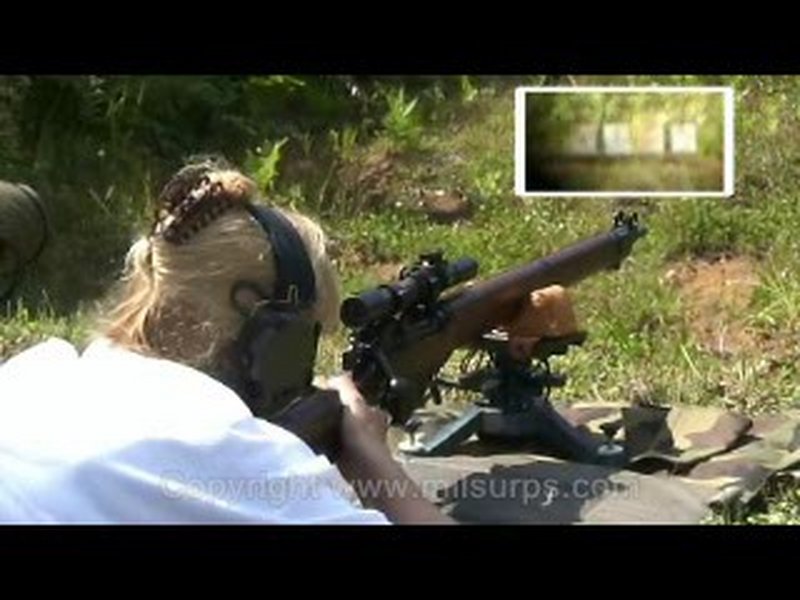
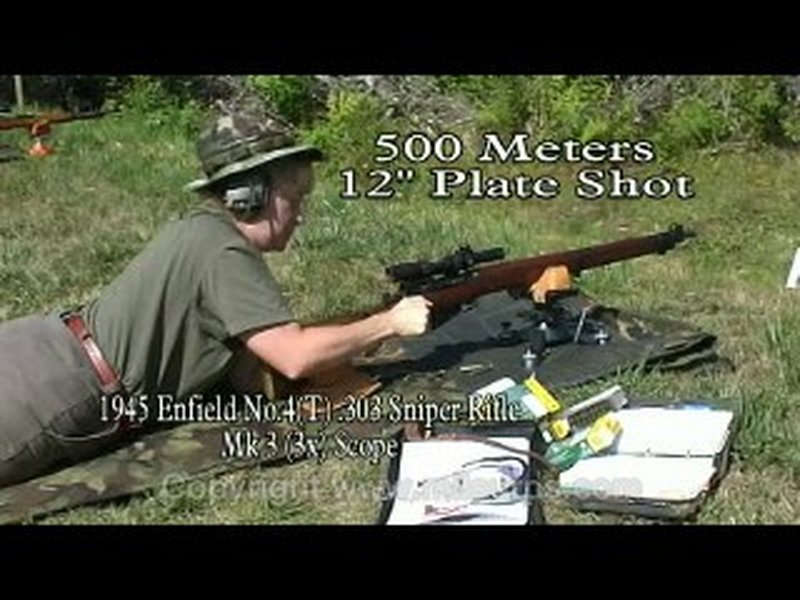
Knocking down 12" steel plates at 500 and 600 meters with a 1945 Enfield No.4 Mk1(T).
(Click PIC to Enlarge)
(Click PIC to Enlarge)
Note: If you have any questions or don’t understand something or my instructions are ambiguous then please ask on the forum and NOT by PM (Private Message). That way everyone will get the benefit of the question and answer.
So, after reading the last part in this series, members are requested to post you questions here in this thread for Part 4, or the appropriate announcement thread for Part's 1, 2 or 3.
Regards,
BadgerInformation

Warning: This is a relatively older thread
This discussion is older than 360 days. Some information contained in it may no longer be current.
- Knowledge Library

- MKL Entry of the Month
- Australia
- Austro-Hungarian Empire
- Canada
- Czechoslovakia
- Denmark
- Finland
- France/Belgium
- Germany
- Italy
- Japan
- Norway
- Russia
- South America
- Sweden
- Switzerland
- Turkey
- United Kingdom
- United States
- Yugoslavia
- Is my rifle authentic or a fake?
- Jay Currah's Lee Enfield Web Site
- On-line Service Records (Canada)
- Technical Articles/Research
- Forum
- Classifieds
- What's New?
-
Photo Gallery
- Photo Gallery Options
- Photo Gallery Home
- Search Photo Gallery List
-
Photo Gallery Search
- Video Club
- iTrader

 PM
PM