-
This thread has worked for me already.......... By coincidence, someone I knew asked me if I had an old No5 crosspiece to fix a broken bayonet (not broken to the extent of Big Duke's donor I must add...) so I told him no, but that he'd have to follow these instructions. He declined so I had it for a tenner (UK £10) and have just made a new one. Brilliant. A No5 bayonet for a tenner plus a few hours work Thanks Big Duke!
-
Thank You to Peter Laidler For This Useful Post:
-
10-10-2012 10:47 AM
# ADS
Friends and Sponsors

-
FREE MEMBER
NO Posting or PM's Allowed

Nice to see folks saving the old No5 bayonets. Remember it's the same with the rest of our militaria collections. The exhibits are only in our custody for the education of the future generations.
-
Legacy Member


Originally Posted by
LesterH

Nice to see folks saving the old No5 bayonets. Remember it's the same with the rest of our militaria collections. The exhibits are only in our custody for the education of the future generations
I will have to find one to save. Broke down and bought one of the Indian repops. Tourist grade is about all I can say for it. Very poor workmanship.
-
-
Legacy Member

Looking at that filing, it looks like you were apprentice trained & spent your first 6 months of your apprenticeship learning how to hacksaw & file, once you have mastered a file its something you never forget.
Great Job
-
-
Originally Posted by
Simon P
Looking at that filing, it looks like you were apprentice trained & spent your first 6 months of your apprenticeship learning how to hacksaw & file, once you have mastered a file its something you never forget.
Great Job
Certanly was Simon, in fact on the link below post 16 from the Enfield forum (quite recent) shows some of the tools made many years ago.
Opinion on my L42A1
Part two should be with us in the next few days, just adjusting my phostphate solution.
-
-
Legacy Member
Originally Posted by
Simon P
Looking at that filing, it looks like you were apprentice trained & spent your first 6 months of your apprenticeship learning how to hacksaw & file, once you have mastered a file its something you never forget.
Great Job
I hope these skills do not pass with the current generation. Magnificent skills like these are quite humbling.
-
-
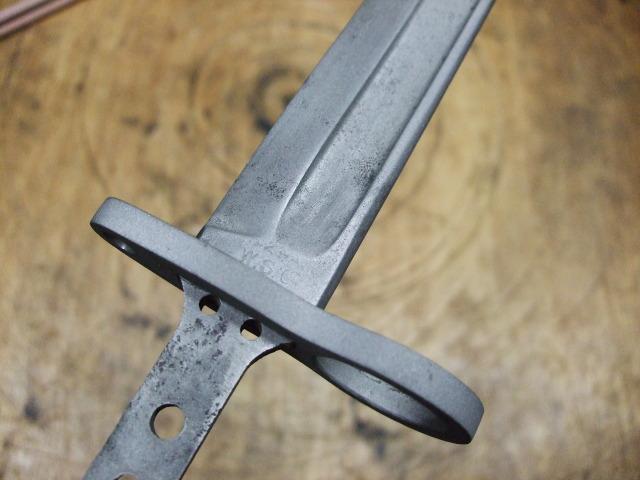
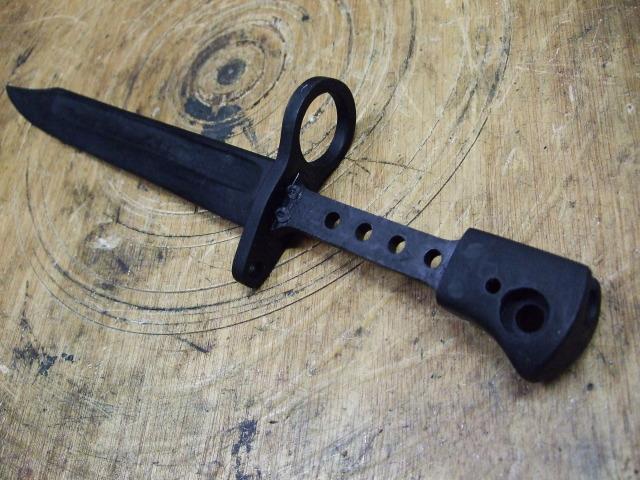
Part two.....
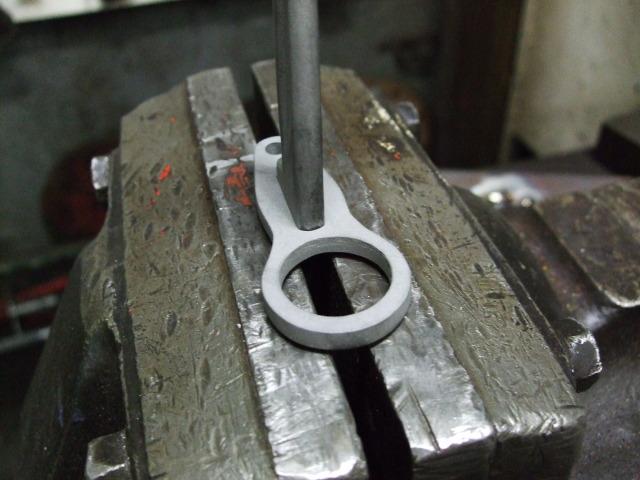
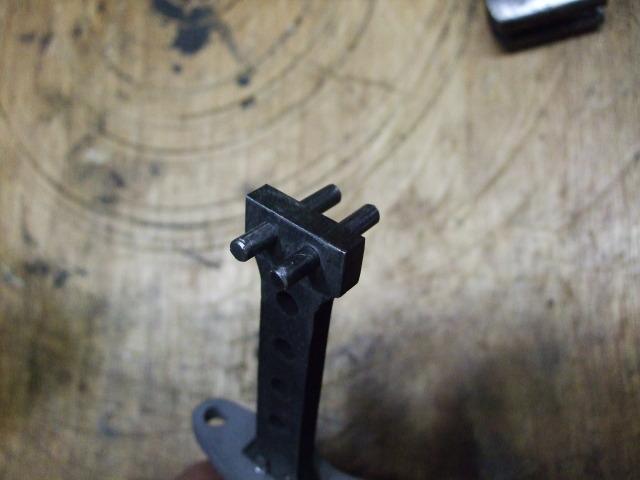
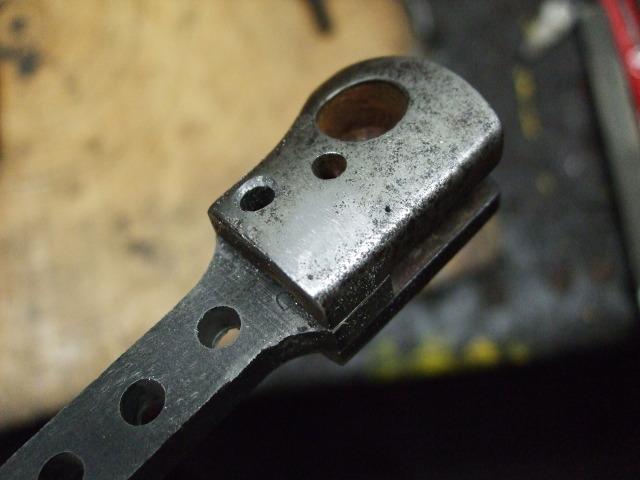
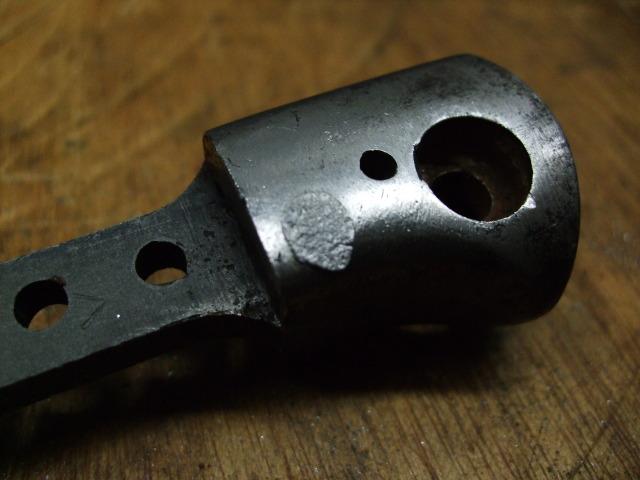
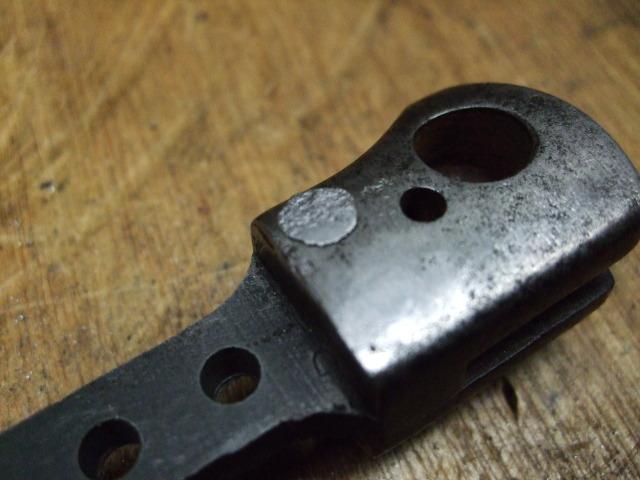
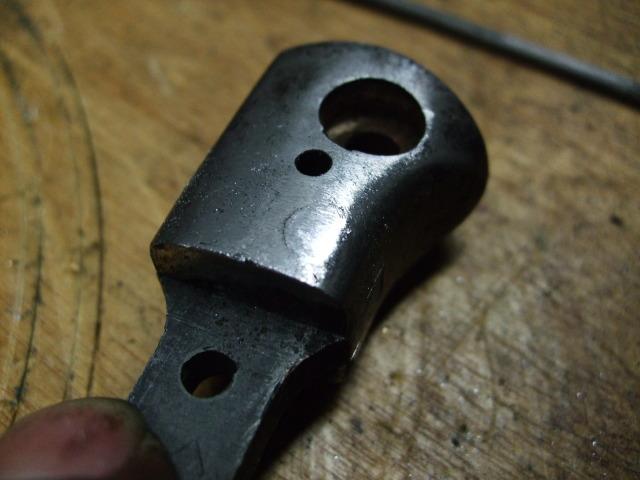
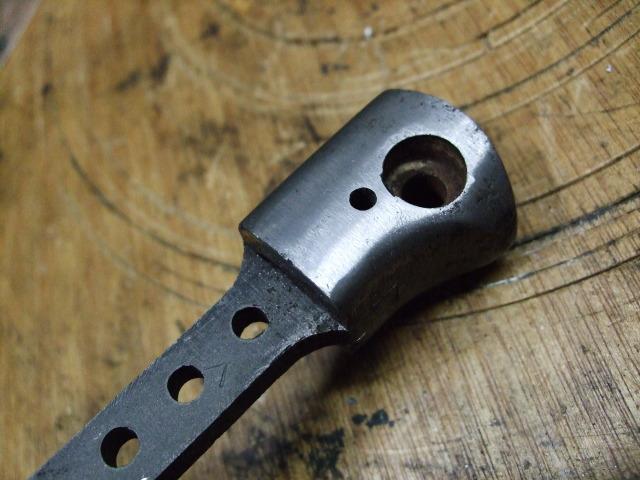
Just a recap from were I left off, bayonet was stripped and the new crosspiece made and fitted,
from here its the reassemble part, some this I will do in a seperate thread as its the finishing part were I experimented with Phosphating / parkerizing also a very cheap spot blaster was used but for the price cant complain, I think it would benifit a few more if its seperate....
So the crosspiece and blade had a quick bead/ sand blast
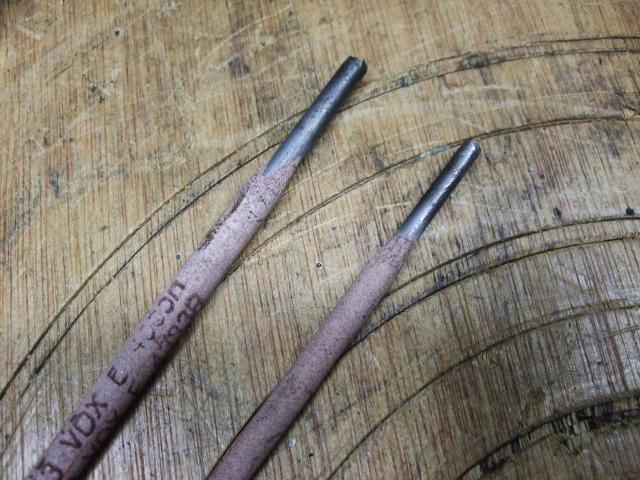
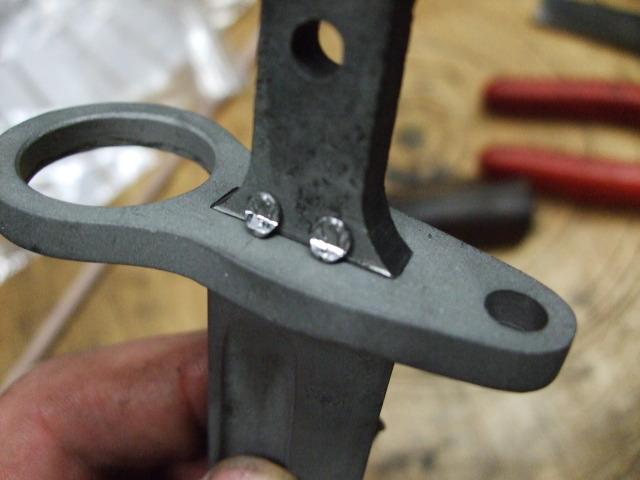
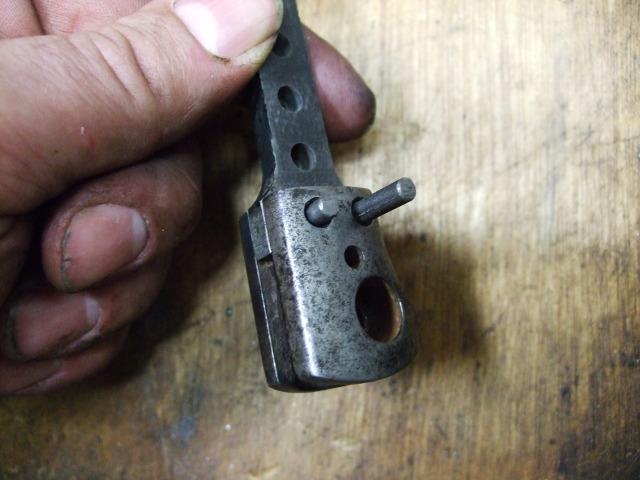
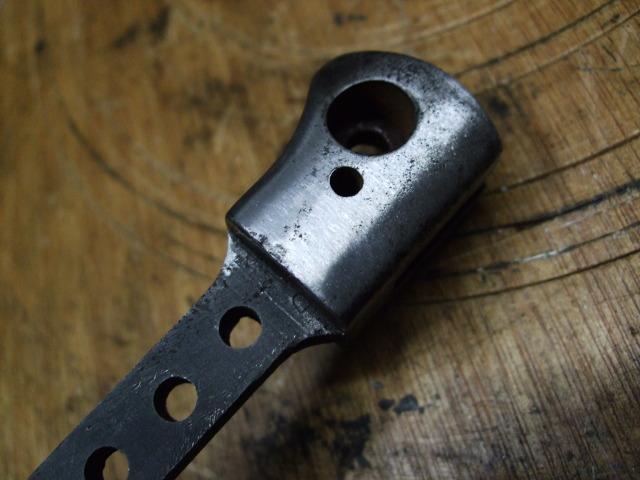
This was ready to be fixed in place by rivets, a quick way would be a few spot welds with the mig but I,m trying to keep it "original" the rivets I needed two pairs, one for the crosspiece and one pair for the pommel, very easy to make, standard welding rods will do the trick, it was just a case of the correct size rod and cut to length, for the crosspiece they had to be within a certain size as the grips fit over these, once cut a quick test in the grips will give an indication,
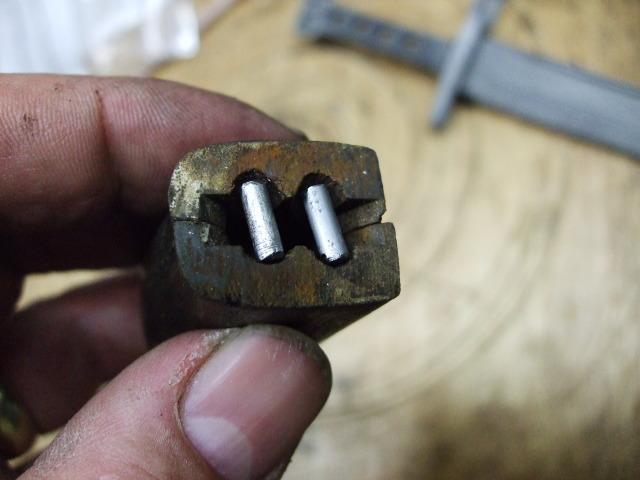
a quick assemble make sure everything fits and the rivets are ok, it was a case of squeezing these in the vice,
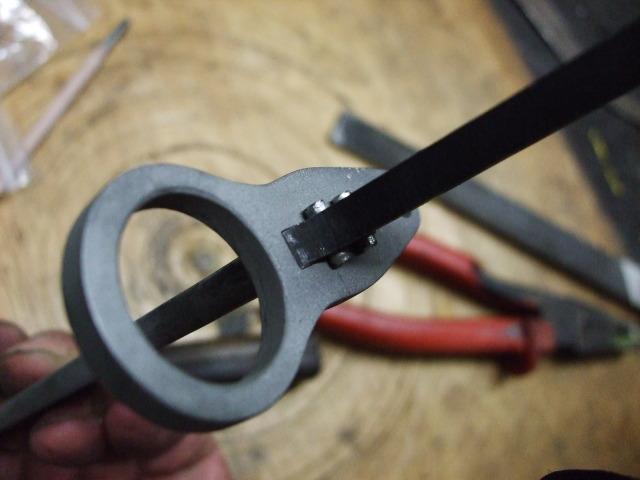
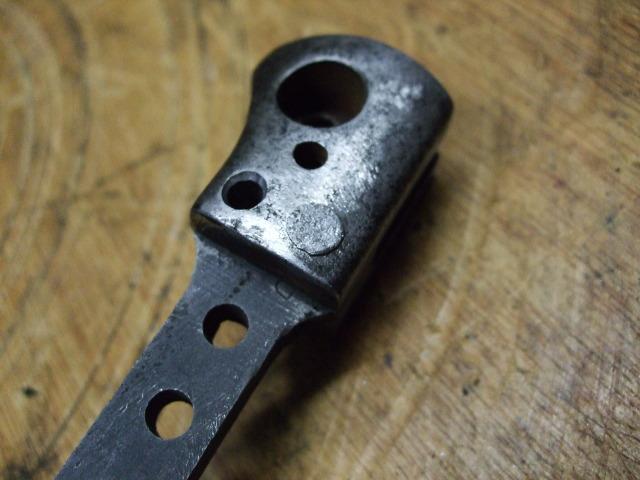
Next was the pommel, this is the part that needs some care as the rivets on this are done the old way, also it needed some patience to countrsink the holes as these are not flush as the pommel is curved so they had to be drilled at an angle for the countersink I used a centre tool from the lathe tools.
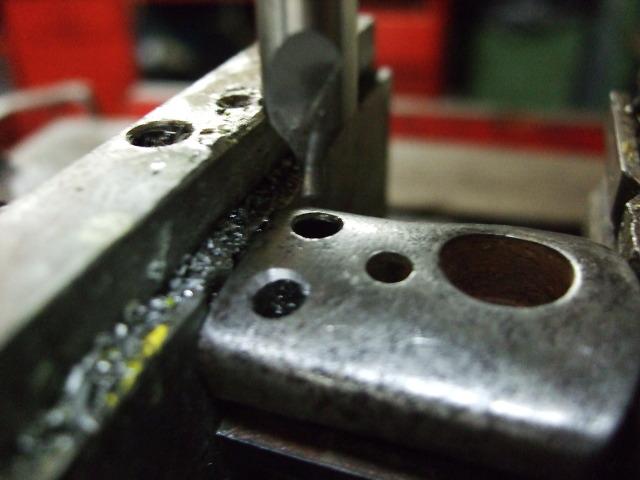
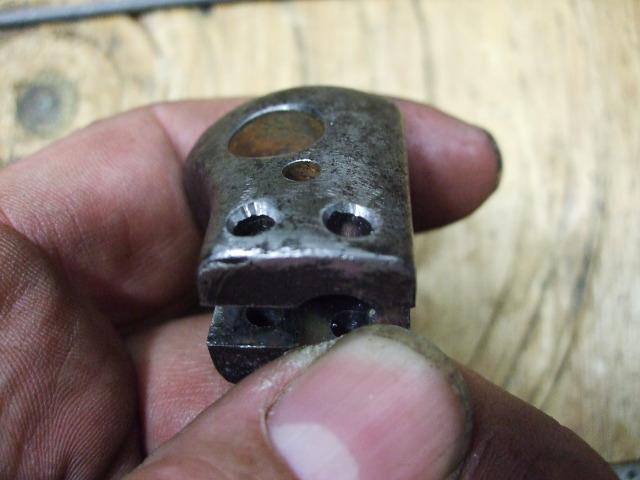
With this ready it was assembled and ready for the rivets, before I go any futher if anyone has never riveted the old way then I suggest to have a practice on some scrap untill your happy, the two rivets I had formed on one side to a rivet shape, this was done using the ball of the hammer and light strikes around the edge ( Its been over 26 years since I last did this so my first ones were not that clever) pic below wil give an Idea what it should look like, the basic idea is to form the angle were it sits in the countersunk hole. if it looks like a mushroom then its no good. (The bottom two pics show the rivets befor they were formed)

The next stage is not hard but you just need to take your time, in the pics I,ve shown one rivet done at a time, in a normal situation you would put all of them in position (were pactical) then work on one at time as the others would act as pegs to keep the item in position.
This kind of riveting does not look nice untill its all filed flush, so dont be too eager to get a nice shape etc the idea here is to form the rivet so both sides sit evenly in the countersunk hole.
(must point out here the length of these rivets are important, too short and they dont work or you cant get a nice finish and if too long you will be swinging on the hammer till the cows come home, so again take your time).
With the rivets in place it just a case of placing it on a flat steel surface such as an anvil etc and start peening away with the ball of the hammer, once the unformed side is taking shape then turn over and repeat on both sides untill there is no gap under them it should not stand too proud and it will have spread out, the pics should be of help,
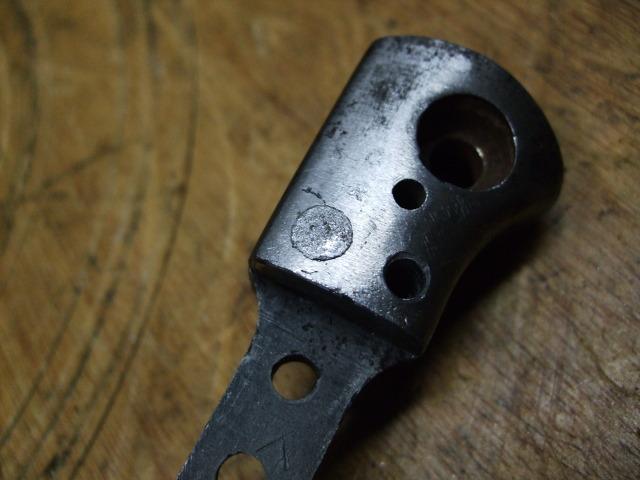
After the hammer work, its a case of removing the exccess with a file untill flush
Same again for the other rivet, have included a pic here at just the finishing point with the file, maybe a good idea here to use a needle file, but after its all done a quick polish with emery paper and it should look as good as new.
The next stage was another blast with the spot blaster (bit more on this on another thread also the parkerizing/ phosphating)
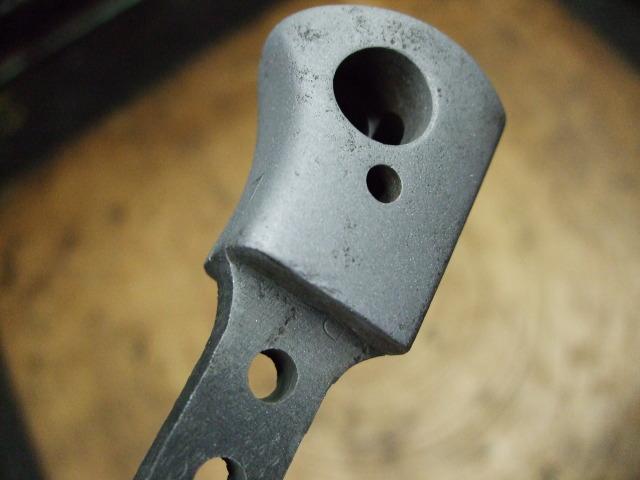
It was ready then for phosphating/ Parkerizing process, before I got to this point I had contacted Peter Laidler who has probably finished a few of these in his time, the main info was regarding the bead blasting and phosphate process, Peter informed me the whole bayonet would be blasted then phosphated the blade also.
Peter mentioned it was a dark grey finish at the end of the process, my homemade solution produced a black finish, but in certain light it is more of a very dark grey.
After a pickle in the phosphate solution it came out beter than expected, again I will go into more detail on a seperate thread.
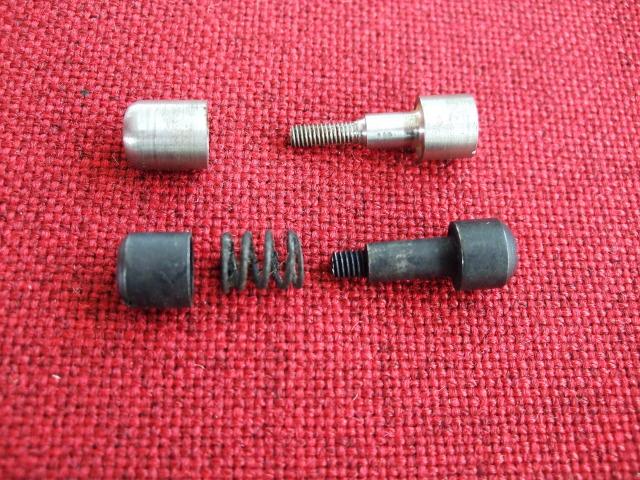
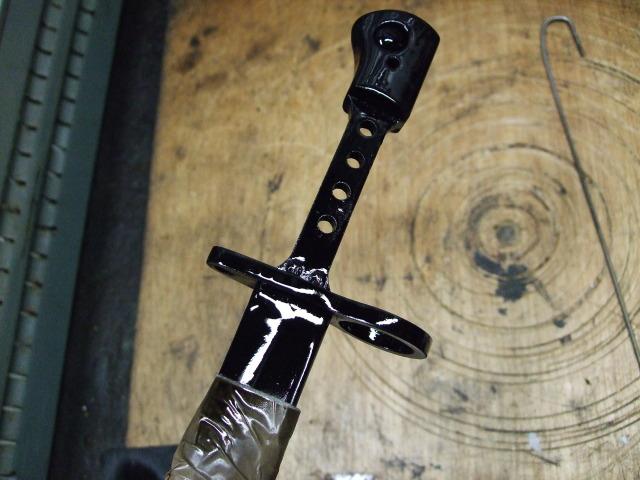
It was now ready for some paint, I didnt have Suncorite at hand and in the past have used Hammerite satin black, so the hammerite it was, but before this a couple of jobs left one was to fit the Press stud/locking bolt and spring, some will remember in the first part I mentioned I had made a few but these were made to no drawing etc just trial and error, have a pic next to one Peter kindly donated for this project, I have kept the dimmensions etc and will produce a drawing so if anyone needs one in the future.....
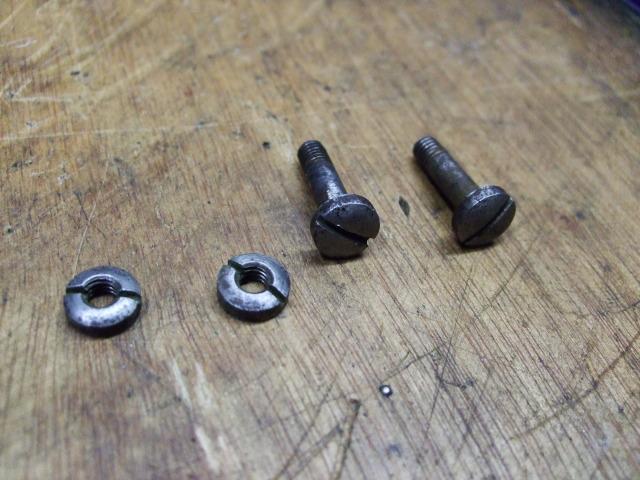
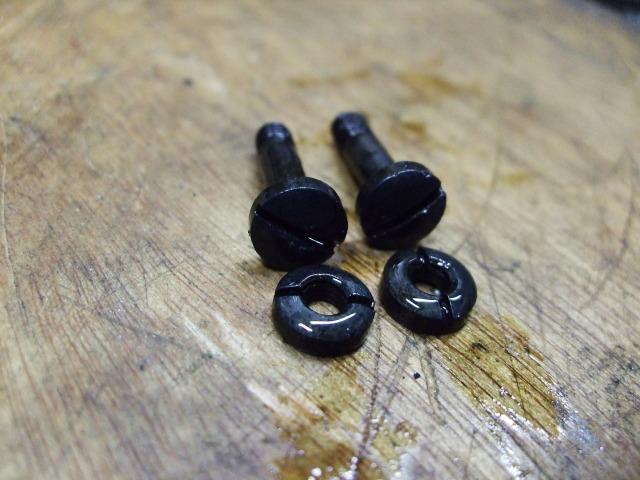
Next was to clean up the grip screws and blue them the oil method, heat up just until they go red and dip in oil
Then it was time to paint and bake,
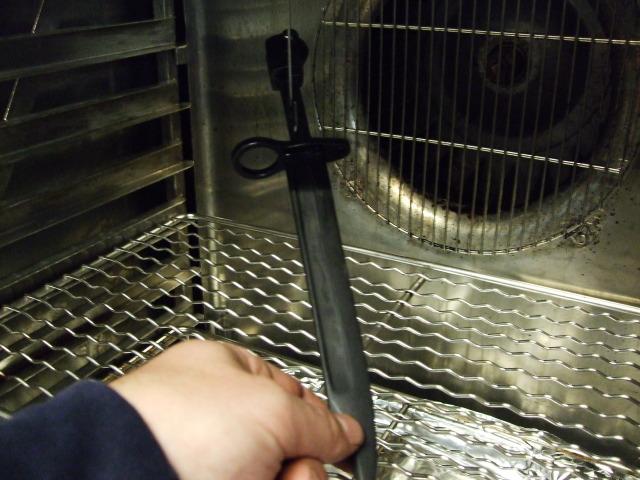
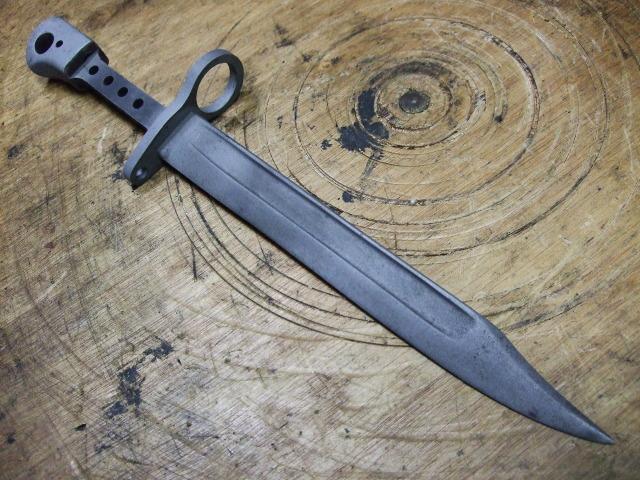
It didnt have that long in the oven as the lads on board were getting hungry, after that it was a final assemble.
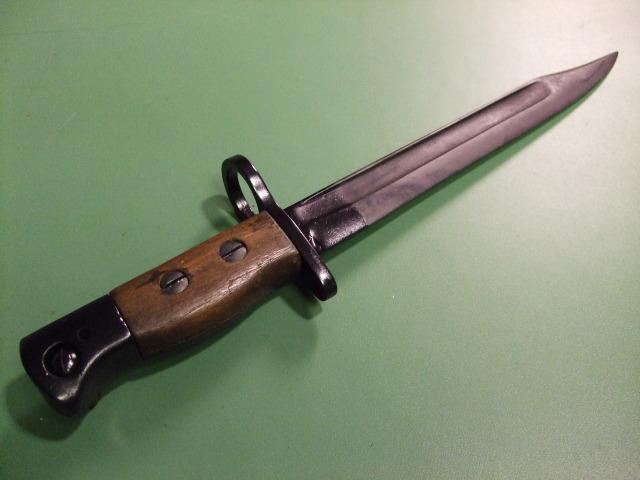
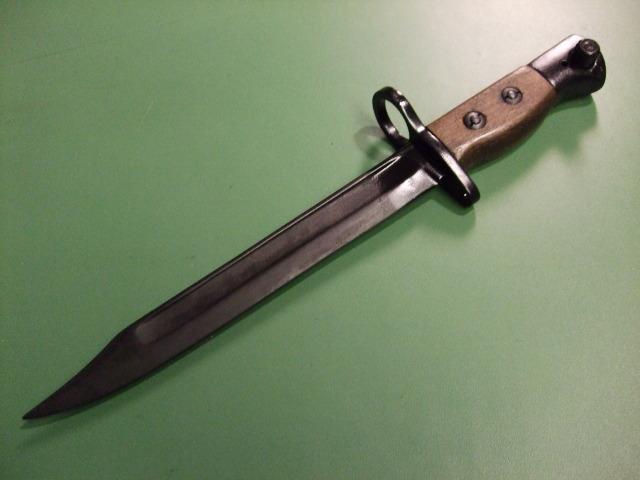
I hope its been of some use to a few (one bloke has gained a Jungle carbine bayonet for a tenner)
Have to say a big thanks to Peter Laidler who give me the run down on the finishing process, I know my phosphate is probably a lot darker than it would of been when it was done in service, and it was lacking the crucial Suncorite paint, (which is on order and will be with me at some point) but I dont think its gone too bad, for anyone interested in the phosphate/ parkerizing process I will write this up on another thread on this forum, this was all new to me, but a very easy process, but gloves goggles and ventilation are required.
Last edited by bigduke6; 05-11-2016 at 12:57 AM.
-
The Following 5 Members Say Thank You to bigduke6 For This Useful Post:
-
Advisory Panel

Excellent step by step on that one. Easily applied to many different bayonets I think. Just use a bit of imagination. Just goes to show things aren't always what they appear to be. Not that hopeless that is...
-
-
Good to see that the bits were useful. Great job. To be honest, our big phosphate tanks would give a lighter finish as they were used so the colour would vary and then the tank operator would measure the SG and re-mix.
-
Thank You to Peter Laidler For This Useful Post:
-
To be honest, our big phosphate tanks would give a lighter finish as they were used so the colour would vary and then the tank operator would measure the SG and re-mix.
I think they would of used zinc ?, were I used manganese dioxide, but its all new to me still a lot or reading up to do , the experimenting was more to do with getting the finish to match a rifle I have, but thought I,d kill two birds with one stone, I will have another go with zinc (its the part I threw away when getting the Manganese from the battery I used)
Last edited by bigduke6; 10-14-2012 at 06:16 AM.
-
Thank You to bigduke6 For This Useful Post:


 PM
PM


