Closed Thread
Page 3 of 22 FirstFirst 1 2 3 4 5 13 ... LastLast
Results 21 to 30 of 213

Thread: Building the Canadian Semi-Auto STEN

Click here to increase the font size Click here to reduce the font size

Hybrid View

  1. #1
    Senior Moderator
    (Founding Partner)


    Site Founder
    Claven2's Avatar
    Join Date
    Oct 2006
    Last On
    05-31-2024 @ 09:58 PM
    Location
    Scandaltown, Ontario
    Posts
    3,242
    Real Name
    Ronald
    Local Date
    06-21-2024
    Local Time
    12:41 AM
    Thread Starter
    DISCLAIMER: Stencollector has been kind enough to allow me to post and use his collection of material on building his SAS3 Sten, the actual gun used to get RCMP approval. The following is his work.

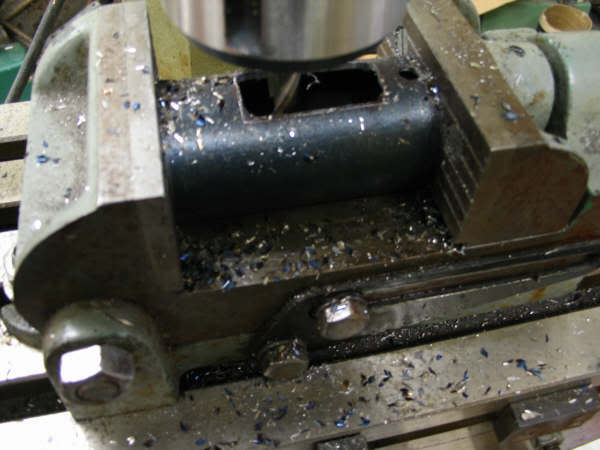
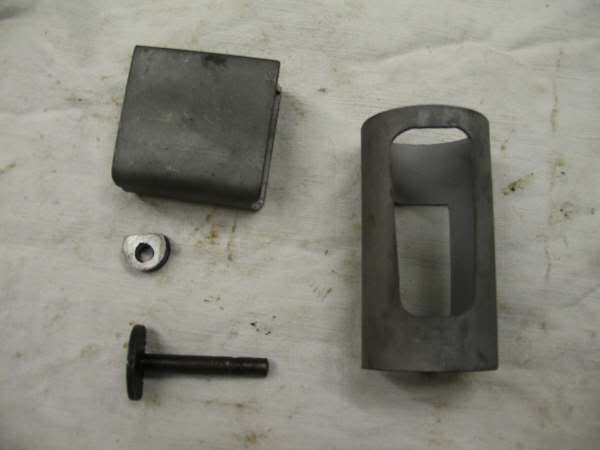
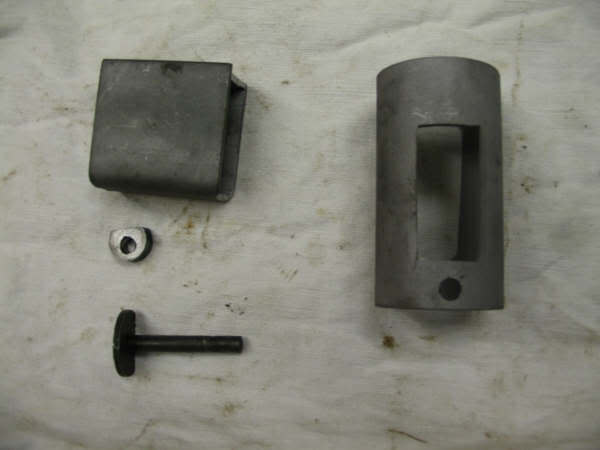
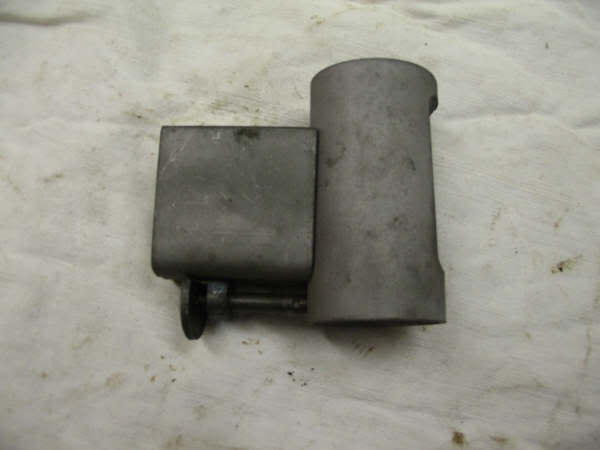
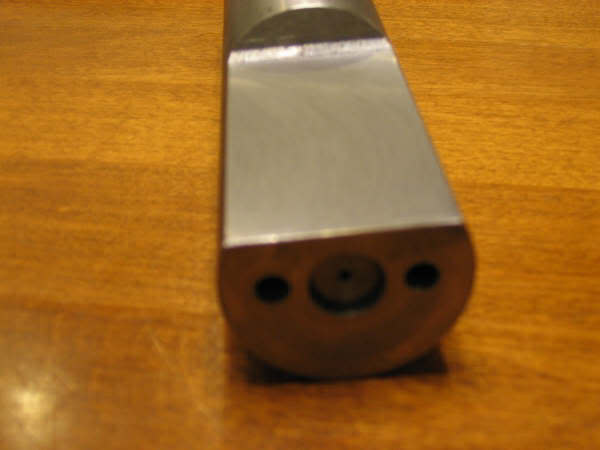
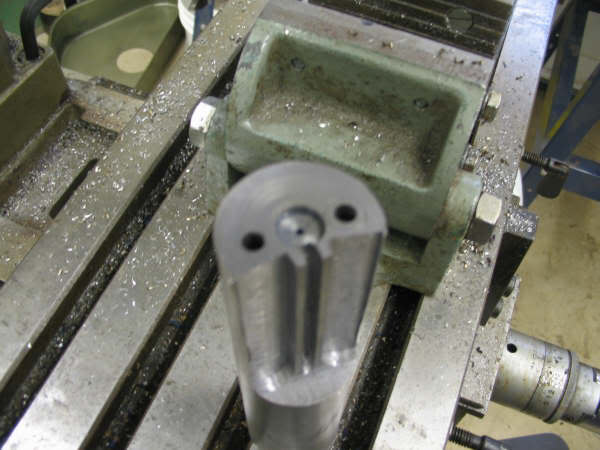
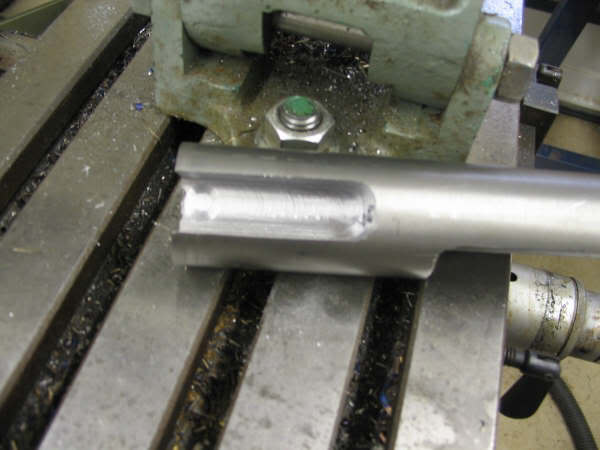
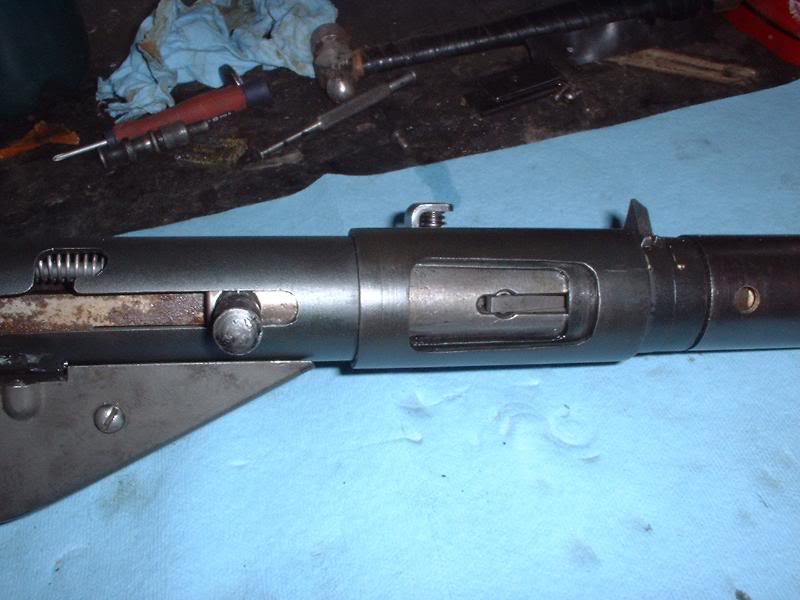
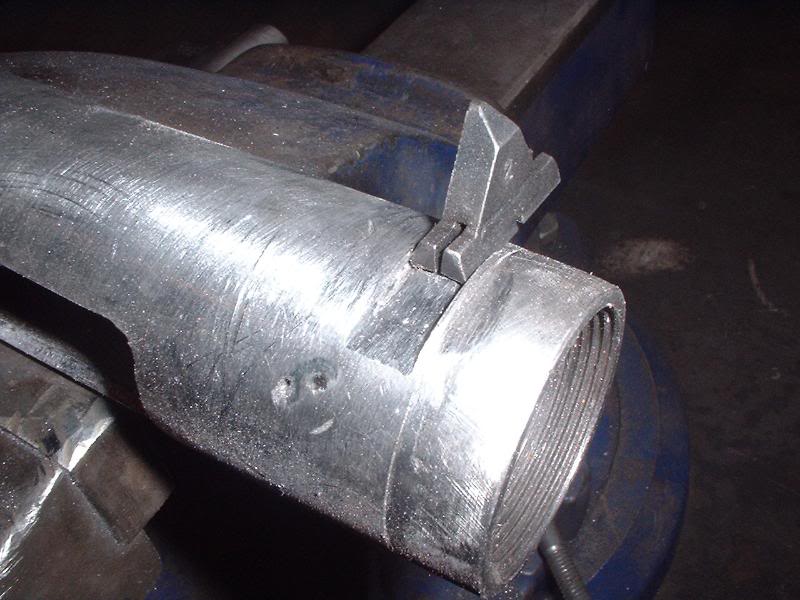
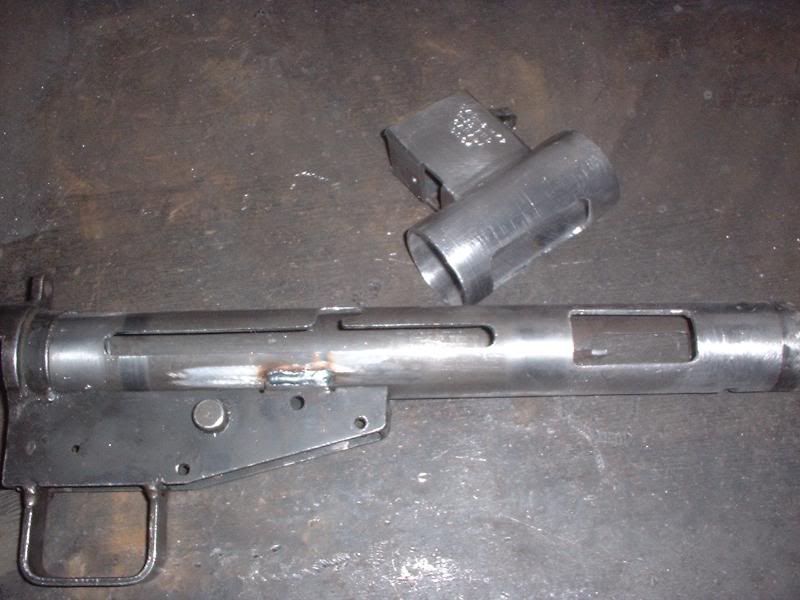
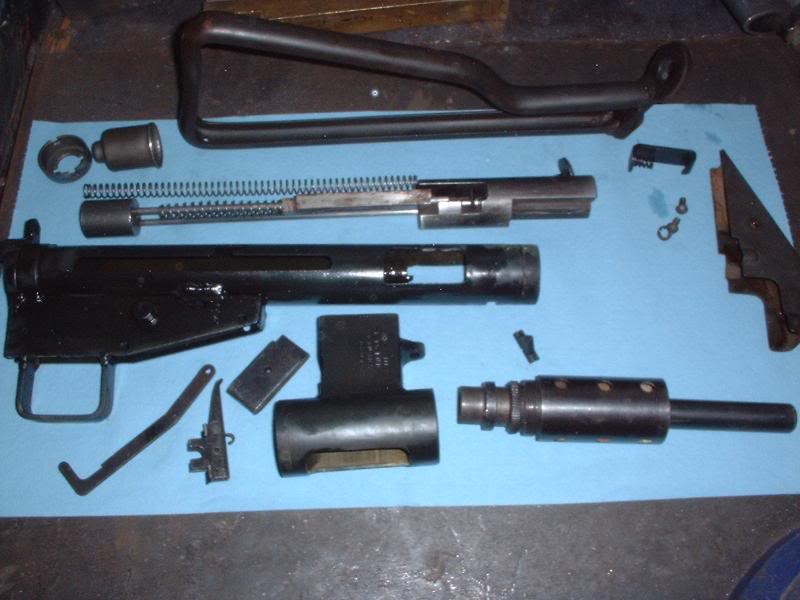
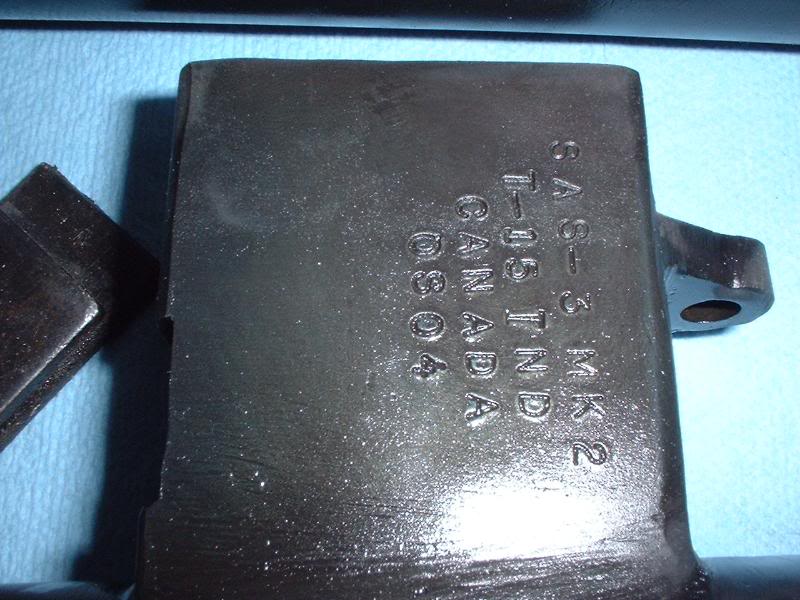
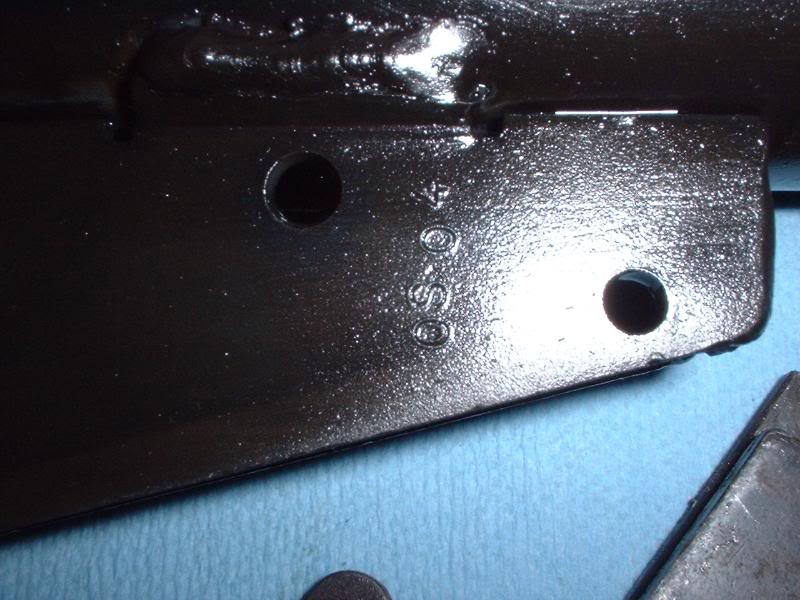
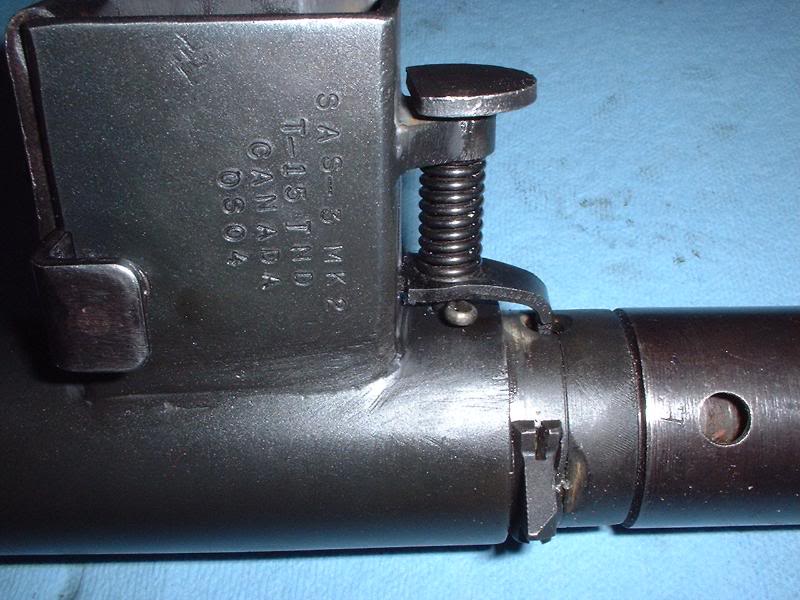
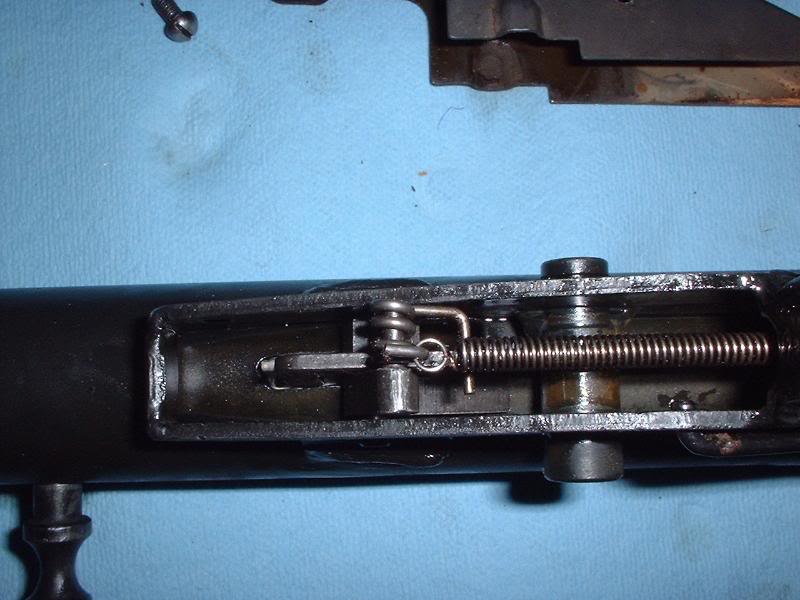
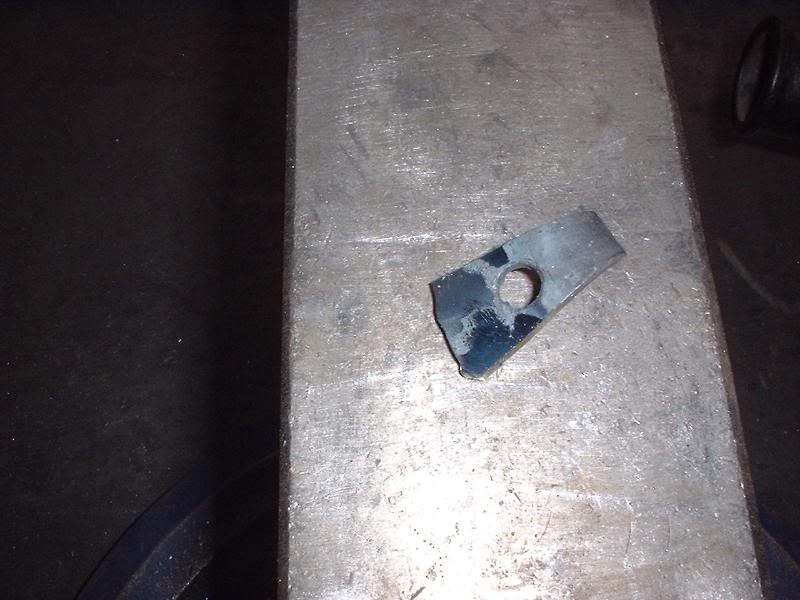
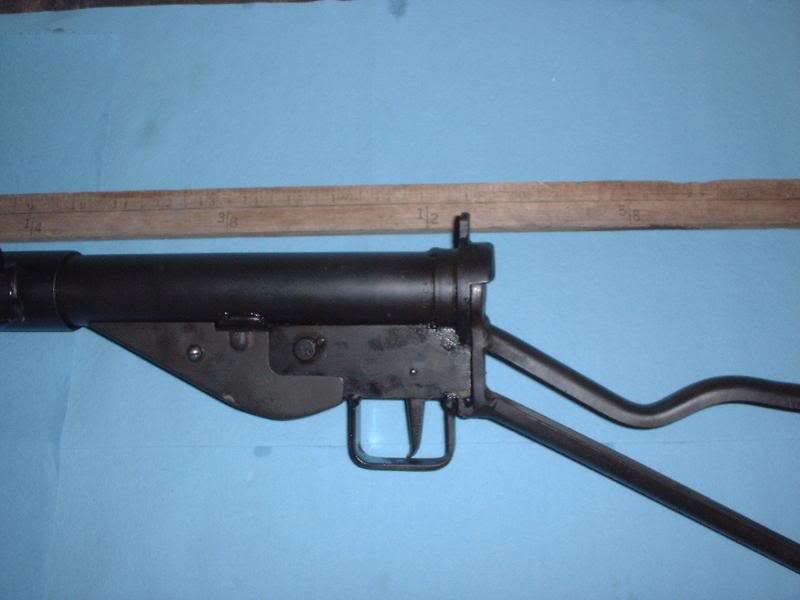
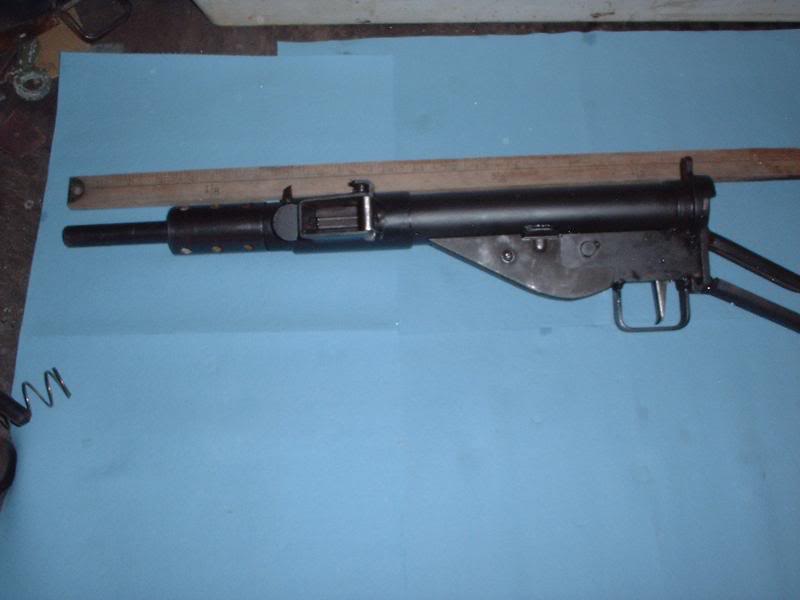
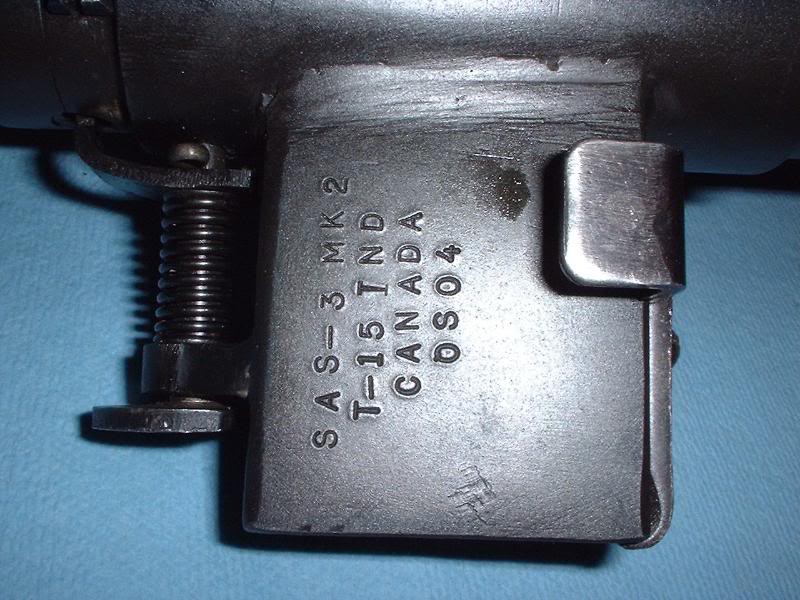
    Here are the final photos of Stencollector's project. Photo 1 is of the dovetail filed in to the receiver. Photo2 is of the two main items with the trigger housing welded back on before refinishing. Photo 3, is of the components ready for assembly. Photos 4, 6, and 7 are the serial numbers located on the magwell, the trigger housing, and the tube. Photo 8 is a shot of the semi auto closed bolt system, which utilizes a AR-15 type firing pin. Photo 9 shows the trigger mechanism from underneath. The change lever has been welded from the top (before it was welded to the receiver) and the slot for the disconnect is cut so it does not allow any side-to-side movement. Any altering of the trigger mech to try and make it F/A will jus result in the gun jamming, as the round will not slide over the firing pin. The bolt was not built with feed lips like that of a normal sten.

    Photo 12 shows the addition of metal to the barrel lock. Because the magwell was moved back 1/16" on the magwell collar, the barrel lock had to also be extended.

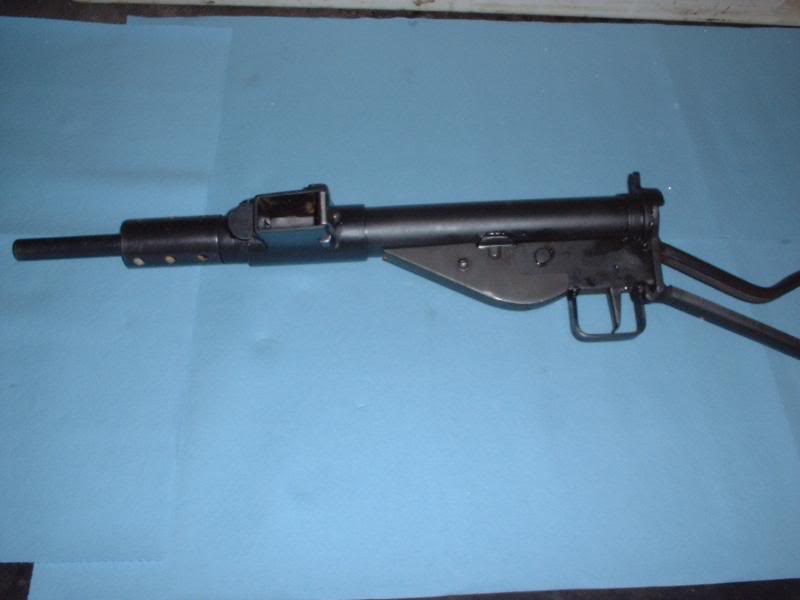
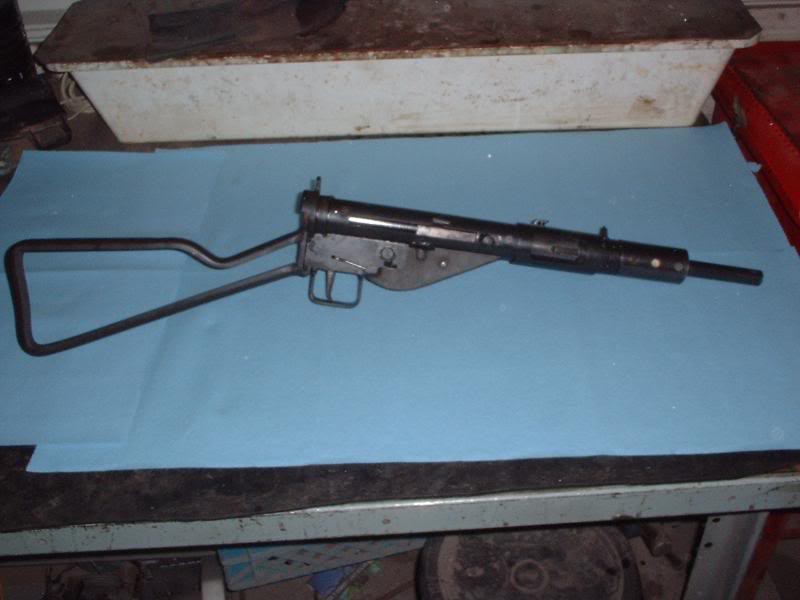
    The remaining photos are of the finished product.


    Information
    Warning: This is a relatively older thread
    This discussion is older than 360 days. Some information contained in it may no longer be current.
    Last edited by Claven2; 01-24-2008 at 08:18 PM.
    Союз нерушимый республик свободных Сплотила навеки Великая Русь. Да здравствует созданный волей народов Единый, могучий Советский Союз!

  2. #2
    Advisory Panel stencollector's Avatar
    Join Date
    Oct 2006
    Last On
    05-25-2024 @ 10:07 PM
    Location
    Shilo MB
    Posts
    795
    Local Date
    06-20-2024
    Local Time
    11:41 PM
    Thanks for posting these Claven. As you can see in the photos, I have no problem working with metal. But wood and computers are not my friends. I couldn't cut a 2X4 square if my life depended on it, nor could I post the photos as neatly as you have.

    The nicest thing about metal is that if you make a mistake and take too much metal off, you can always just zap a little back on. The key to the magwell, in my opinion, is to first get the locating hole in place on the tube where the pin goes in to lock the magwell. Then you can cut the holes to match the piece of tube that is underneath. Use the original tube from the cut up sten receiver.

    When you are making up the new receiver, same deal. Get that locating hole in the right spot, then pin on the remnants of a cut up magwell to the new receiver. Use it to make the magazine and ejection ports. Use the origional piece of tubing as a guide as to just how far you should cut. Note that the ejection port does not go all the way to the trunnion.

    Some of this doesn't make sense to you? Just wait until you are starting to make your cuts...it'll all make sense then. Or after you've made a wrong cut. Then it'll really make sense.

  3. Avoid Ads - Become a Contributing Member - Click HERE
  4. #3
    Head Moderator
    (Founding Partner)

    Site Founder
    Stevo's Avatar
    Join Date
    Oct 2006
    Last On
    08-31-2015 @ 06:39 PM
    Location
    NW Alberta
    Posts
    2,357
    Local Date
    06-20-2024
    Local Time
    10:41 PM
    Have you guys given any thought to making an adaptor to use the RRA 10 rd 9mm AR mags?

  5. #4
    Advisory Panel stencollector's Avatar
    Join Date
    Oct 2006
    Last On
    05-25-2024 @ 10:07 PM
    Location
    Shilo MB
    Posts
    795
    Local Date
    06-20-2024
    Local Time
    11:41 PM
    Considered it, but I did this to have a reasonable copy of the sten gun. If the RCMP had an issue with the sten magwell I built, I was going to make one that took Inglis browning mags. I have many, many sten mags, so it is nothing for me to cut down 20 or 30 to 5 rounds only. That way, whatever I have in my pocket is to it's full capacity.

    If I really wanted to make a useful goofball variant, I would make it take the luger 32 round drum magazines.

  6. #5
    Advisory Panel tiriaq's Avatar
    Join Date
    Oct 2006
    Last On
    Yesterday @ 08:27 PM
    Location
    Central Ontario
    Age
    78
    Posts
    1,083
    Local Date
    06-21-2024
    Local Time
    12:41 AM
    Concerning shop made reamers - go to www.practicalmachinist.com, and in the gunsmithing forum there is a current discussion of "D" bits. All the information you would need to make these.

  7. #6
    Senior Moderator
    (Founding Partner)


    Site Founder
    Claven2's Avatar
    Join Date
    Oct 2006
    Last On
    05-31-2024 @ 09:58 PM
    Location
    Scandaltown, Ontario
    Posts
    3,242
    Real Name
    Ronald
    Local Date
    06-21-2024
    Local Time
    12:41 AM
    Thread Starter
    Some more progress is being made on the mag housings.

    Here we see the housing collar pictured in an earlier mockup. it was made by bending flat bar around a mandrel and then seam-welding, much like the one Stencollector made. (on the second sten, we'll probably be using seamless tubing to save time) In this case, the ejection port opening and mag feed opening are being cut in a mill, mostly to save time and improve cosmetics.

    After bead blasting:

    Another view:

    Note that holes and openings were measured and placed based on the original (demilled) mag wells that came with the kits from Stencollector.
    Mocked up and ready for welding:
    Союз нерушимый республик свободных Сплотила навеки Великая Русь. Да здравствует созданный волей народов Единый, могучий Советский Союз!

  8. #7
    Senior Moderator
    (Founding Partner)


    Site Founder
    Claven2's Avatar
    Join Date
    Oct 2006
    Last On
    05-31-2024 @ 09:58 PM
    Location
    Scandaltown, Ontario
    Posts
    3,242
    Real Name
    Ronald
    Local Date
    06-21-2024
    Local Time
    12:41 AM
    Thread Starter
    Now since the SAS3 kits are still not in-hand, just for fun, let's see what it takes to manufacture an SAS3 bolt assembly...

    First you need some suitable round stock... and a mill... and patience... and, and, and...

    (in other words, this is just for show, most guys shouldn't try this at home unless they are machinists)

    First you center-bore the firing pin hole using a mill or lathe (lathe was used here) and then you use a mill to bore the guide rod holes. An end-mill cuts the cartridge recess and a small drill bit is used to cut the pin opening. Afterwords, you mill a flat which will eventually be feed lips.

    Back into the mill, and....

    Ta-da! Feed lips! (note they do NOT protrude beyond the cartridge recess face. Doing so would make it "go fast" under the right circumstances, which is illegal, so do not do that.)

    And here the hammer recess is milled into the back of the bolt.

    This bolt still needs the extractor and pin cuts made - it's not done. It'sa trial experiment or sample. The next one will go easier... if there is ever a "next one". Hopefully the SAS3 bolts are importable to save us all the trouble.
    Союз нерушимый республик свободных Сплотила навеки Великая Русь. Да здравствует созданный волей народов Единый, могучий Советский Союз!

  9. #8
    Senior Moderator
    (Founding Partner)


    Site Founder
    Claven2's Avatar
    Join Date
    Oct 2006
    Last On
    05-31-2024 @ 09:58 PM
    Location
    Scandaltown, Ontario
    Posts
    3,242
    Real Name
    Ronald
    Local Date
    06-21-2024
    Local Time
    12:41 AM
    Thread Starter
    I'm sure the CFC will let you know if the serial you intend to use is taken or not. I'll probably use some random Longbranch formatted serial number myself.

    The mill is an older Bridgeport. Manual, not CNC.

    I was talking to a friend who is a gunsmith machinist, and he thinks we may be able to fabricate a series of mandrels and presses to form the mag boxes from seamless tubing, cutting down on ALOT of the work. It's a long-off possibility right now, but at some point maybe someone can offer a formed mag box and collar, unwelded, as a kit for prospective builders, an "80% receiver" of sorts.
    Last edited by Claven2; 02-02-2008 at 02:33 PM.
    Союз нерушимый республик свободных Сплотила навеки Великая Русь. Да здравствует созданный волей народов Единый, могучий Советский Союз!

  10. #9
    Legacy Member NavyShooter's Avatar
    Join Date
    Oct 2006
    Last On
    02-08-2022 @ 04:29 PM
    Location
    Waverley, overlooking the lake
    Age
    50
    Posts
    93
    Local Date
    06-21-2024
    Local Time
    12:41 AM
    Ok.

    I'm intrigued now.

    I took a closer look at my 1943 7L series Dewat, and I did a bit of disassembly, and discovered that it is quite possibly a good candidate for this kind of conversion.

    So.

    Is there a bill of materials that I'd need to get a move on assembling?

    Have we tracked down anyone who's importing the kits as of yet?

    NS

  11. #10
    Advisory Panel stencollector's Avatar
    Join Date
    Oct 2006
    Last On
    05-25-2024 @ 10:07 PM
    Location
    Shilo MB
    Posts
    795
    Local Date
    06-20-2024
    Local Time
    11:41 PM
    NS: If your dewat is at all like the ones I am familiar with, then the barrel's chamber has been cut back about 3/8" and then the entire area has been welded in to the trunnion of the receiver. It will take some fancy cutting and filing to remove the barrel from that trunnion. In all likelihood you will need a new extractor as well since the face of your bolt should have been cut or ground away.

    And of course, if you take apart that dewat, make sure you destroy that magwell. It would not do to have a loose prohib kicking around. The fate of my first magwell (which was recycled) came up when I was talking to the RCMP lab tech about my SAS-3mk2.

    If you manage to get one of the SAS-3 kits in from the US, there is very little you would need to get here in the way of materials. Between a sten parts kit and what is contained in the SAS3 kit, the newly manufactured magwell would be the only thing requiring any materials.

Closed Thread
Page 3 of 22 FirstFirst 1 2 3 4 5 13 ... LastLast

Similar Threads

  1. Building a match #4
    By sdh1911 in forum The Lee Enfield Knowledge Library Collectors Forum
    Replies: 6
    Last Post: 12-14-2008, 02:32 PM
  2. Dewat sten
    By mitchell in forum Other LMG/HMG and SMG Forum
    Replies: 30
    Last Post: 05-07-2008, 01:11 PM
  3. "Semi auto milsurps for sale" CGN Private Ad
    By Sigismund in forum Appraisals, Fakery, Dispute Resolution & Mediation Forum
    Replies: 6
    Last Post: 09-09-2007, 10:20 AM
  4. Inglis Canadian Hi Power S. Auto Pistol (Joe Salter)
    By Badger in forum Commercial Auction and Sale "Gossip"
    Replies: 0
    Last Post: 06-27-2007, 07:52 PM
  5. Johnson semi-auto
    By bill1 in forum Milsurps General Discussion Forum
    Replies: 13
    Last Post: 04-24-2007, 05:33 PM

Tags for this Thread

Posting Permissions

  • You may not post new threads
  • You may not post replies
  • You may not post attachments
  • You may not edit your posts