


OK, apparently Armalite once made ambi safeties for the AR180B. Good luck finding one - I looked and could not even locate a picture of a factory ambi safety, let alone one available for purchase.
I'm a lefty, so of course my OCD dictated I make one
I started by ordering a standard safety selector from Wolverine Supplies up here in Canadaas a spare part. I retained the original safety from the rifle in case I or the rifle's next owner wants to go back.
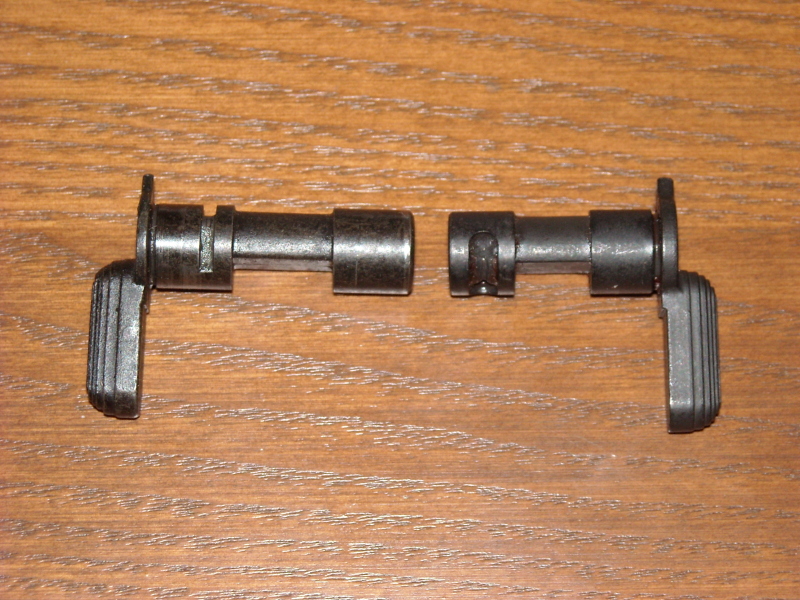
AR180B safety on the left, AR15 safety on the right. This is where I give a shout-out to CGNer sigboy who was awesome enough to send me a spare used AR15 selector which made this little project possible.
Now for those who don't know, you can't even cut these with a file. AR safeties/selectors are glass hard. To even think about modding one you have to anneal it. Heat it up with a map gas or OA torch until red hot and then let air cool. It will now machine, though it will still be harder then low carbon steel - they are probably cast from 4140 harden-able steel alloy or similar.
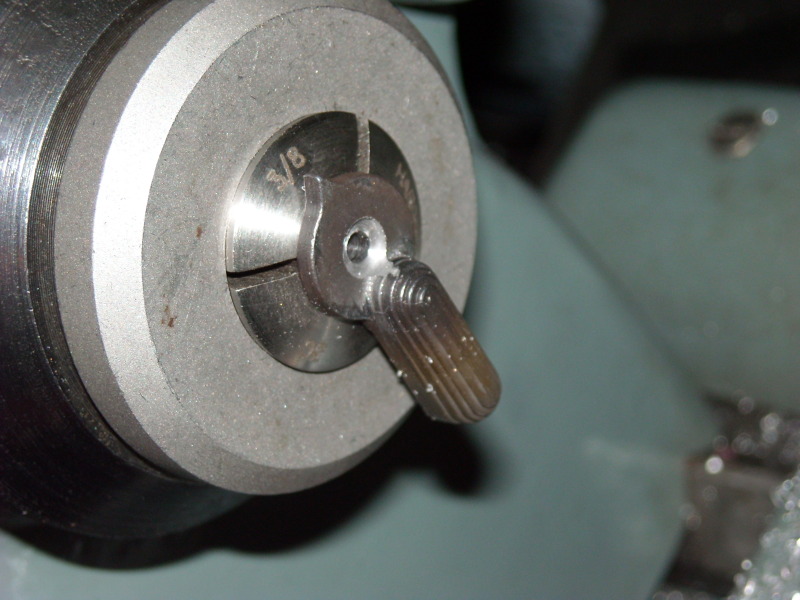
I cut the tail off the AR15 safety leaving enough meat to grab in a collet (Hardinge 3C collets ROCK!) on the lathe to cut a clearance hole and a 0.190" diameter countersink using an end-mill held in a Jacobs tailstock chuck.
I made an appropriately sized 4-40NC screw out of a larger screw on the lathe, though in truth if I had felt like leaving the house this could have been bought and the head turned to precisely fit the countersink. I also annealed the spare AR180 selector and cut a slot in the tip and drilled and threaded a 4-40NC hole into the centre on my knee mill. I also milled the back of the AR15 selector down flush to the circular flat skirt but left a slightly oversized tongue which I shaped with small files to precisely align and fit the tongue to the slot on the modified AR180B selector.
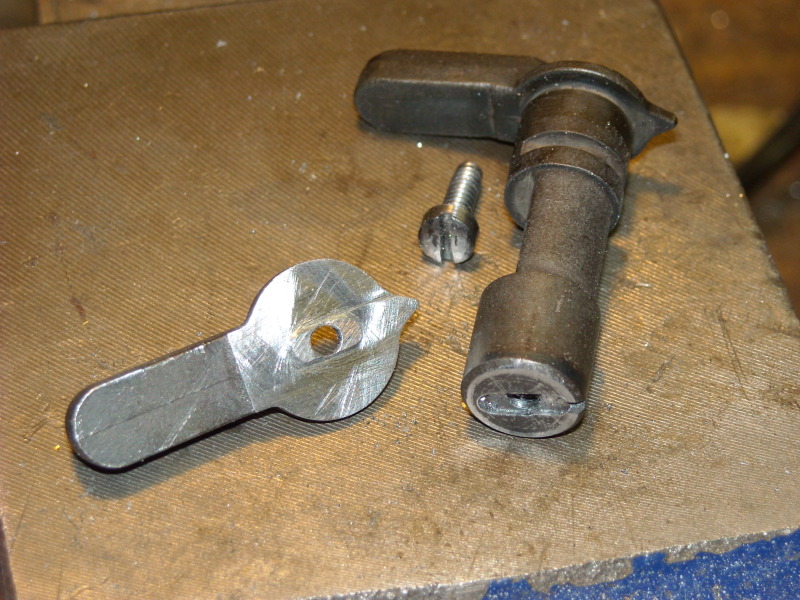
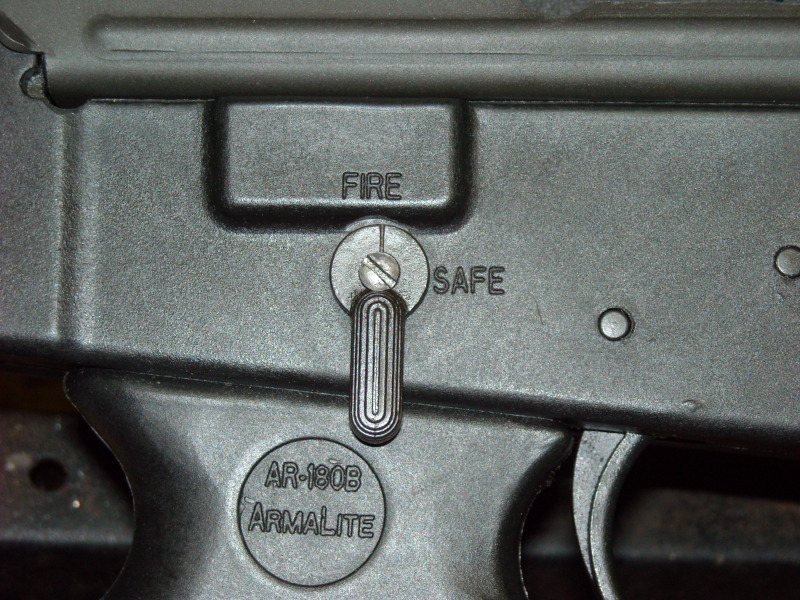
Mocked up:
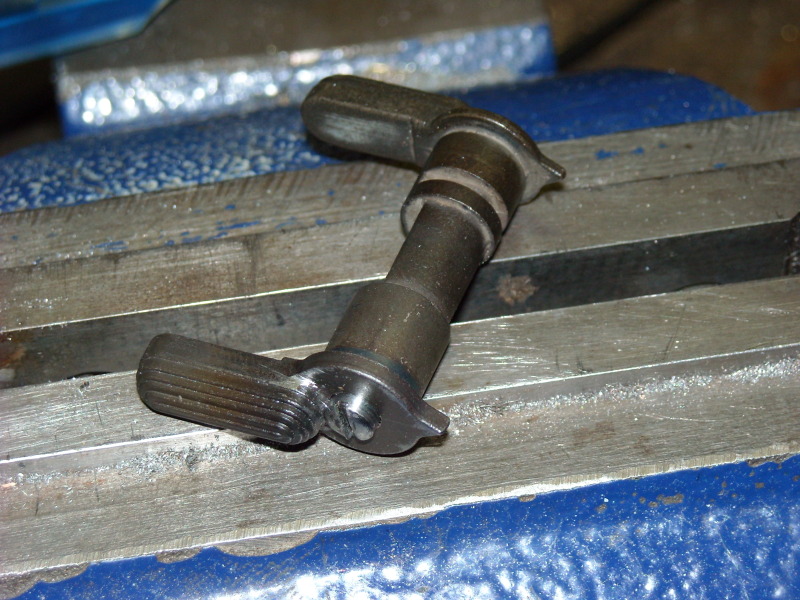
Finally, because the AR15 selector skirt is slightly too large and interferes with the rectangular receiver protrusion where "FIRE" is written (not sure what that hump for???), I filed the pointing arrow off the modded AR15 selector lever and used the mill to cut a slight circular relief into the radius of that "hump". I then filed an indicator line on the skirt to replace the pointer. Finally, I re-hardened the parts (heat to red hot, drop in cold water) and re-parkerized them.
I think it turned out well, though the screw I made didn't take the park as well as the selector bits. A minor inconvenience I can live with.
Works like a charm Information

Warning: This is a relatively older thread
This discussion is older than 360 days. Some information contained in it may no longer be current.
- Knowledge Library

- MKL Entry of the Month
- Australia
- Austro-Hungarian Empire
- Canada
- Czechoslovakia
- Denmark
- Finland
- France/Belgium
- Germany
- Italy
- Japan
- Norway
- Russia
- South America
- Sweden
- Switzerland
- Turkey
- United Kingdom
- United States
- Yugoslavia
- Is my rifle authentic or a fake?
- Jay Currah's Lee Enfield Web Site
- On-line Service Records (Canada)
- Technical Articles/Research
- Forum
- Classifieds
- What's New?
-
Photo Gallery
- Photo Gallery Options
- Photo Gallery Home
- Search Photo Gallery List
-
Photo Gallery Search
- Video Club
- iTrader


 PM
PM