


OK, time to show off some small positive progress. I had hoped to be further along but my wife wanted the porch fixed too, and happy wife = happy life
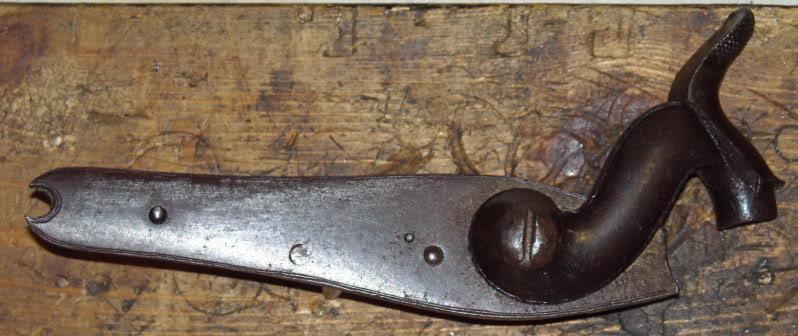
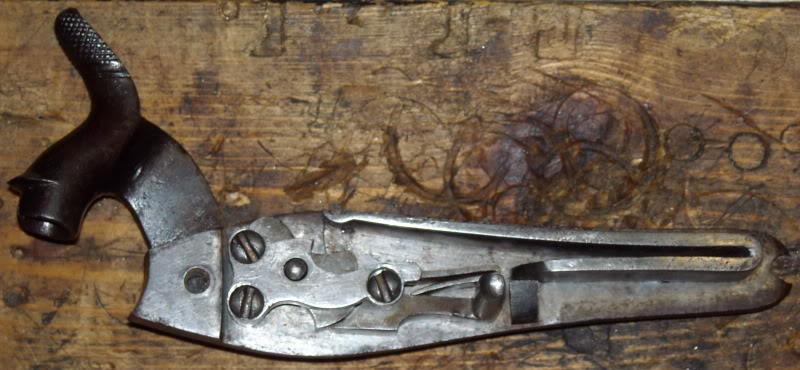
First the lock. It was, as expected, really frozen up sluggish with storage grease (something akin to cosmolene but thicker) and grime. I expected it to be fairly bad, but it was surprisingly nice under all the gunk. No broken parts and good strong springs.
Before going drastic, my plan is to try and retain as much original patina as possible - no small feat when rinsing everything with evapo-rust and superclean is FAR easier. I took the lock off and disassembled it (it only needed minimal amounts for liquid wrench). Used an ultra-sonic cleaner with progressively more agressive fluid until something worked well. I started with dish soap and water - it removed the grime but not the oil or cemented-on dust, then gain laundry detergent - only a mild improvement, finally settled on TSP and scolding hot water. Did the trick and got 90% of the filth and grease off the lock.
There were some rust issues on the ourside, mostly under the hammer and on the hammer itself. I spent about two hours with a fine copper scraper and stoft steel dental pics to detail it. I got all the active rust off and out of the pits without damaging any patina. The hardest part was the feather-like engraving just above hte neck of the hammer.
I oiled it and re-assembled the lock - it works great when tested, nearly as good as new. Got lucky with a really nice lock IMHO. and it still looks 170 years old as it should.
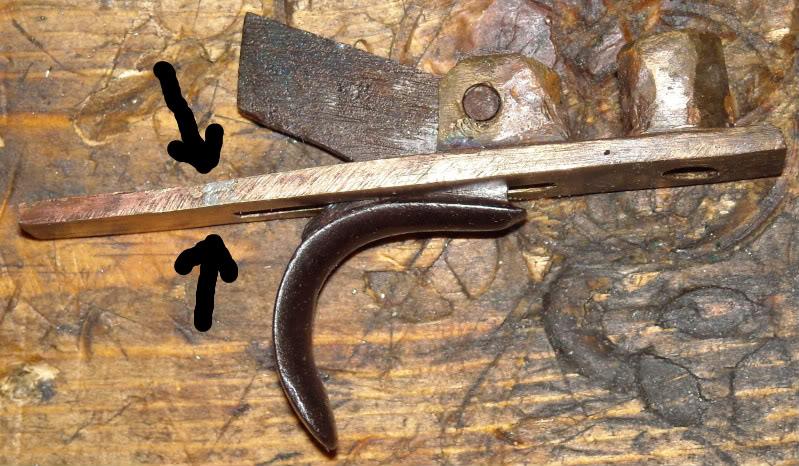
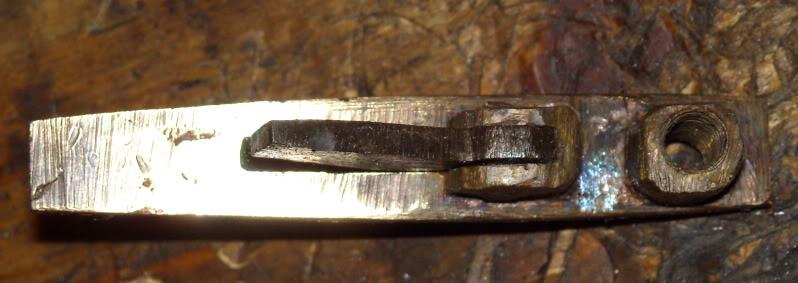
Next, I tacked the trigger assembly. The original brass casting had a crack in it out at the tail. Probably it was a casting fault that got aggravated when the trigger guard was broken away. It's a non-critical surface, so I repaired it with low-temperature silver solder and dressed it. I think it looks good, the repair is almost invisible.
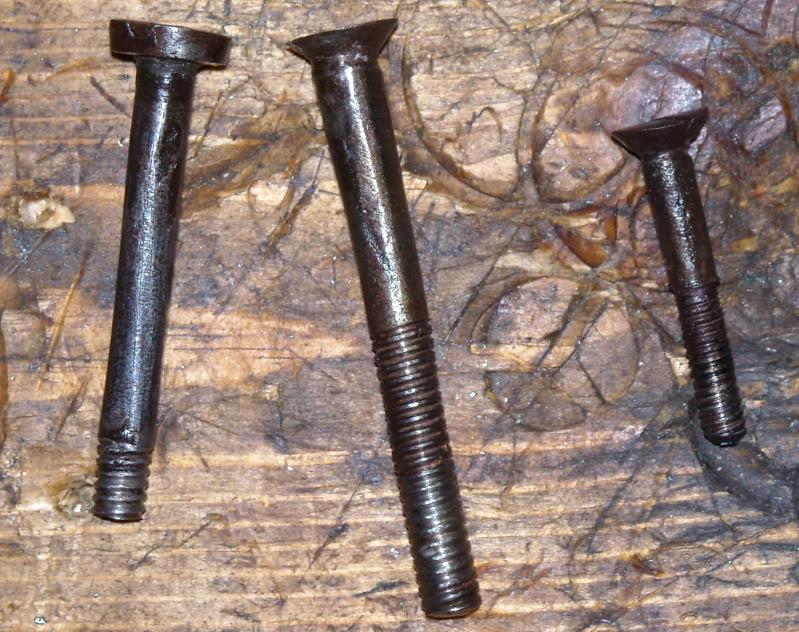
The original trigger guard screws were still in place and were not torn out when the trigger guard was broken away. Lucky for me. The down side is they were badly mangled and bent. I had to heat them up hot, straighten them, and fix the heads by hammering them back to shape with a jewellers ballpeen. I then reheated them and hardened them with a cold water quench.
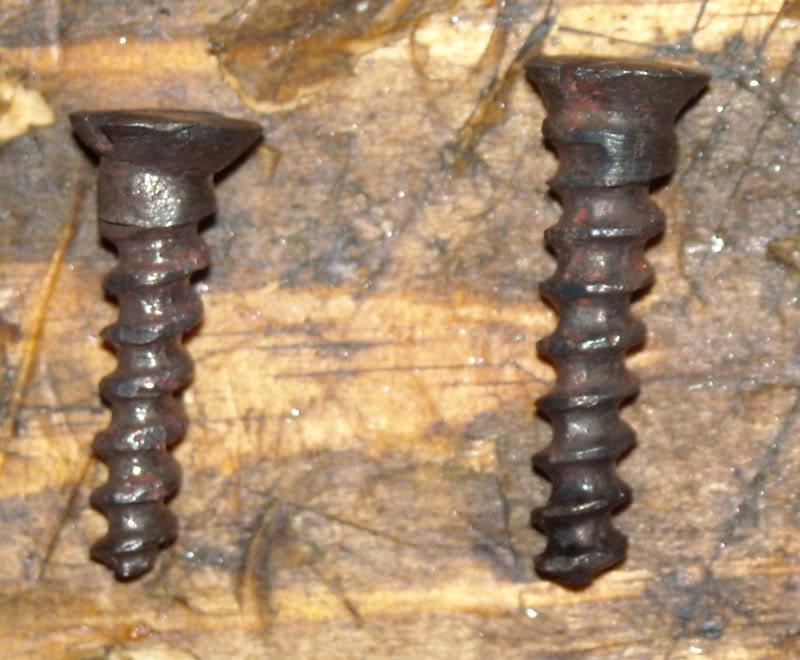
Here we see the orignal hand-forged screws, from left to right, for the lockplate, tang and forward trigger guard screw. Apart from superficial surface rust, they were all pristing with good crisp slots and the original heat-treating quench color still visible on all them!
I got the cleaning rod out - boy was it ever stuck in the stock! I had to wiggle it back and forth with an old drill bit through the hole in the head of the rod as I pulled on it. when it came out it was CAKED in rust and dried mud. It must be made of soft iron because it was also rippled like a snake in motion
I fired up the fine wire wheel and went to town on it - cleaned it right up. There's some pitting on it, mostly where it's inside the stock, but at least there's no active rust now and the the pits aren't that deep. I spent a good 30 minutes straightening it in a soft-jawed vice. It's threaded, though I don't think it threads into anything. There must have been an issue ball screw or patch worm for the end of it.
There were some clean areas of the rod before I started, mostly under the brass finials, and from that I could tell the original finish seems to have been in the white with some mottled patina. I may give the rod a quick once-over with browning solution and then buff it with coarse burlap to make it look aged again... we shall see.
I also got the barrel out of the stock. It's not too bad, just some shallow pitting mostly confined below the stock line. Nothing is deeper than maybe a half a millimetre. Haven't looked at the bore yet. Much of the original browning is still there with a moderate amount of wear above the stock line. I may leave it as-is and not re-brown it.
I tried removing some of the screws for the brass escutcheons and most are stripped.
More as I progress...
- Knowledge Library

- MKL Entry of the Month
- Australia
- Austro-Hungarian Empire
- Canada
- Czechoslovakia
- Denmark
- Finland
- France/Belgium
- Germany
- Italy
- Japan
- Norway
- Russia
- South America
- Sweden
- Switzerland
- Turkey
- United Kingdom
- United States
- Yugoslavia
- Is my rifle authentic or a fake?
- Jay Currah's Lee Enfield Web Site
- On-line Service Records (Canada)
- Technical Articles/Research
- Forum
- Classifieds
- What's New?
-
Photo Gallery
- Photo Gallery Options
- Photo Gallery Home
- Search Photo Gallery List
-
Photo Gallery Search
- Video Club
- iTrader


 PM
PM