


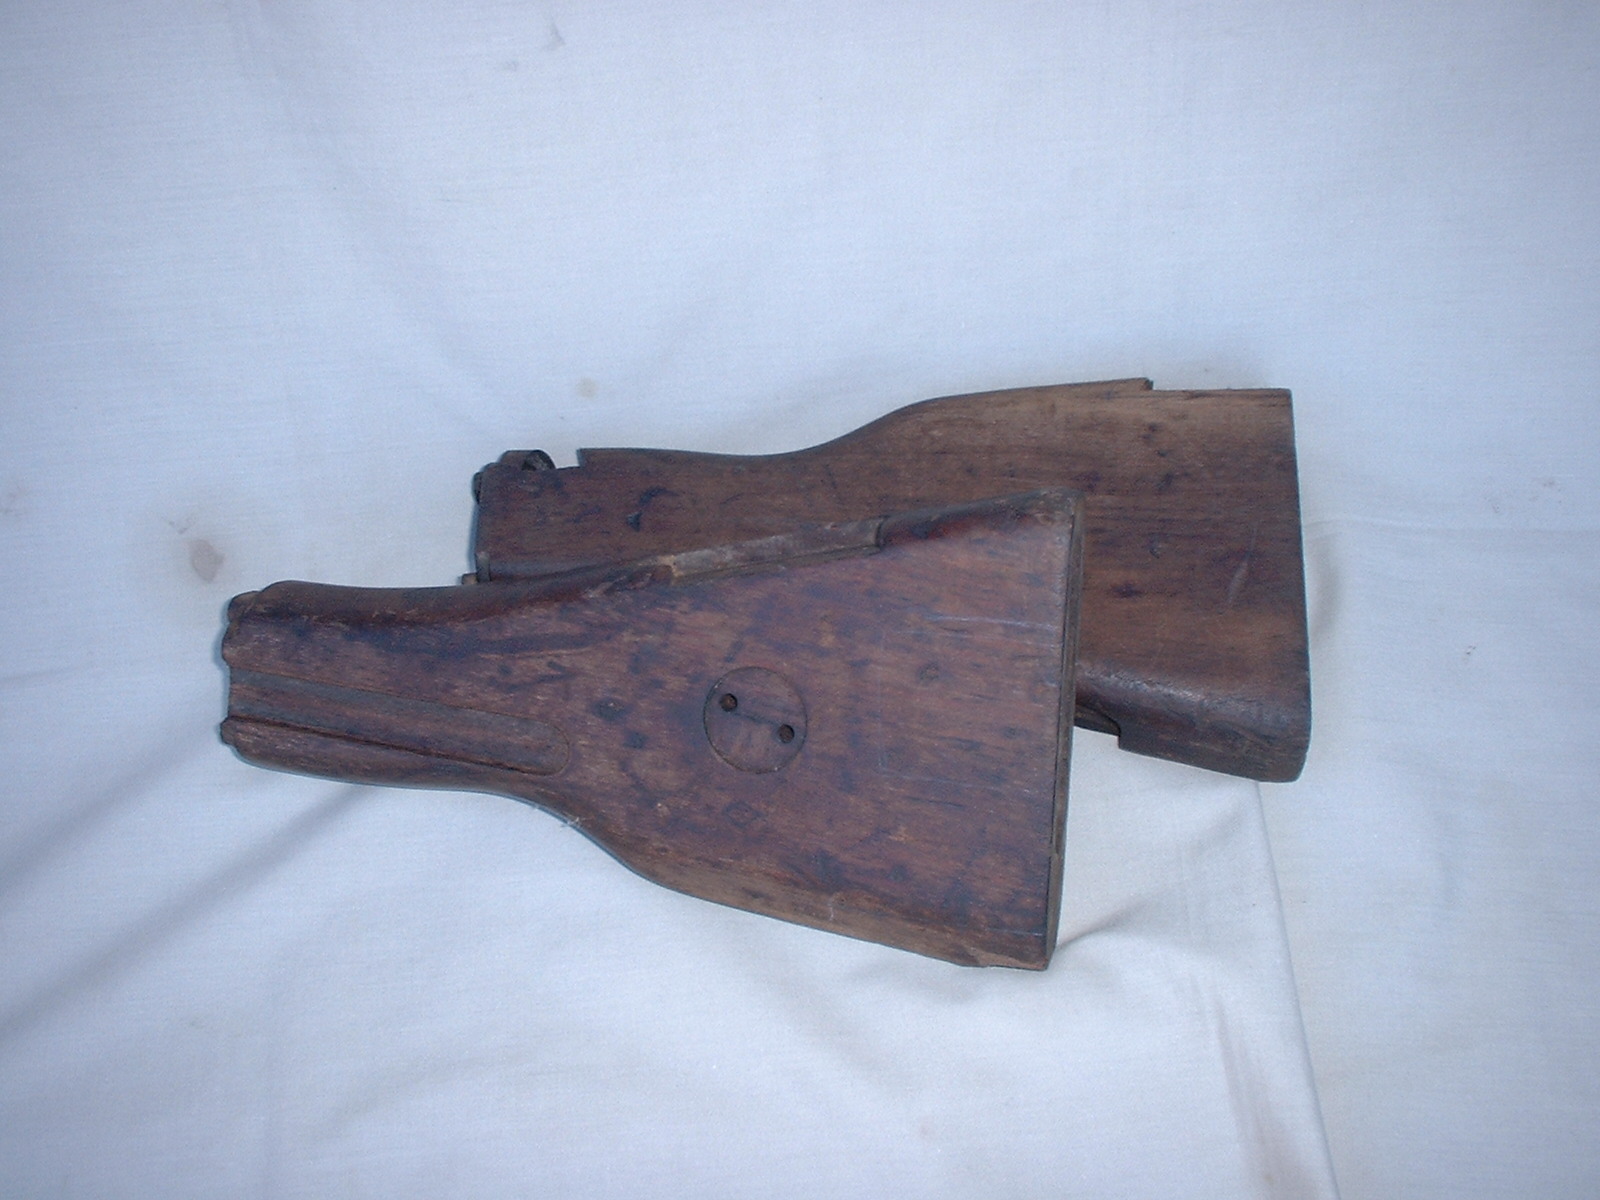
Take two Mk2 Bren butts........ Totally battered, bruised, oil soaked, split, cracked and damaged to the point of no return, ready for fire-wood Inglis Mk2 Bren butts. But you start with what you’ve got and what you aim for. As you’ll see at the end of this little pictorial essay, they were actually worse than I thought – or I bit off more than I could chew. Take your pick!
That said, the idea of this snap shot into wood patching on your milsurp is that there’s only one way to do it and that’s properly. That way the patches will last a lifetime. I have done some of these in a wood that illustrates what I’m on about. Naturally it’s better if YOU do it, to select a colour that matches more evenly – or stain afterwards. I mention elsewhere that there’s really two schools of thought when it comes to patching wood on rifles or other weapons. There’s those safe-queen fiends who look at them and comment ‘.....ugh....., look at those patches’ and then turn their noses up. Then there’s those who comment ‘..... wow...., look at those patches.....’ then comment on the quality and effort that’s gone into bringing something that’s had a hard life back from the brink – as in these clapped-out Inglis Bren butts.
And there’s something else too. There are sometimes isolated dings, dints and severe bruising that you can’t actually patch (see photo 014 and 21) as such, but it’s there! You can try steam-raising the grain and then scraping or levelling to make good but always keep sight of the fact that it WILL settle down again just as sure as eggs is eggs......
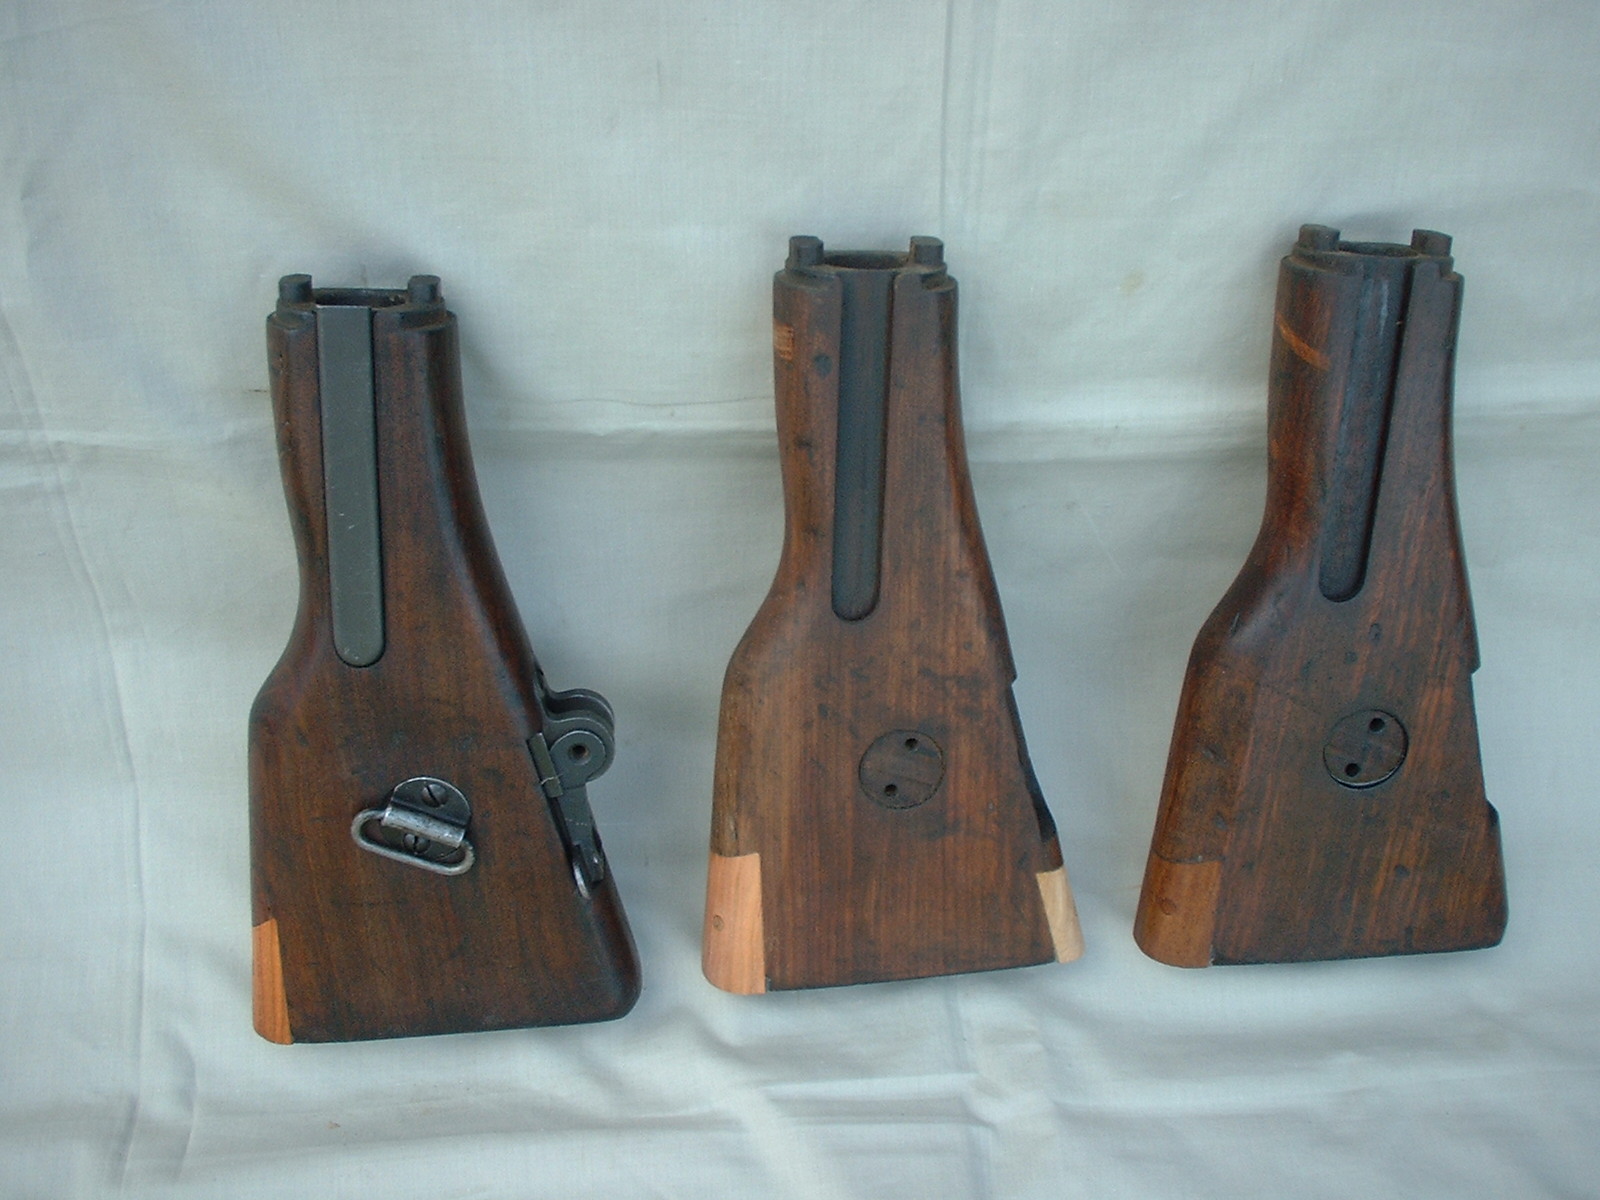
Anyhow, here goes. Where was I now..... Oh yes, take two (but three later) clapped out fit for firewood Inglis Bren butts. Incidentally, these Mk2 Bren butts are great examples to practice on. They’re flat, parallel, slab sided with gentle curves and only a few intricate shapes to worry you.
(Click PIC to Enlarge)
The two butts in question after they’d been dunked in the hot tricho tank. You can see that a couple of the old patches had fallen straight out. BUT, they wouldn’t have if they’d been pegged too!
(Click PIC to Enlarge)
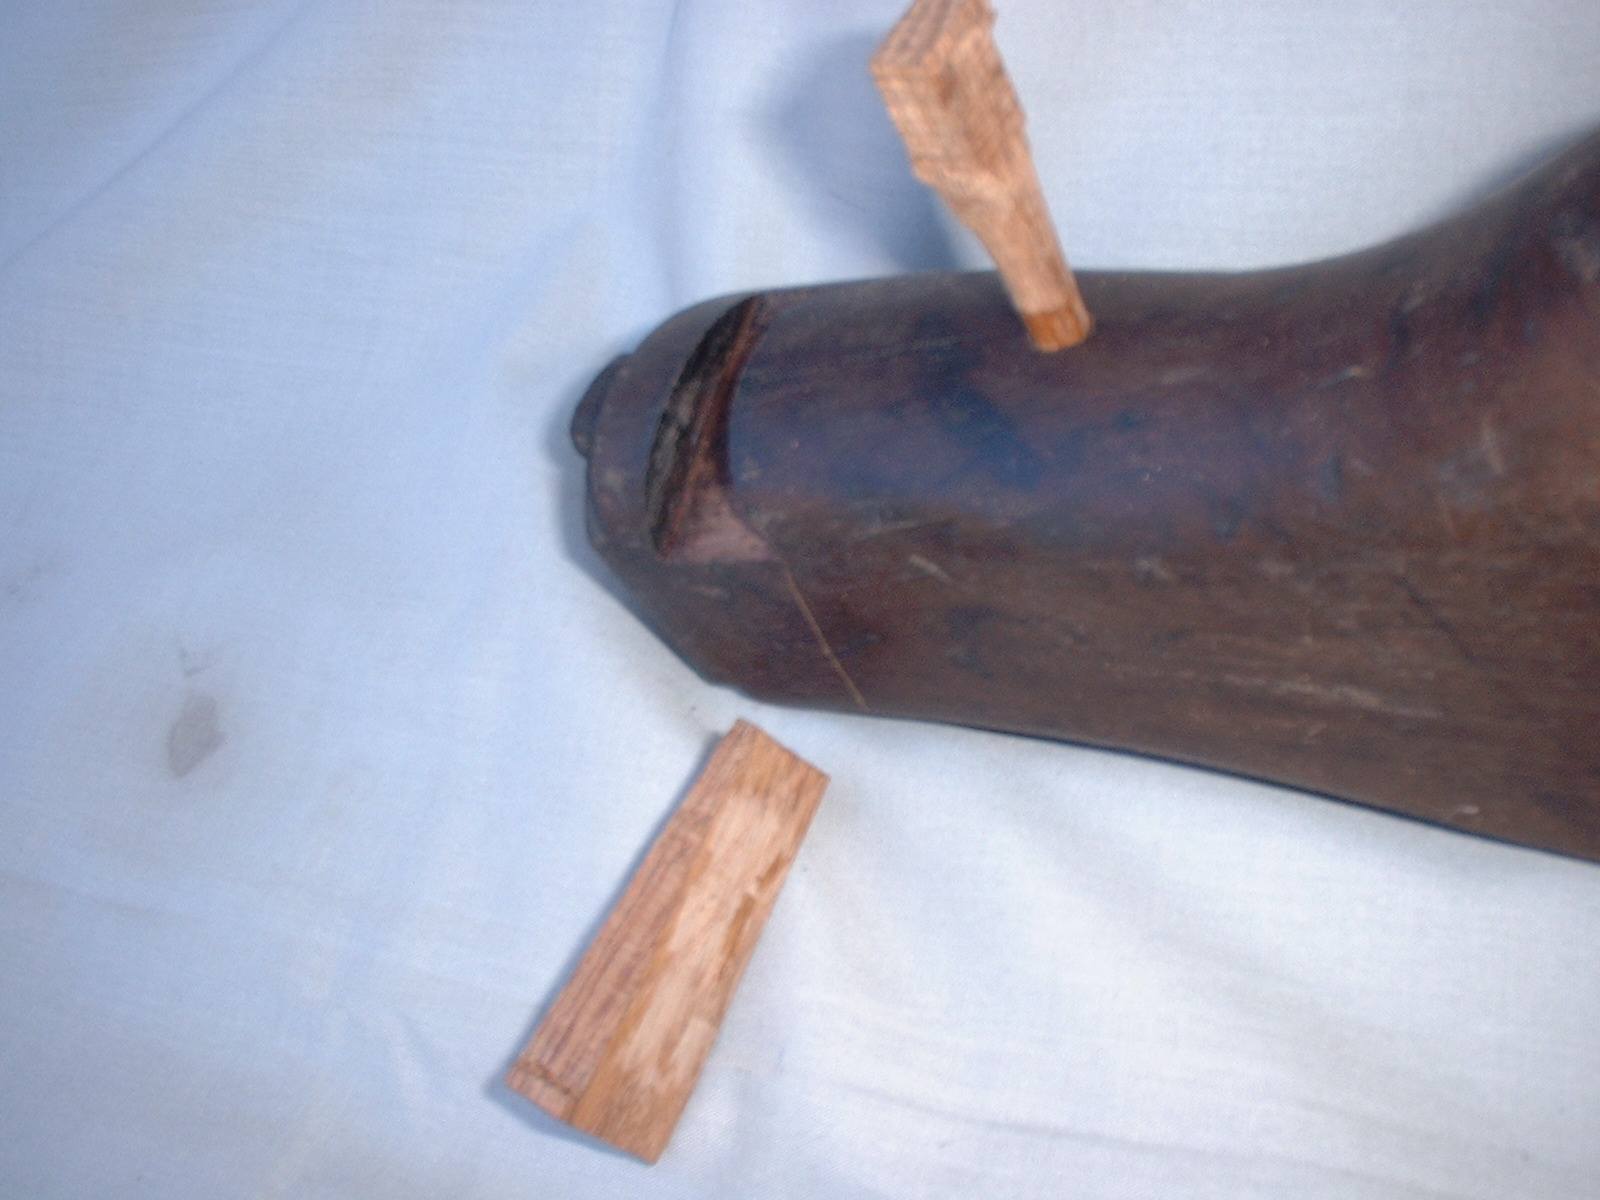
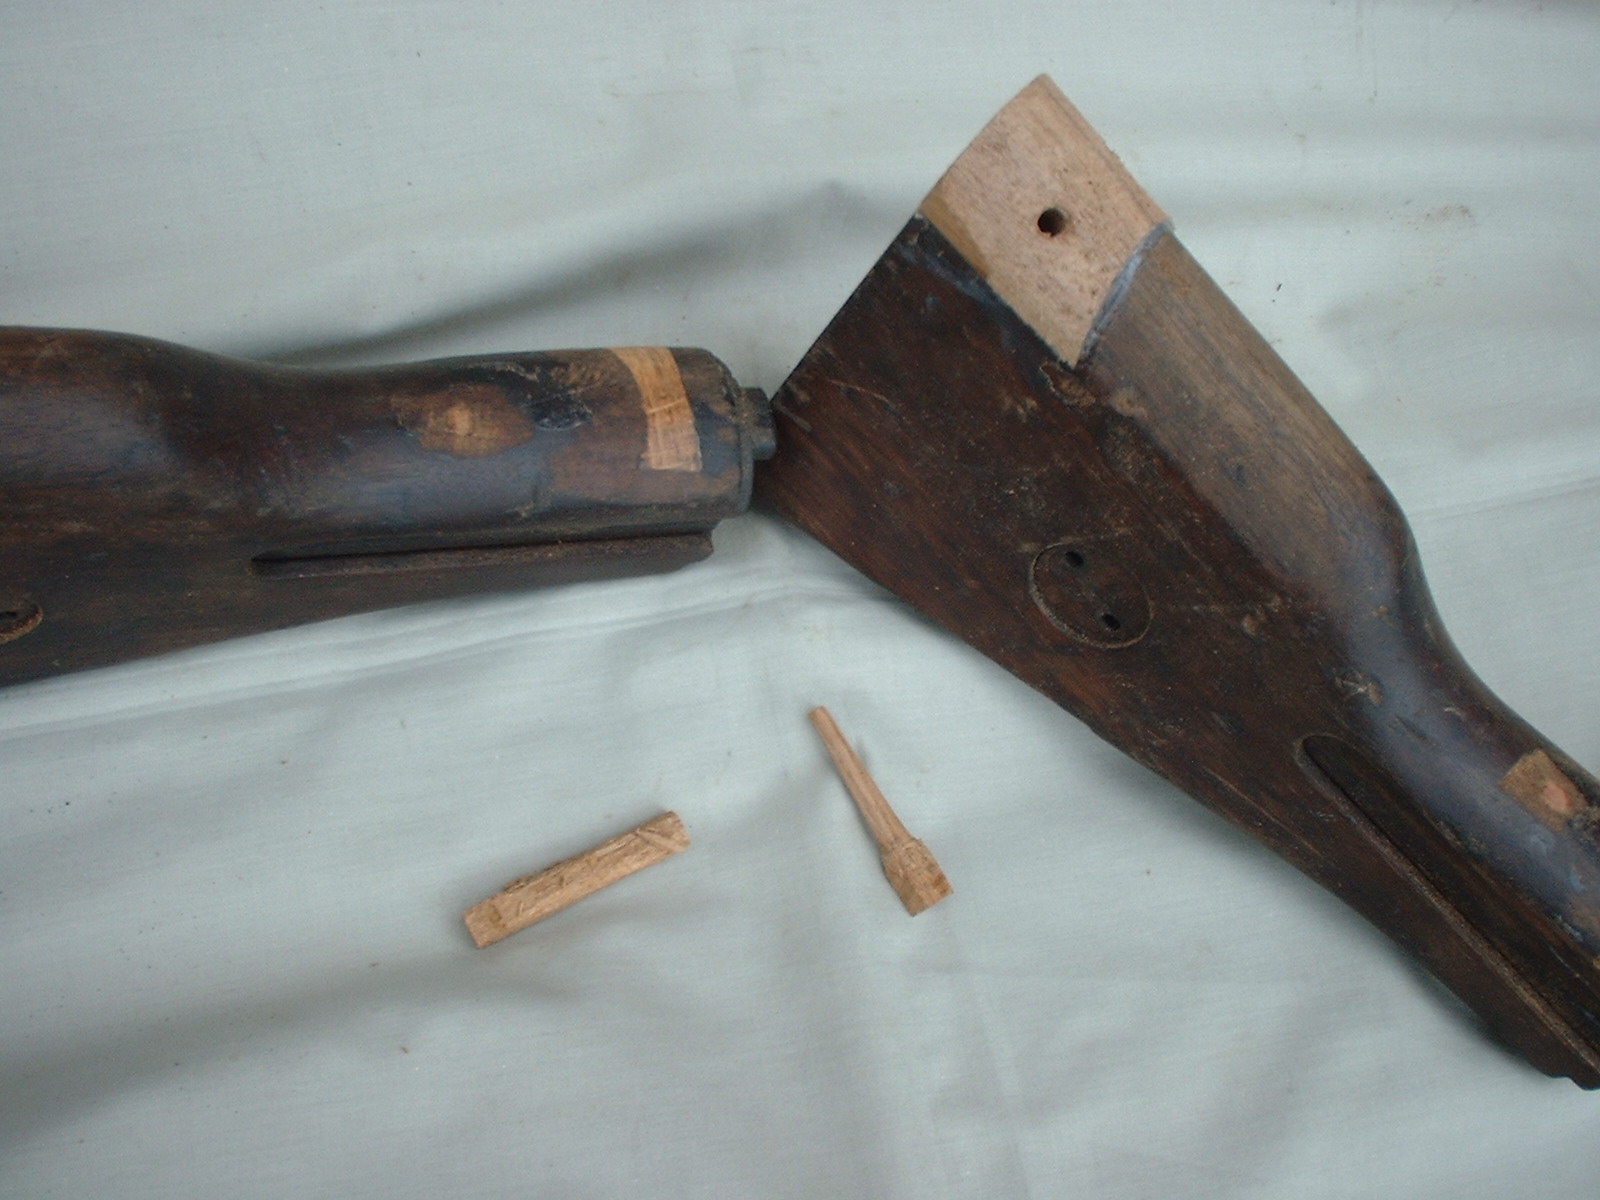
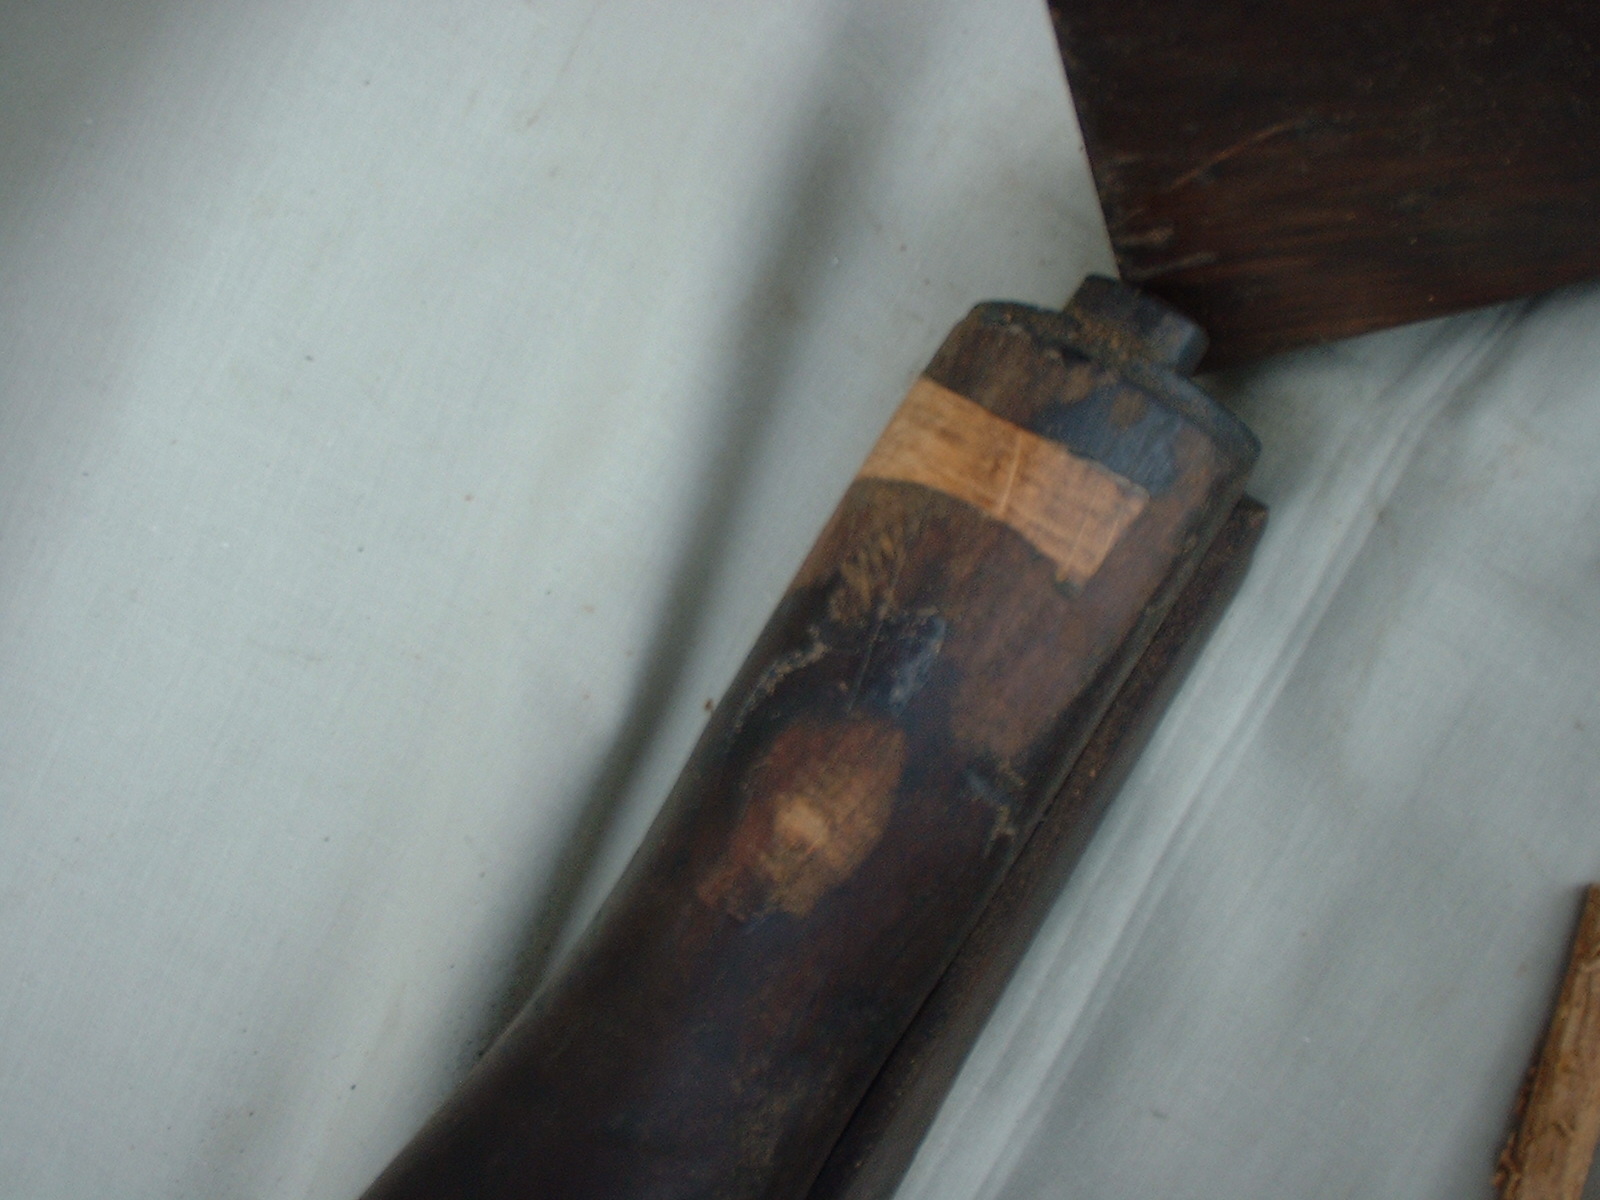
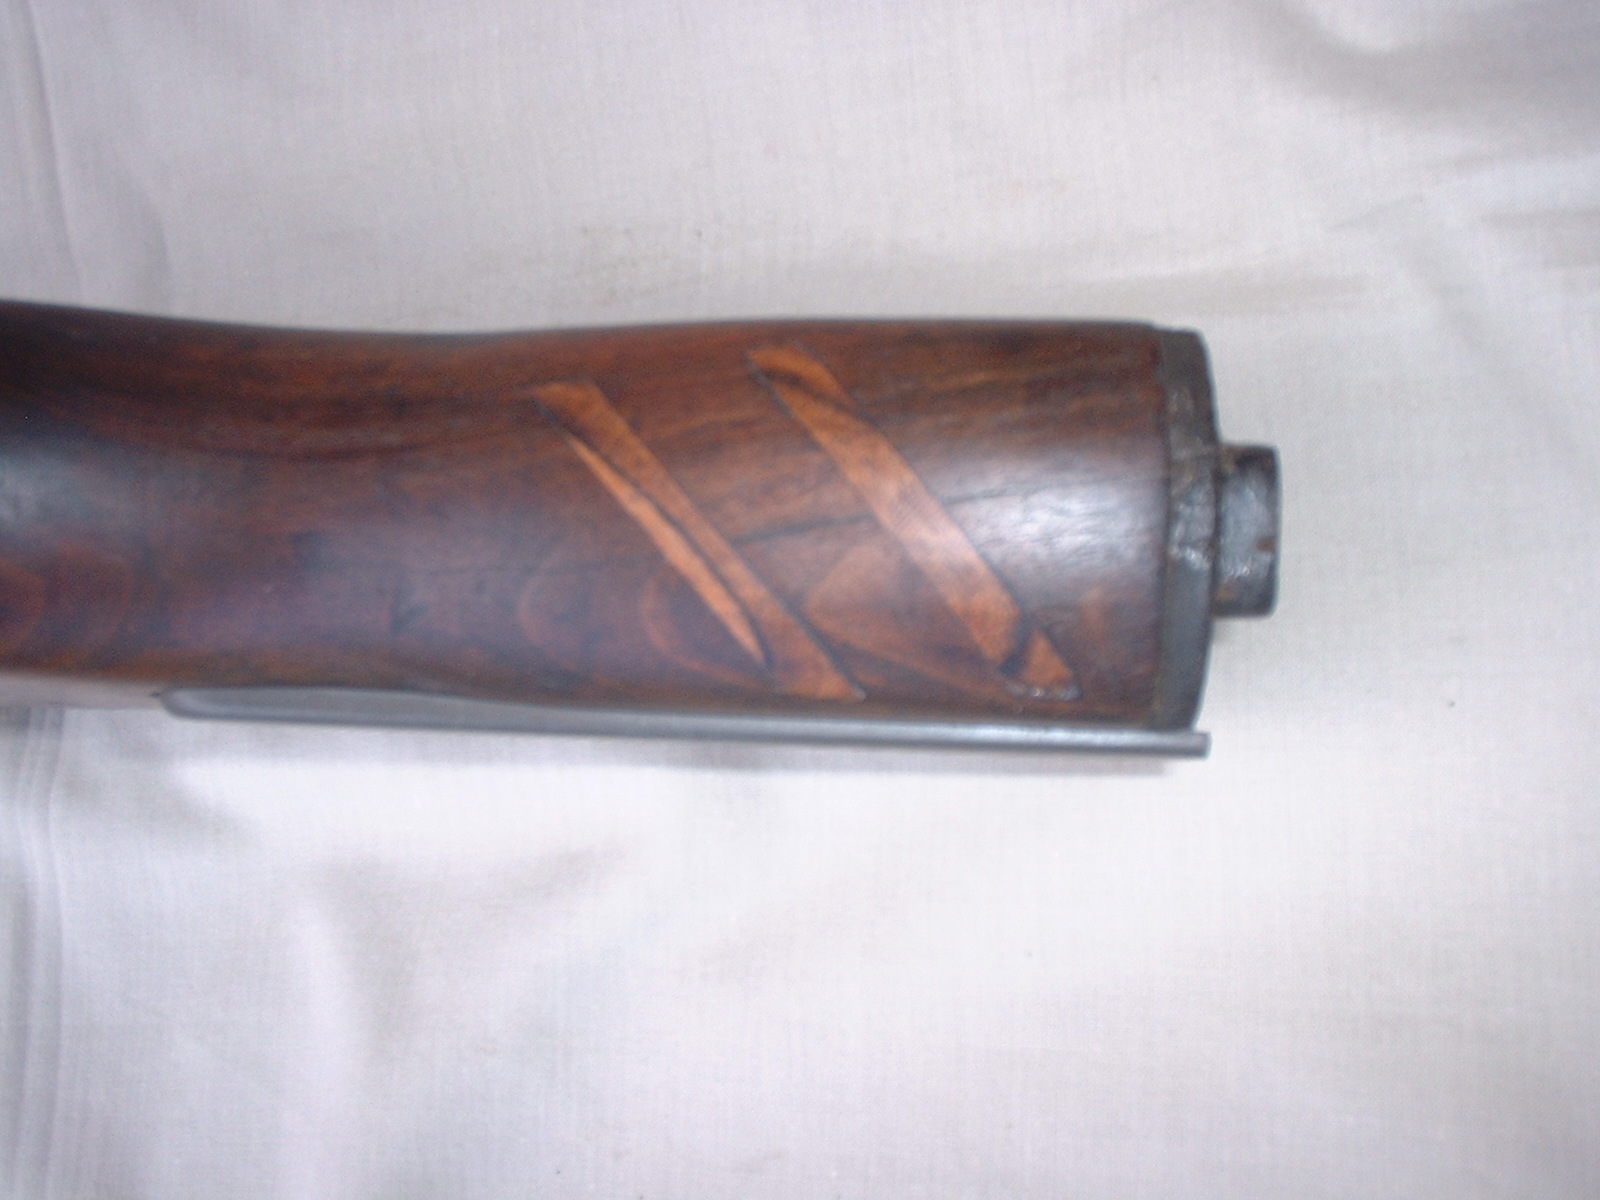
Long split here along the top of the wrist. The split is drilled and pegged at the end. The old slip patch has been substituted by what we call a ‘tapered dovetail’. It’s pretty clear pictorially and verbally what a tapered dovetail is. What it doesn’t tell you is how difficult they are to achieve and how pointless they are on rifle woodwork. But we had to do a few of them during our apprenticeships – and I haven’t done one since before today! Ok....., Ok....., just showing off a skill that I haven’t forgotten.
(Click PIC to Enlarge)
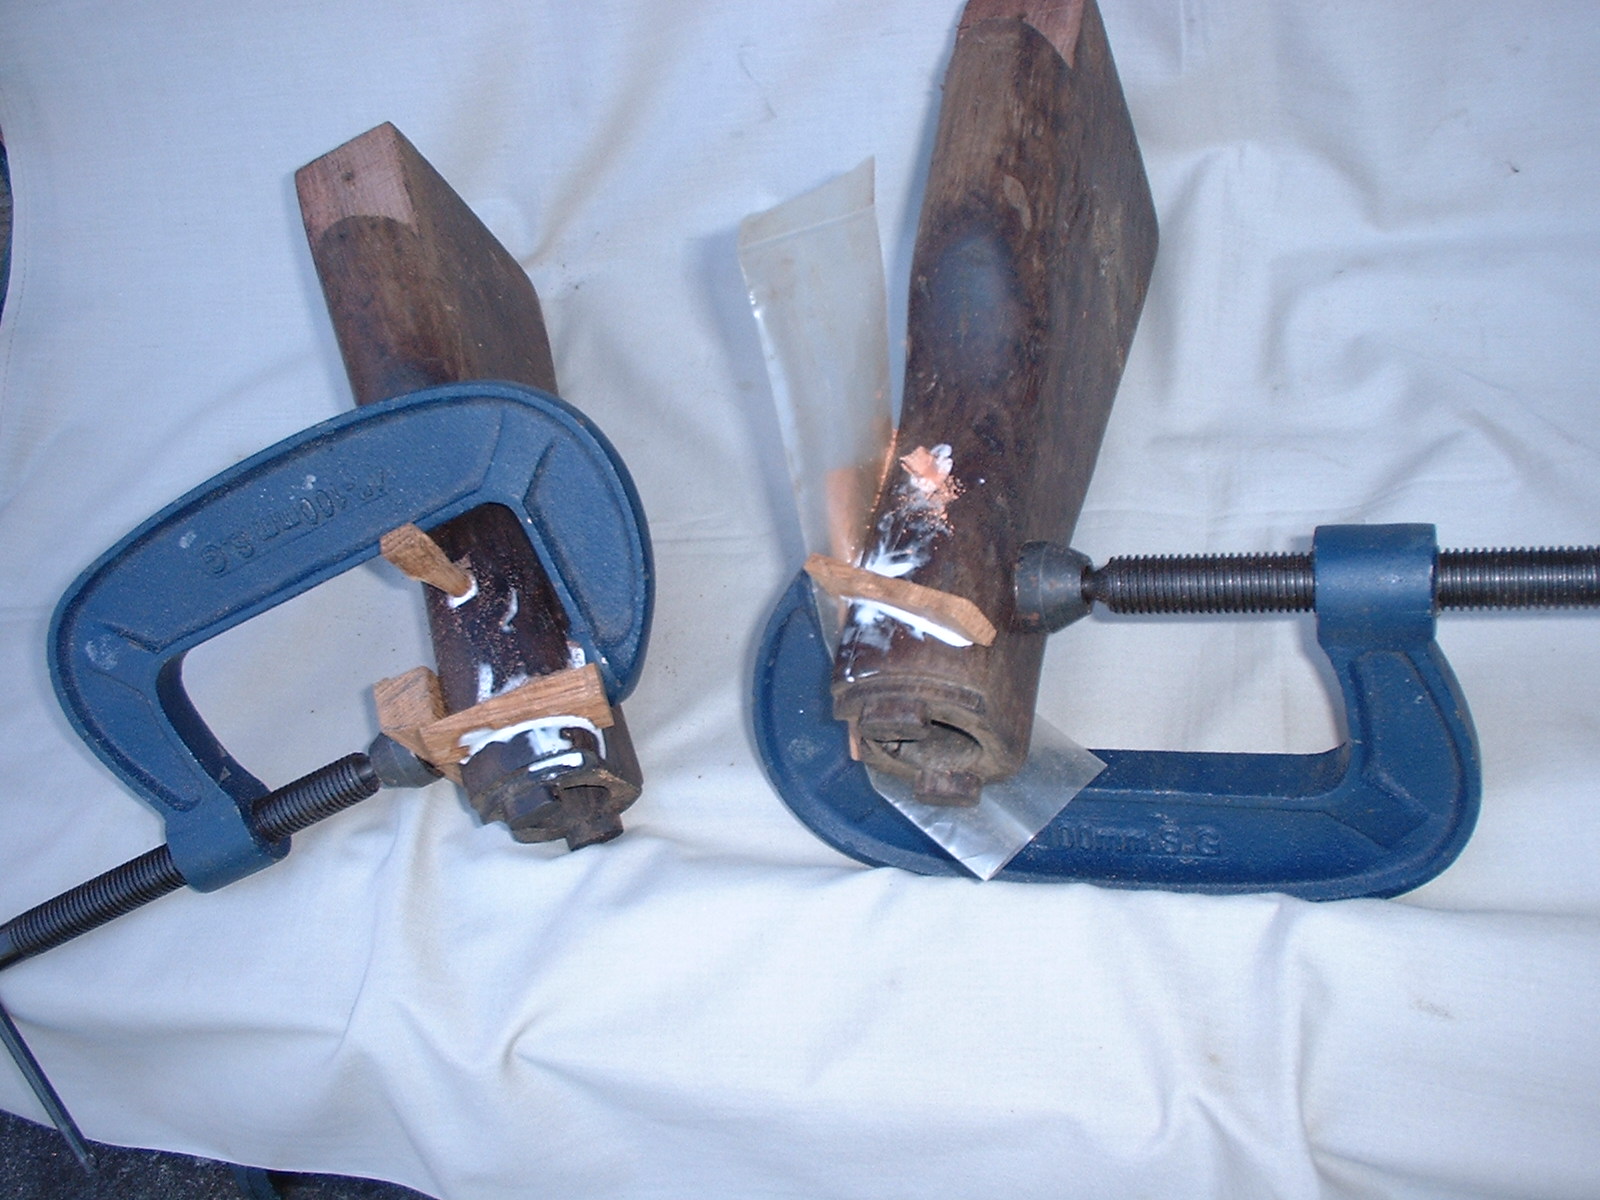
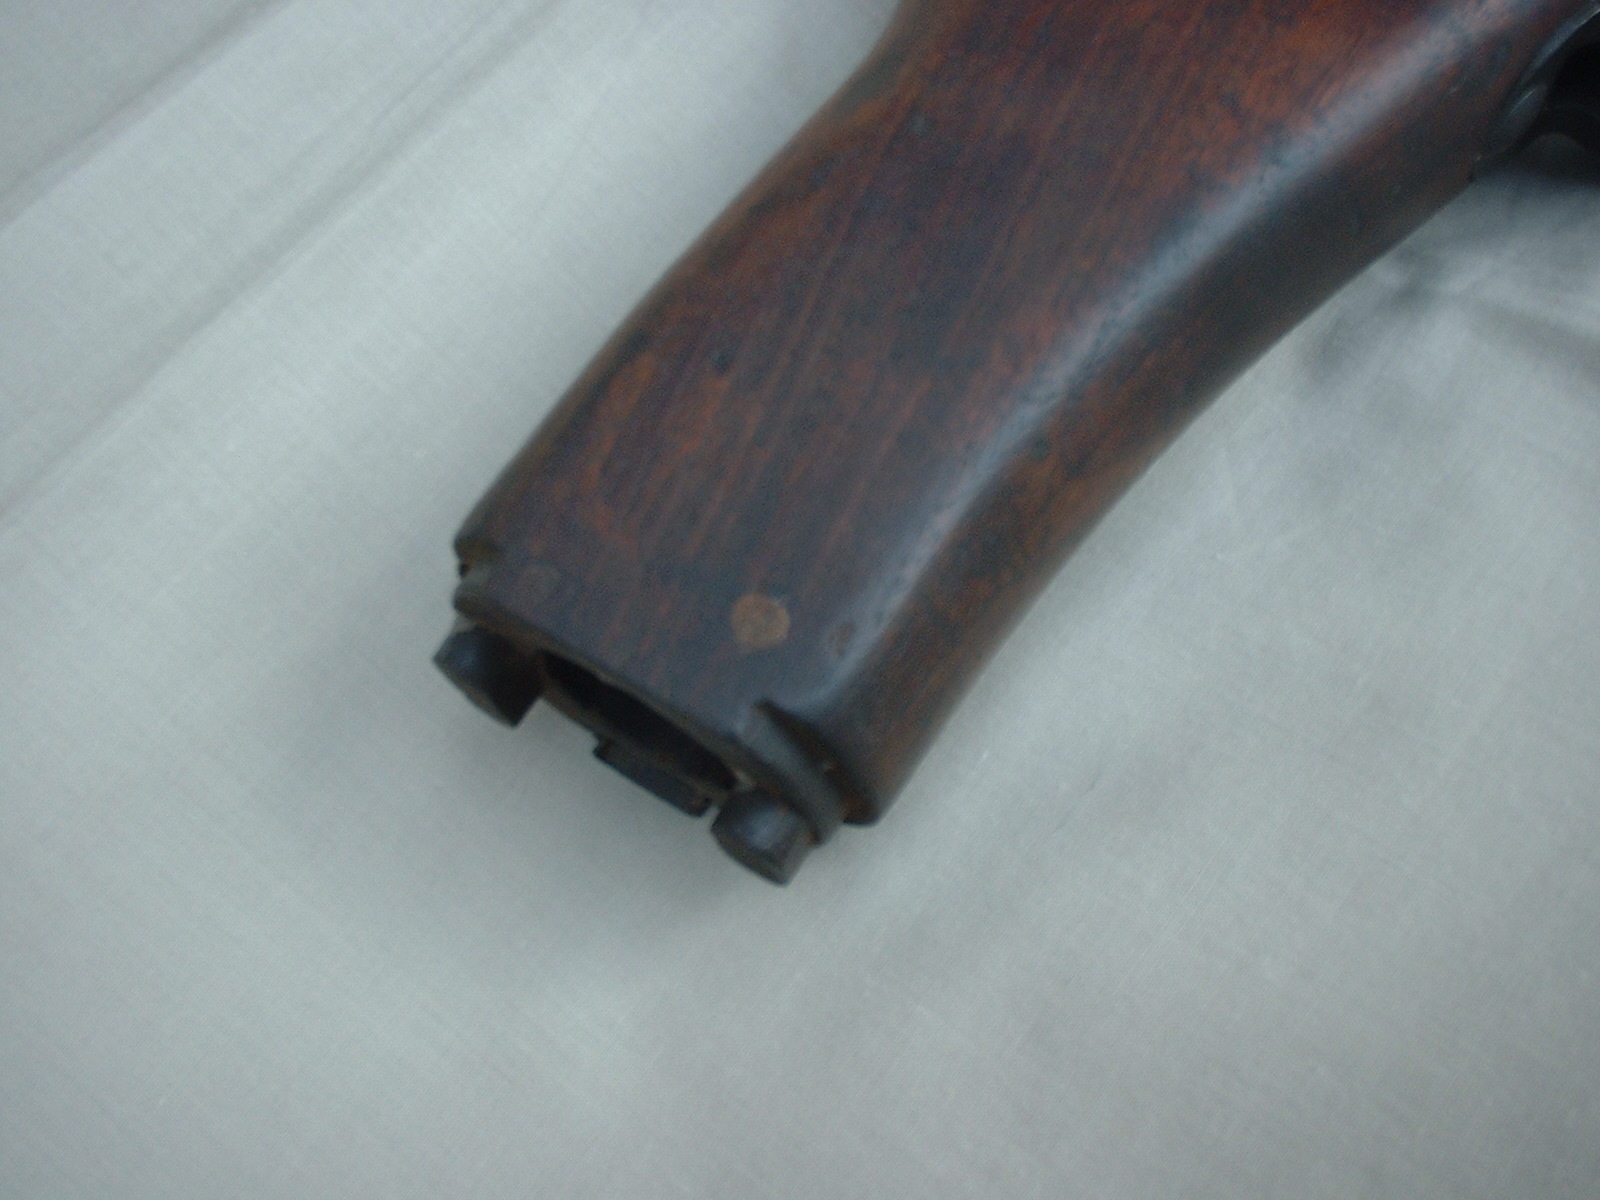
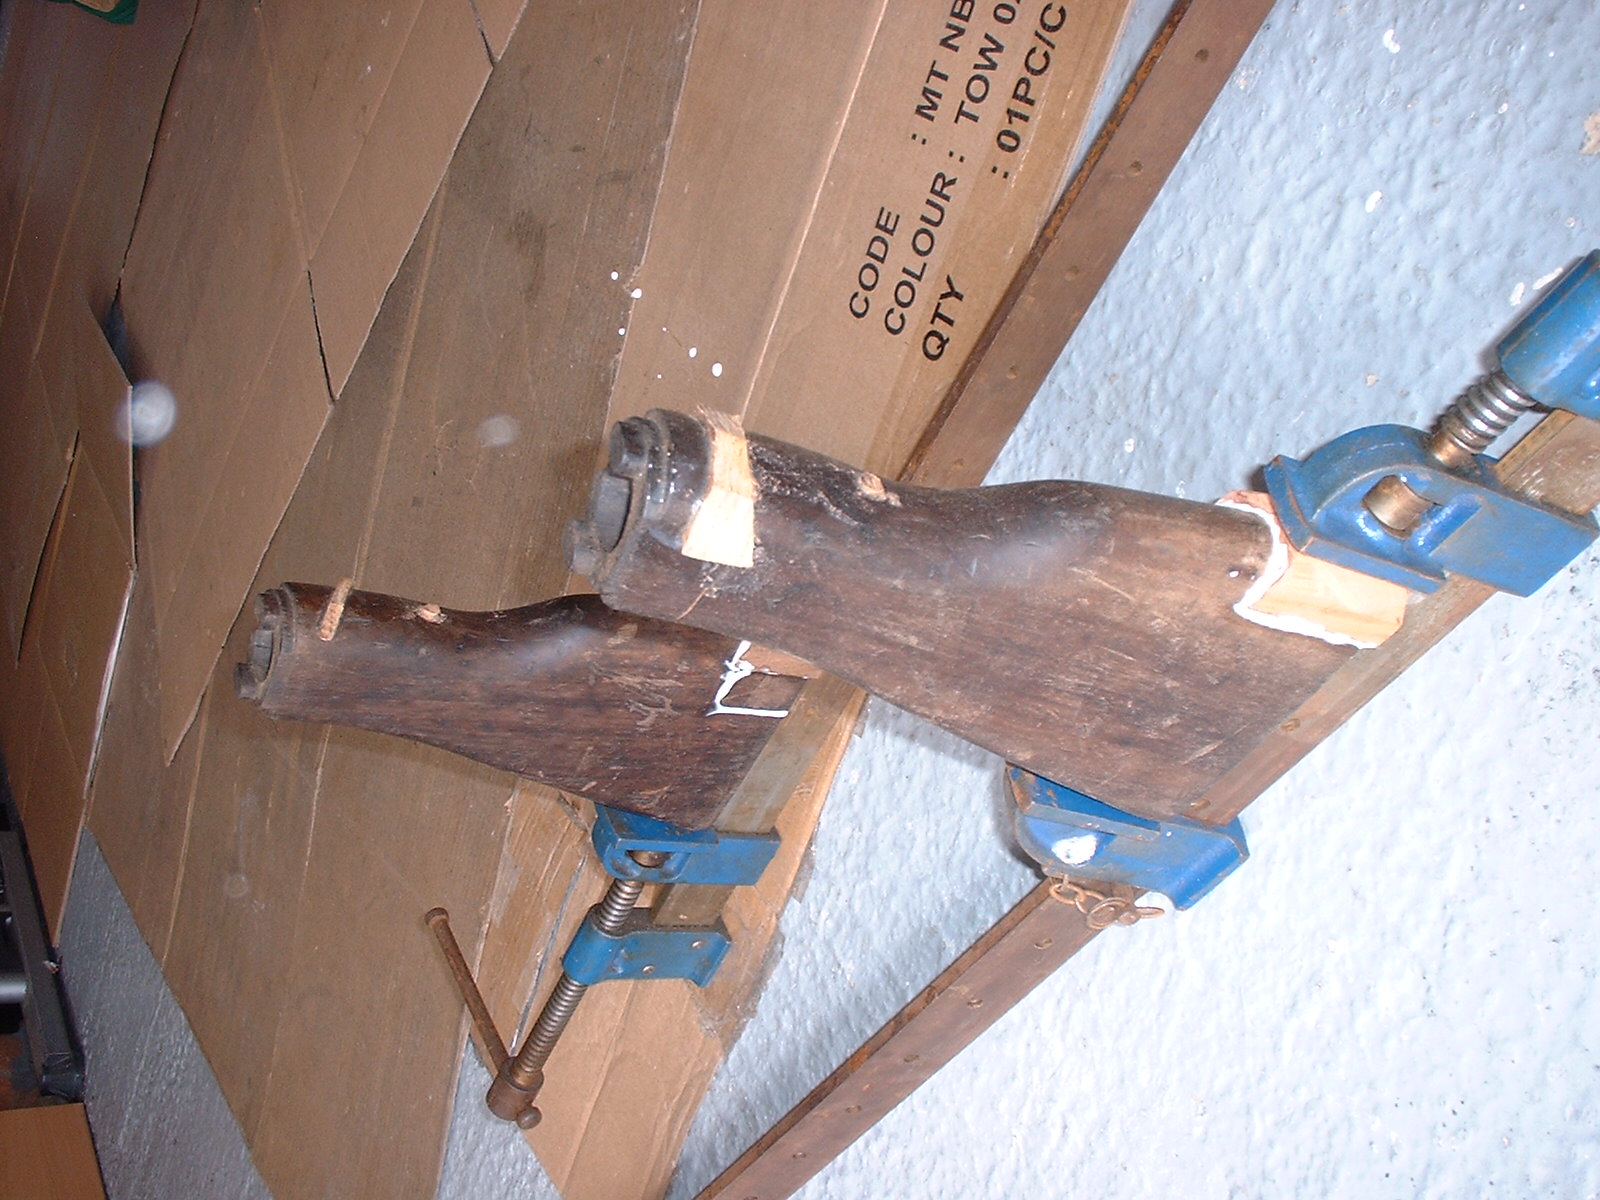
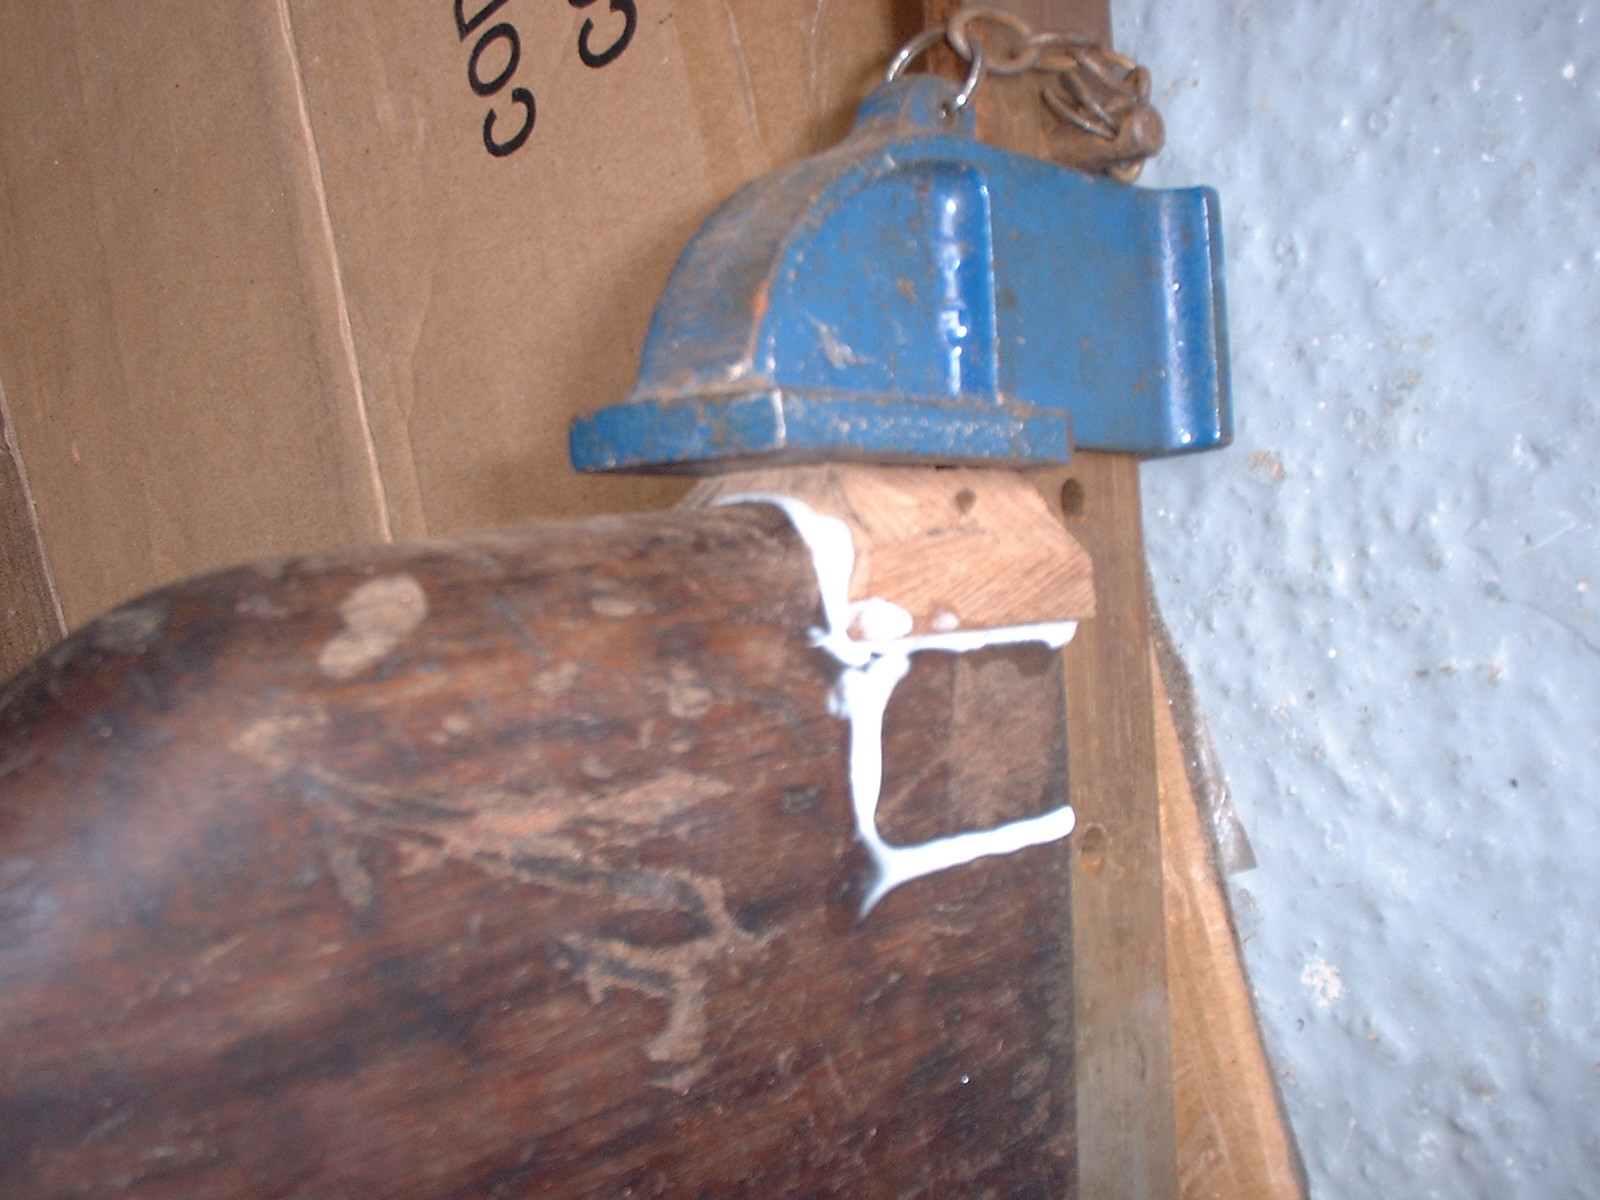
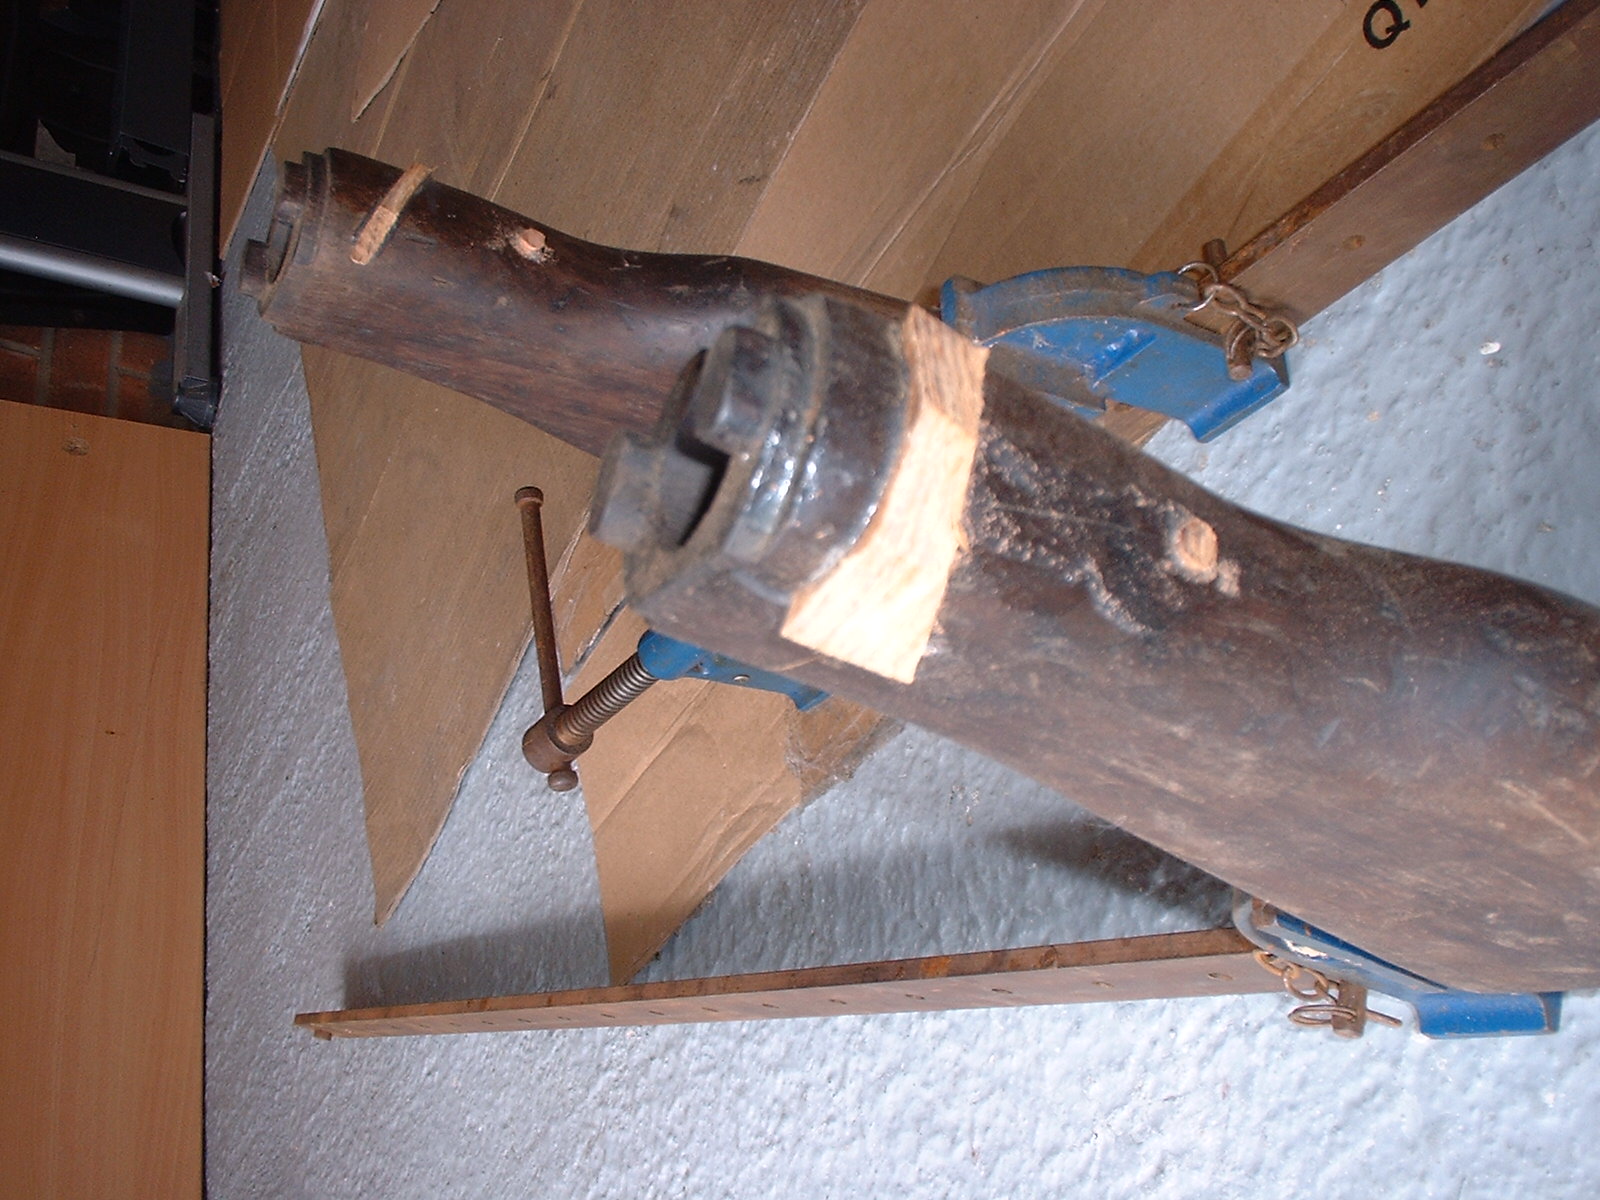
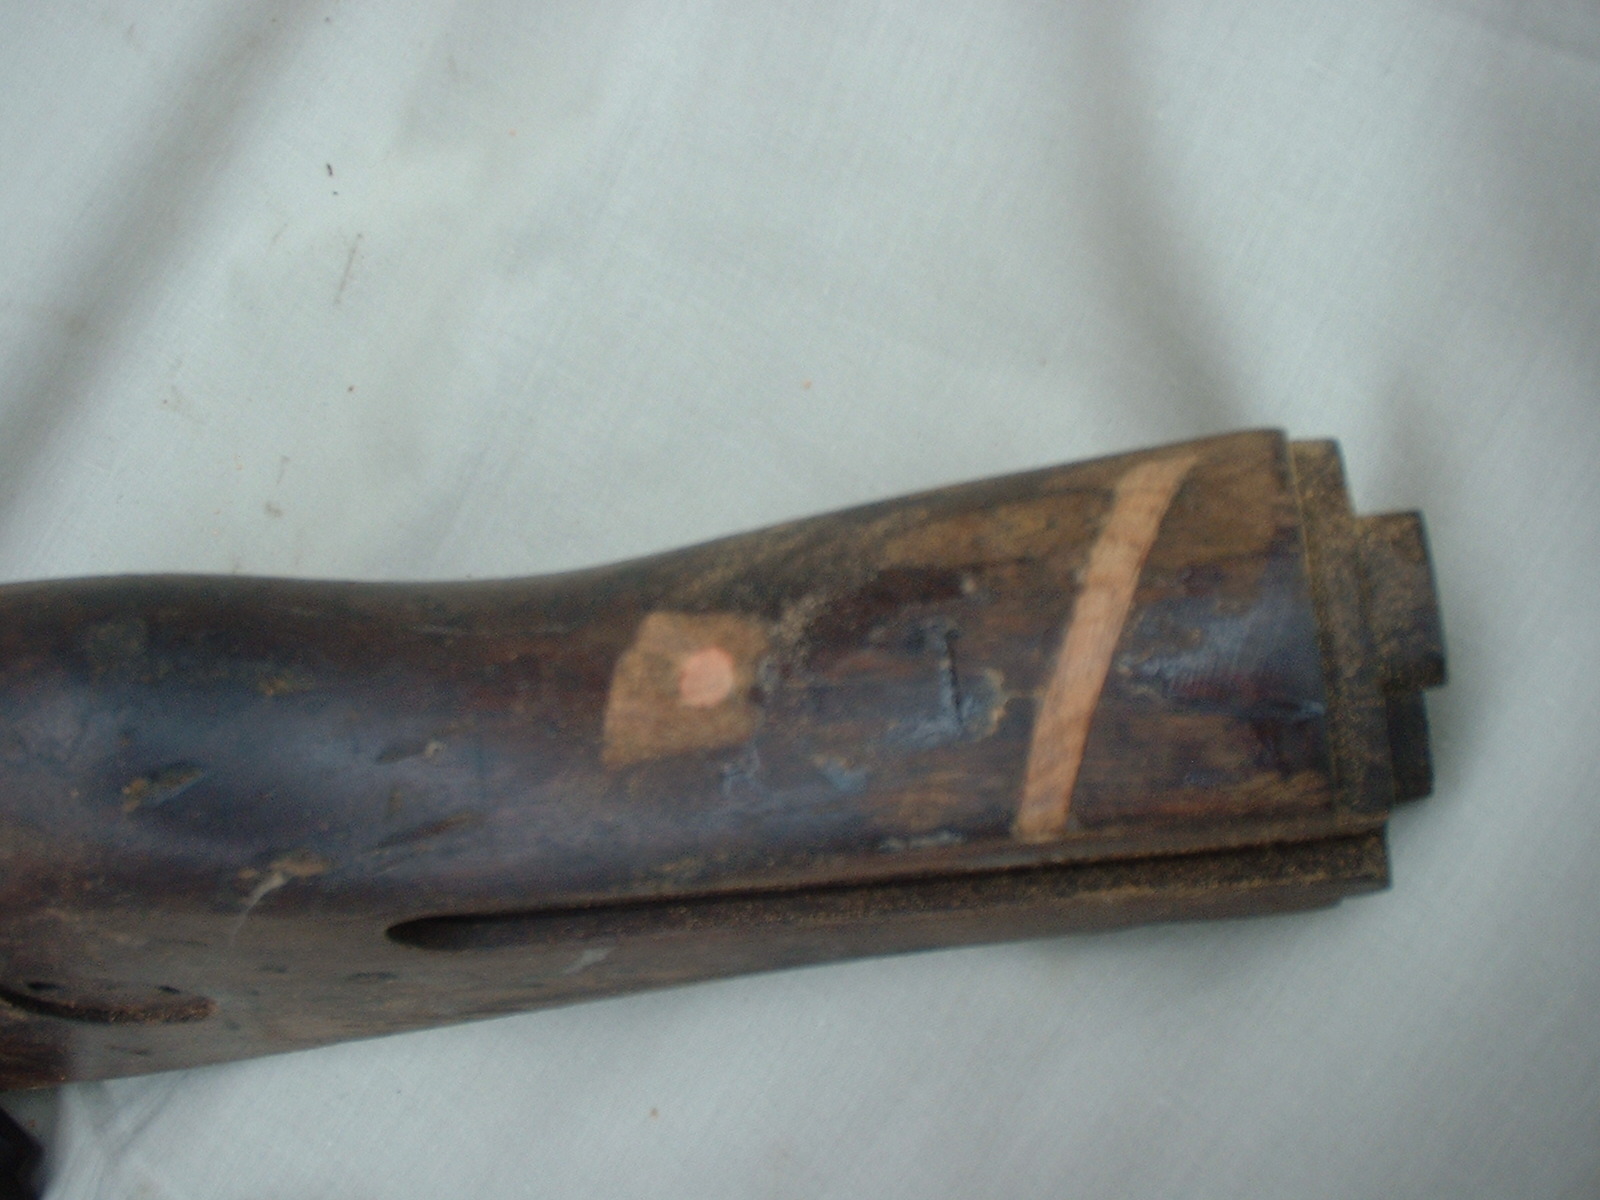
Both butts patched at the wrists. Notice the hand-made tapered oak pegs. Pegs are always made of oak. This ensures that they’re a tight and a secure fit in the holes when they are knocked in. See the normal but slightly wider walnut slip patch and the oak tapered dovetail. The split has also been opened slightly and wood glue squeezed into it. It is important to clamp the butt as the glue dries. You’ll also see the heel patches cut out, ready to go.......
(Click PIC to Enlarge)
If the butt is split along the underside remember that there’s more meat there and instead of a slip patch or two you can open up the split, squeeze glue into it and insert a crosswise dowel that you’ll see in the picture
(Click PIC to Enlarge)
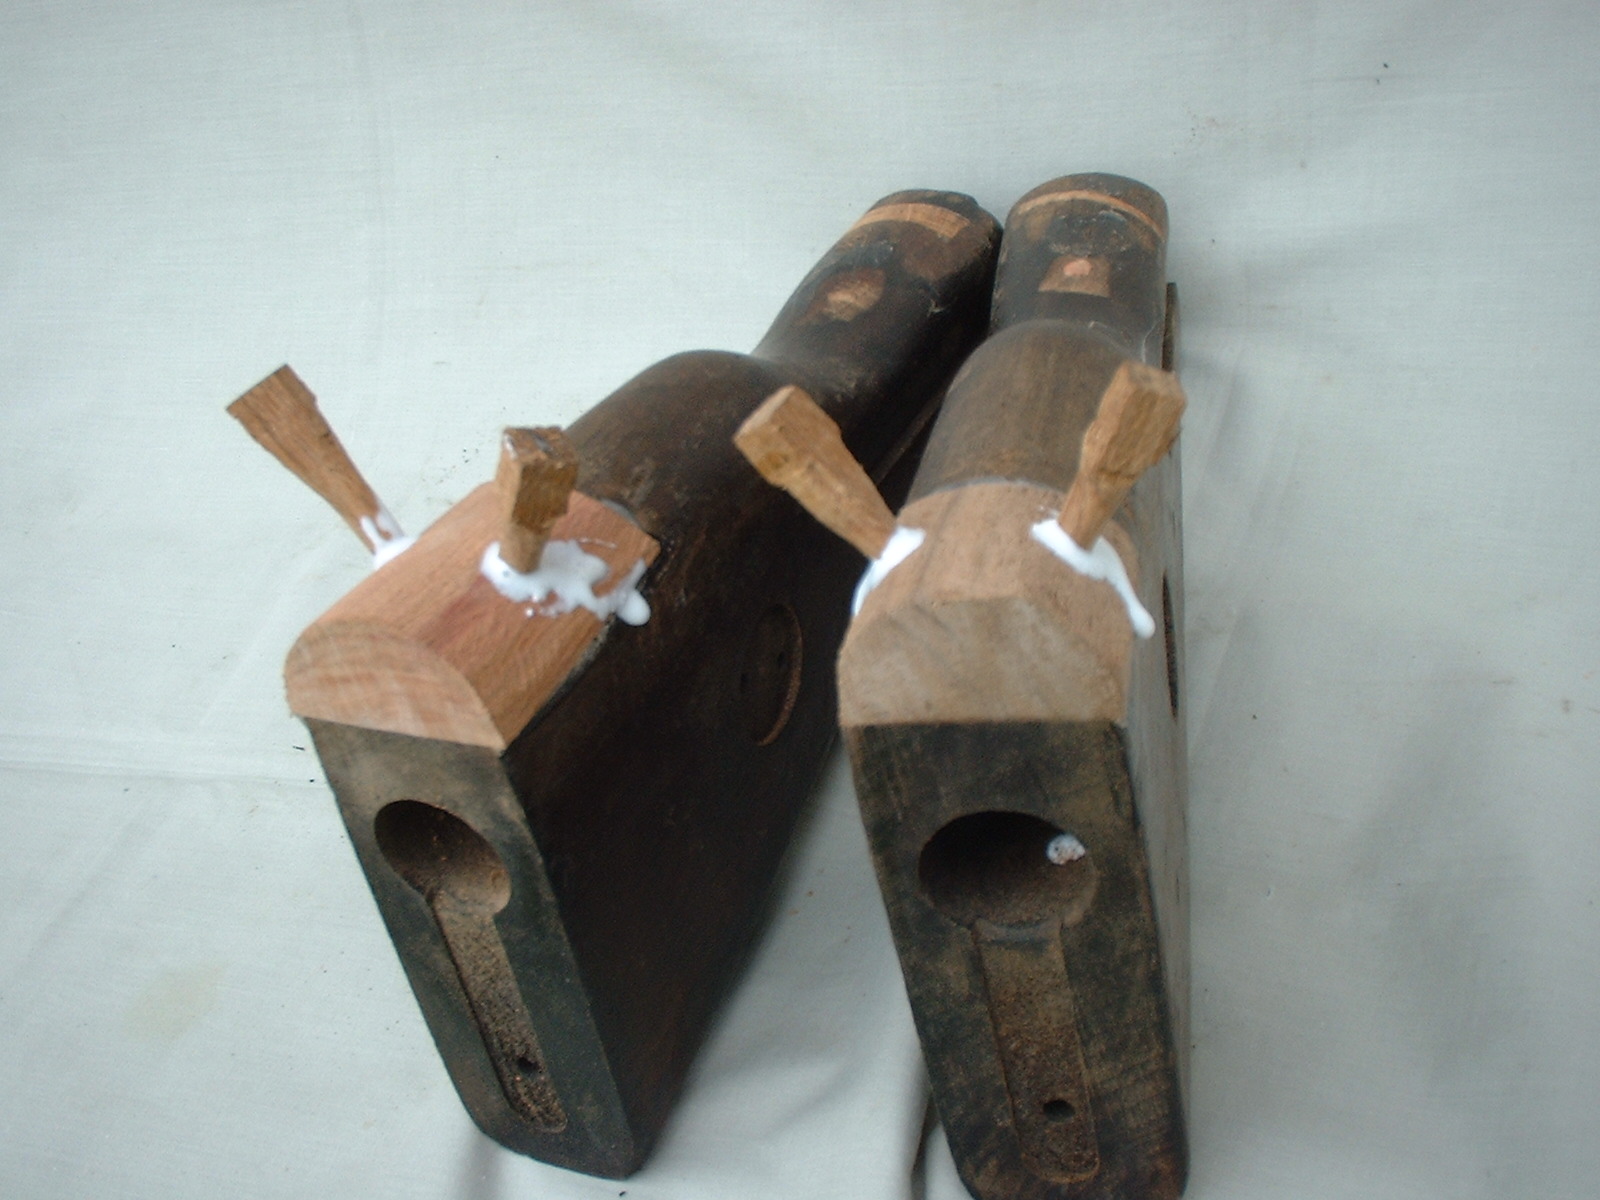
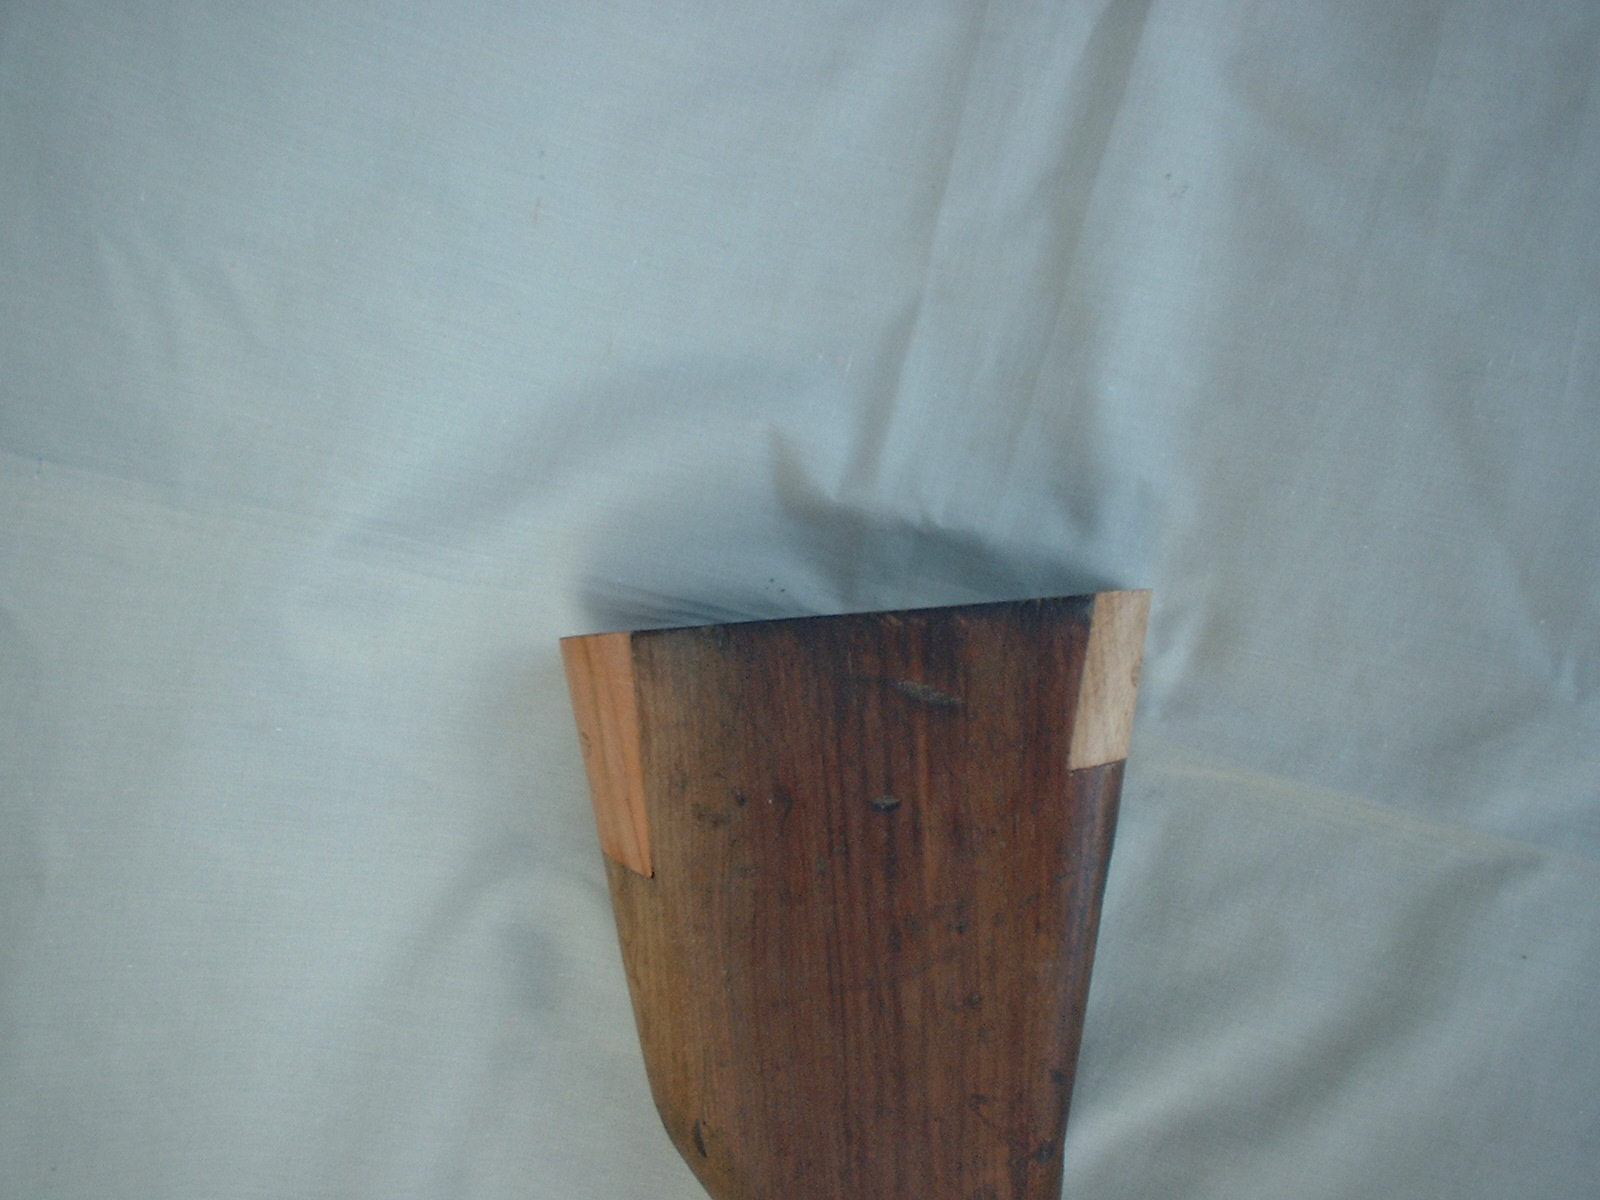
The heel patches of both guns accurately fitted, glued and clamped in place. 1 oak and 1 plumb from an old tree in my garden.
(Click PIC to Enlarge)
The earlier wrist slip patches and pegs cut back ready to work with a rasp and file
(Click PIC to Enlarge)
(Click PIC to Enlarge)
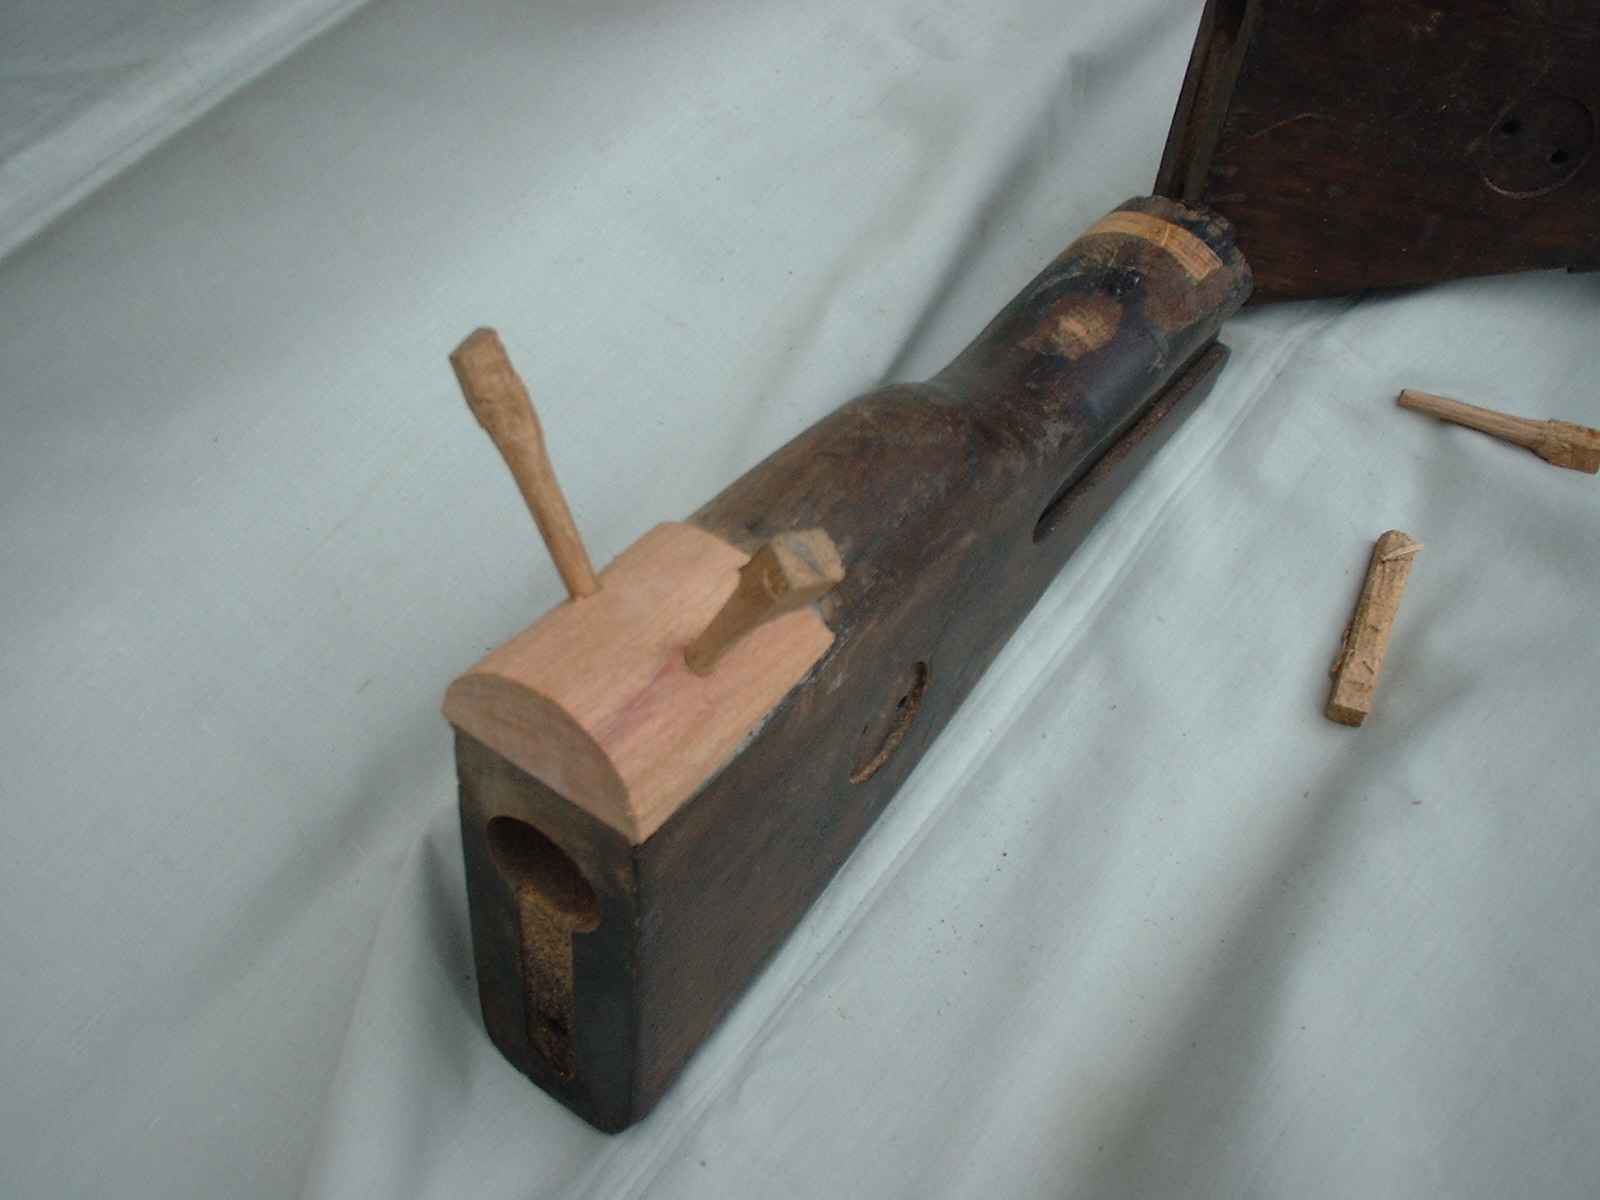
The wrist patch ready to work and butt patch ready for plugging. Note again the hand-made tapered plugs ready, glued and then knocked in quite deeply
(Click PIC to Enlarge)
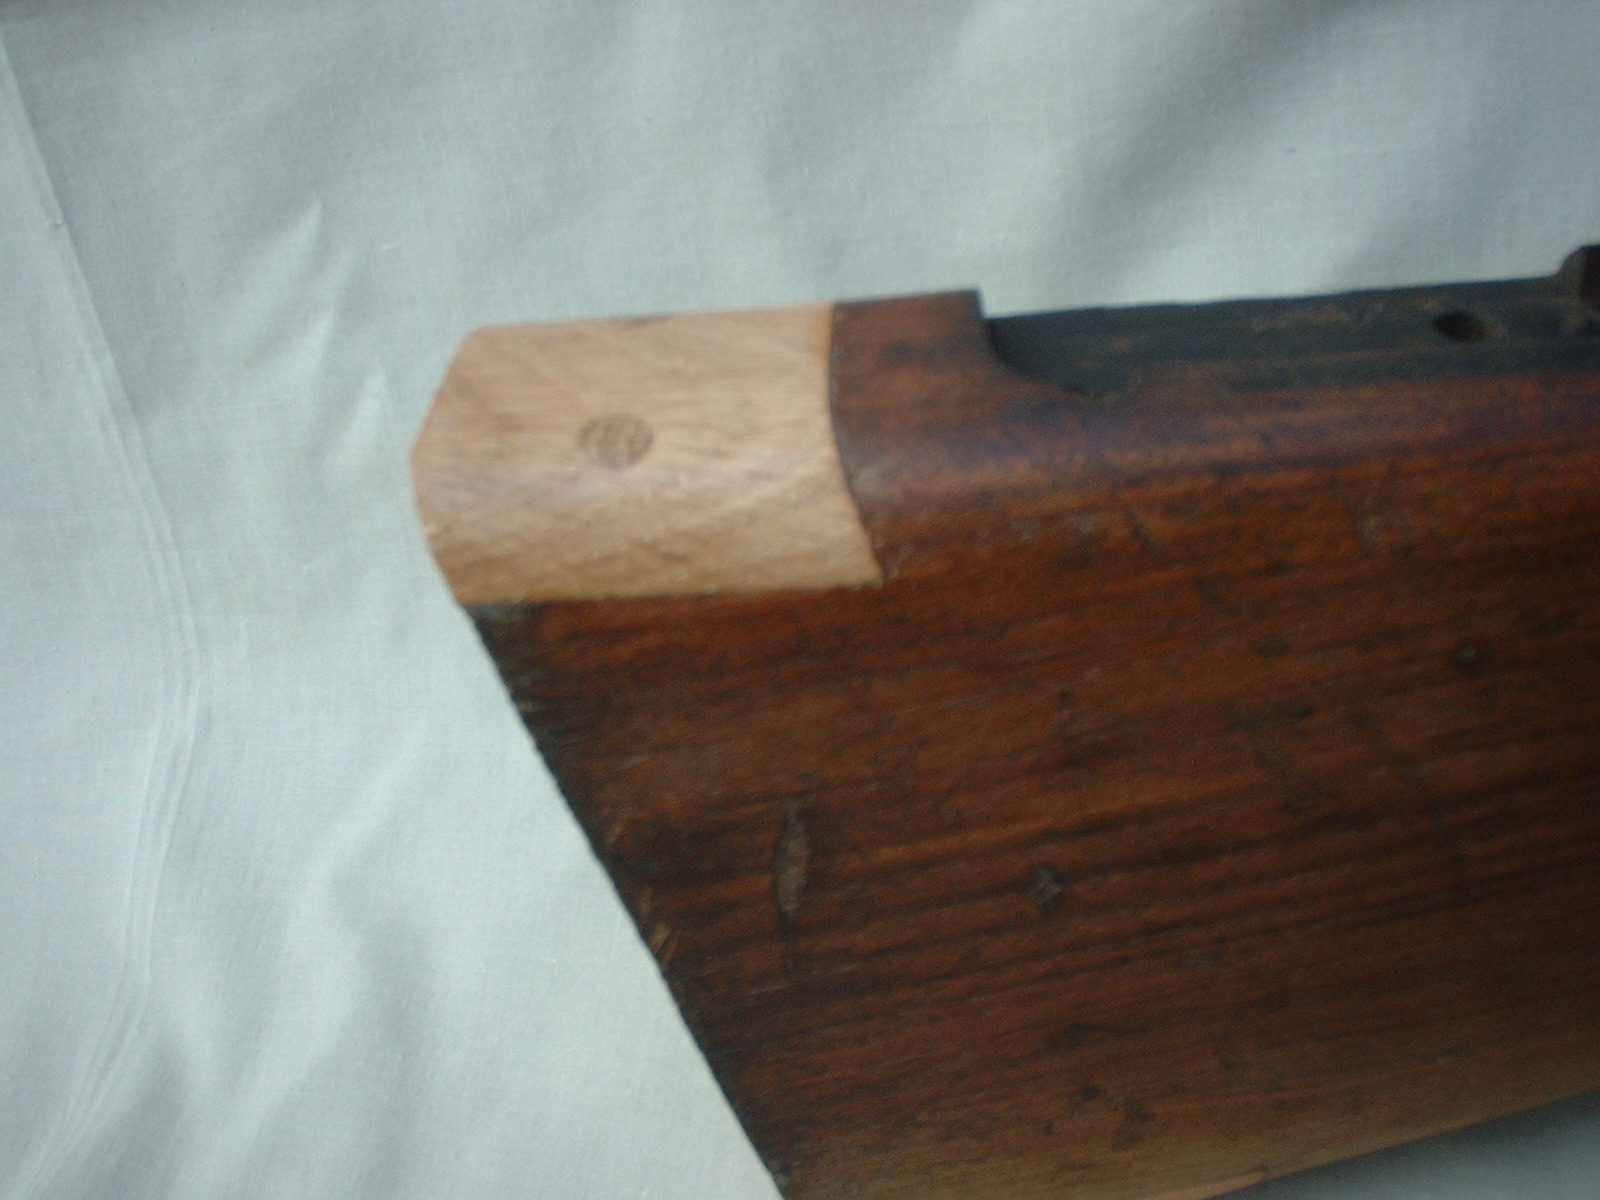
Wrist patches rasped down ready to be scraped down and made off
(Click PIC to Enlarge)
The wrist and heel patches made off, wood scraped and carefully sanded using a flat sanding block
(Click PIC to Enlarge)
It didn’t end there as one butt was badly dinged at the toe too. So that had to be patched too. Nothing special here, just a repeat of the two heel patches
(Click PIC to Enlarge)
Here’s one I did earlier. A double slip patch using old walnut taken from an old SMLE butt. Necessary? Or just double the work?
(Click PIC to Enlarge)
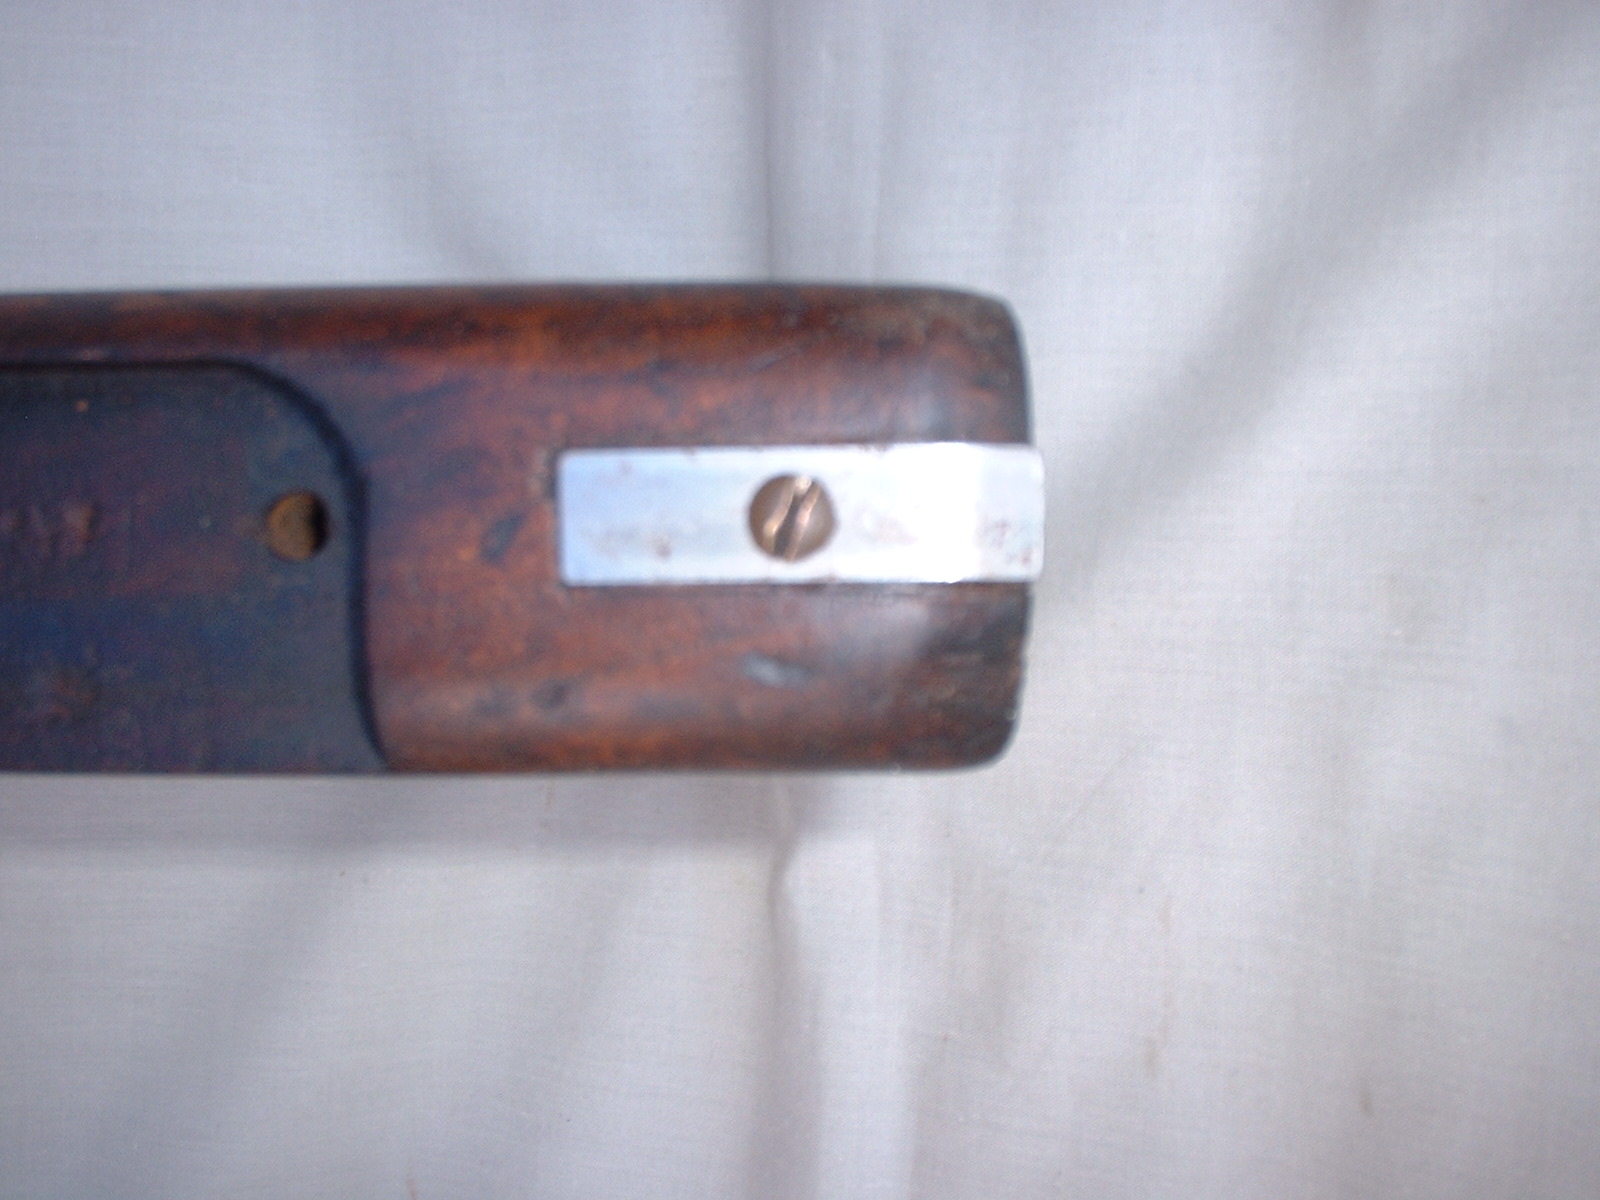
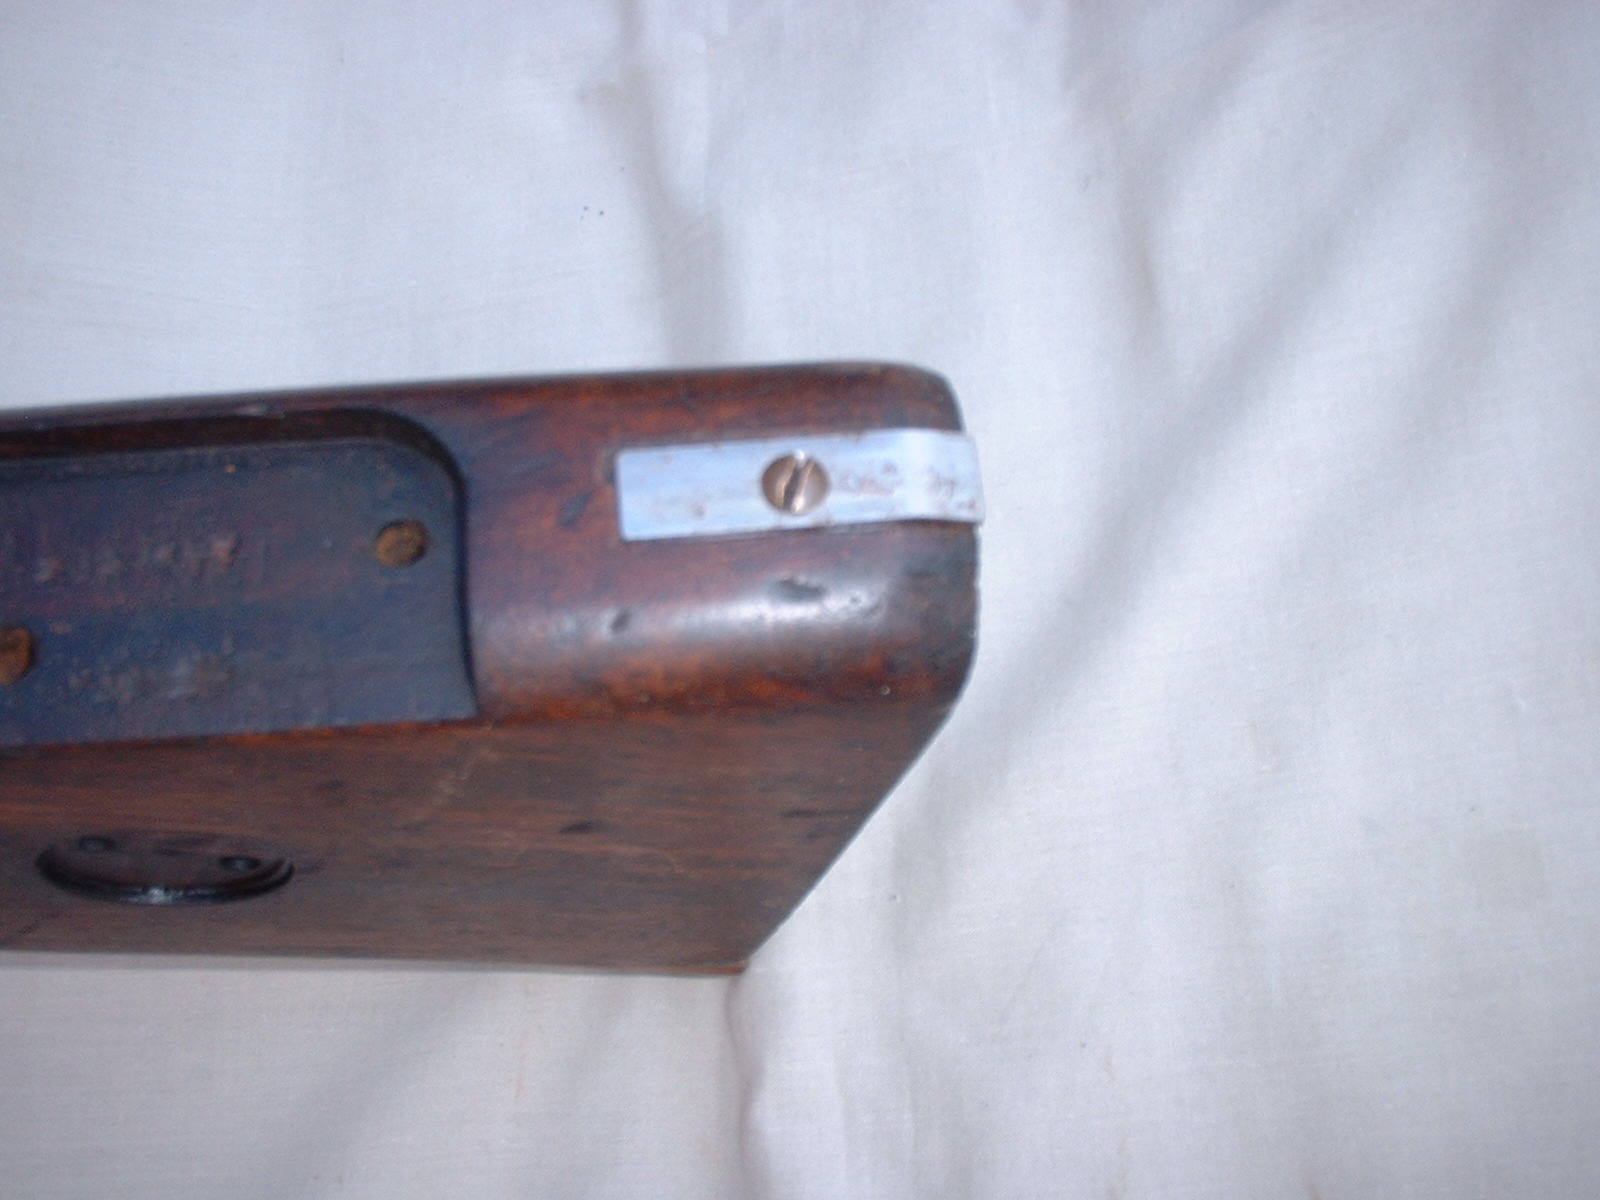
A little tacit modification. A strip of steel recessed and screwed in place to prevent further damage to the toe of the butt during rigorous use.
(Click PIC to Enlarge)
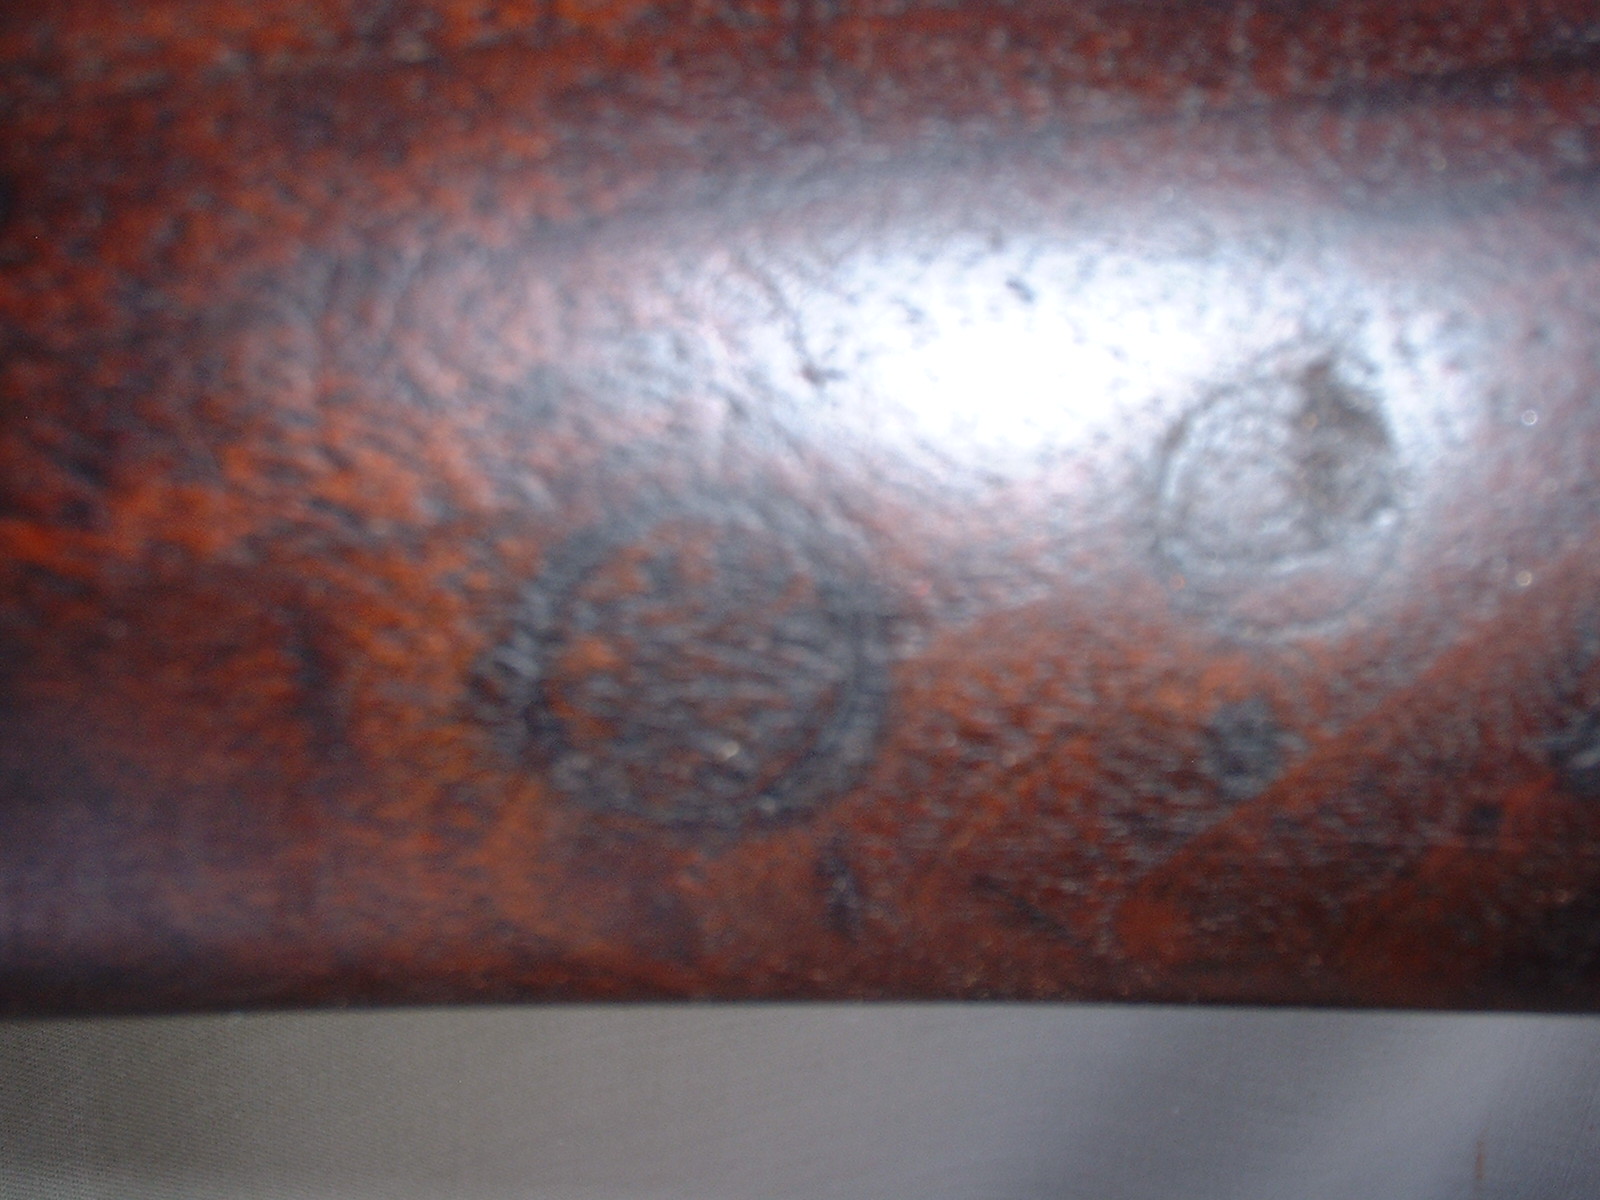
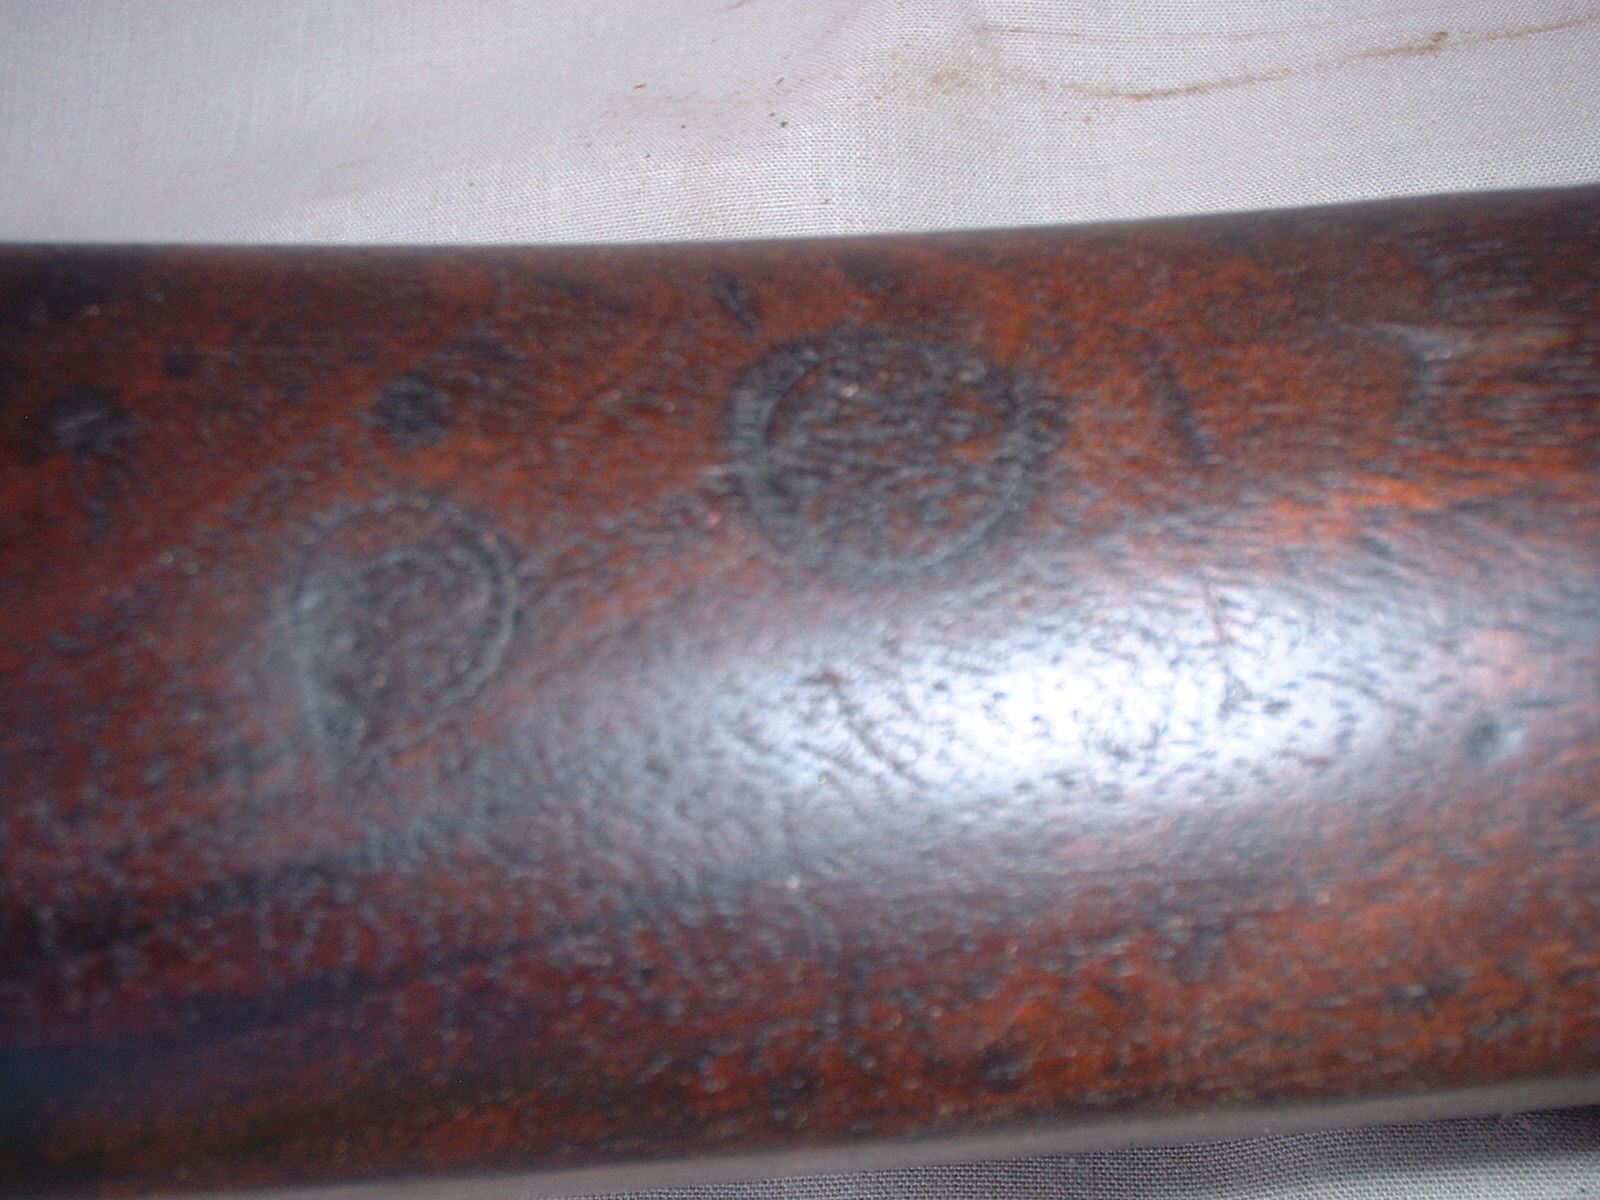
What is this little mark? A little stylised, curly W within a ½” or so circle.
Last but not least, cutting out the top recess for the tang of the butt plate. This a job best left for when you have to fit the actual butt plate. It could be the overhung Mk2 type or the simple squared off Mk3 type. In real life, the overhung butt plates were a recipe for more work as the moment you put the gun down heavily – as the crunchies are prone to do - on the butt, the overhang would hit the ground, send the tang into the undercut wood and bend the screw. If you are going to re-use this overhung butt plate then can I advise you NOT to undercut the wood but just leave the exposed tang sat on top. Or better still, heat the butt plate, flatten the top section out and simply convert it to the squared-off Mk3 type. Or even better still, what Armourers have been doing in BAOR since the 50’s. Just flatten the Mk2 or 3 butt plate out and using a Mk5 butt plate (the butt plate from the Mk3 gun don’t forget.....) as a template drill and countersink an additional butt plate screw hole, round the top off to suit the shape of the repaired butt and be done with it!
Moderator Edit: After you click on images to ENLARGE them, you may find they automatically size smaller in your browser's window making them harder to view. The auto sizing is your browser's way of keeping images entirely within the screen size you have set. Move your mouse pointer to the bottom centre of the pic and you will see an options panel appear. There will be a small square box next to the large X, which will have a pointer arrow sticking out of it. If it's illuminated, it means the pic you're viewing can be enlarged, so click on this box and the pic will EXPAND and open to its normal size. You can then grab the pic with your mouse (hold down left mouse button) and move it around to look more closely at various parts of the photo.Information

Warning: This is a relatively older thread
This discussion is older than 360 days. Some information contained in it may no longer be current.
- Knowledge Library

- MKL Entry of the Month
- Australia
- Austro-Hungarian Empire
- Canada
- Czechoslovakia
- Denmark
- Finland
- France/Belgium
- Germany
- Italy
- Japan
- Norway
- Russia
- South America
- Sweden
- Switzerland
- Turkey
- United Kingdom
- United States
- Yugoslavia
- Is my rifle authentic or a fake?
- Jay Currah's Lee Enfield Web Site
- On-line Service Records (Canada)
- Technical Articles/Research
- Forum
- Classifieds
- What's New?
-
Photo Gallery
- Photo Gallery Options
- Photo Gallery Home
- Search Photo Gallery List
-
Photo Gallery Search
- Video Club
- iTrader

 PM
PM