-
Legacy Member

-
-
11-01-2021 11:41 AM
# ADS
Friends and Sponsors

-
Advisory Panel

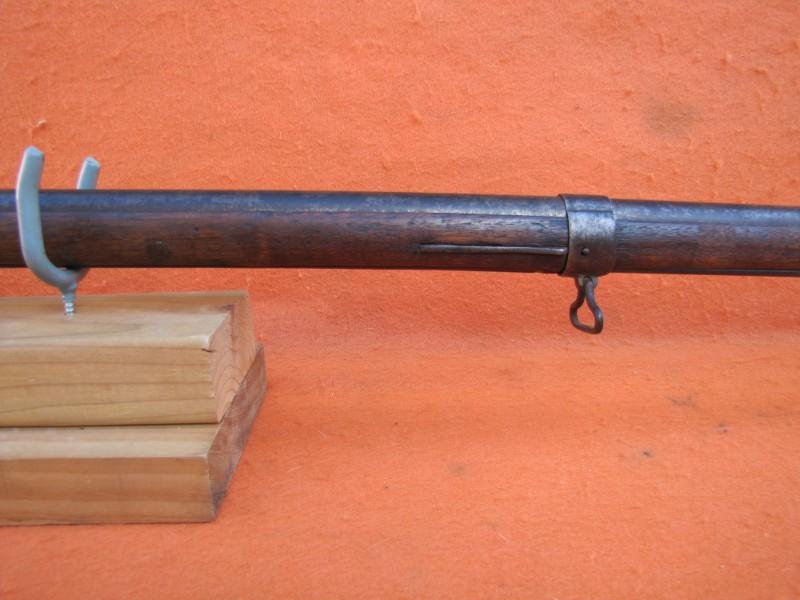
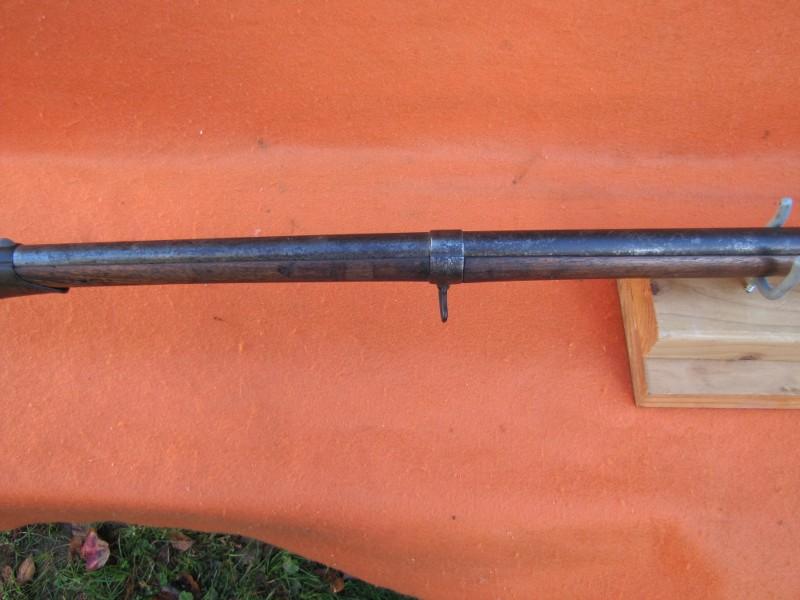
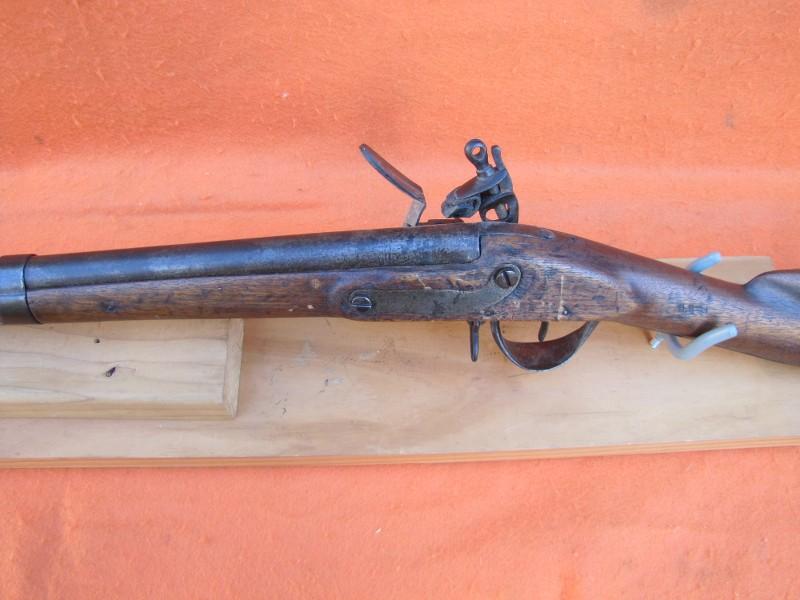
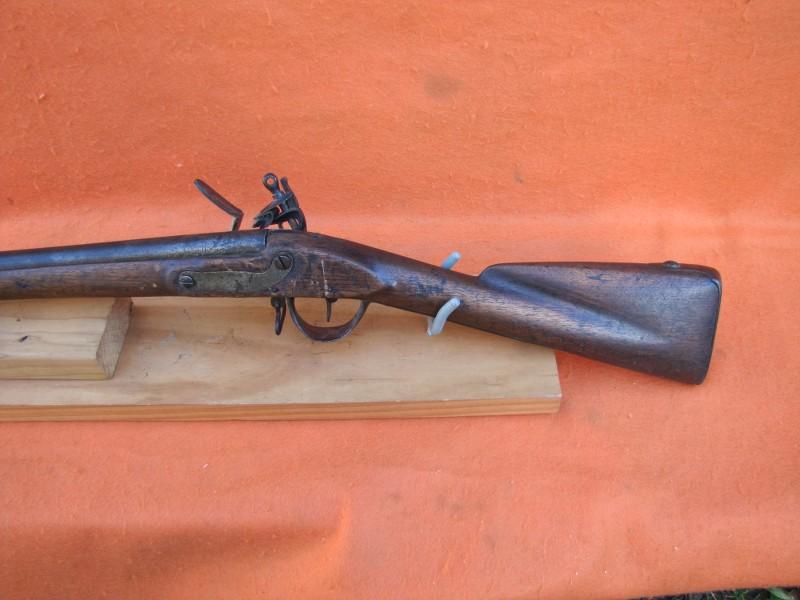
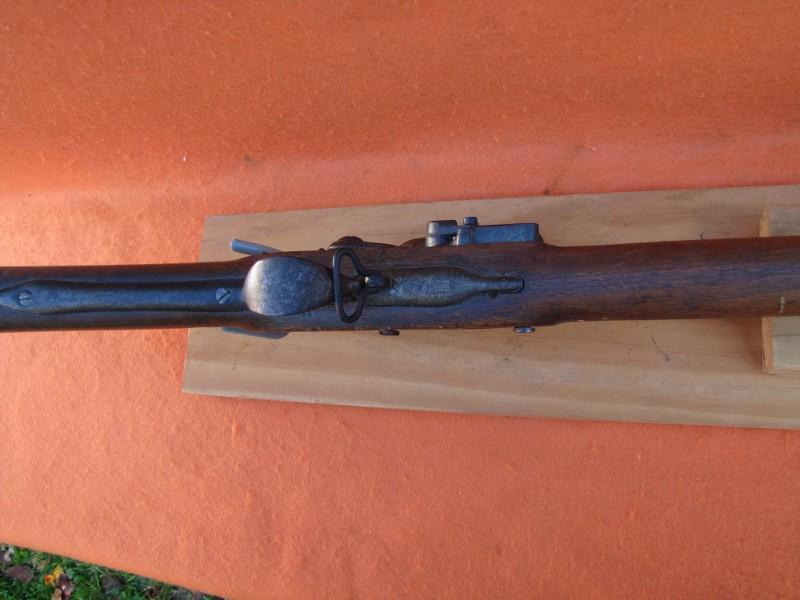
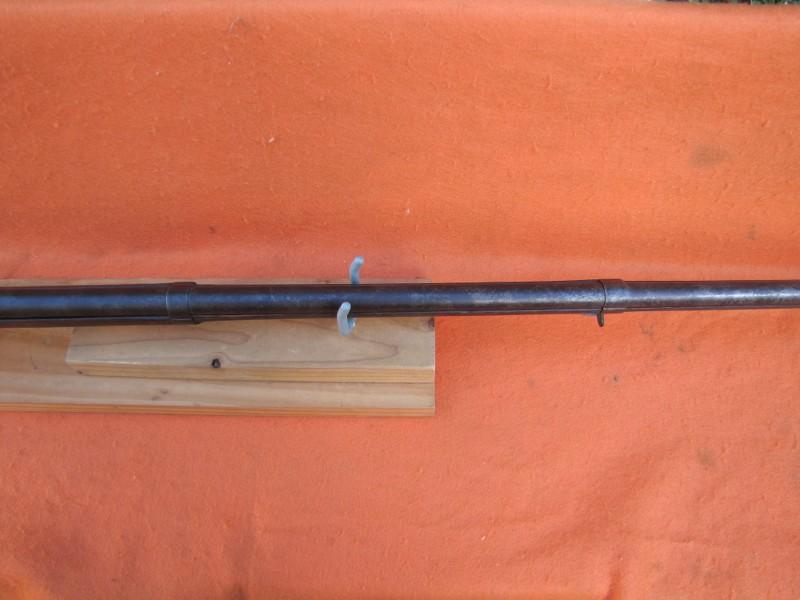
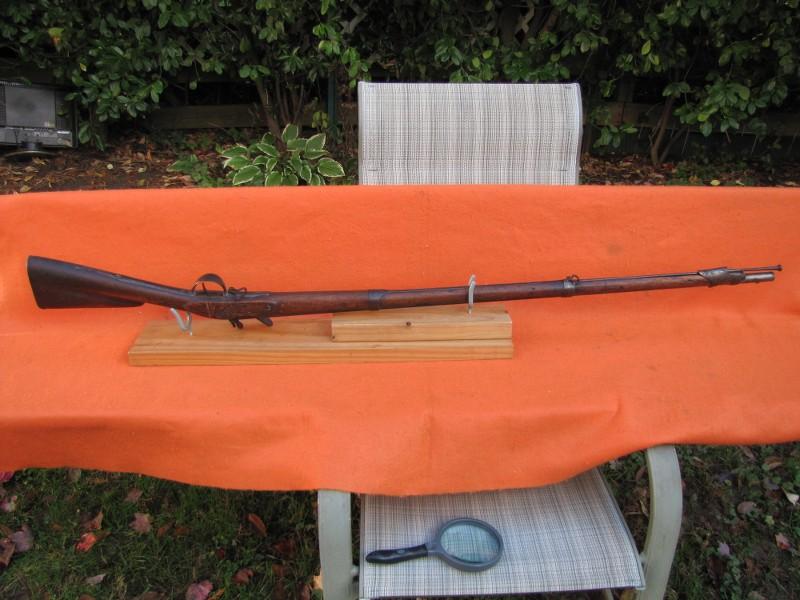
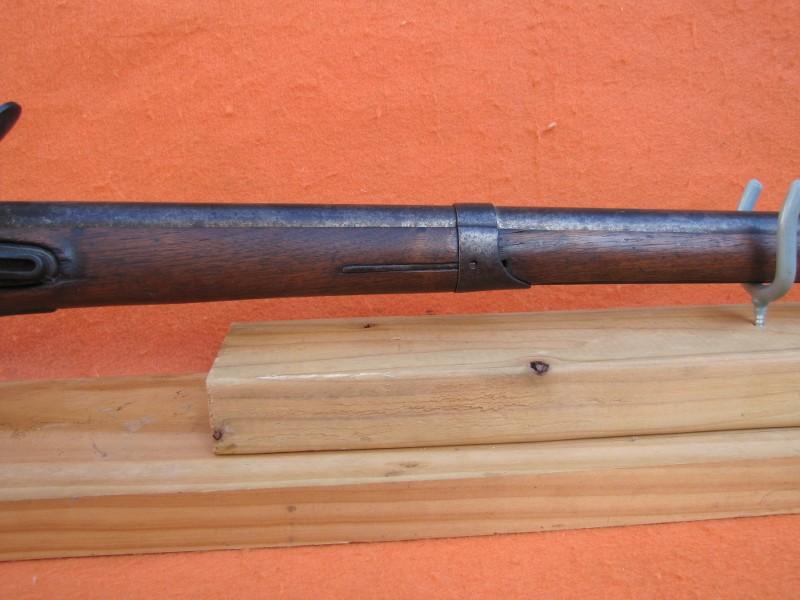
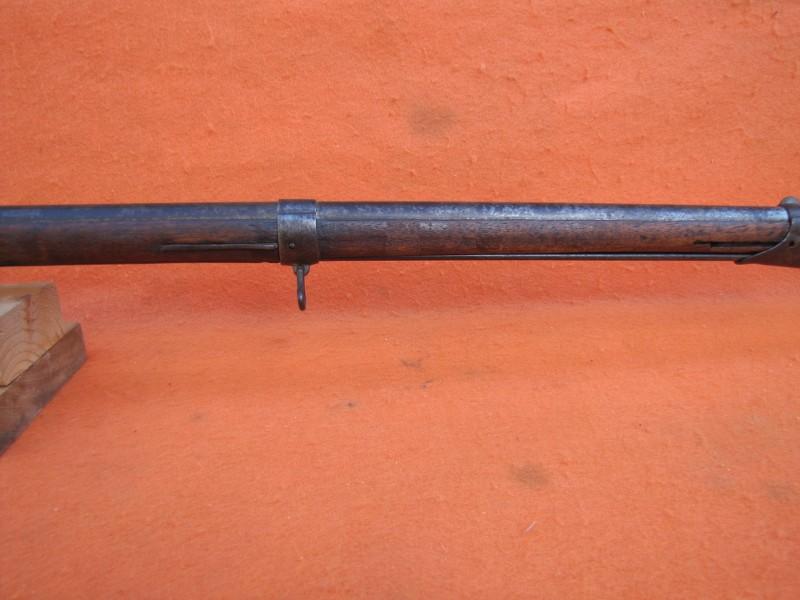
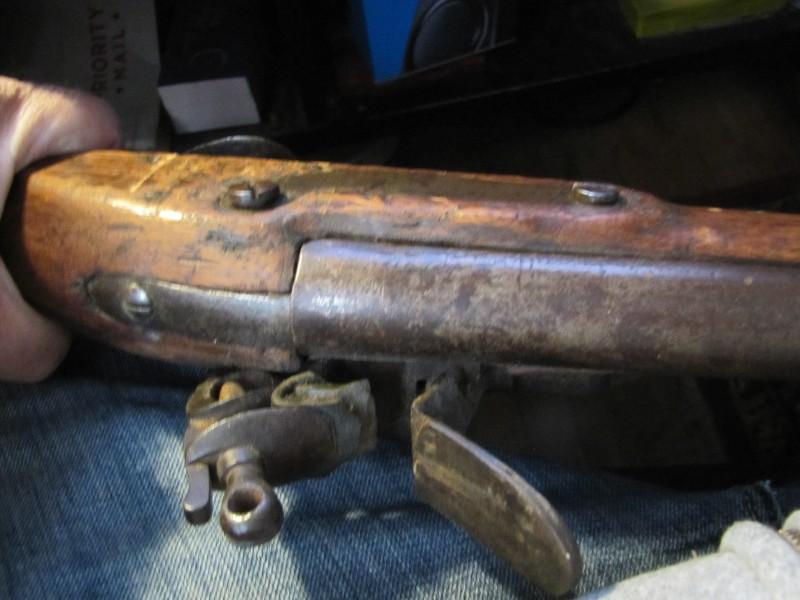
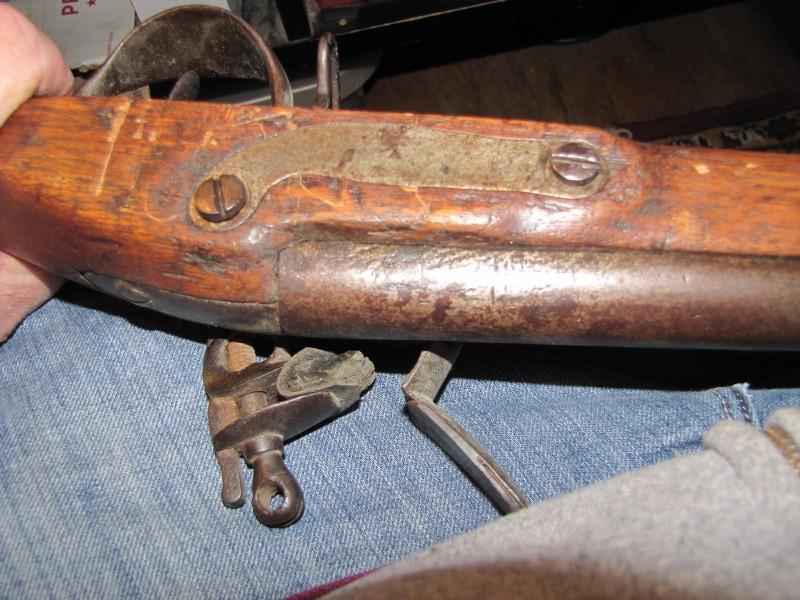
Nice looking old musket, interesting that there's a front sight on both the barrel and the front band...
-
-
Legacy Member
Nice looking old musket, interesting that there's a front sight on both the barrel and the front band...
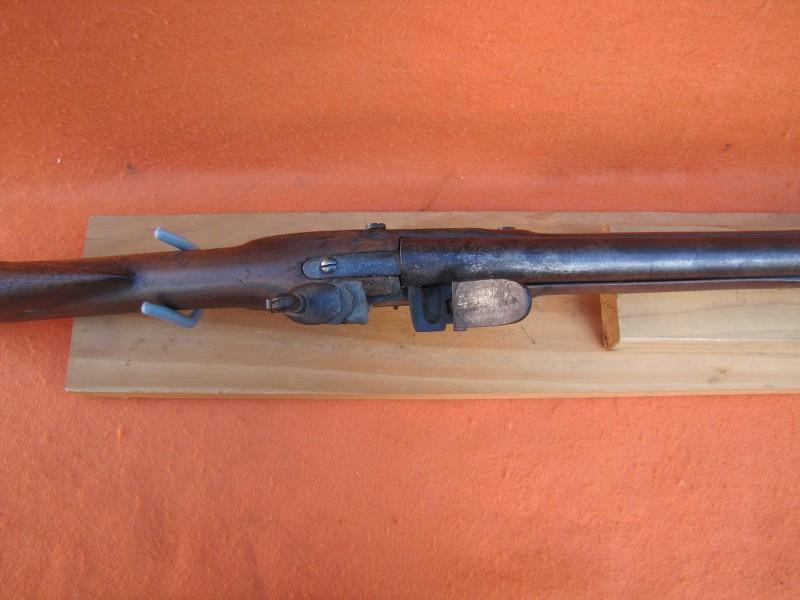
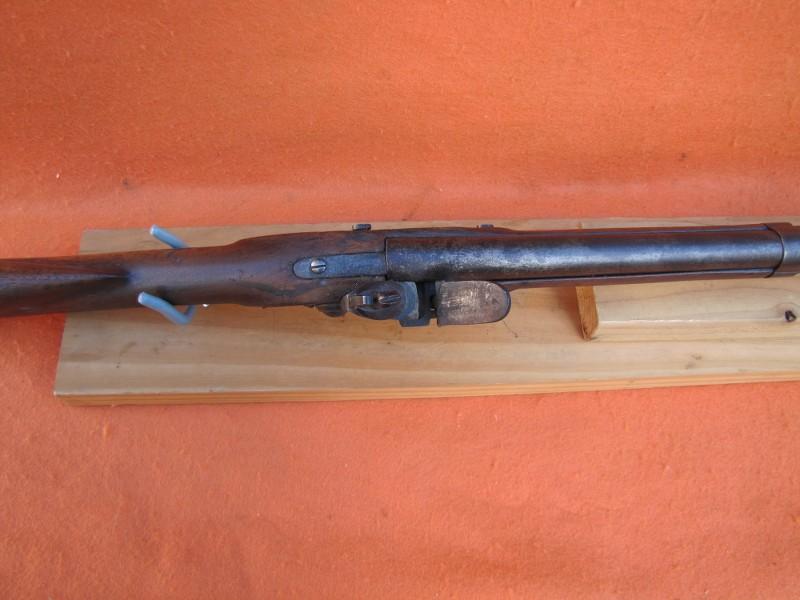
If this is a Miles CP Military Contracrt Rifle then it was made in the Northern Liberties Section of Phila. Pa.
-
-
Legacy Member

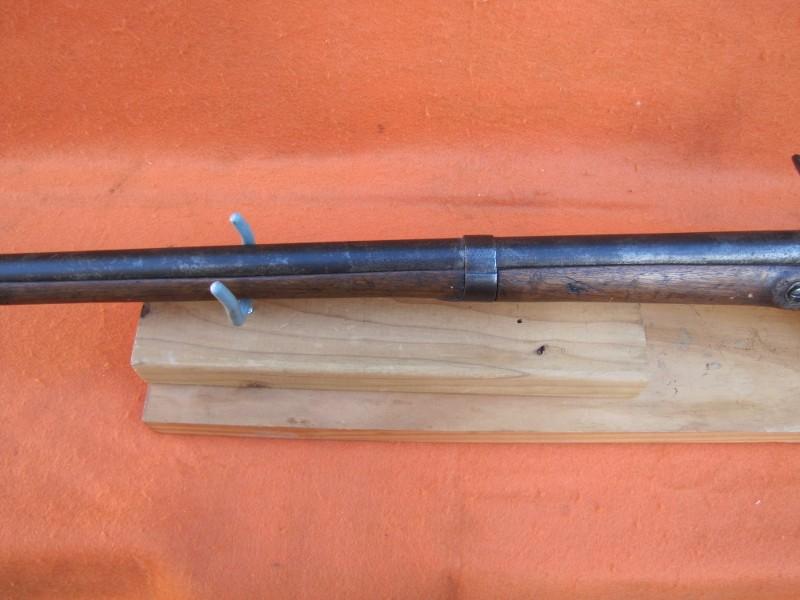
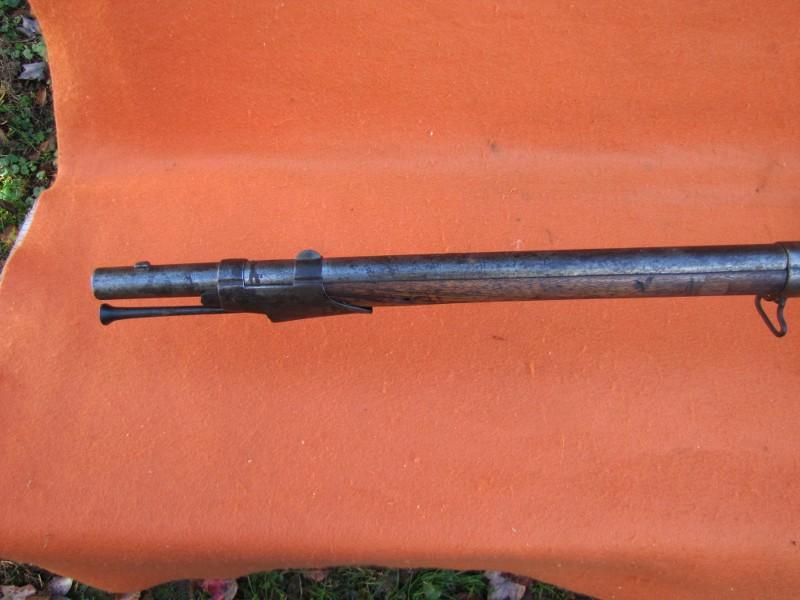
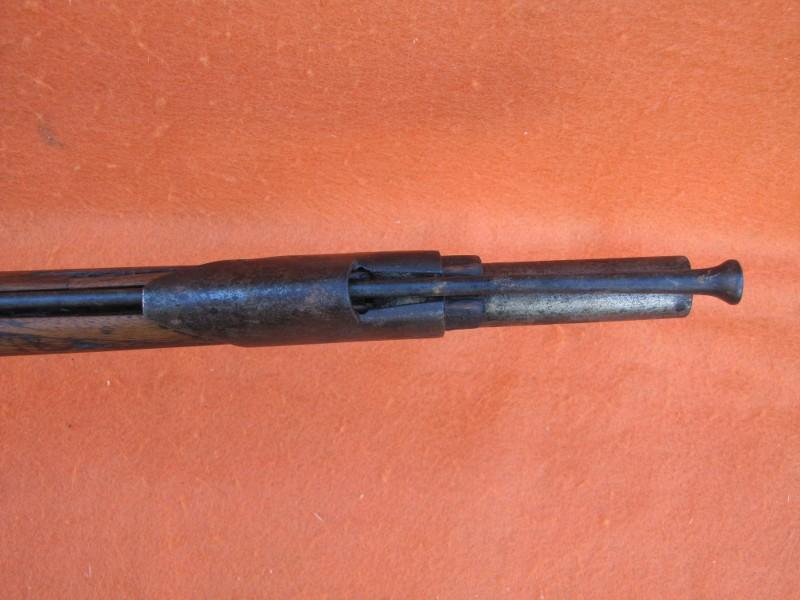
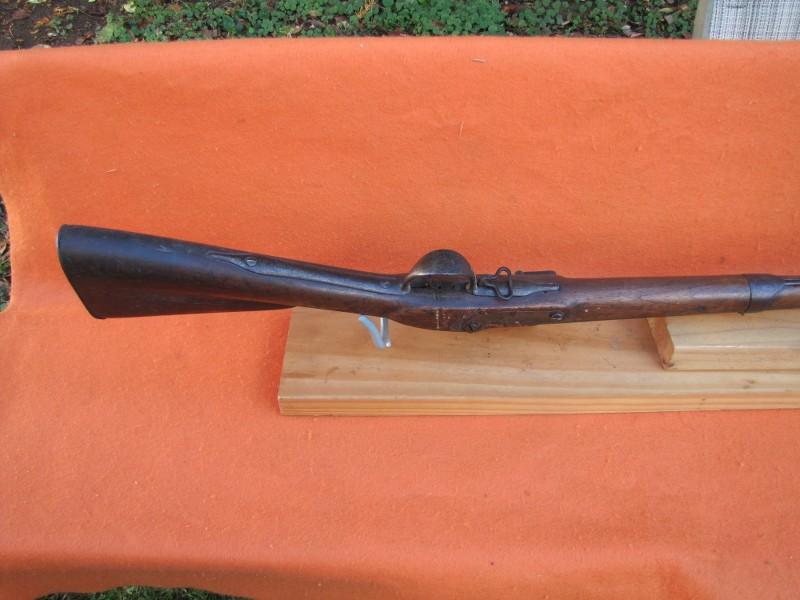
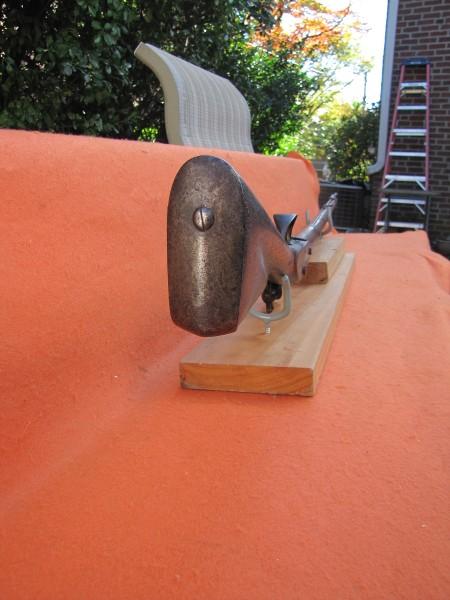
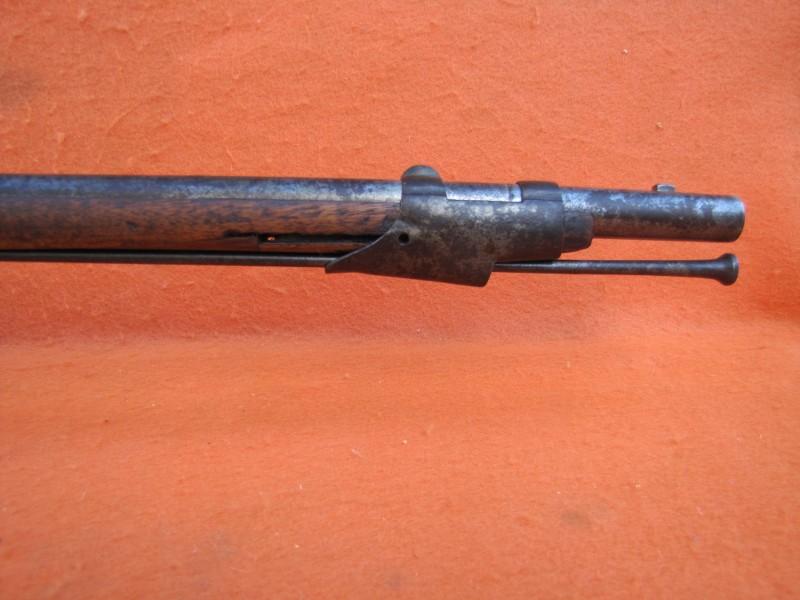
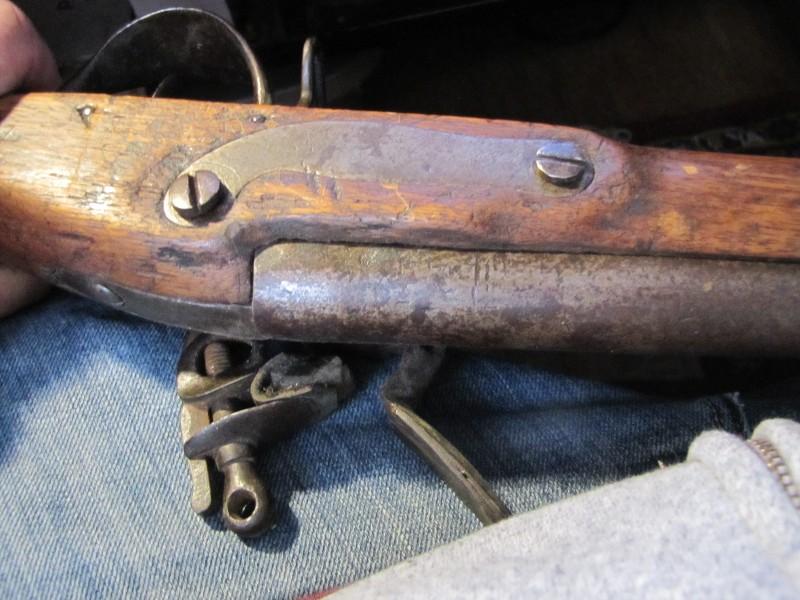
Sight is on the band. Block for bayonet is on the top of barrel. Nice musket. The upper band springs are available and shouldn’t be too hard to find.
-
Thank You to gsimmons For This Useful Post:
-
Advisory Panel

Originally Posted by
gsimmons

Block for bayonet is on the top of barrel.
OK, didn't know that.
-
Thank You to browningautorifle For This Useful Post:
-
Advisory Panel

Originally Posted by
md66948
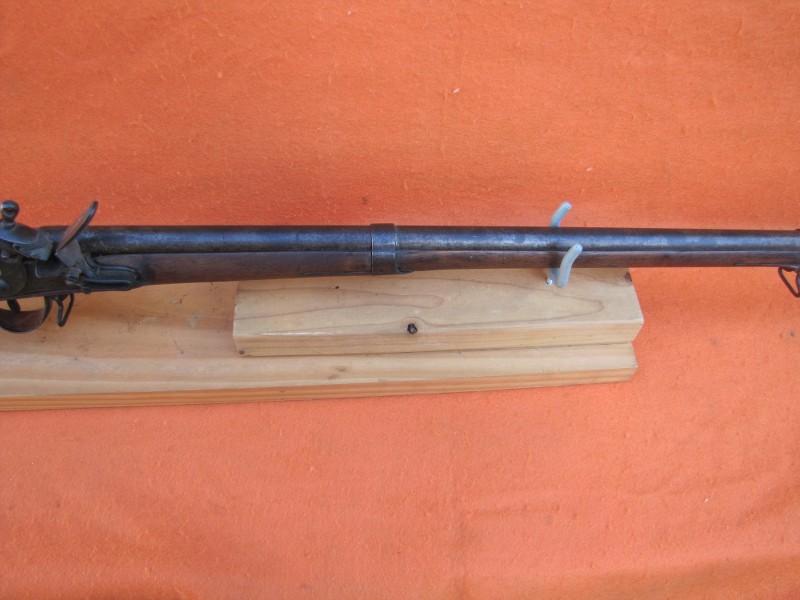
I believe I have a Miles 1795 Contract Flintlock Rifle.
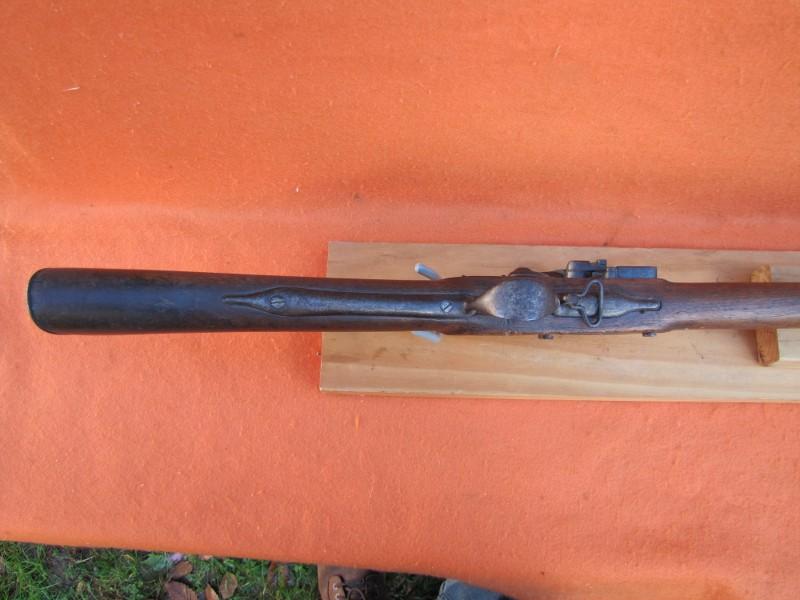
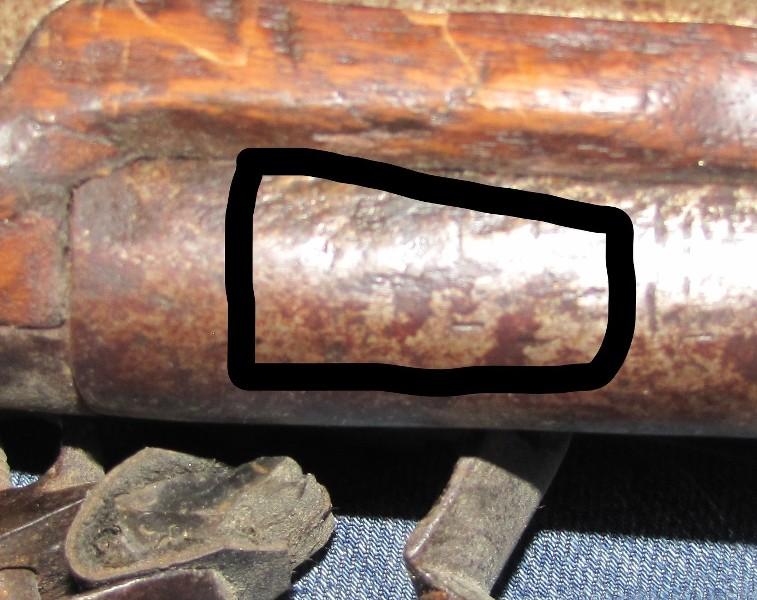
Are you sure about that? Firstly, it is surely a flintlock musket, not a rifle?
Secondly, the earliest mention of John Miles in "United States Martial Flintlocks" by Robert M. Reilly is a possible assembly of government-supplied parts during 1797-99. The first definite contract muskets by Miles were from an 1801 contract as part of the Pennsylvania Contract series, commencing in 1797. See Reilly P.59.
In other words, unless additional information has come to light since Reilly's book, there was no such thing as a Miles contract of 1795.
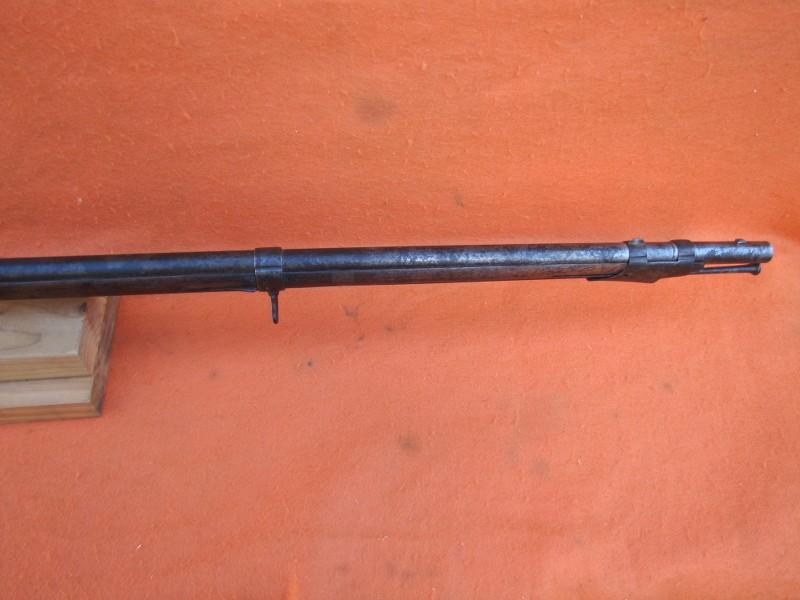
Reilly also gives a useful clue to dating a contract musket: "On those muskets produced prior to 1799, the barrel proof will include a small Liberty Cap/P within a sunken cartouche..." This "... was discontinued in favor of the more common "CP" marking along with a small eaglehead/P in cartouche..."
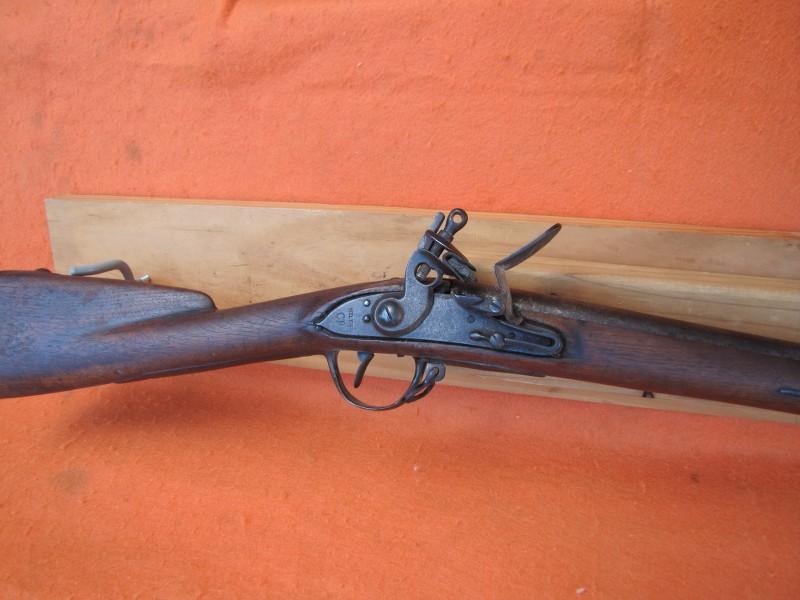
One would thus expect a Miles contract musket to bear the later style of barrel proof. And the lockplate does indeed bear a CP.
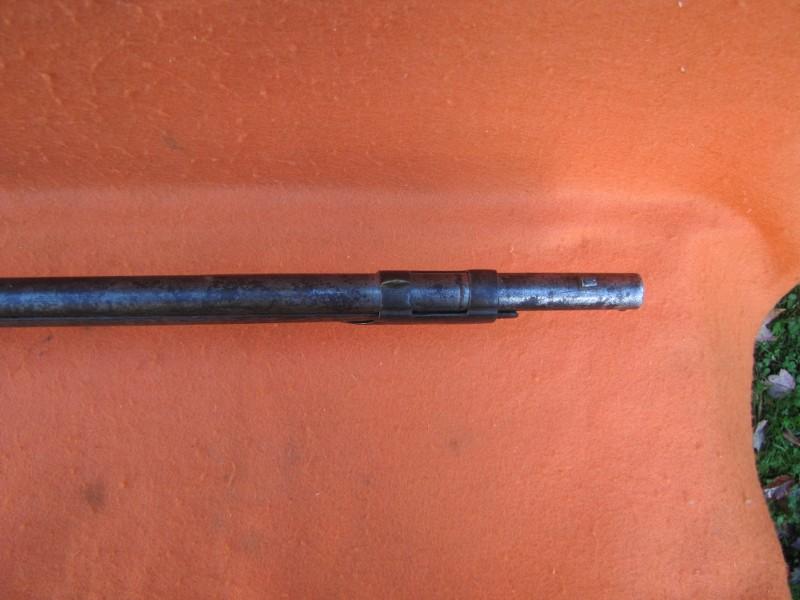
Take a close look at the barrel again!
Last edited by Patrick Chadwick; 11-01-2021 at 04:58 PM.
-
Thank You to Patrick Chadwick For This Useful Post:
-
Advisory Panel
A slight expansion of the previous post is in order, for the purposes of clarification:
Reilly, P. 69, describes the connection between Miles and the contracts in some detail:
"John Miles Sr. ... entered the contract market picture when he agreed to produce 2000 Charleville pattern muskets for the state of Pennsylvania on Sep. 3, 1798 ... followed on April 16, 1801 for a second 2000 stands ... Several variations of Miles lockplates are known. Figure 174 [lockplate layout, see P. 70] was used with his Pennsylvania muskets, and is stamped behind the cock in two vertical lines "MILES / CP" ..."
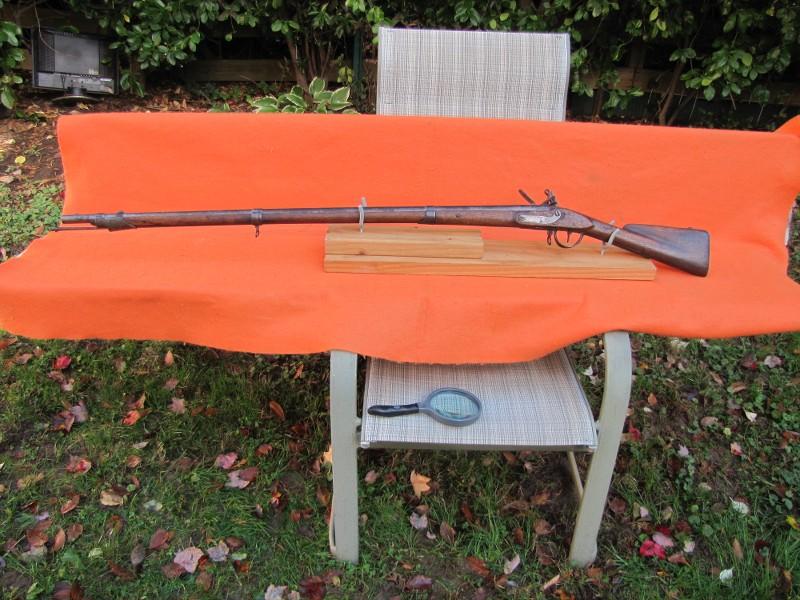
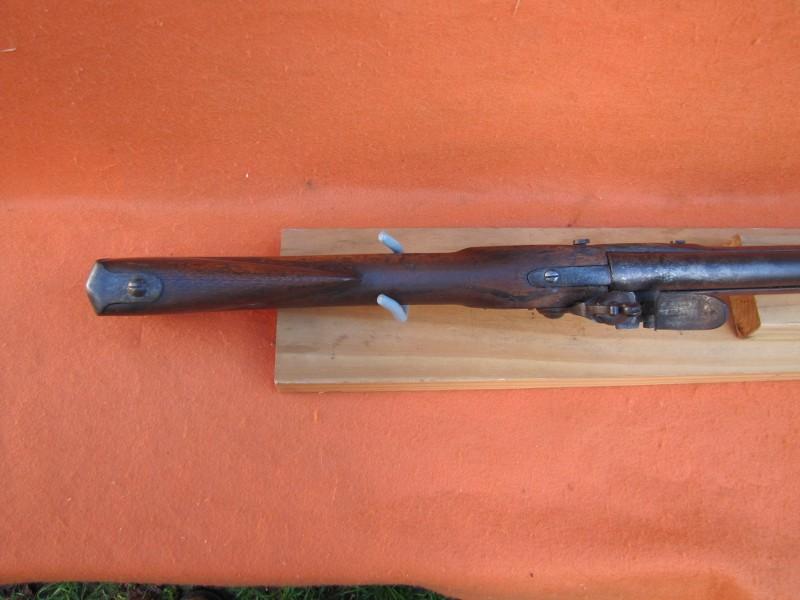
It certainly looks like a Miles contract musket, made to the 1795 Springfield pattern and - if it has not been deliberately defaced - there should be a stamp on the barrel as described in my previous post.
Last edited by Patrick Chadwick; 11-04-2021 at 03:18 AM.
Reason: Typo
-
The Following 2 Members Say Thank You to Patrick Chadwick For This Useful Post:
-
Legacy Member
-
-
Advisory Panel
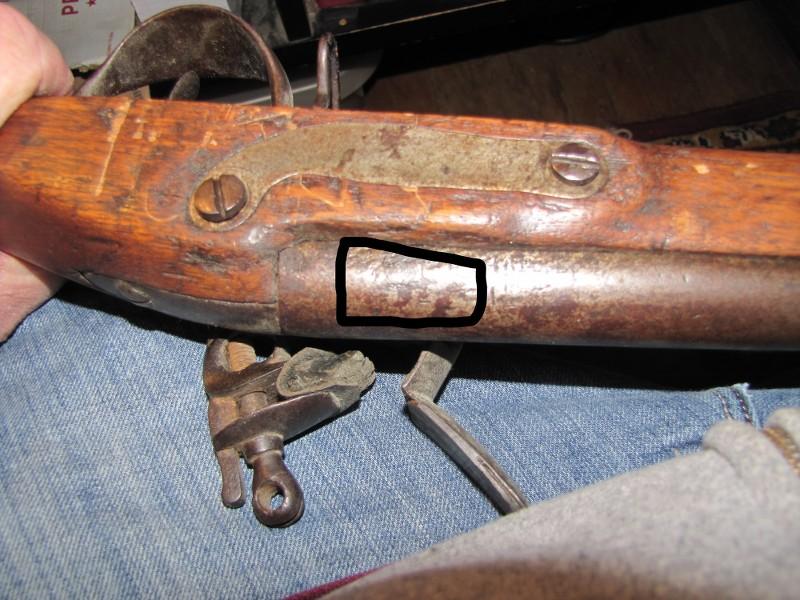
I regret that I cannot see anything definite in the photos. It's one of those cases where you may be able to detect something if you hold the piece under a strongly directional light and rotate it, but well-nigh impossible to photograph.
I think it's a case for differential etching. I described this in detail on the British Militaria site, and shall now attempt to copy it over to this thread!
India Pattern Brown Bess - Advice needed! - Page 4 - British Militaria Forums
(post #71)
-------------------------------------------------------------------------
Differential etching works!
Before:
Bess_proofs-2-RED_1215.jpg (213.47KiB)
Attachment 121455
After:
Bess_proofs improved_1222.jpg (292.8KiB)
Attachment 121456
Not what a forensic scientist would use, but this works.
a) Wear protective clothing and glasses.
b) Have paper towels, water etc standing by, just in case.
1) Use a cotton bud to put a smear of Fry's Fluxite or equivalent soft-solder flux paste onto the illegible, but suspected, proof marks.
2) Use a soldering iron with a clean tip to heat up the flux until it sizzles.
3) Use another cotton bud soaked in Birchwood-Casey Plum Brown to dab the browing fluid onto the patches under investigation, rubbing it into the liquified Fluxite.
4) Take a walk, make a cup of tea, or whatever you need to keep your hands off the gun for 5 minutes.
5) There will now be a thin brown rust patch** (in this case, patches).
6) Do NOT use wire wool for the next stage. To remove the rust patches** you must use a lightly abrasive material on a firm substrate that does not fall into the depressions of the stamps, otherwise the whole point of the exercise will be lost. I use a fine abrasive block - model railroaders may have something suitable as a track cleaner. Very fine emery paper glued to a flat wooden stick should also be effective.
7) Polish up the surface.
And finally, enjoy the result!
- In this case, clearly Birmingham proof marks with caliber 12.
This is, of course, a quick & dirty method compared with the forensic methods that may be found online, but IF there are any proofs on your barrel, it will suffice to make them visible.
I look forward to seeing the results!
Patrick
**Don't be scared of the expression "rust patch". It's only a micron-thick layer that you will be removing!
Last edited by Patrick Chadwick; 11-14-2021 at 02:22 PM.
-
-
Legacy Member
One thing that might help you to see what these markings are, is to do a "rubbing" of it........... take a piece of tracing paper and hold it tightly on the place where the markings are, and then take a number 2 pencil, sharpened, and rub it so that there is the most amount of lead possible on the point to contact the paper. try it a few times, and maybe you can see what is there. that has helped lots of people see the markings on stuff, including tomb stones. hope it helps ya!
-
")

")


 Information


 PM
PM. CLICK BANNER to send me a PM for International pricing and shipping.")
 and Malcolm 8X Gen II (Unertl reproduction). Several of our scopes are used in the CMP Vintage Sniper competition on top of 1903 rifles.")


 Milsurps Voice Mail